ESP32 with LM35
To start measuring temperature with ESP32 we need an external sensor. So, we will be using LM35, a temperature sensor widely used with microcontroller boards. A maximum temperature range of 55°C to 150°C can be measured by it. One just needs to power it up and it will instantly read the voltage level on the output terminal. Vout pin will map the output temperature on ESP32 pin.
Following are some technical specifications of LM35:
- Linear + 10-mV/°C Scale Factor
- 0.5°C Ensured Accuracy (at 25°C)
- Temperature range of −55°C to 150°C
- Voltage range of 4 V to 30 V
- Less Than 60-μA Current Drain
- Non-Linearity Only ±¼°C Typical
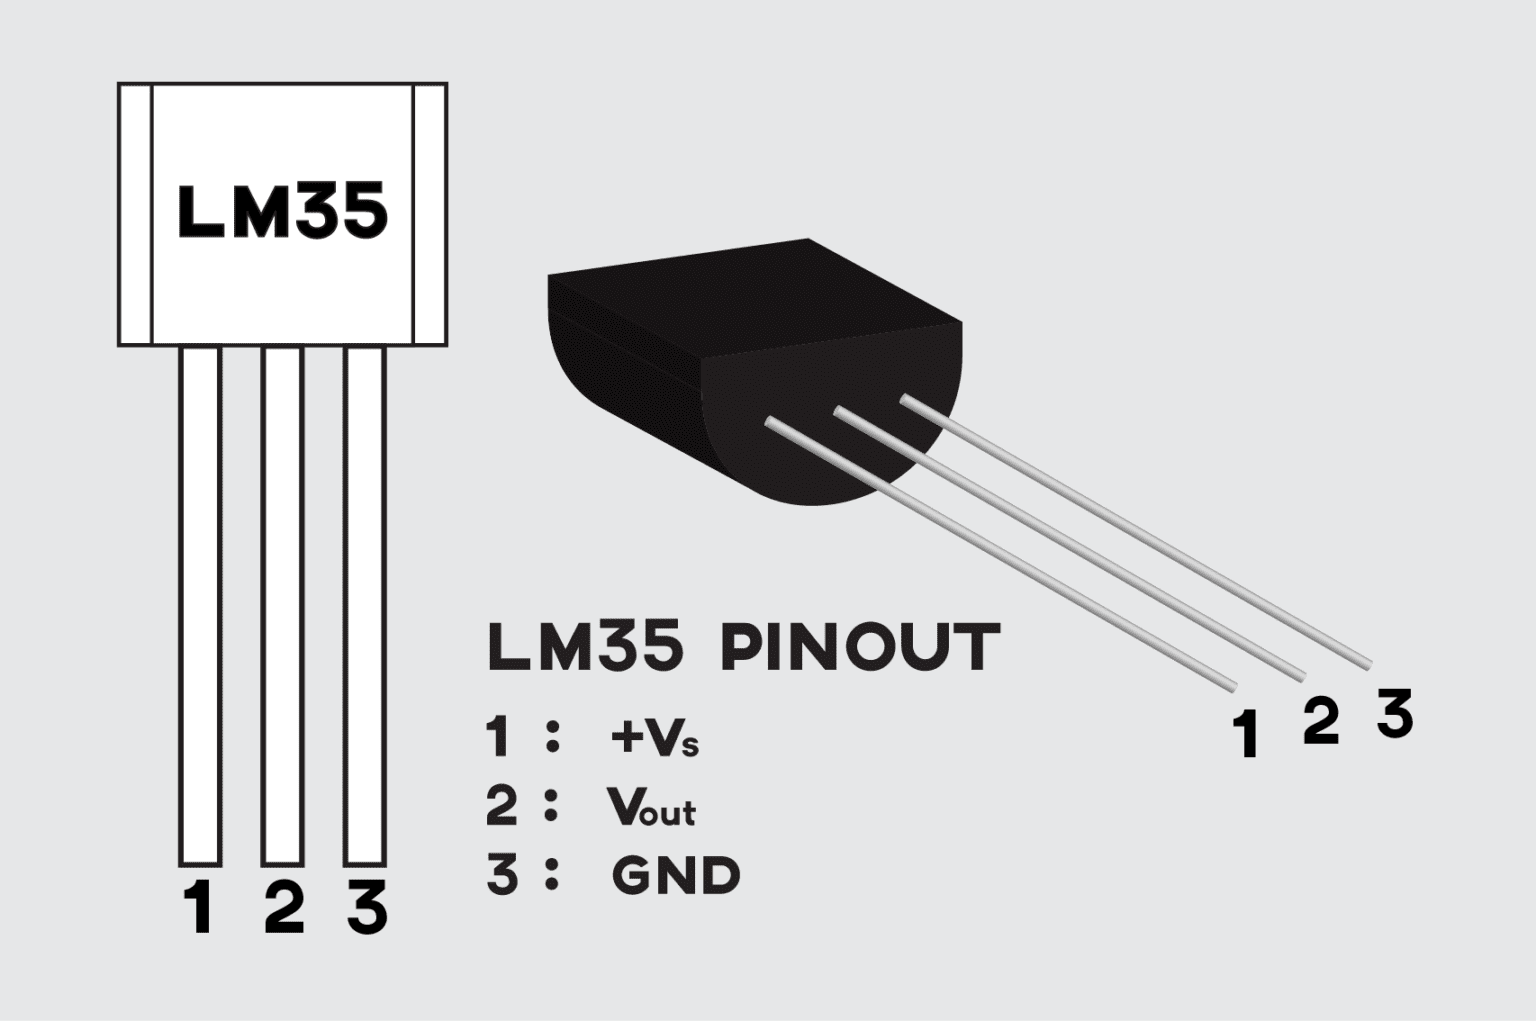
LM35 Pinout
LM35 sensor has three different pins:
| Pin Number | Pin Name | Description |
| 1 | Vcc | This pin can take input voltage of 5V |
| 2 | Analog Out | For a rise of 1C a voltage increase of 10mV will be observed. Typical range is from -1V(-55°C) to 6V(150°C) |
| 3 | Ground | Connected to GND of ESP32 |
Circuit
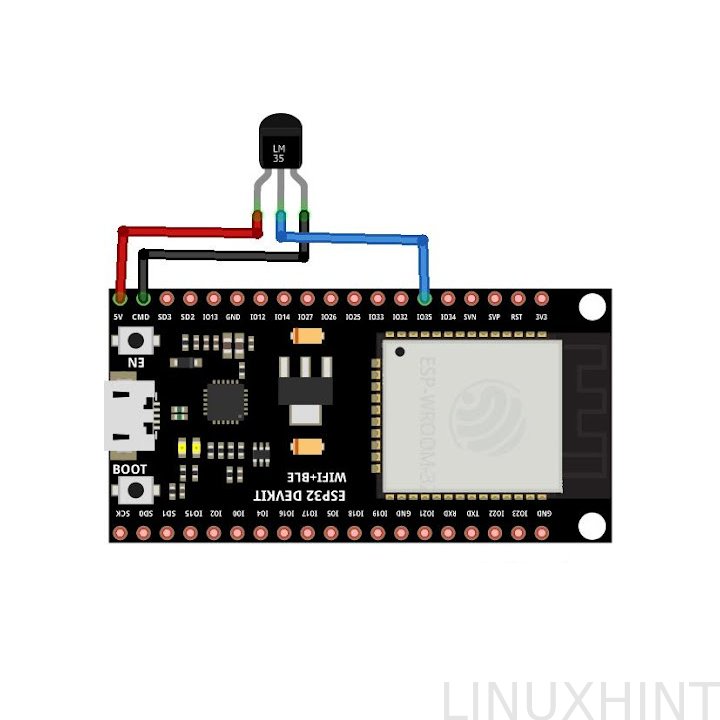
Connect LM35 with ESP32 using the three terminals on the sensor. Two of the side legs will be connected to the GND and Vin pin of ESP32 while the central pin Vout will be connected to the GPIO pin of ESP32. Following image illustrates connections of ESP32 boards with LM35:
Below table explain connection pin for LM35 temperature sensor:
| LM35 Pin | ESP32 Pin |
| Pin 1 Vs | Vin |
| Pin 2 Vout | D35 |
| Pin 3 GND | GND |
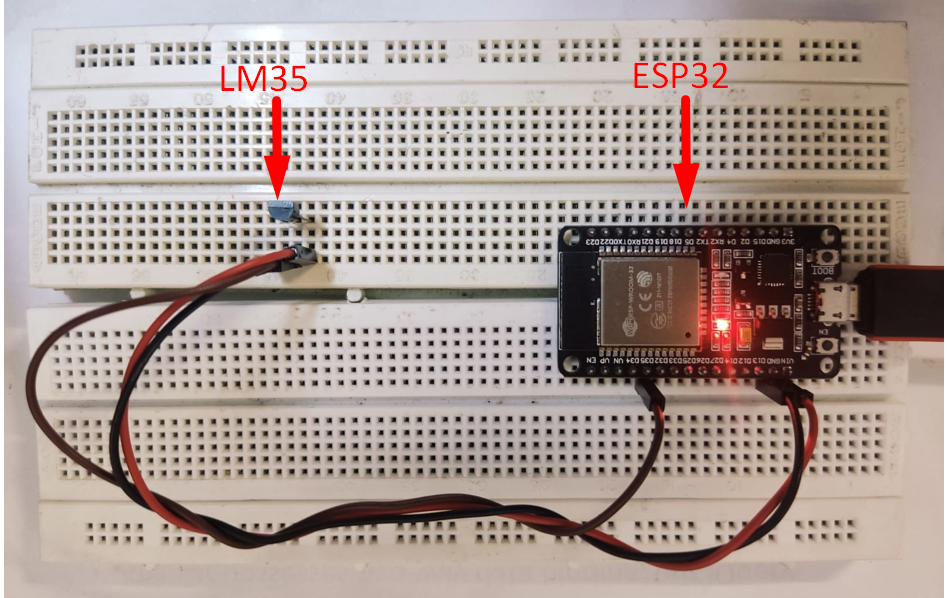
Hardware
To make the circuit of ESP32 with LM35 temperature sensor following list of components will be required.
- LM35 Temperature sensor
- ESP32 Board
- Jumper Wires
- Breadboard
- Micro USB cable
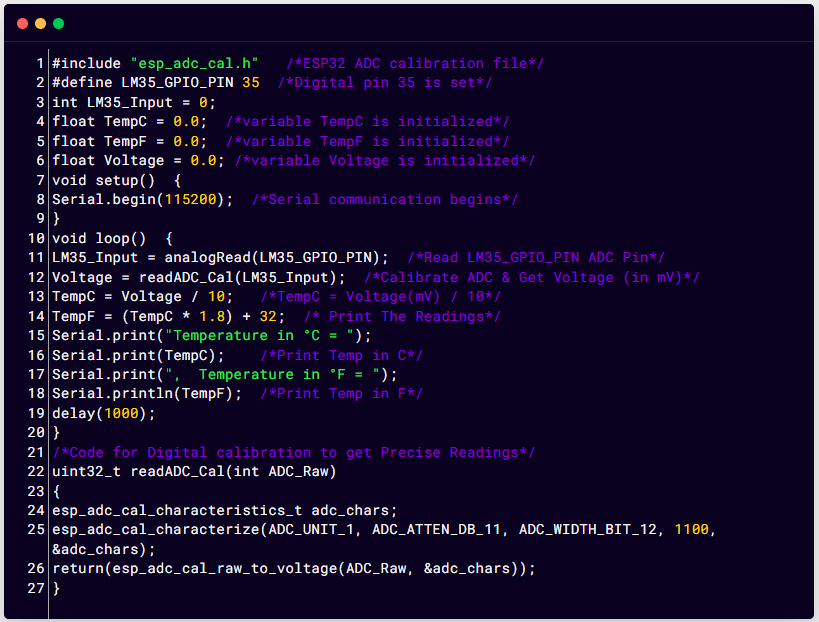
Code
Open IDE write code below in editor. Select the ESP32 board and click upload.
#define LM35_GPIO_PIN 35 /*Digital pin 35 is set*/
int LM35_Input = 0;
float TempC = 0.0; /*variable TempC is initialized*/
float TempF = 0.0; /*variable TempF is initialized*/
float Voltage = 0.0; /*variable Voltage is initialized*/
void setup()
{
Serial.begin(115200); /*Serial communication begins*/
}
void loop()
{
LM35_Input = analogRead(LM35_GPIO_PIN); /*Read LM35_GPIO_PIN ADC Pin*/
Voltage = readADC_Cal(LM35_Input); /*Calibrate ADC & Get Voltage (in mV)*/
TempC = Voltage / 10; /*TempC = Voltage(mV) / 10*/
TempF = (TempC * 1.8) + 32; /* Print The Readings*/
Serial.print("Temperature in °C = ");
Serial.print(TempC); /*Print Temp in C*/
Serial.print(", Temperature in °F = ");
Serial.println(TempF); /*Print Temp in F*/
delay(1000);
}
/*Code for Digital calibration to get Precise Readings*/
uint32_t readADC_Cal(int ADC_Raw)
{
esp_adc_cal_characteristics_t adc_chars;
esp_adc_cal_characterize(ADC_UNIT_1, ADC_ATTEN_DB_11, ADC_WIDTH_BIT_12, 1100, &adc_chars);
return(esp_adc_cal_raw_to_voltage(ADC_Raw, &adc_chars));
}
To start measuring temperature using ESP32 we have to include an ADC calibration file in code. Using this we can increase LM35 temperature sensitivity.
Define the LM35 pin at which it is connected with ESP32. This GPIO pin will be used as an ADC analog input channel.
Now create four variables, one of int and 3 float data types that will hold the LM35 input and read the voltage from the sensor to convert values into Degree and Celsius temperature. Following are the four variables:
float TempC = 0.0;
float TempF = 0.0;
float Voltage = 0.0;
In setup part of code initialized serial communication by defining baud rate.
{
Serial.begin(115200);
}
In the loop part of the sketch read analog values and store them in voltage variables.
Voltage = readADC_Cal(LM35_Input);
Next print the temperature in °C and °F.
TempF = (TempC * 1.8) + 32;
Serial.print("Temperature in °C = ");
Serial.print(TempC);
Serial.print(", Temperature in °F = ");
Serial.println(TempF);
Add this code to your sketch this will calibrate the input ADC reading and convert them into temperature °C and °F.
{
esp_adc_cal_characteristics_t adc_chars;
esp_adc_cal_characterize(ADC_UNIT_1, ADC_ATTEN_DB_11, ADC_WIDTH_BIT_12, 1100, &adc_chars);
return(esp_adc_cal_raw_to_voltage(ADC_Raw, &adc_chars));
}
Output
Using serial communication, we can print output on a serial monitor. Two different temperatures will be shown, one will represent in C and other one in F.
After applying heat to the sensor using a gas lighter a gradual change in temperature will be observed.
Conclusion
ESP32 is easy to use and operates a user-friendly microcontroller board that can interface with a great range of sensors. Here in this write up we highlight all the steps needed to start measuring temperature using ESP32 board. A temperature sensor LM35 is used which will print the measured temperature on the serial monitor. Multiple other temperature sensors are also available having more precision than LM35 to know about them click here.


