The majority of people want to capture live pictures of their work, but they are unable to provide a high-quality image of their work. Why use live capturing when there is better software that can capture your desktop screen images and is simple to use? In most cases, it is hard for someone to capture a screen image. However, in some situations it is necessary for you to document your process or provide help to someone. Taking a screenshot is the most suitable choice with this situation at this point.
So, in this article, we’ll show you how to take a screenshot in the Raspberry Pi OS and if you stick with us until the end, you will be able to choose the best way to take a Screenshot.
1 : Taking Screenshot through Scrot in Raspberry Pi
Taking screenshots will never be any easier if you use the Scrot software. Because this software is preinstalled on the Raspberry Pi, you do not need to type any commands in the terminal. Taking the screenshot is possible with a single keystroke. The only thing you have to do is to press your keyboard “Prnt Scrn” key, and the screenshot will be saved to your home folder. You can view your saved images by navigating to your home folder.
If your operating system lacks Scrot, you can install it manually with the following command line:

Terminal Scrot
Using the “Prnt Scrn” key to take a screenshot is one of the simplest things to do. But what should you do if your key is not working properly? What if you do not want a full screenshot of your desktop? In that case, manually configuring the screenshots on the terminal is a good option. Scrot Delay will easily perform this trick for you.
It provides you with complete control over saving the screenshot to the specified folder.
The scrot-s command in the terminal can be used to capture a screenshot of the window. You can easily control the Screenshot area yourself after using this command.

If you want to take a screenshot of your complete window, use the “scrot -b” command in the terminal:

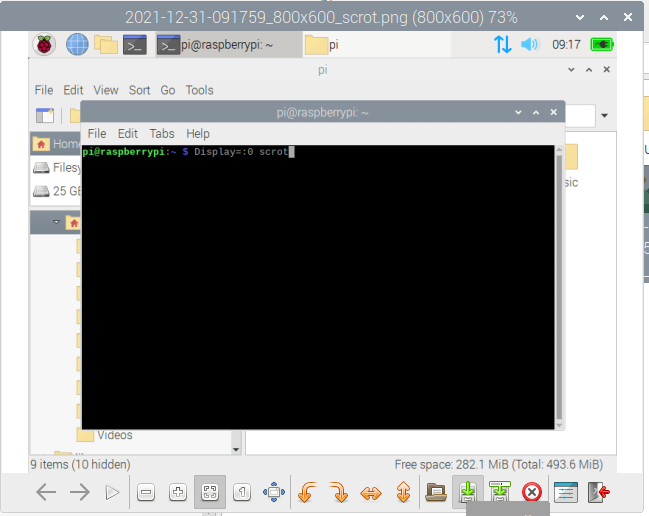
You can also use the command line to easily delay the time of the screenshot. In the terminal, type:
The above command syntax to delay the time of a screenshot and the number of seconds is defined by <num>. If you want to keep track of the screenshot’s timer, use the command with “c” flag:

If your primary goal is to capture only the Screenshot of the active window, use the terminal command “scrot-u”:

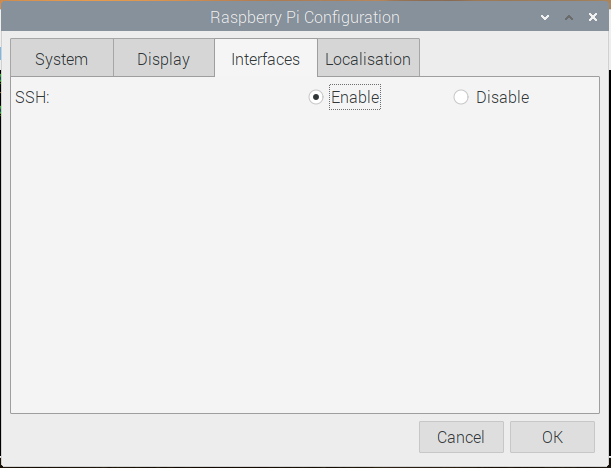
The Scrot can capture screenshots if your Raspberry Pi is set to run in headless mode. This is easily accomplished by enabling SSH in the Raspberry Pi configuration. To enable it, navigate to the Raspberry Pi configuration, which can be found in the accessory’s menu. Now go to the interface option and enable SSH there.
After enabling SSH, you can enter the below command in the terminal if you want to take a Screenshot:

2 : Taking Screenshot using GNOME screenshot app in Raspberry Pi
GNOME Screenshot is a lightweight utility which you can use easily to capture screenshots of the desktop. It was previously included in the gnome-utilities package, but it is now available as a standalone package. You can easily download the GNOME Screenshot software by typing the below mentioned command-line in the terminal:

GNOME Screenshot has a GUI interface that is considerably easier to use. If you want to avoid interaction with the terminal, you can manually take screenshots of your choice within the software, as it comes with numerous options.
In order to run the GNOME Screenshot, head to the Raspberry Pi menu, click on accessories, and run the Screenshot.
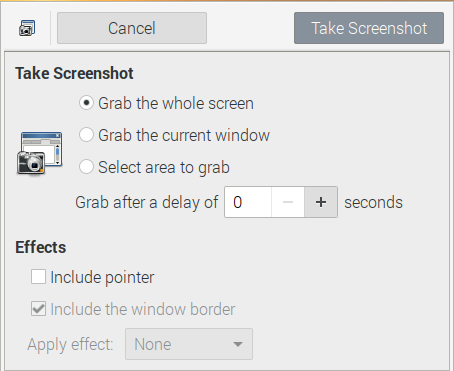
In the software, you will see three modes of capturing. If you wish to choose the “Grab the whole screen” option you can easily capture the complete screen. If you choose The “Grab the current window” option , you will then be able to capture the current window screenshot. The “Select area to grab” option gives you the choice of selecting an area to capture. You can add a delay to your Screenshot or add little effects to it quite easily.
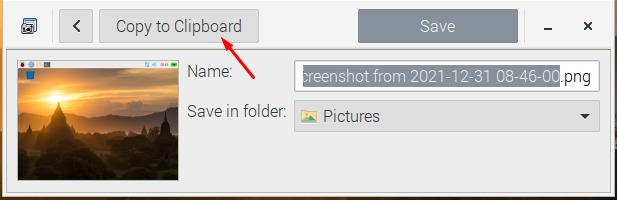
After clicking the “Take screenshot” option, you will be asked to provide a name and destination for the saved screenshot.
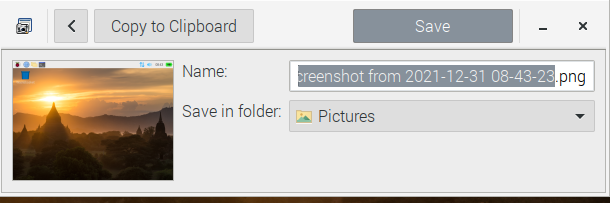
If you do not want to save your picture and want to directly put it into your document, you can do it easily by clicking the “Copy to Clipboard” option.
Conclusion
Sharing snaps of your projects with others has never been easier on the Raspberry Pi OS than it is now. However, which screenshot method you prefer is entirely up to you. This article mentioned two primary methods to take screenshots in Raspberry Pi operating system, through scrot and through GNOME screenshot app. Both procedures have their own advantages.