In this article, we are going to discuss different commands to take screenshot on Raspberry Pi using Scrot.
Take Screenshots on Raspberry Pi Using Scrot Tool
The majority of Linux flavored OS, including the Raspberry Pi system, already have Scrot installed. However, if you suddenly remove it from the system by mistake, you can run the following command to install it again on Raspberry Pi:

Using the Scrot tool, you can capture the screen in different ways. Scrot involves specific parameters for each capture either it could be the whole screen, the specific window, or the custom area. Once you capture the screenshot using the “scrot” command, it will automatically save the file to the default directory on your Raspberry Pi.
The default directory to save the screenshot is /home/pi.
If you want to save the screenshot to another directory, with a specific file name then you might use the following command.
![]()
There is another option that you can use for specific windows. Once you submit the command, you can use your mouse to draw a border around the area where you want to capture it. Use below command to capture the specific area.
![]()
After executing this command, the mouse cursor turns into a symbol “+” which means, you can use it to draw a specific area to the computer. After capturing, the file will automatically save into the default directory of the Raspberry Pi device.
Focused mode is another type of feature from Scrot tool, where users can take a Screenshot of the currently open window. Use the following command to take screenshot of the focused window.

This command immediately takes a screenshot of active window and saves it into the default directory. The immediate screenshot will only be available for only active window and that will always be a terminal window.
To take a screenshot with some delay, you can use the scrot command with “num” as shown below.

The above command will give you the time before taking the screenshot of the active window.
To see elapsed time while taking a Screenshot, you can add a countdown timer by adding the “c” parameter with “d”. While the rest of the command will remain the same.

You can also use the following command to take a screenshot of whole border of the screen.

You can also set the screenshot picture resolution according to your choice using the following command:

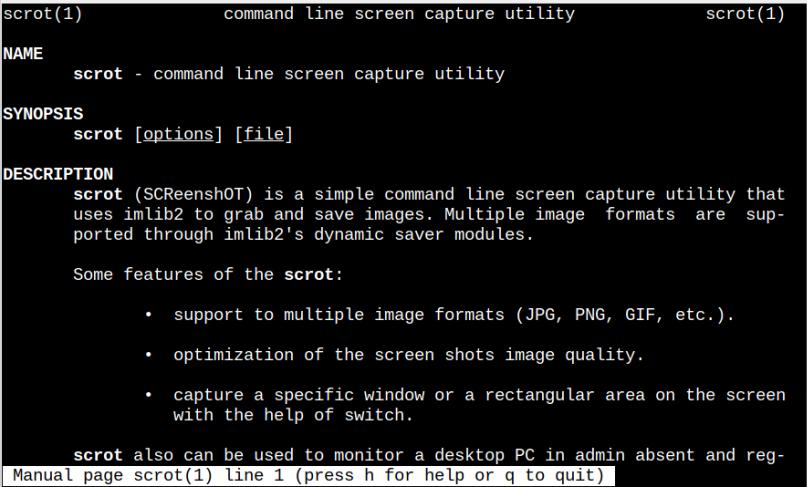
For further guidance, you can open the scrot manual using the following command:
Conclusion
Capturing screenshots on the Raspberry Pi operating system is simple using the Scrot utility, which allows you to take screenshot from the terminal. The above-mentioned guideline will show you multiple scrot-based commands to capture screenshots on Raspberry Pi system in different ways. The users can follow the above commands to take screenshot, however, they can also open the scrot manual to see other commands too.