In this article, we will discuss the method to sync time with a server on Raspberry Pi is discussed.
How to Sync Time with a Server on Raspberry Pi?
In Raspberry Pi, there are two ways to sync time with the server:
Method 1: By Using timedatectl
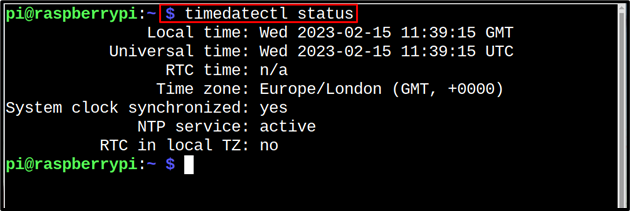
As mentioned earlier, in Raspberry Pi the time is synced with the “timedatectl” package, so to checkout that if your system is synced to your region server you can run the below-mentioned command to display the status:
In the output, you can see that the time zone is set to Europe/London which is not accurate for my region.
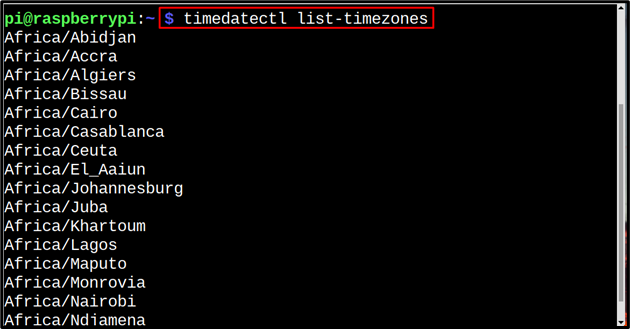
To find out the available time-zones options in Raspberry Pi, you can run the below-mentioned command:
As an output it will display a complete list of available time zones, along with the continent names:
Before setting the time zone, it is important to enable the time synchronization on Raspberry Pi and for that, run the below-mentioned command:

Once the time synchronization is enabled, you can set the time zone by using the below-mentioned command and the system clock will get synchronized with the set time zone server:
For instance, here I wanted to synchronize the time with the New York time zone:

Now to verify that the time synchronization is enabled successfully we will try to manually set the time to any desired time:
If the above command generates an error stating that the “Automatic time synchronization is enabled” then your time synchronization is completed successfully

Method 2: By Using timesyncd.conf
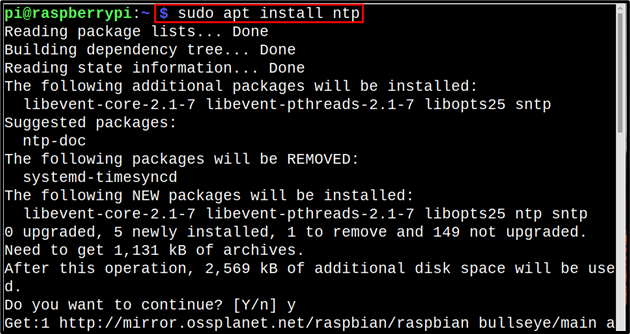
The other method to sync time is by editing the “timesyncd.conf” file to use the NTP protocol to sync the time. But for that firstly you are required to install the ntp package from the below-mentioned command:
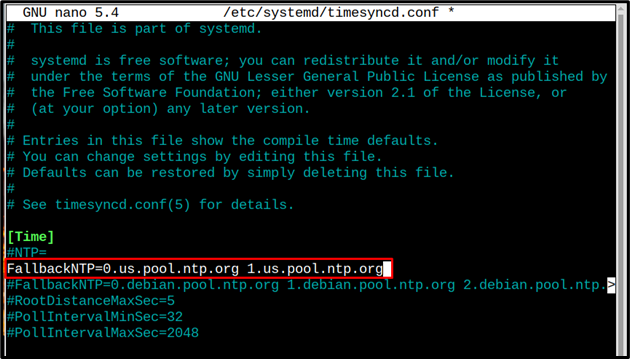
Then by using the nano editor open the “timesyncd.conf” file by using the below-mentioned command:
Once the file is opened now scroll to the bottom of the file and paste the text inside the file, which is mentioned below:
FallbackNTP=0.us.pool.ntp.org 1.us.pool.ntp.org
Save the file by pressing Ctrl+X and then Y.
Now to ensure that ntp service is running, use the below-mentioned command:
If the status of the service is inactive then you are required to start the service:
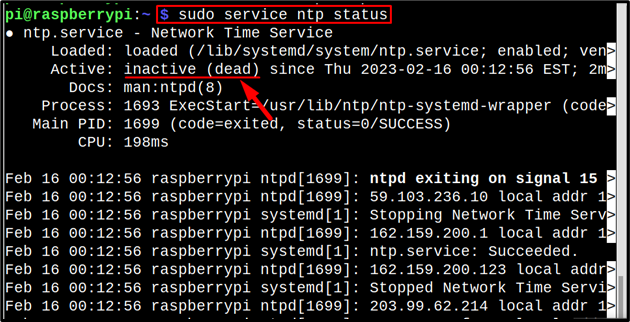
To start the ntp service, run the below-mentioned command:

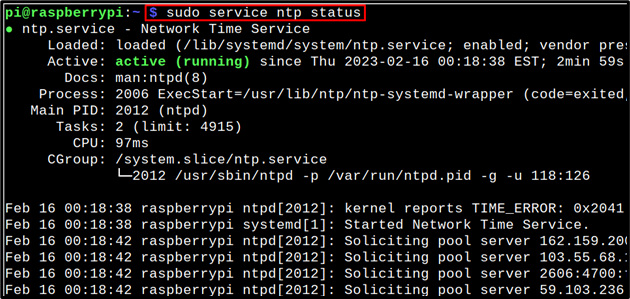
And to verify that the service is started, run the ntp status command again:
In the output, you can see that the service is actively running now:
Finally, to verify that the synchronization is enabled successfully, let’s try to manually set the time on Raspberry Pi:
The error is generated which verifies that the time is synchronized successfully.

Conclusion
To sync time with a server on Raspberry Pi there are two methods; one is by using the “timedatectl” which is also used by default to sync time on Raspberry Pi. The other method is by modifying the “timesyncd.conf” file but for this method, the ntp package needs to be installed.