In this article, we’ll show you how to share your Arduino sketches using the Web Editor’s Share feature. We’ll cover four different ways to share your sketches, including embedding them in a Project Hub tutorial, sharing them via a public URL, and embedding them on a web page. Let’s get started!
Creating an Arduino Account
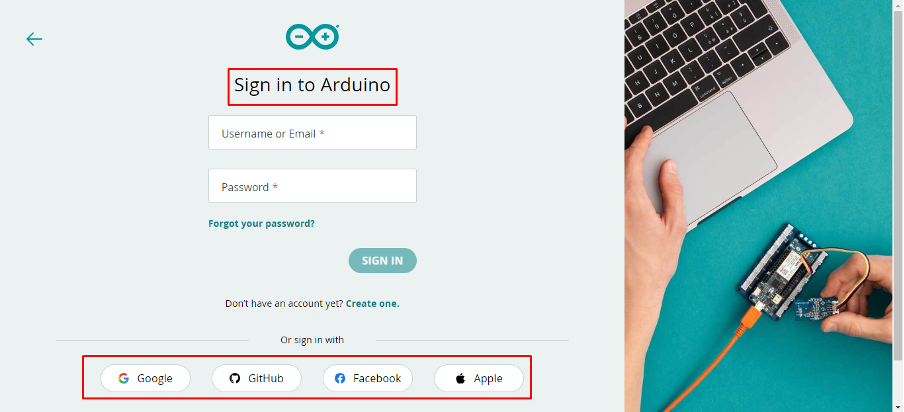
Before we dive into the Share feature, the first step is to create an Arduino account if you don’t already have one. Head over to the Arduino website and sign up for a new account if you haven’t done so already.
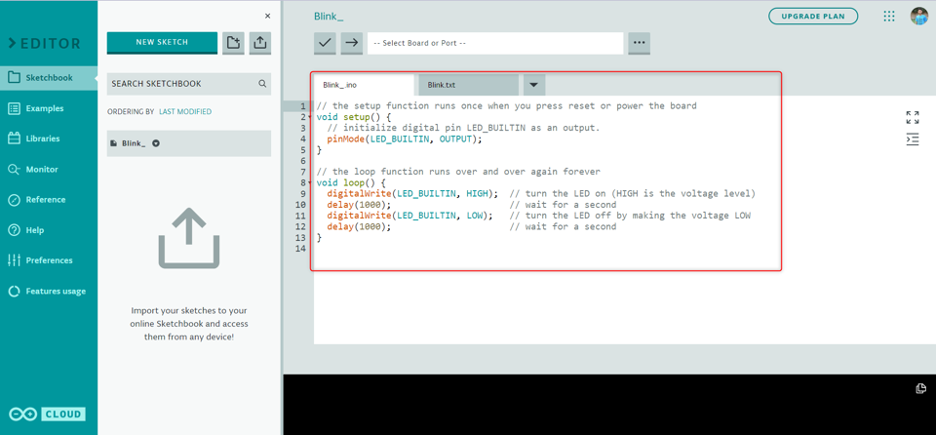
Once you’ve created an account, log in to the Arduino Web Editor to begin creating your sketch. Here we have taken a LED blink example.
Now we will cover all ways of sharing an Arduino Web Editor project. For a brief summary here is the list of all method:
- Sharing Arduino Sketch via Project Hub
- Sharing Arduino Sketch via Public URL
- Embedding Arduino Sketch on a Web Page
- Share Arduino Sketches in Google Classroom
A: Sharing Arduino Sketch via Project Hub
If you want to share your sketch with a larger audience, embedding it in a Project Hub tutorial is a great option. Here’s how to do it:
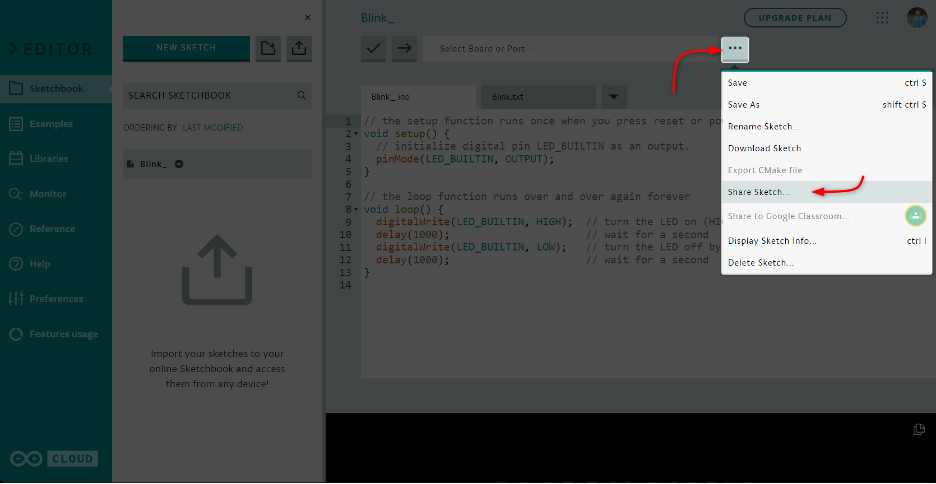
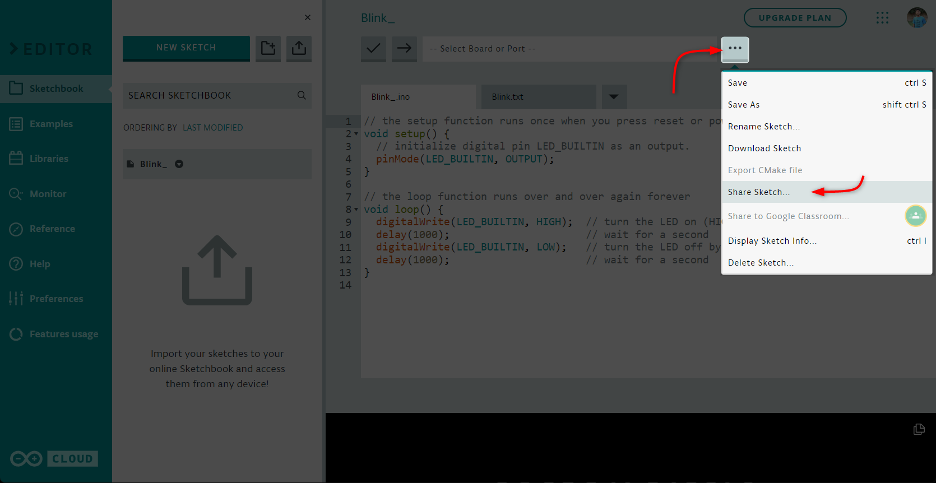
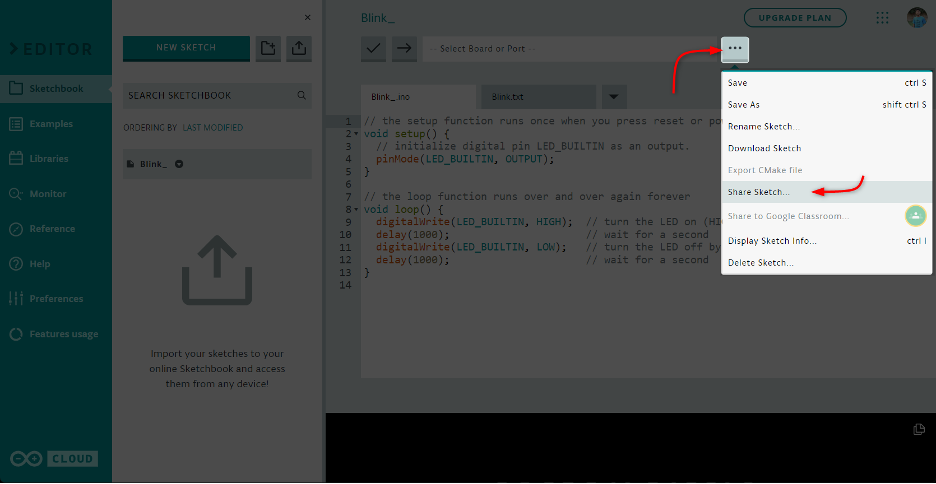
1: Create a new project in the Arduino Web Editor. After that click the share button.
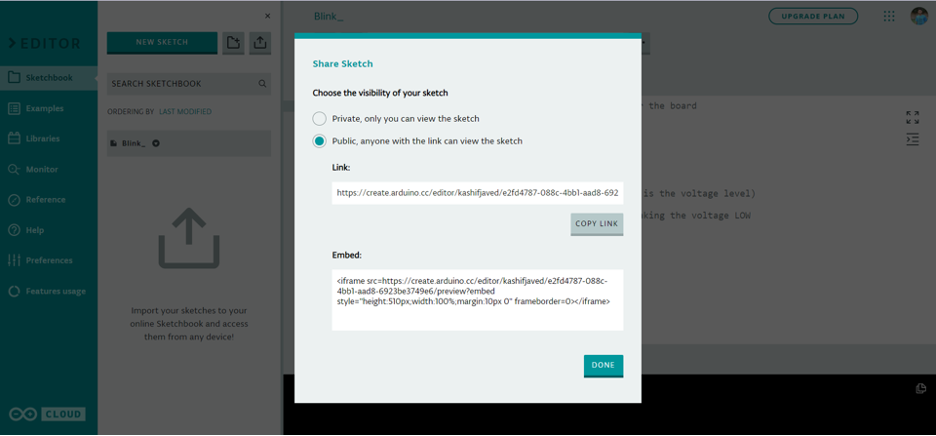
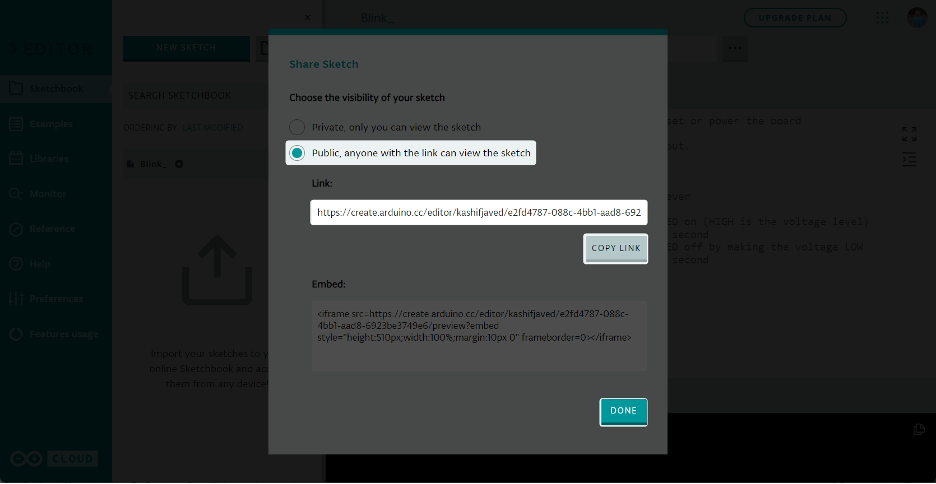
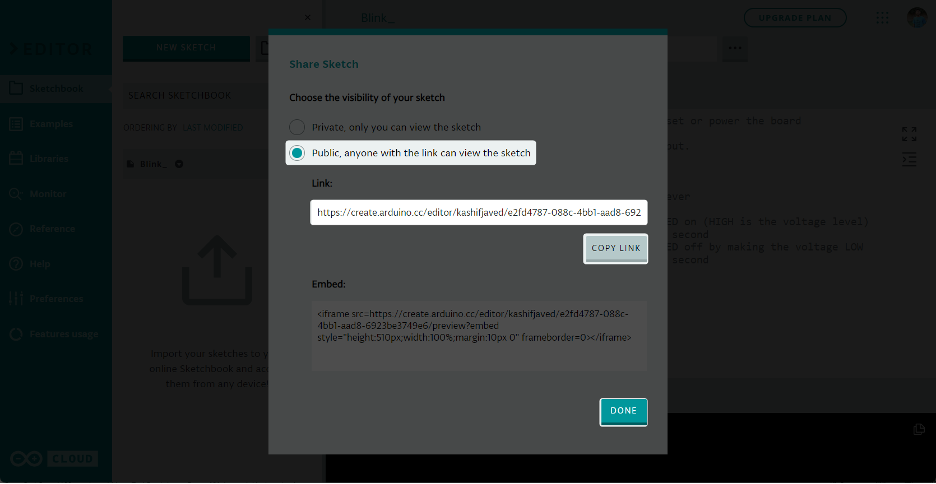
2: By default, the sketch is set to Private sharing. To set it to public so anyone can view the project we will select the Public option.
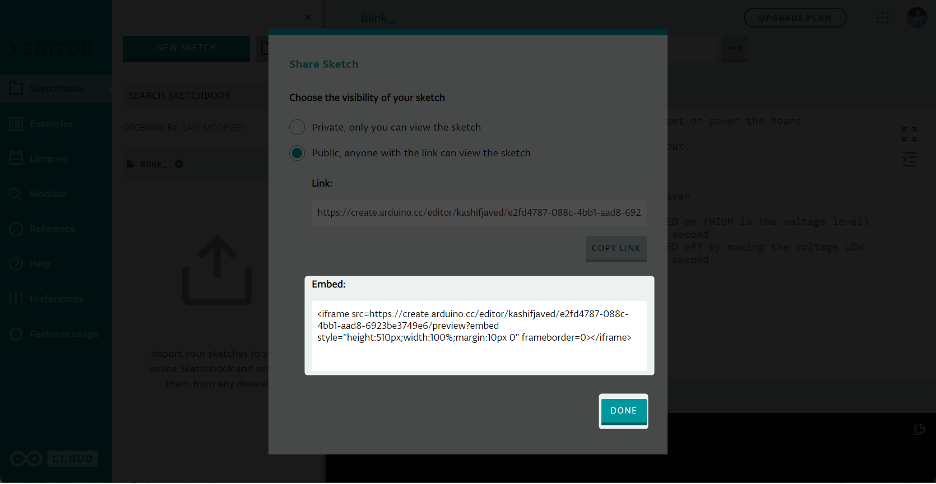
3: After selecting the Public option two different sharing links will open up. One for the general sharing and second is the HTML embedded link to share it on your blog or website.
Select the general link and copy it.
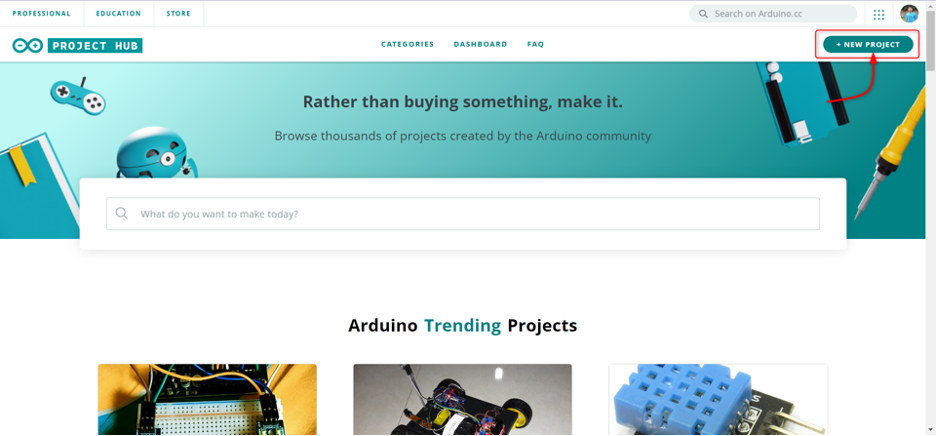
4: Now open the Arduino Project Hub and create a new project.
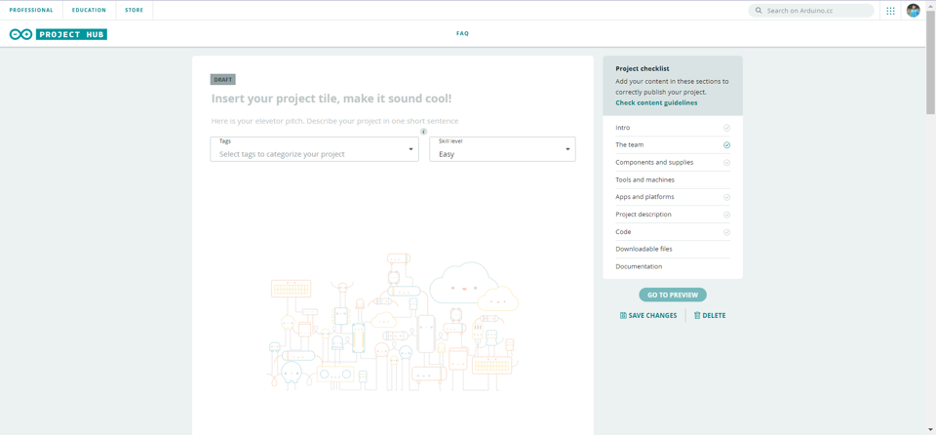
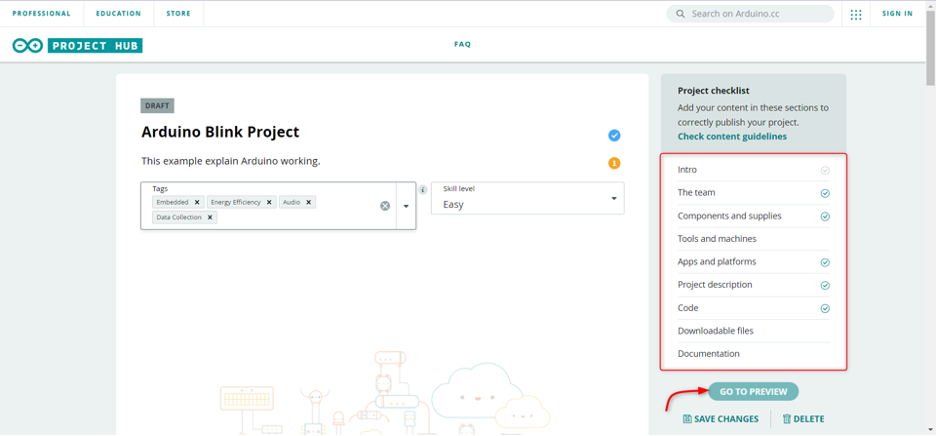
5: Once you’ve created your project, the following window will open.
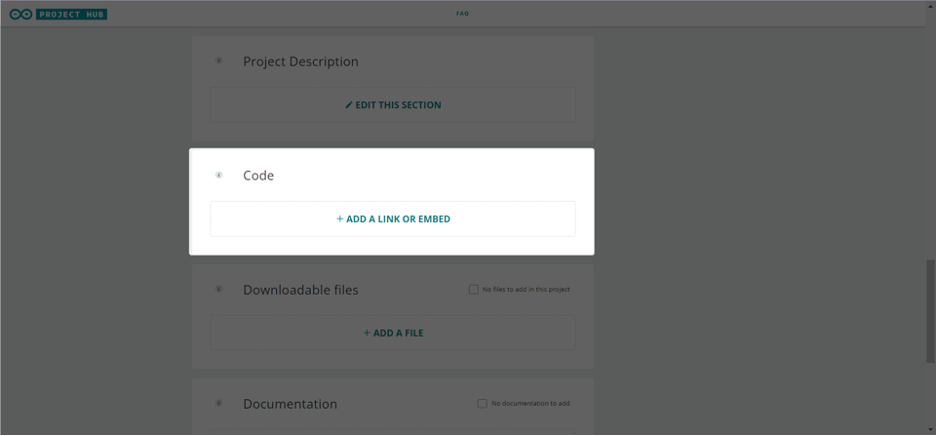
6: Now navigate to the Code section and click Add a Link or Embed.
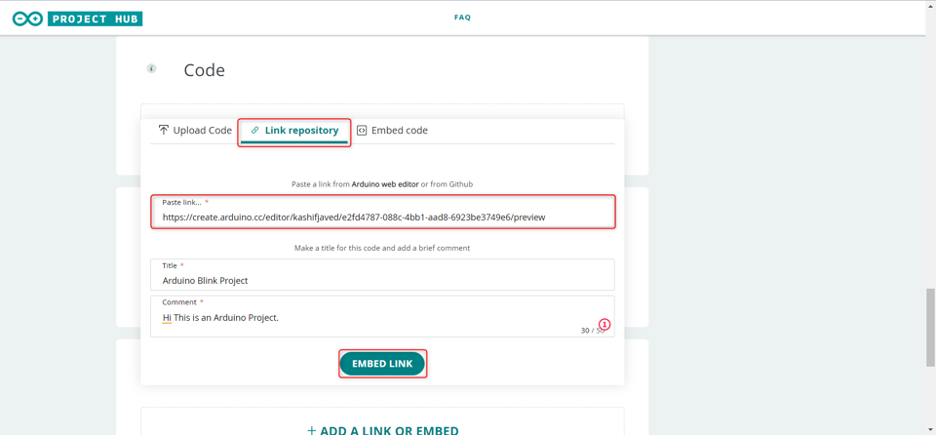
7: In the Code section, click on Link Repository. Paste the link we copied earlier from the Web Editor and give a title to your project then click EMBED LINK.
8: After that you can add the project title, author name and component used. After filling all the details click preview and then select Publish.
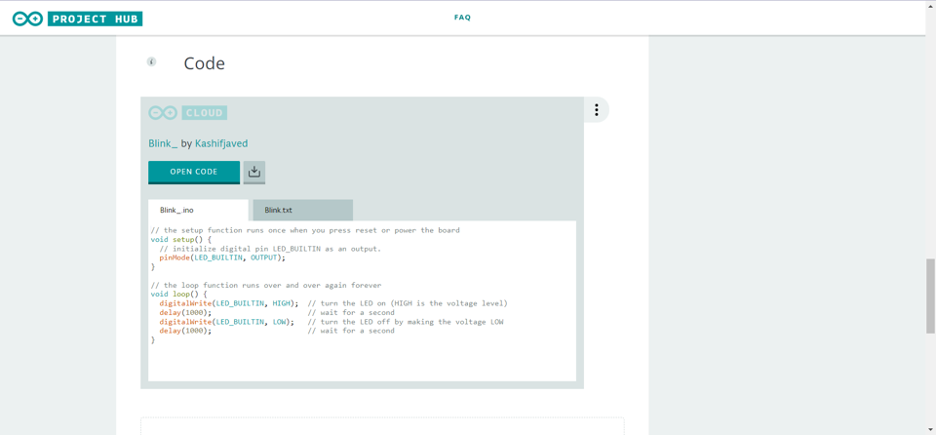
9: Once the code is successfully published it will look like this. Arduino sketch is now available to anyone who views your Project Hub tutorial. Plus, any edits you make to the sketch in the Web Editor will automatically update in the tutorial, so your audience always has access to the most up-to-date version of your sketch.
B: Sharing Arduino Sketch via Public URL
If you want to share your sketch with someone quickly and easily, sharing it via a public URL is a great option. Here’s how to do it:
1: In the Web Editor, click the Share button.
2: Click the Copy link to copy the sketch’s public URL to your clipboard.
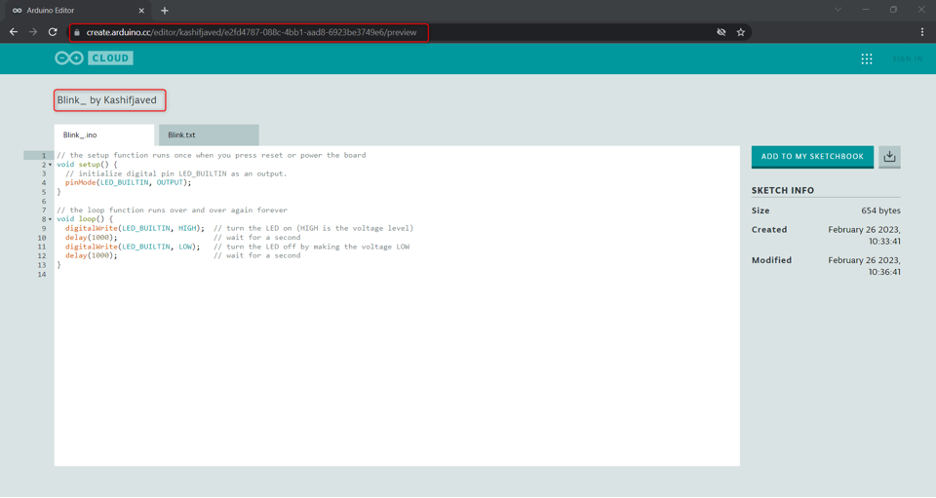
3: Share the URL with your intended audience. Anyone who clicks on the URL will be able to view your sketch, even if they don’t have an Arduino account. They can also download the sketch or add it to their sketchbook if they do have an account.
C: Embedding Arduino Sketch on a Web Page
Finally, if you want to embed your sketch on a web page, the Share feature has got you covered. Here’s how to do it:
1: In the Web Editor, click the Share button.
2: Copy the project Embed link from the popup window. Paste the link into your HTML page.
Once you’ve embedded your sketch on your web page, any changes you make to the sketch in the Web Editor will automatically update on your page.
D: Share Arduino Sketches in Google Classroom
Google Classroom is a widely used learning management system for educators and students. Sharing Arduino sketches in Google Classroom can be a useful tool for teaching electronics and programming concepts.
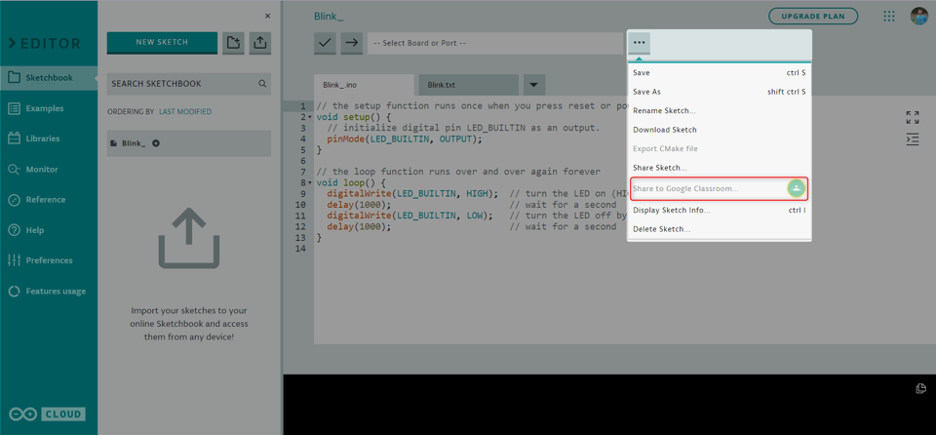
Arduino Web Editor has integration support for the Google Classroom. You can directly share your project across Google Classroom with a single click.
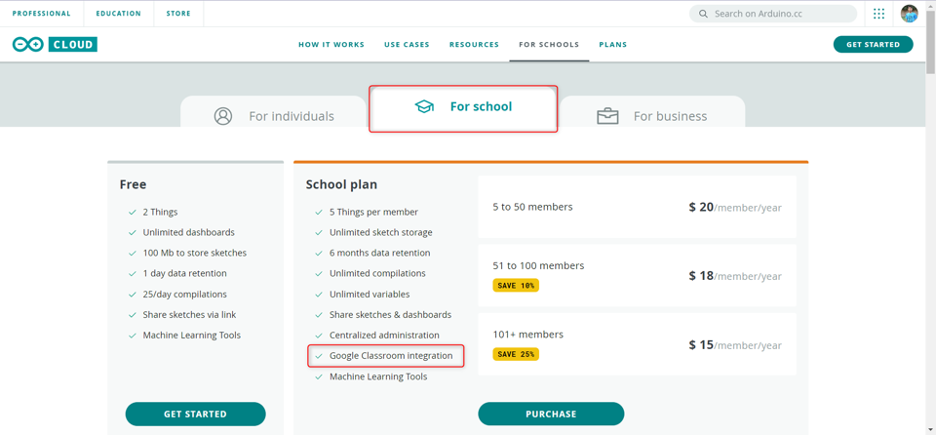
However, one thing to note is that this integration is not free and only allows educational institutes to create and share Arduino projects in Google classrooms. To view all plans, you can visit the site Arduino Plans for more information.
Tip: As Arduino Web Editor integration with Google Classroom is not free, however there is an alternate way of doing this.
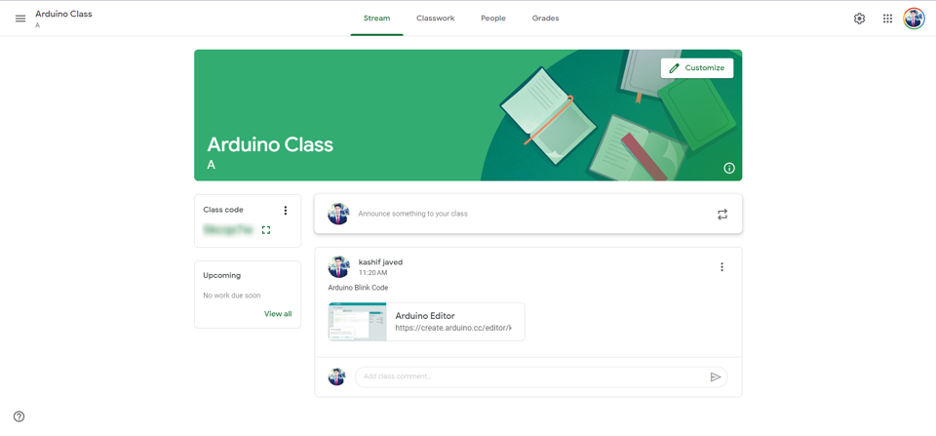
Create an Arduino Project and copy the Pubic link and paste it inside the Google Classroom stream.
Conclusion
The Arduino Web Editor’s Share feature makes it easy to share your sketches with the world. Whether you want to embed your sketch in a Project Hub tutorial, share it via a public URL, or embed it on a web page, the Web Editor has got you covered. So, start sharing your sketches today and inspire others to build on your ideas!

