Setup Passwordless SSH Login
To set up Passwordless login for SSH, you must follow the below-mentioned steps
Step 1: Make sure that the SSH is enabled on your Raspberry device and you can follow here to enable the SSH service.
Step 2: Use the below-mentioned command to generate an SSH key pair with your ID if you don’t have an existing SSH key pair.
Step 3: Then it will ask you to enter a passphrase, Press the enter button multiple time without entering the passphrase.
As a result, this generates the SSH key on your terminal.
Step 4: Now to see the key successfully generated on your system, use the following “ls” command:
Now you must copy the “id_rsa.pub” file to add this to your system for removing the password. For this process, you must enter the below-mentioned command in the terminal:
Make sure that you have the same username and hostname “pi@raspberrypi”, which you can confirm from the terminal.
Type“yes” to add the SSH key.
You may need to enter your system’s password for the one last time do it to confirm the changes.
After this step, you have successfully removed the password authentication for SSH login.
You can check on your Raspberry Pi system to see whether you can log in to SSH without a password:
This ensures that you don’t require any password for SSH login because the SSH key is added to your system.
Remote Access to a Server
In case you want to use a similar process for another server like your laptop or PC, you can do it easily by first installing the PuTYY application on your Raspberry Pi system using the following command:
The reason for installing this on Raspberry Pi system to generate an SSH key to allow other systems to perform SSH login without password.
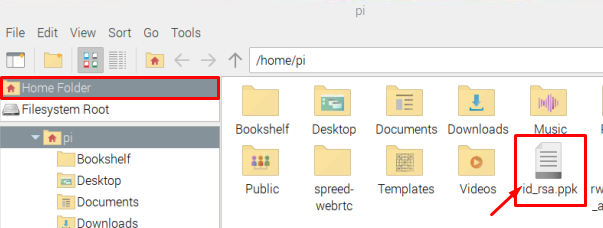
After installing the PuTTY tool on Raspberry Pi, use the following command to create the “id_rsa.ppk” file in the home directory that includes the authorization information copied from id_rsa file.
The above command generates the id_rsa.ppk file in your home directory and you have to transfer this file to your laptop or PC.
Now move towards your PC or laptop and download the PuTTY application.
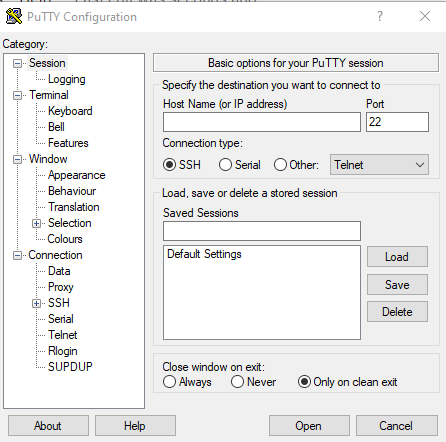
After the Installation of PuTTY, open it into your system to open the configuration window.
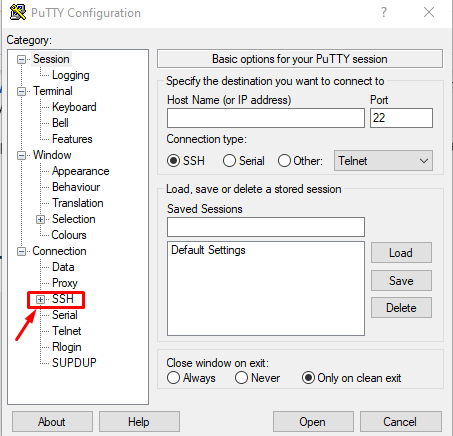
Click on the “SSH” option from the “Connection” category.
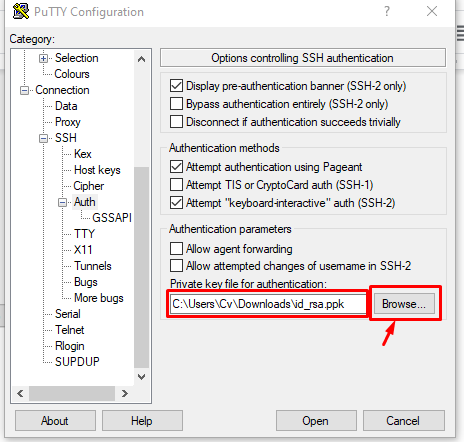
Then select “Auth” from the “SSH” list that has extended further after clicking on SSH
Now click on the “Browse” button and load the id_rsa file you transferred from your Raspberry Pi system.
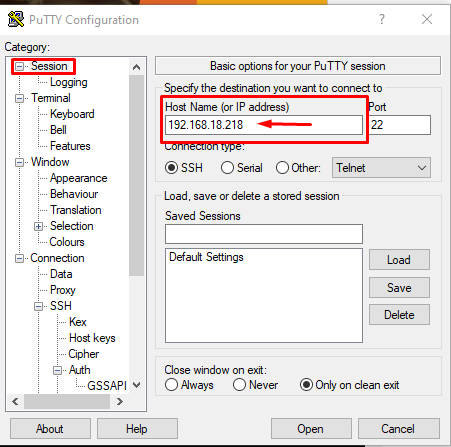
Then click on the Session option, add your Raspberry Pi IP Address, and click the “Open” button.
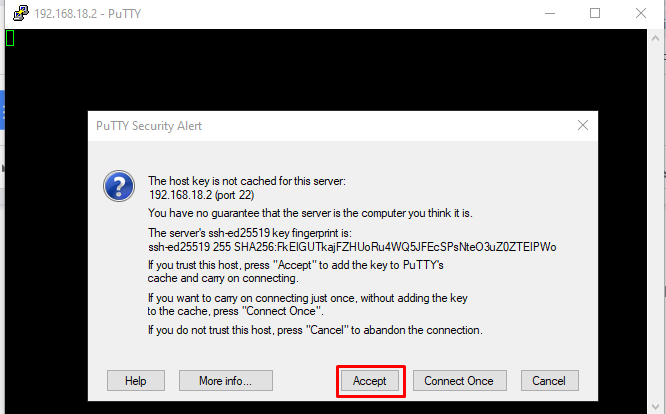
A PuTTY Security Alert dialogue box will appear on the screen, and you have to accept it by clicking on the “Accept” button:
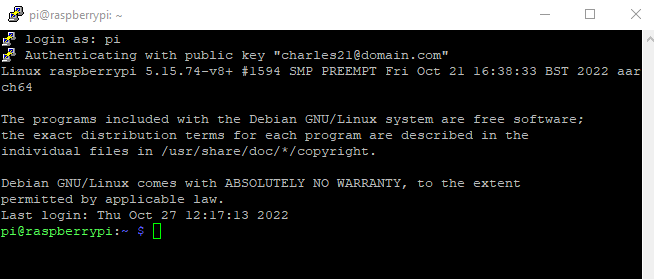
A black window will appear on the screen where you must enter the Raspberry Pi’s user name.
After entering the username, it will automatically access your device terminal without asking for a password, which ensures that we have successfully set up Passwordless SSH Login for Raspberry Pi.
That’s it for this guide!
Conclusion
Removing the SSH login password may not be a secure option but if you are the only person using this device, then removing the password isn’t bad at all. To set up passwordless SSH Login, first, you have to generate an SSH key and then add a few other commands from the above-mentioned guidelines to successfully enable the password-less SSH login. Afterward, you must install the PuTTY application on your Raspberry Pi system to generate an id_rsa file so that you can use this file to access the Raspberry Pi terminal remotely without a password.


