Scrolling LEDs means to glow the LEDs in such a pattern that it looks like they are moving in one direction and then in another direction to catch the next LED. We can interface different LEDs to the Arduino and can glow in such a way that it looks like the scrolling pattern. This scrolling pattern is used for many applications such as for displaying different names and for advertising purposes. The scrolling pattern of LEDs is the basic example to have an understanding of this.
In this write-up, we will use multiple LEDs and glow them in a scrolling pattern.
Scrolling LEDs in Arduino
The LEDs connected with Arduino glows in a scrolling pattern are known as scrolling LEDs. We will explain its circuit and code in detail. The Arduino code for scrolling LEDs is:
void setup() {
for (i=0; i<count; i++){
pinMode(pin[i], OUTPUT);
}
}
void loop() {
for (i=count-1; i>=0; i--){
digitalWrite(pin[i], HIGH);
delay(50);
digitalWrite(pin[i], LOW);
}
for (i=0; i<count; i++){
digitalWrite(pin[i], HIGH);
delay(50);
digitalWrite(pin[i], LOW);
}
}
Explanation to code: In the above Arduino code, we have initialized three “for loops”; one for declaring the pins 3,4,5,6, and 7 to behave as an OUTPUT, second loop for making the LEDs on and off with a delay of 50 milliseconds from pin 3 to pin 7, and last loop is used to make the LEDs on and off with a delay of 50 milliseconds from pin 7 to 3.
Simulation and Hardware configuration
For a circuit of scrolling LEDs with Ardunio, we required the following components:
- 5 LEDs
- 5 resistors of 220 ohms
- Connecting wires
- Breadboard
- Arduino Uno
The circuit diagram for the circuit of scrolling LEDs will be:
In the above circuit diagram, the LEDs are connected to pins 3,4,5,6, and 7 of Arduino with the help of resistors(the purpose of connecting resistors is to protect LEDs). The cathode of all LEDs is connected to the ground.
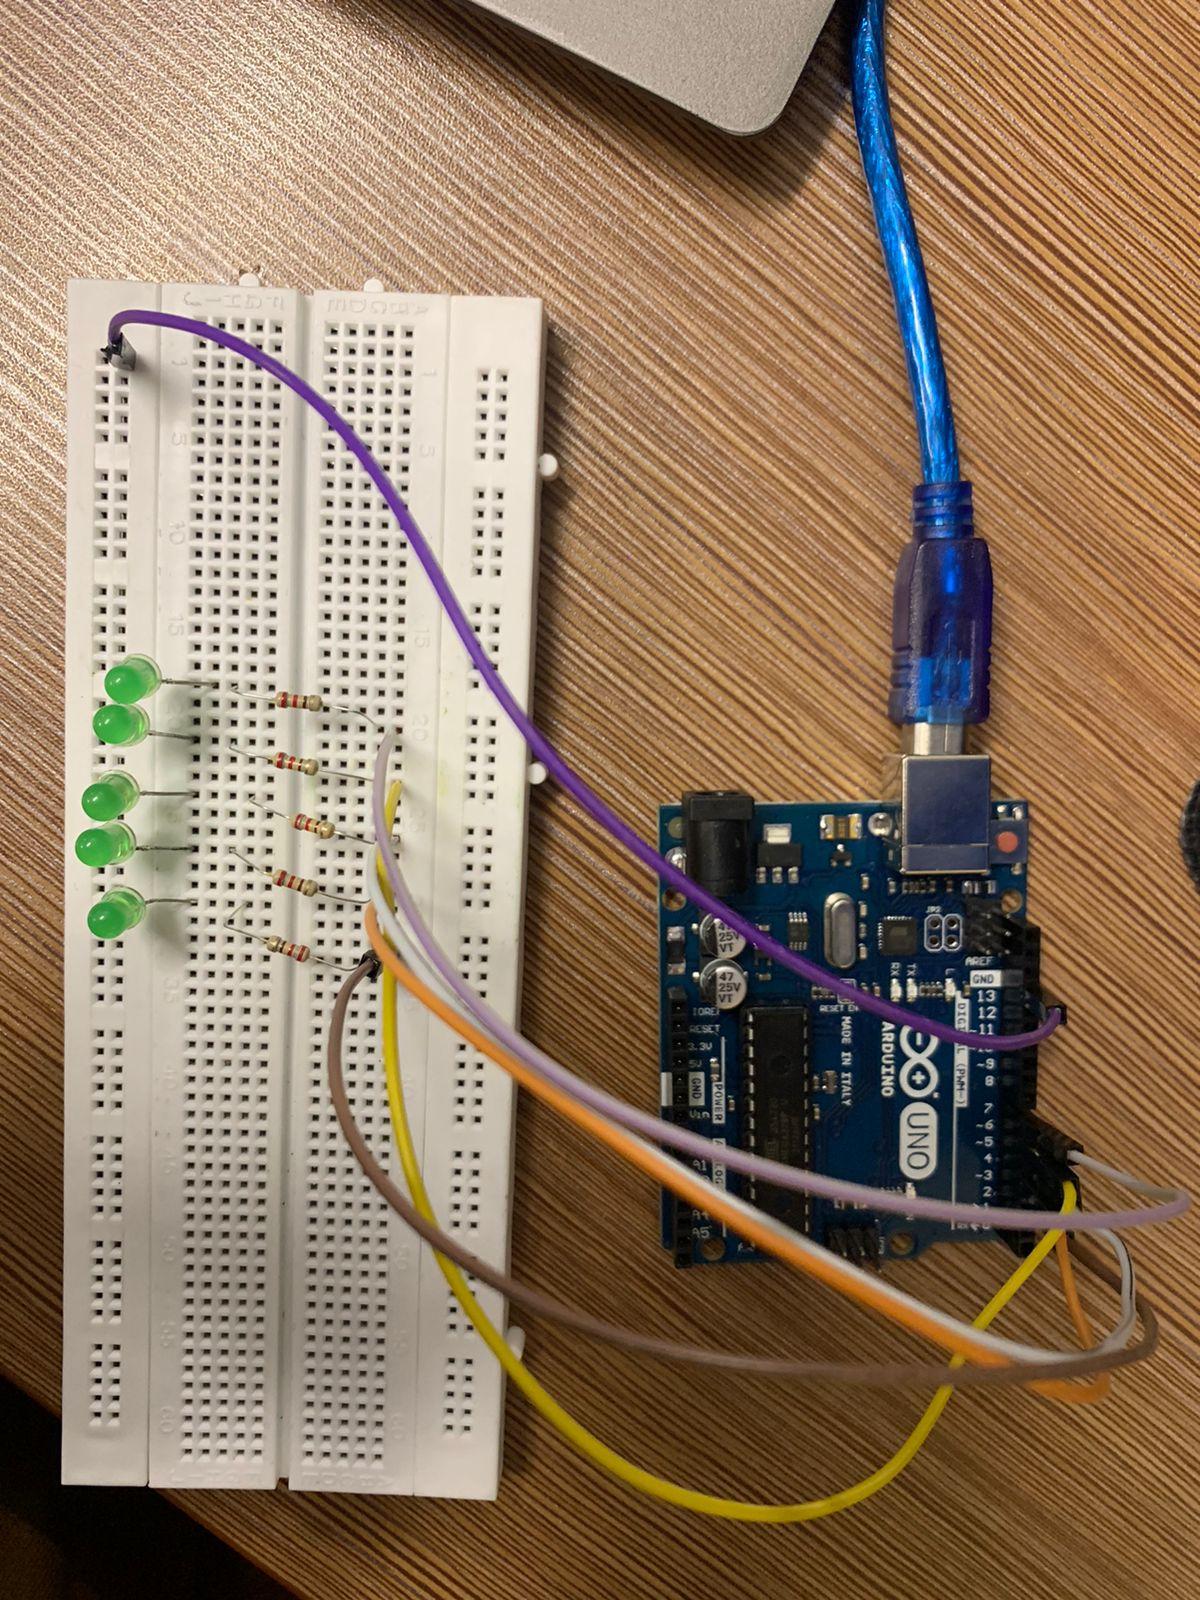
The hardware configuration of the above circuit diagram is:
In the hardware configuration:
- We have connected the resistors with the anode of LEDs
- The second legs of all LEDs are connected with pins 3,4,5,6, and 7 of Arduino with the help of jumper wires
- The cathode of all LEDs are connected to the ground pin of the Arduino
The hardware working of the above circuit is:
Conclusion
The “scrolling LEDs” is simply the pattern of turning ON and OFF the LEDs in a scrolling way, this circuit can be configured using Arduino. Scrolling LEDs are mostly used for marketing, advertising, and decorations purposes. In this write-up, the circuit of scrolling LEDs is explained in detail with its Arduino code and hardware configuration.


