How to Run Arduino Code
Arduino programming is a subset of C++ programming language with additional functions and methods. Arduino code also known as Sketch is written inside the IDE (Arduino Software) which compiles the code and converts it into machine language.
Different methods can be used to run an Arduino code. One of the most popular and user-friendly methods to run a code on Arduino is by using Arduino IDE.
All you need is:
- Arduino board (UNO)
- USB B cable
- Arduino IDE
- PC
Following are some steps needed to run Arduino code:
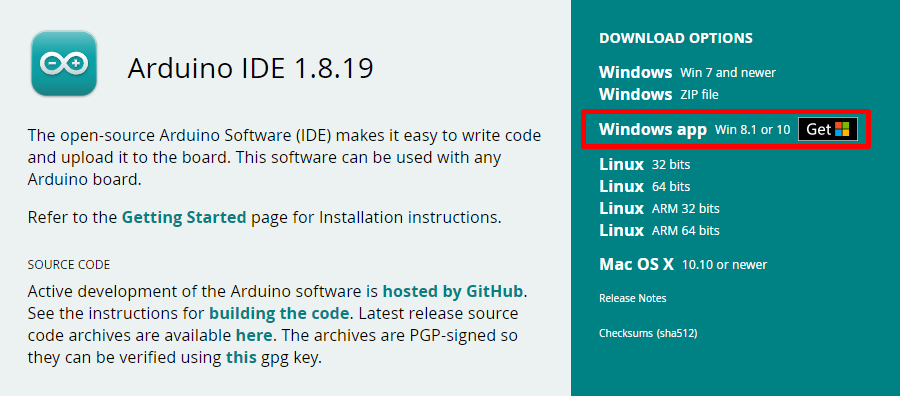
Step 1: Download Arduino IDE from Arduino’s official site:
As code is written in C++ language it’s necessary to convert it into machine language. To do this Arduino IDE is used. There are multiple others compiling software available for Arduino which can be learned by clicking here.
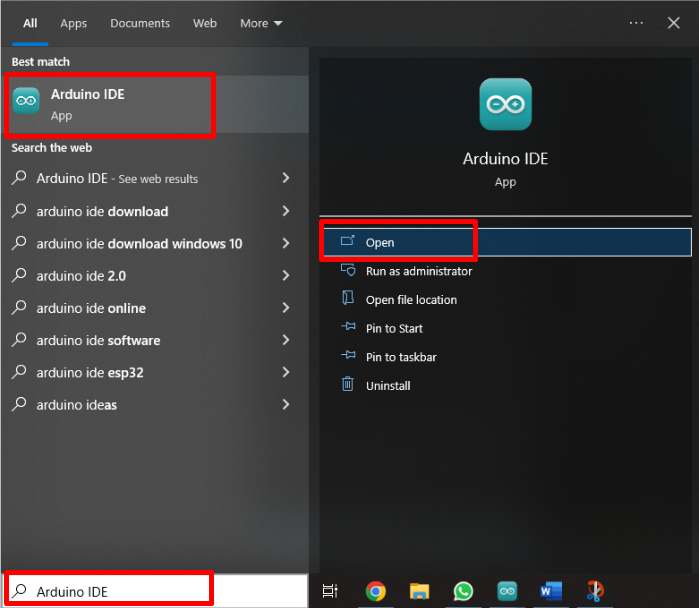
Step 2: After installing IDE, open it by double clicking the shortcut icon or type IDE in the Windows search bar.
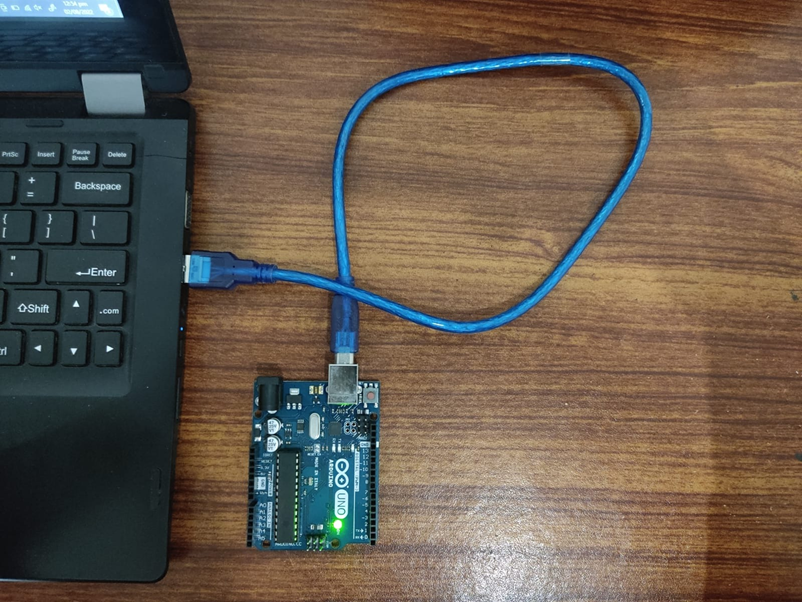
Step 3: After the IDE is open, it’s time to set up Arduino hardware. Now connect the Arduino board using USB B cable through the COM port on the PC.
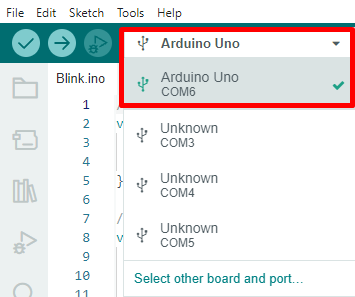
Step 4: Once the Arduino board is connected, it will automatically install the necessary drivers needed and will select the port at which it is connected.
Step 5: Connection is established between Arduino board and PC. It’s time to upload an Arduino sketch.
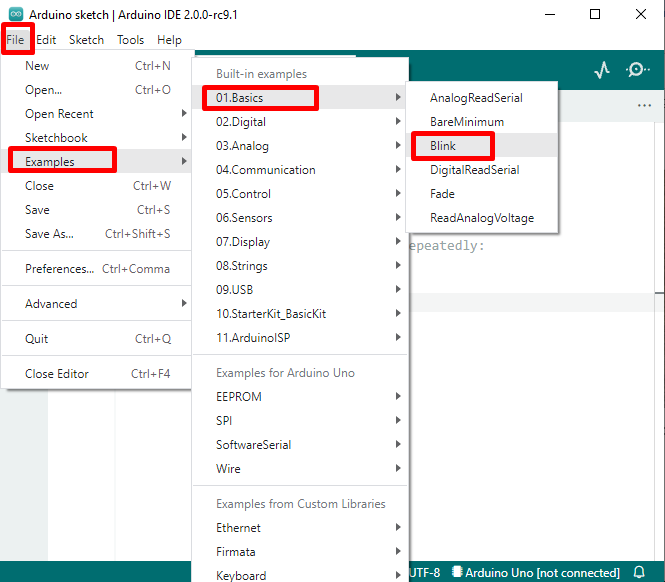
As an example, we will use LED Blink code to upload it to the Arduino board. Go to, File>Examples>Basics>Blink:
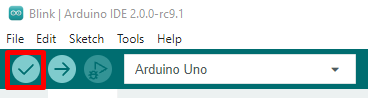
Step 6: Blink code will open in a new window. It’s time to compile the code. Click Verify button as shown below:
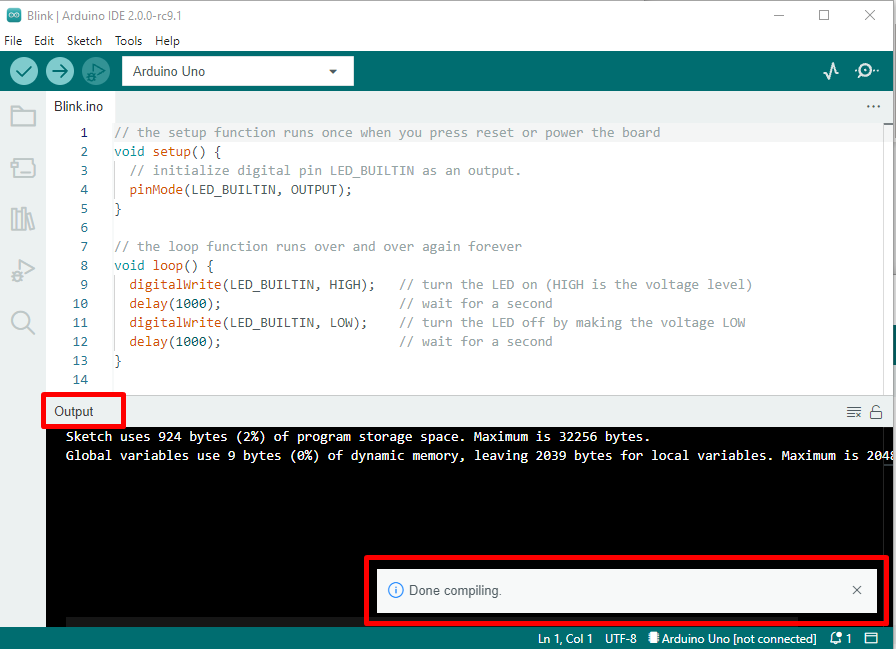
Once our code is compiled, we will see a message Done compiling in the output window.
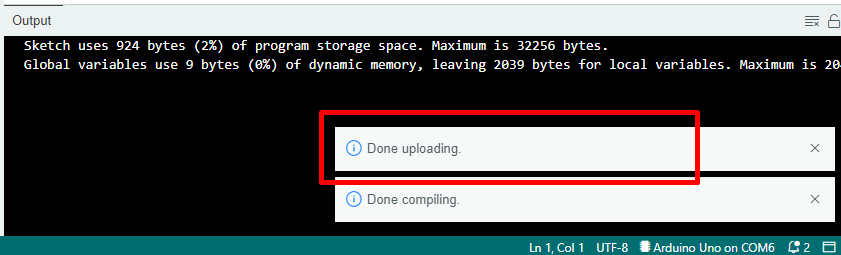
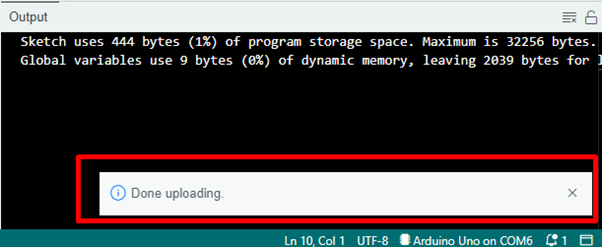
Step 7: Last step is to upload this sketch in Arduino. To do this click the right pointing arrow known as Upload button present to the right side of the verify button. Once the upload is finished, a Done Uploading message will appear in the output window.
We have successfully uploaded our sketch in Arduino.
How to Open and Run an Arduino Code Already Saved in PC
Following these steps, we can run an already saved program in IDE.
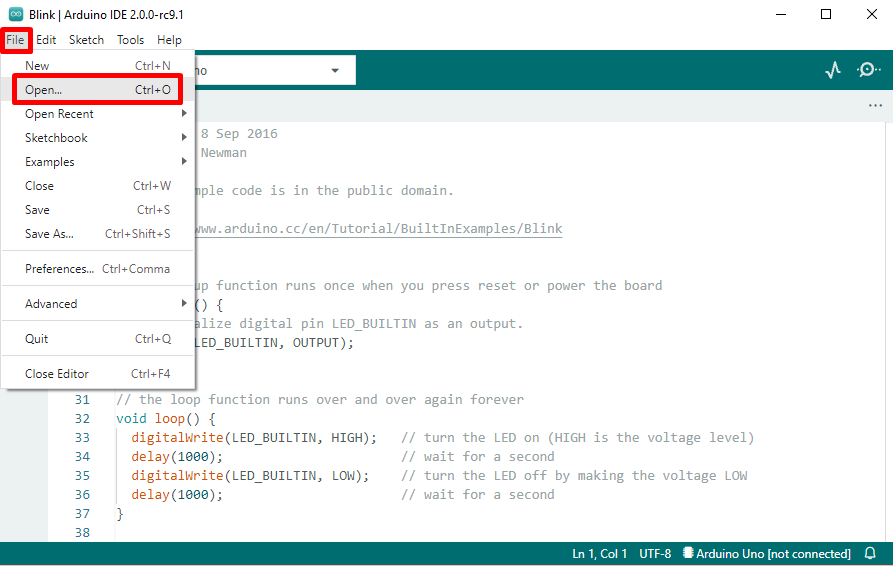
Step 1: Click file then select Open or press Ctrl+O on keyboard.
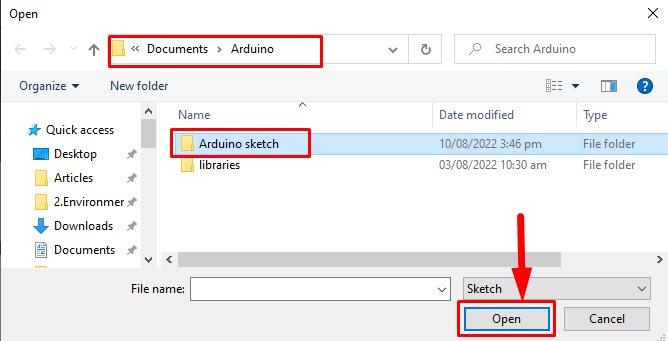
Step 2: A new window will open containing the Arduino project directory folder. Select the folder where the Arduino sketch is saved. Double click that folder or select and click Open.
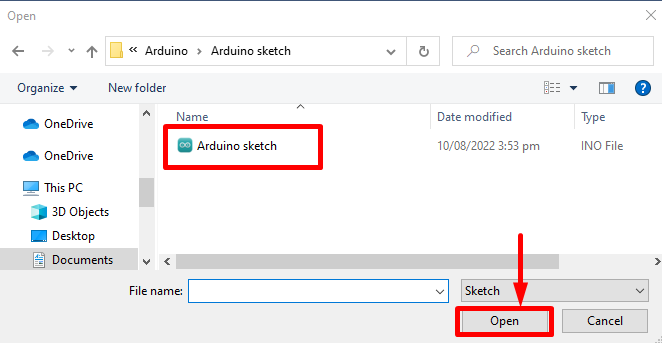
Step 3: Now, select Arduino sketch and click Open:
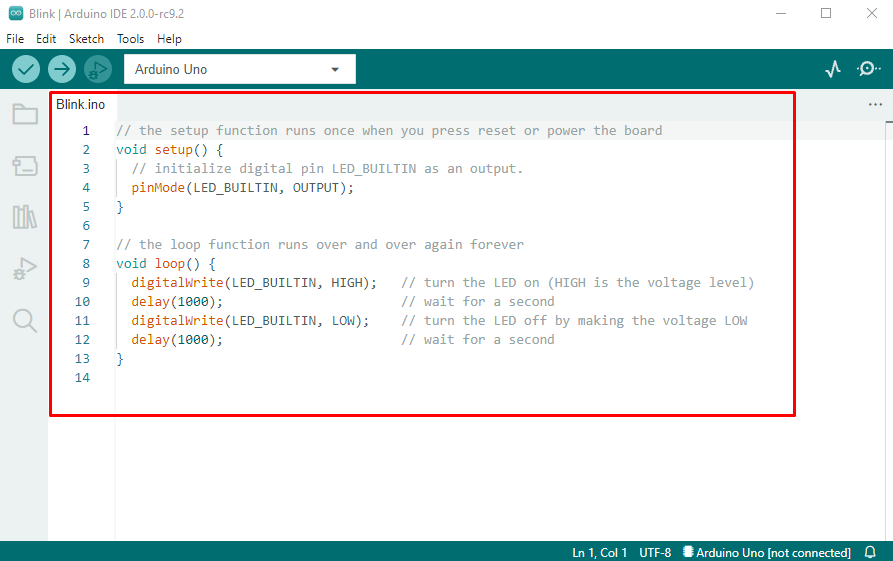
Step 4: Arduino IDE will open sketch in new window as shown here:
Step 5: After Arduino has opened our sketch now Compile and Upload sketch into Arduino like explained above by using quick action buttons.

Conclusion
Arduino is a very diverse platform. For beginners its intuitive design makes it a favorite spot to learn programming and embedded systems. Starting with Arduino is always a great experience. Here in this article, we have discussed how to run our first Arduino code. Using this knowledge anyone can upload a new sketch to its Arduino. Try to upload multiple Arduino example codes into the Arduino board.