Remove the Black Border from Raspberry Pi
There are three simplest methods to remove the black border from Raspberry Pi OS, which are as follows:
- Remove Black Border from GUI
- Remove Black Border from raspi-config
- Remove Black Border from Configuration File
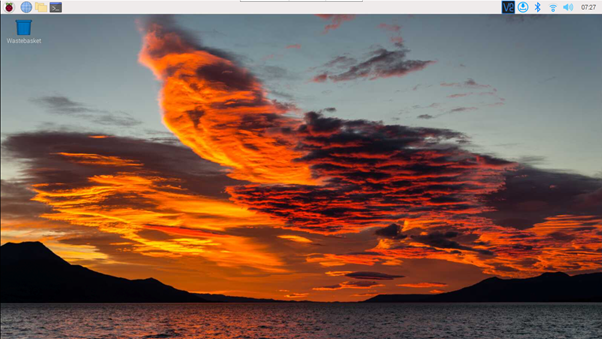
Let’s discuss the above methods to remove the black borders if you are facing the black border around the desktop like the one shown in the below image.
Method 1: Remove Black Border from GUI
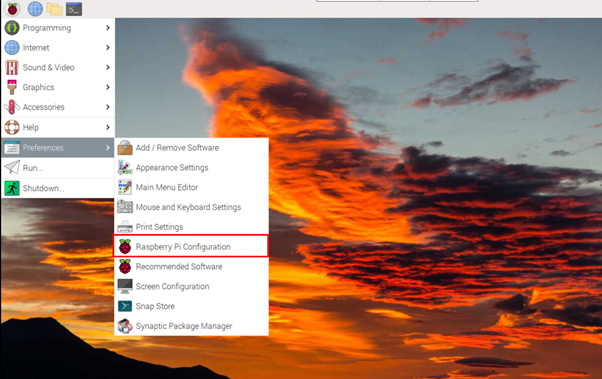
You can easily remove the black border from the Raspberry Pi configuration, which you can find in the “Preferences” section in the main Raspberry Pi menu.
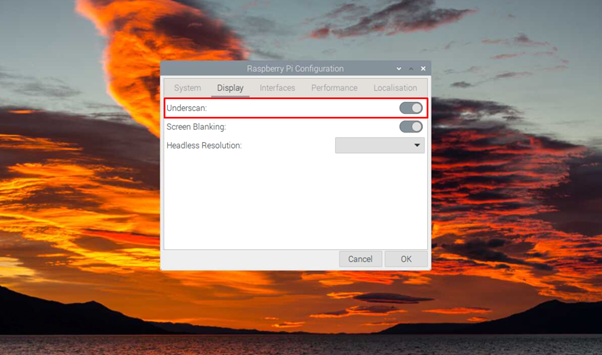
Head towards the “Display” section and disable the “Underscan” option.
Method 2: Remove Black Border from raspi-config
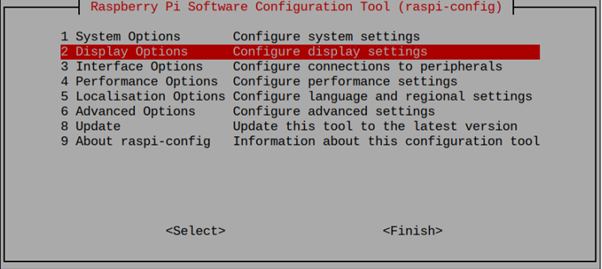
You can also open the Raspberry Pi configuration within the terminal to disable the black border. To open the Raspberry Pi configuration, you should apply the following command:
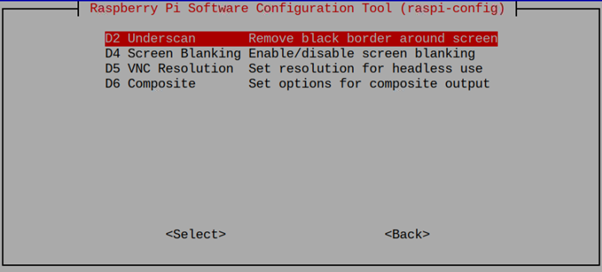
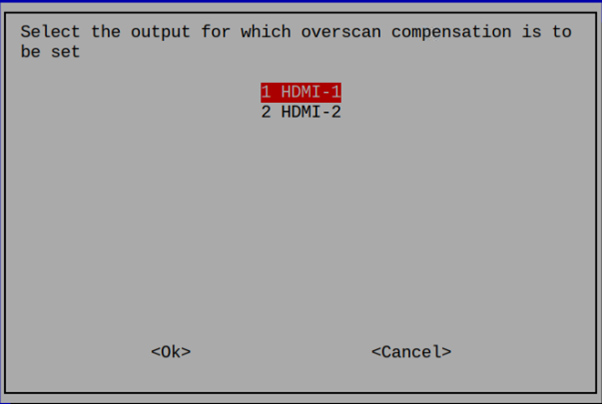
You can find the “Underscan” option in the “Display Options”.
Choose the “HDMI” port you use for your Raspberry Pi display.
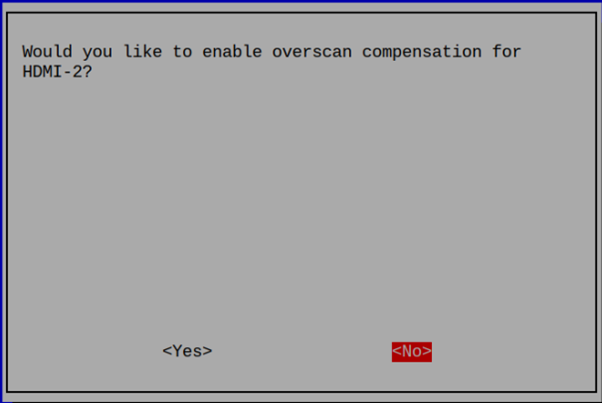
Then choose “No” option to disable the over scan compensation for the selected HDMI.
After disabling the “overscan” option, reboot the device to apply the changes.
Method 3: Remove Black Border from Configuration File
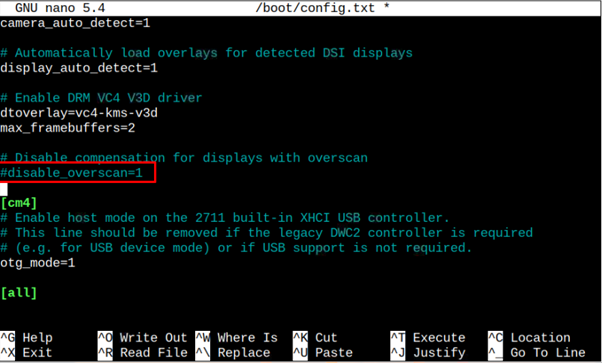
You can also remove the black border on Raspberry Pi by opening the boot configuration file in the terminal using the following command:
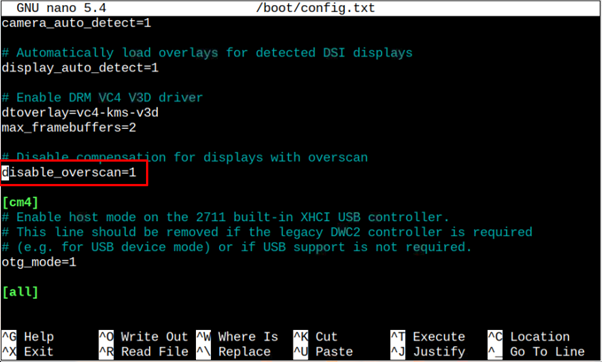
Within the configuration file, search the option “disable_overscan=1” using “CTRL+W” keys
To disable this option, add # before it, save the file and exit using “CTRL+X”.
Reboot the device to confirm removing the black border from your Raspberry Pi desktop.
Conclusion
Black Border around the system display is the most common issue that prevents Raspberry Pi desktop from fitting on your monitor display. To remove the black border, follow the above-mentioned methods that provide easy instructions by disabling the “underscan” option. You can disable this option either from GUI, raspi-config, or through the boot configuration file and after applying the changes, you should reboot your device to perform the black border removal process successfully.


