This article will provide a solution to remotely access your Raspberry Pi behind the firewall and access the Raspberry Pi terminal without an IP address and default SSH port.
How to Remotely Access Raspberry Pi Behind Firewall
RemoteIoT is an amazing platform that enables users to remotely access the Raspberry Pi device behind the firewall and router. To perform the remote access process, follow the below-mentioned steps:
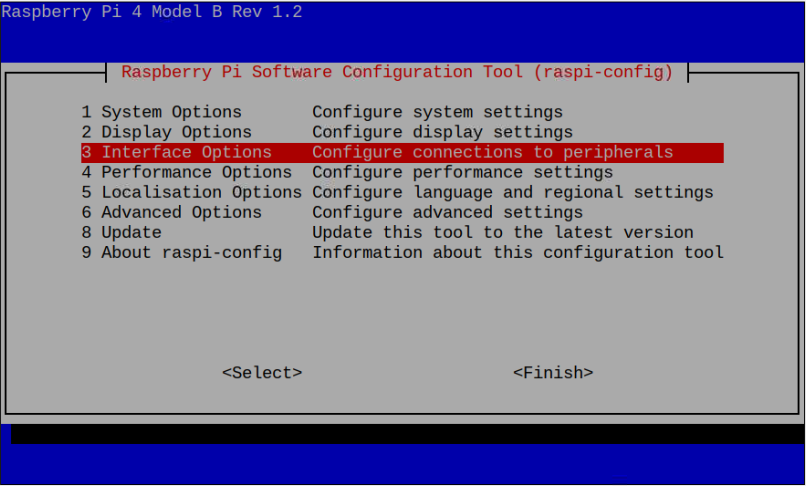
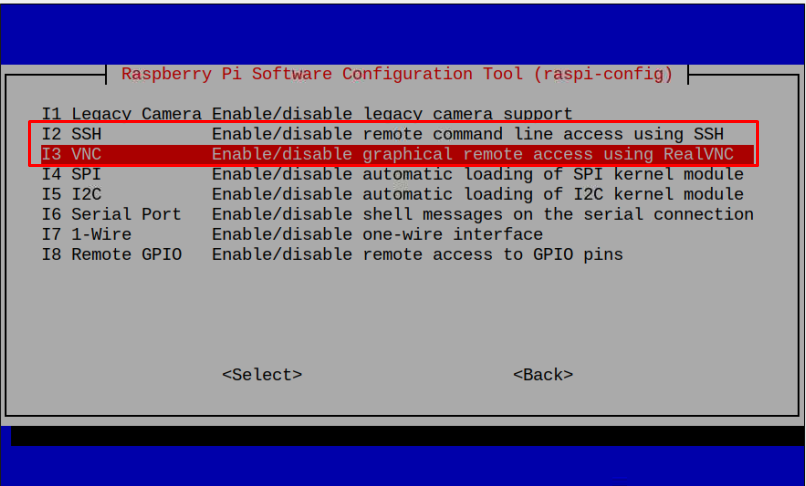
Step 1: Enable SSH and VNC on Raspberry Pi from “raspi-config” in the “Systems Option”.
You must select the SSH and VNC one by one to enable them.
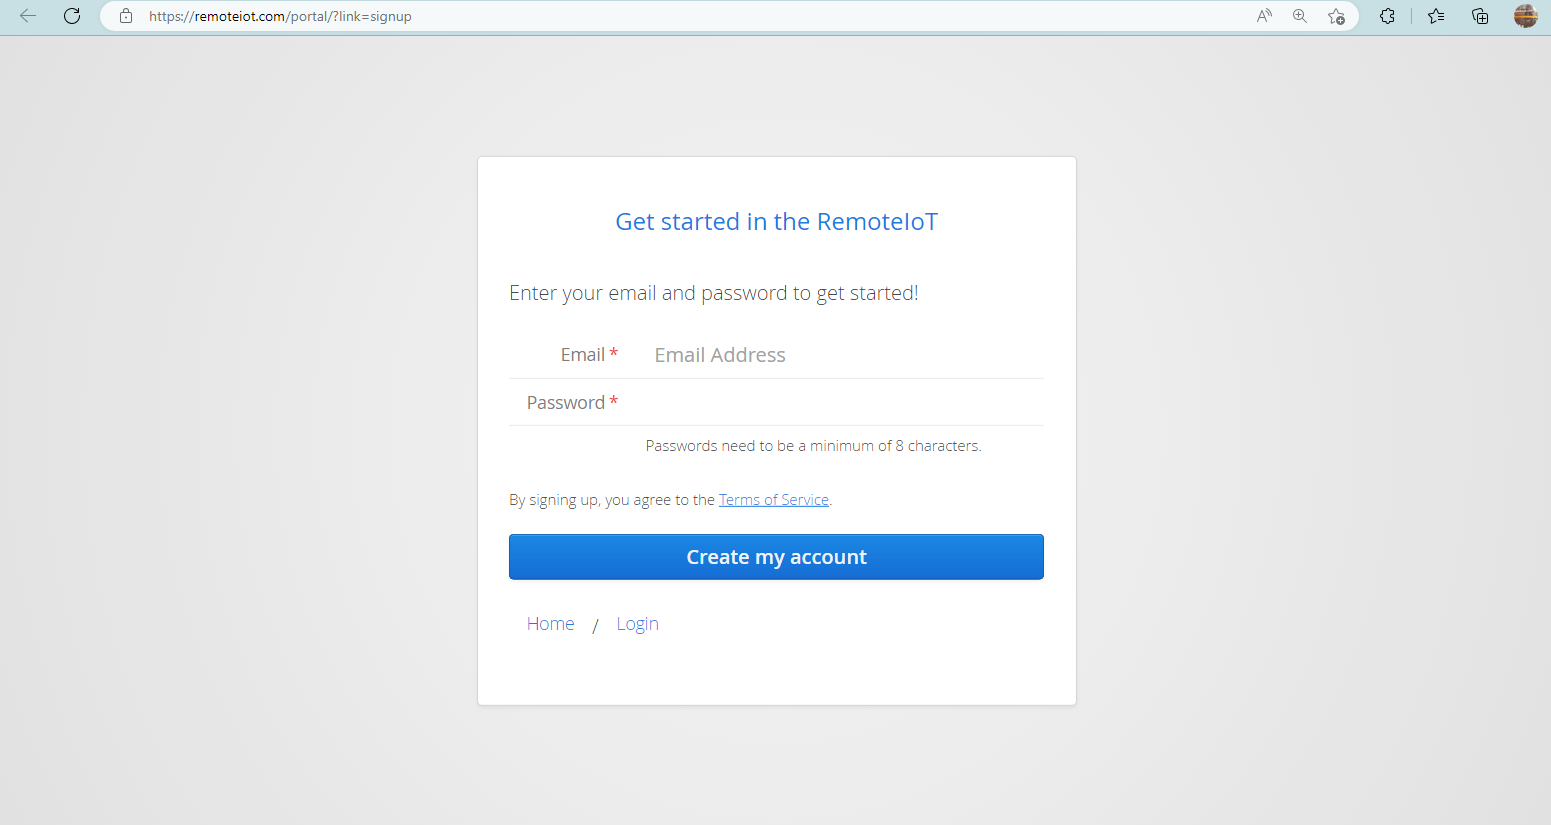
Step 2: Go to the website and sign up for RemoteIoT using your email and password.
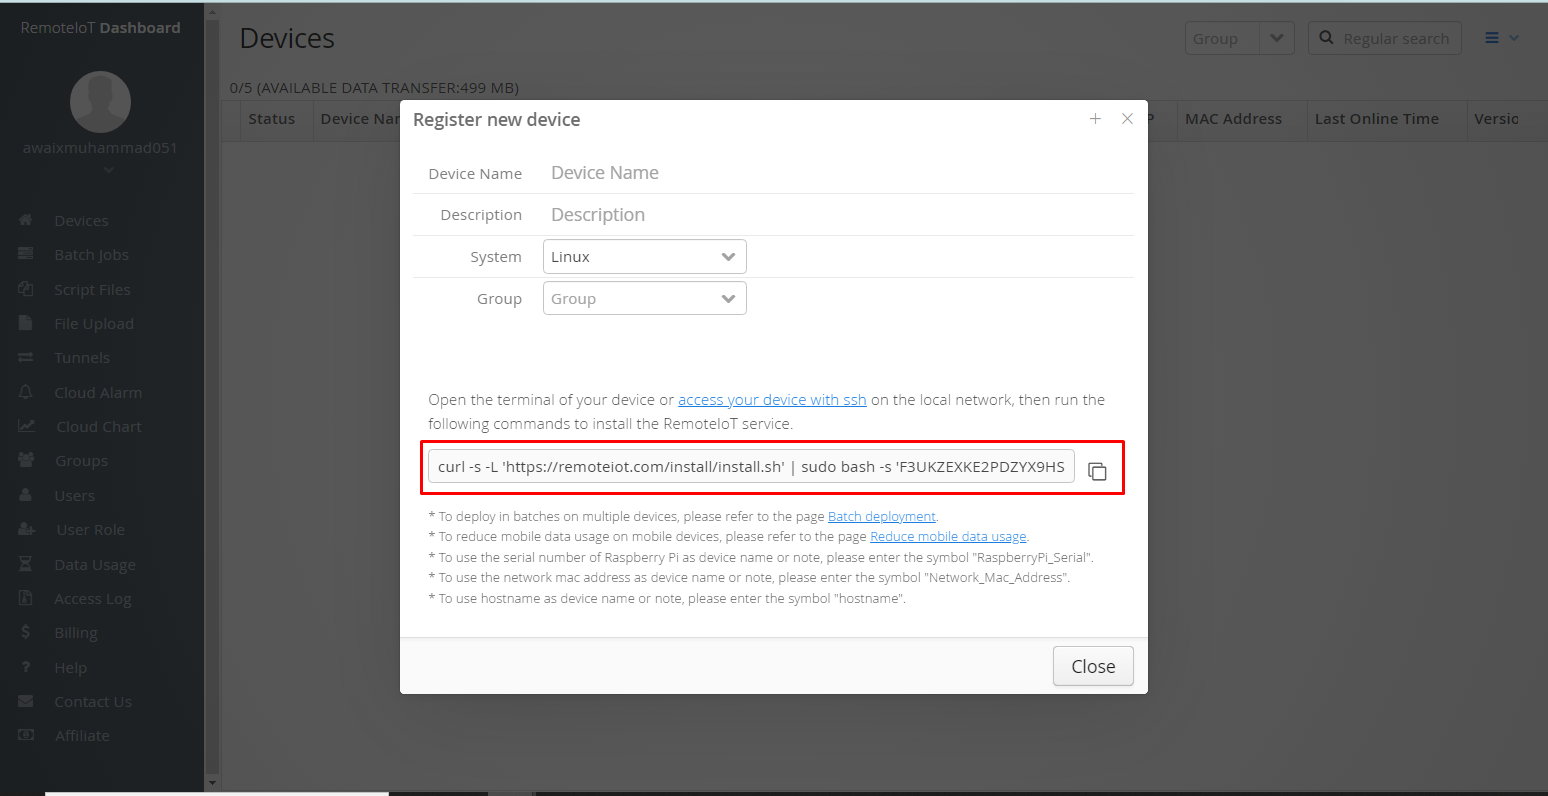
Step 3: Select System as “Linux” copy the “curl” command that appears on your screen.
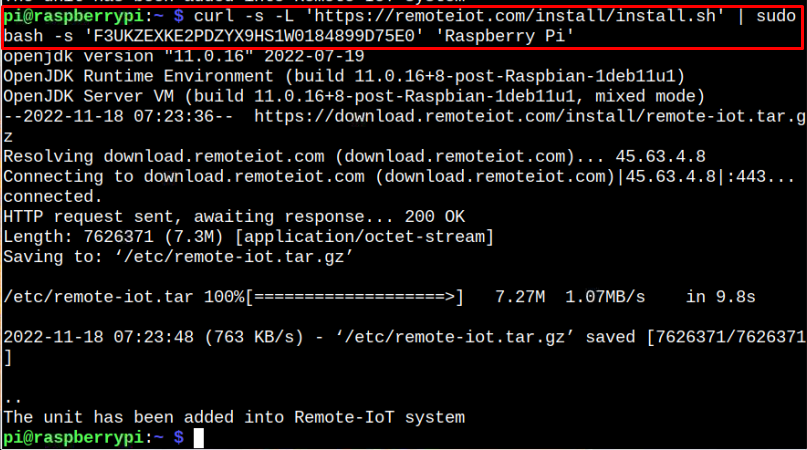
Step 4: Execute the curl command in the Raspberry Pi terminal to add your device to the RemoteIoT system.
Note: Replace “My Device” name with any name you want like in my case I gave it the name “Raspberry Pi”.
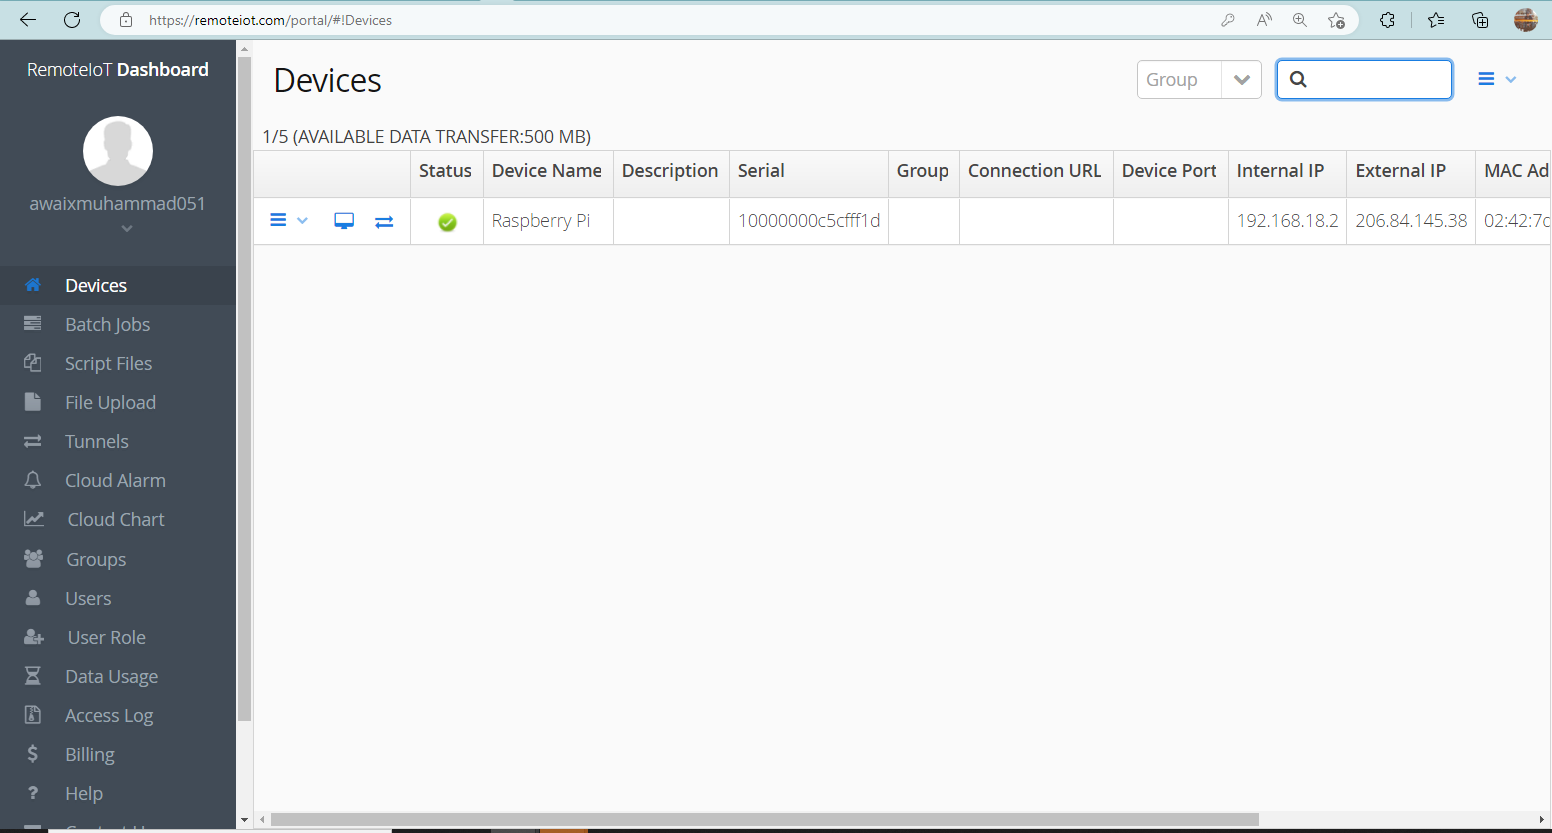
Step 5: This adds the Raspberry Pi device to the RemoteIoT system and you can see it in the “Devices” section. Double-click on the device.
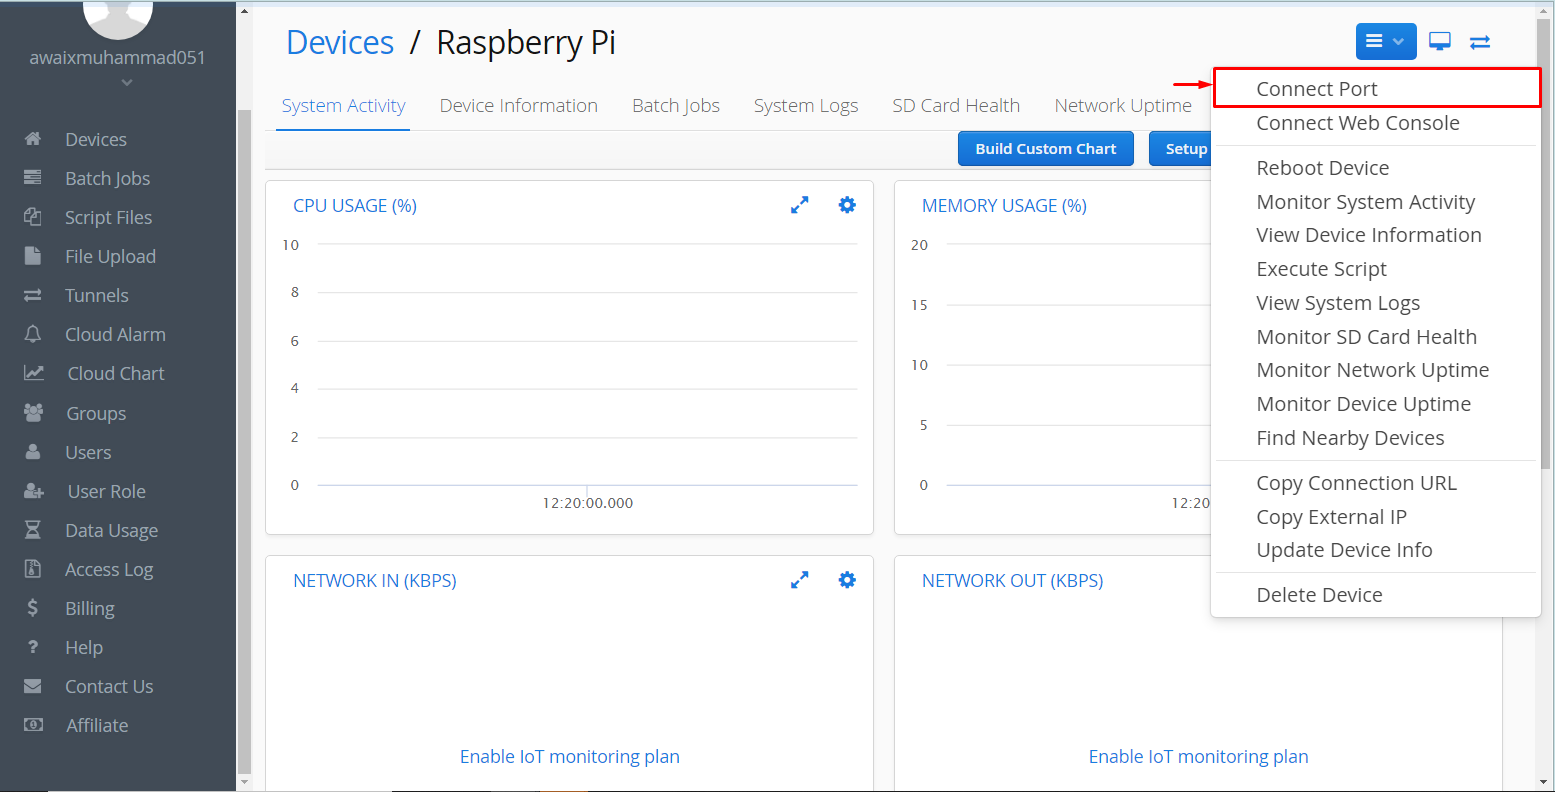
Step 6: Go to the list menu and select the “Connect Port” option.
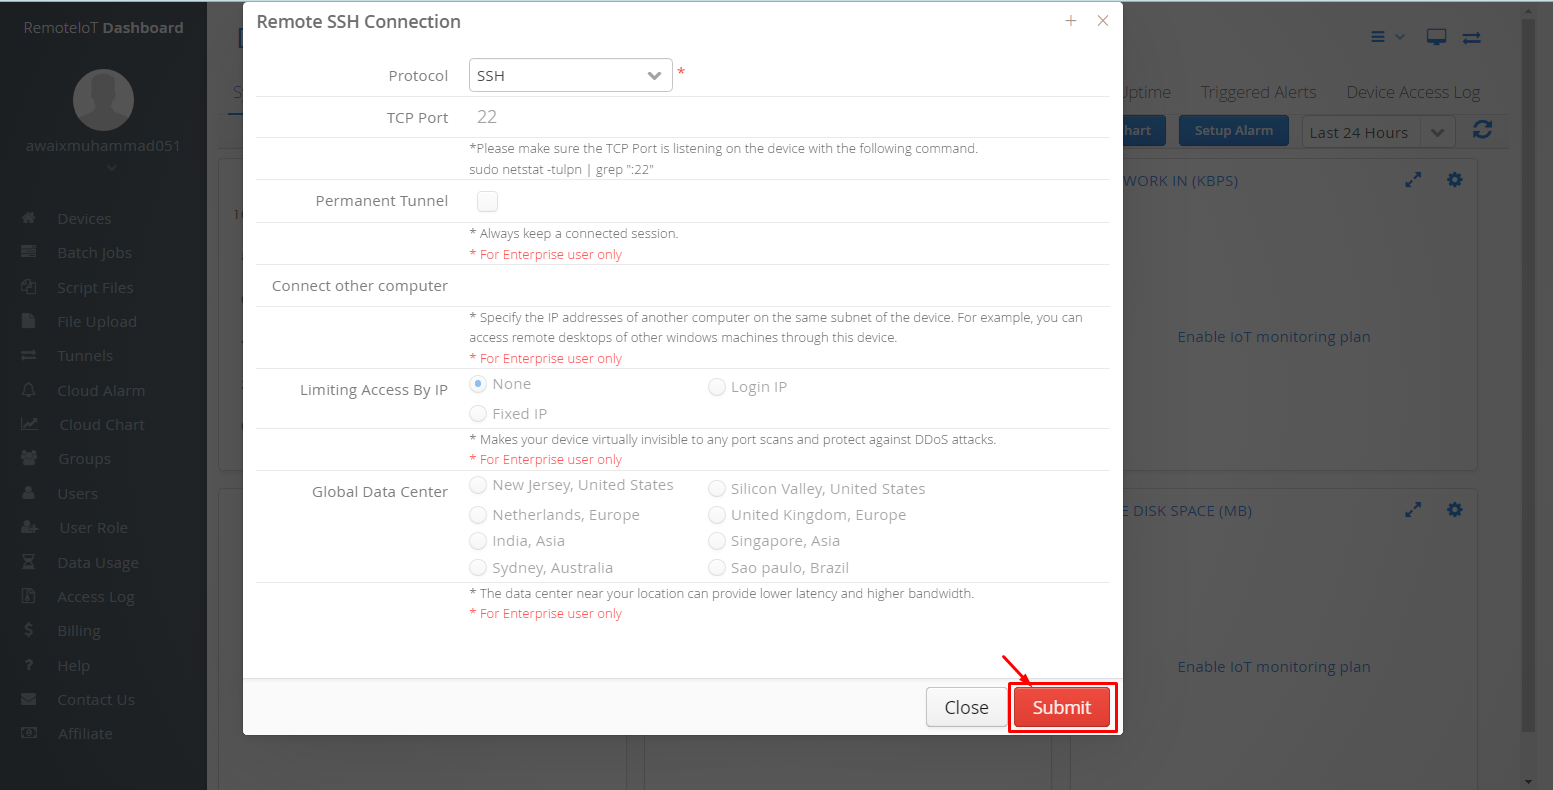
Step 7: Select the “SSH” option, leaving others as default, and select the “Submit” button.
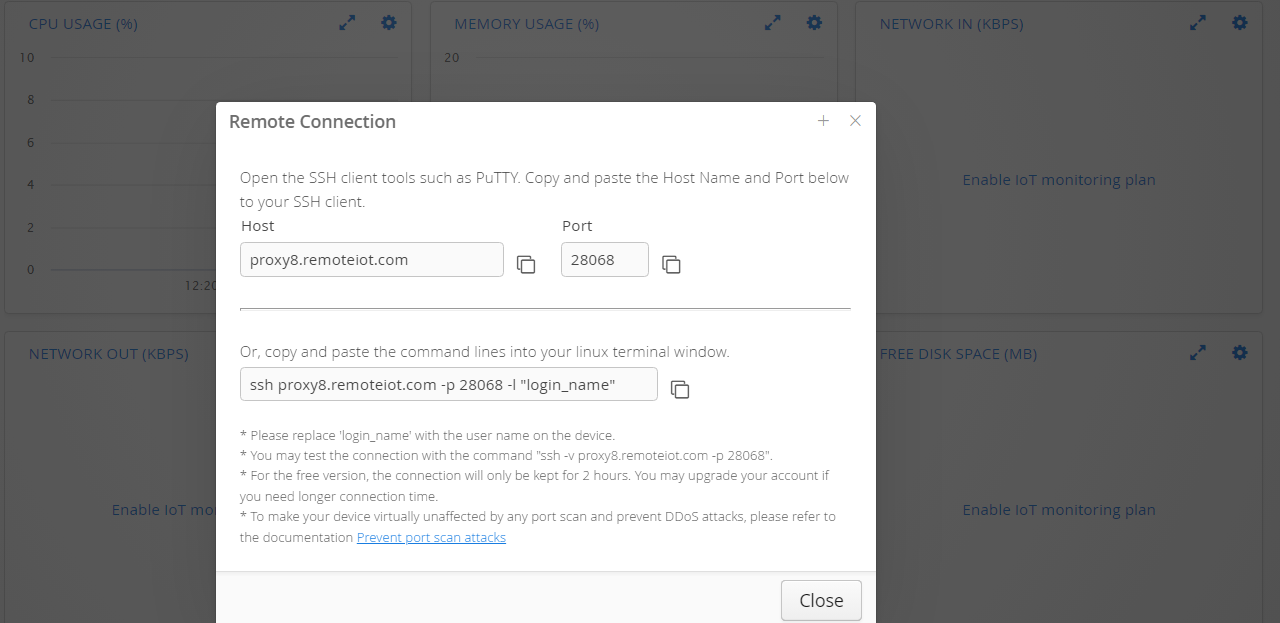
This opens the SSH remote connection information on your screen and you can use this information for accessing the Raspberry Pi terminal remotely.
Access Raspberry Pi Terminal Remotely Behind Firewall
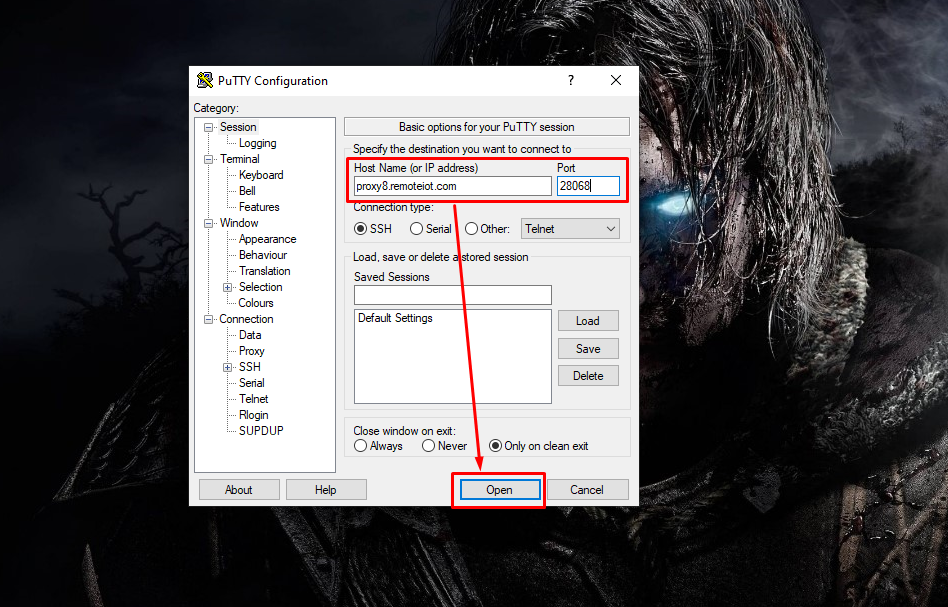
Open PuTTY application on your windows system and add the “hostname” and port number that appears on your screen. In my case, “proxy8.remoteiot.com” is the hostname and “28068” is the port number.
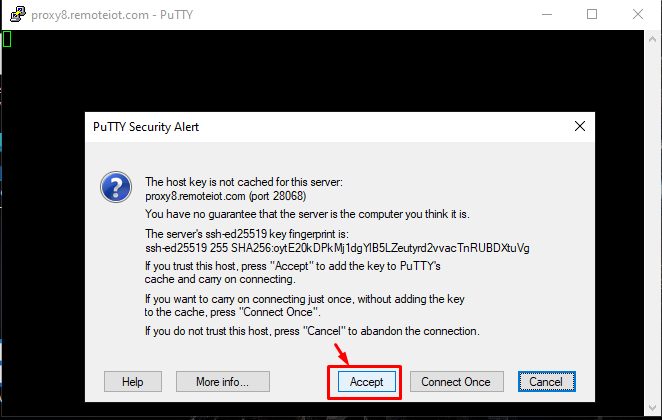
Accept the remote connection using the “Accept” button.
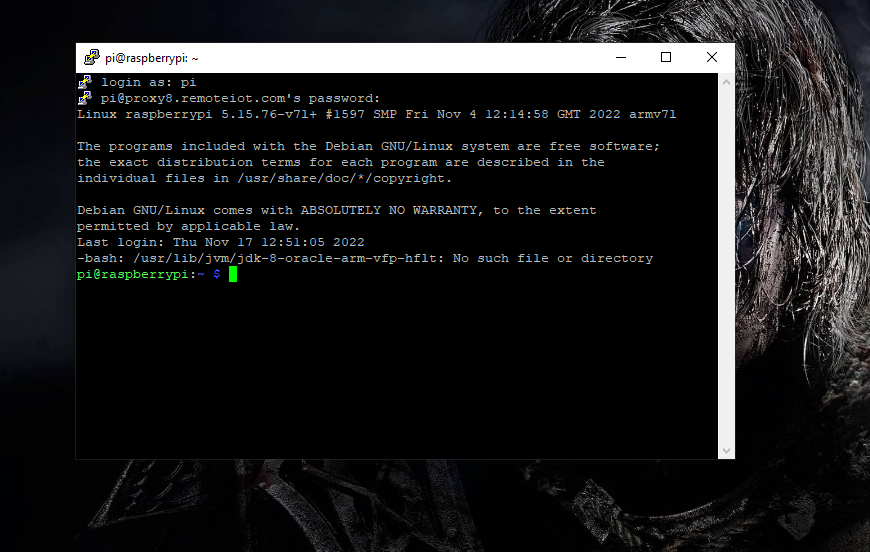
Login as “pi” and add the default password for the username too.
This will open the Raspberry Pi remote terminal behind the firewall using another port number instead of using the default one “22”.
Access Raspberry Pi Remotely Behind Firewall Through VNC
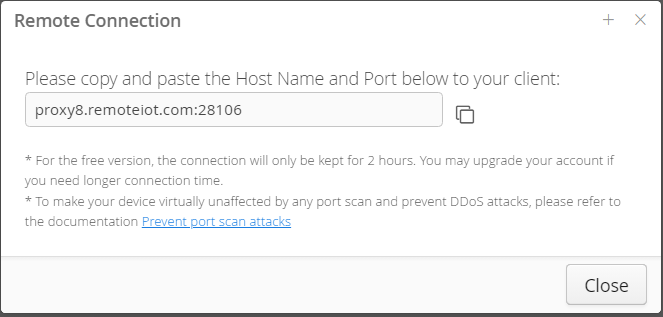
In case you want to use the VNC service, follow Step 6, where instead of SSH, you must select the “RealVNC” option.
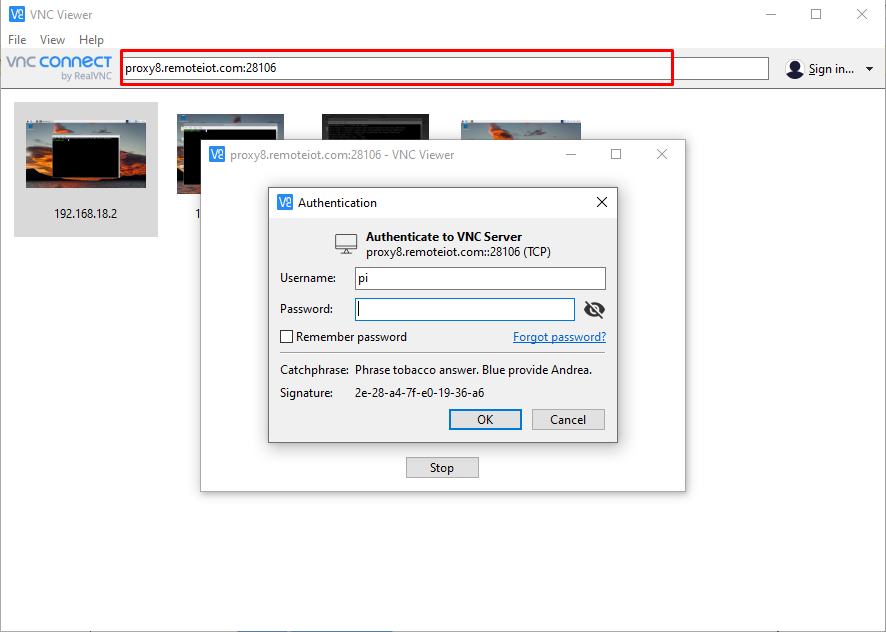
Use the address that appears on your screen and add it to the VNC viewer.
Login with Raspberry Pi default credential if you haven’t changed it.
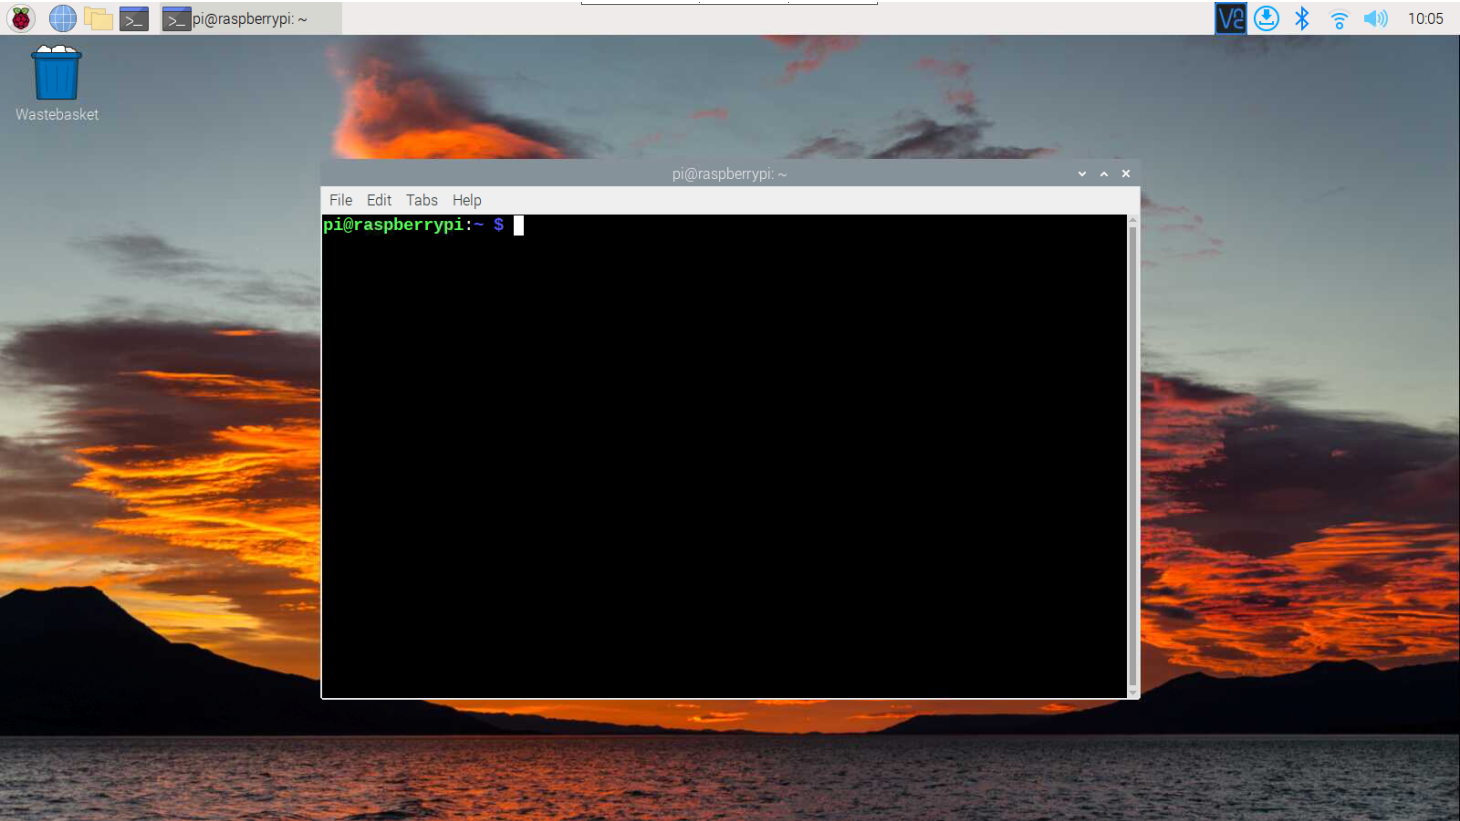
This will open the remote VNC access behind the firewall.
At this point, we have remotely accessed the Raspberry Pi device behind the Firewall.
Conclusion
Remotely accessing the Raspberry Pi device behind the firewall helps secure your device by protecting it from port scan attacks that can access your Raspberry Pi device using the default port number. The guidelines mentioned above will help you easily perform remote access using the RemoteIoT system, which requires creating an account and executing the “curl” command to connect your device. Afterward, you can use the “Connect Port” option to access the device through PuTTY or VNC viewer behind the firewall.

