In this write-up, we will learn about the “raspi-config” package and also some tweaks by which we can improve the performance of the Raspberry Pi operating system.
What to do if raspi-config is not found in Raspberry Pi
The raspi-config is pre-installed with the Raspberry Pi OS package, and we can access the package by using the “apt” package manager and sudo permissions by running the command:

You may come across “sudo: raspi-config: command not found” error while accessing raspi-config package, this means the raspi-config file is not present in your Raspberry Pi operating system, or someone has accidentally deleted the package by using the apt package manager. But there is no need to worry; we can still install the package of the raspi-config manually, which we will learn in the next section of this write-up.
How to install the raspi-config in Raspberry Pi
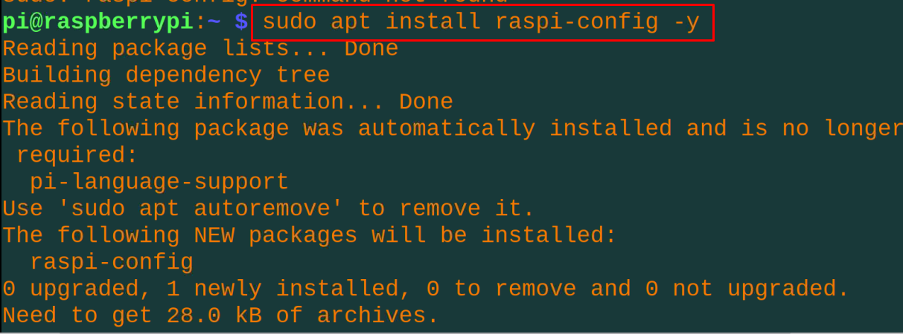
To install the package of the raspi-config, we will use the apt package manager with the “sudo” keyword using the command:
With the execution of the above command, the package of the raspi-config has successfully installed.
How to access the raspi-config from the command-line in Raspberry Pi
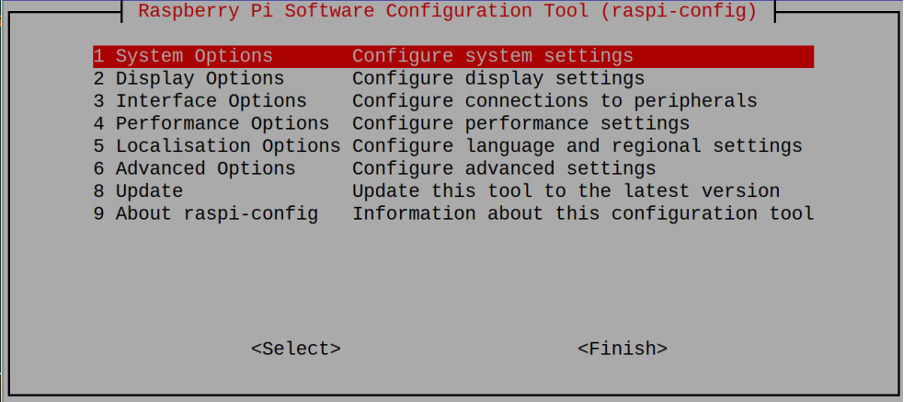
To access the raspi-config from the command-line of the Raspberry Pi, we will simply launch the terminal and execute the following command:
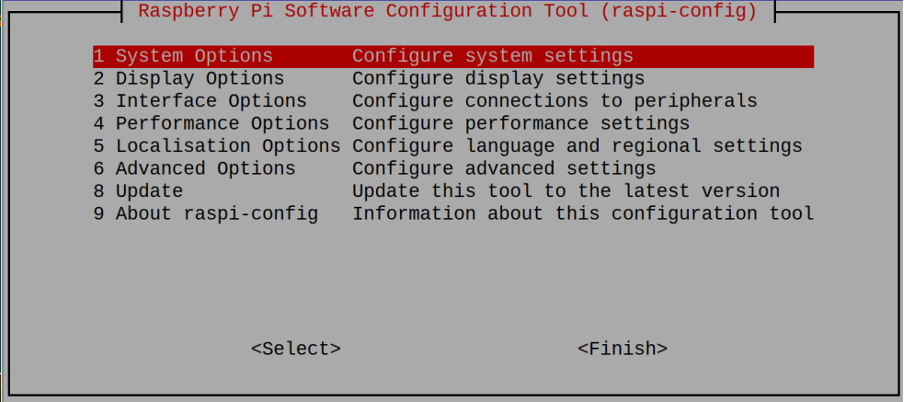
A menu will be displayed on the screen with different configuration options of the Raspberry Pi:
How to configure the wifi using raspi-config in Raspberry Pi
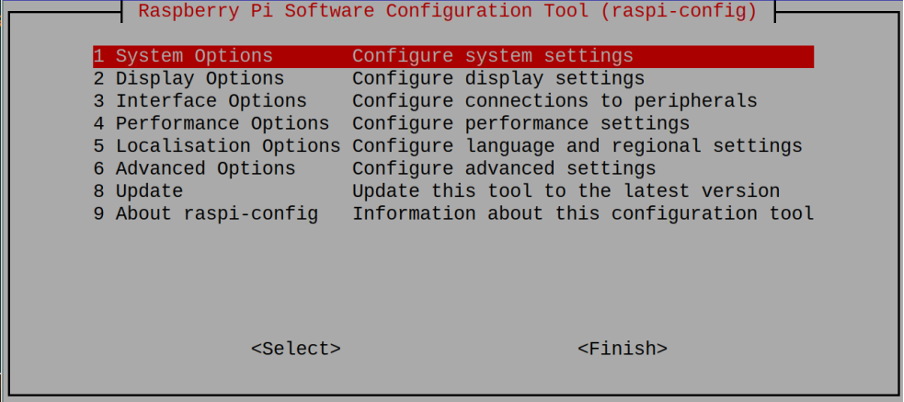
To configure the wifi settings of the Raspberry Pi, we will select the “System Options” in the menu displayed after the execution of the “raspi-config” command:
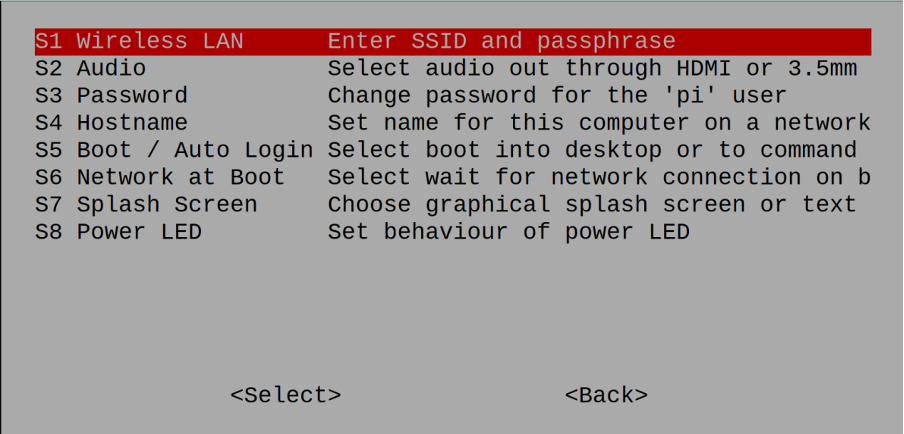
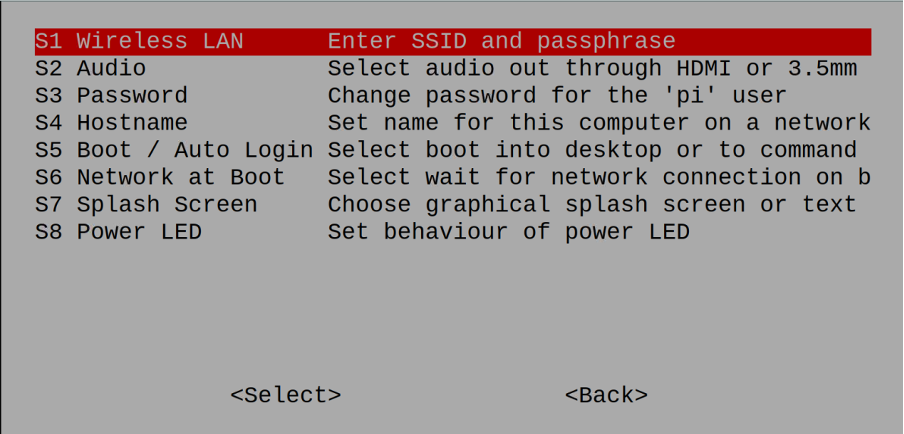
And press the return key from the keyboard after which a new menu will be prompted as:
This menu has eight different options from S1 to S8, if we will click on the “S1 Wireless LAN” and press the ENTER key, it will display a menu like:
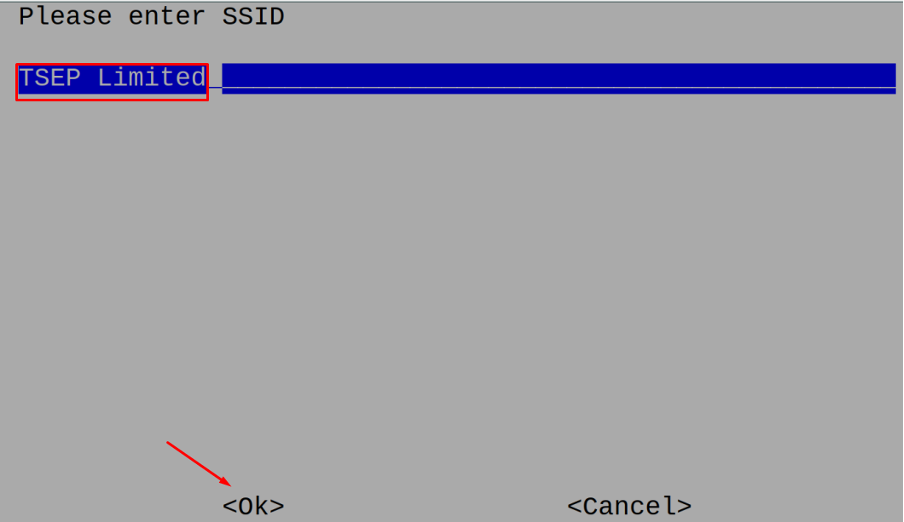
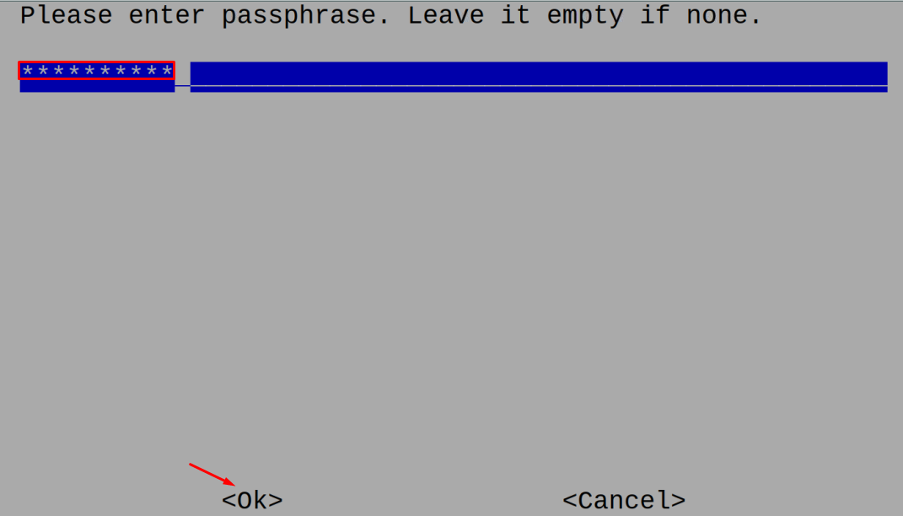
Enter the SSID of the WiFi to which you want to connect like we have the “TSEP Limited” and press the Enter key, then it will ask you for the Wifi password, if a password is set on your internet wifi connection, then enter it else leave it and press the “Ok”:
It will connect the Raspberry Pi to the provided wifi. Other options in the “System Options” are described in the table below:
| System Options | Explanation | |
|---|---|---|
| S2 | Audio | It is used to set the audio output either by HDMI or 3.5 audio jack port |
| S3 | Password | It is used to change the password of the “Pi” user |
| S4 | Hostname | It is used to change the hostname of the Raspberry Pi on network |
| S5 | Boot/ Auto Login | It is used set the behavior after the boot either it will open the “GUI” mode or “CLI” of the Raspberry Pi |
| S6 | Network at Boot | It is used to select the network at the time of Boot |
| S7 | Splash Screen | It is used to configure the splash screen |
| S8 | Power LED | It is used to set the behavior of power LED of the Raspberry Pi |
How to set the resolution of the Raspberry Pi using the raspi-config
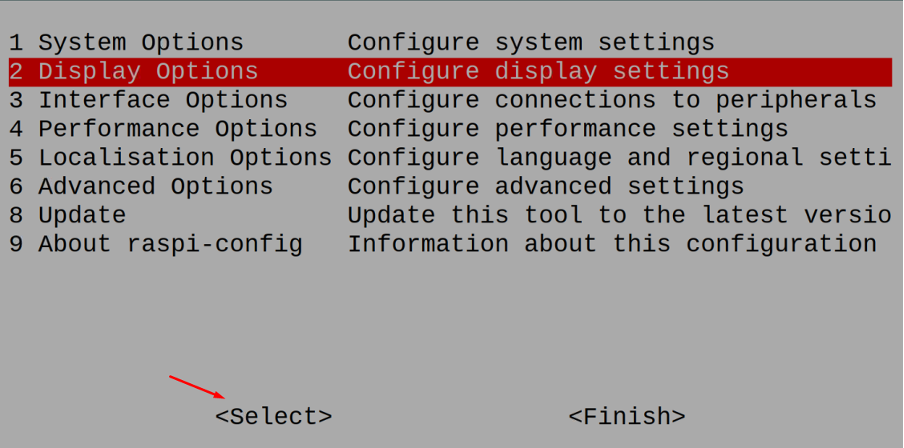
To set the resolution of the Raspberry Pi and other configuration related to the display of the Raspberry Pi, we will go to the “Display Options” of the raspi-config menu:
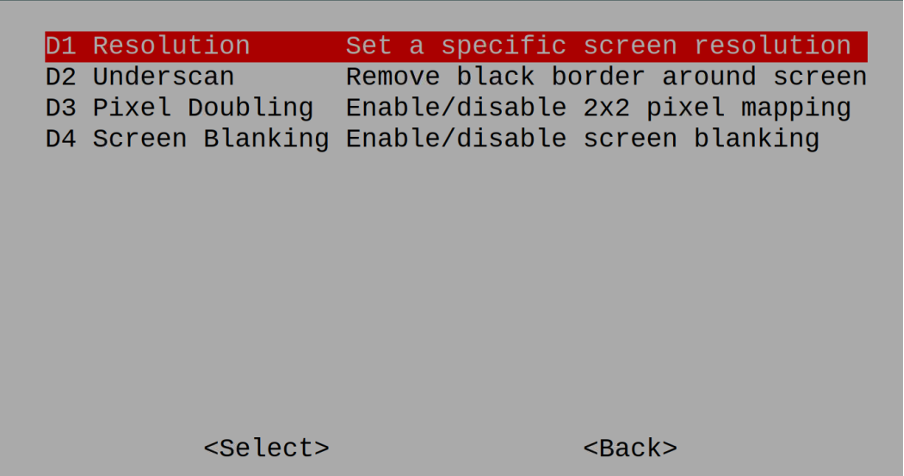
A menu will be displayed, here choose the “D1 Resolution” and click on the “Select”:
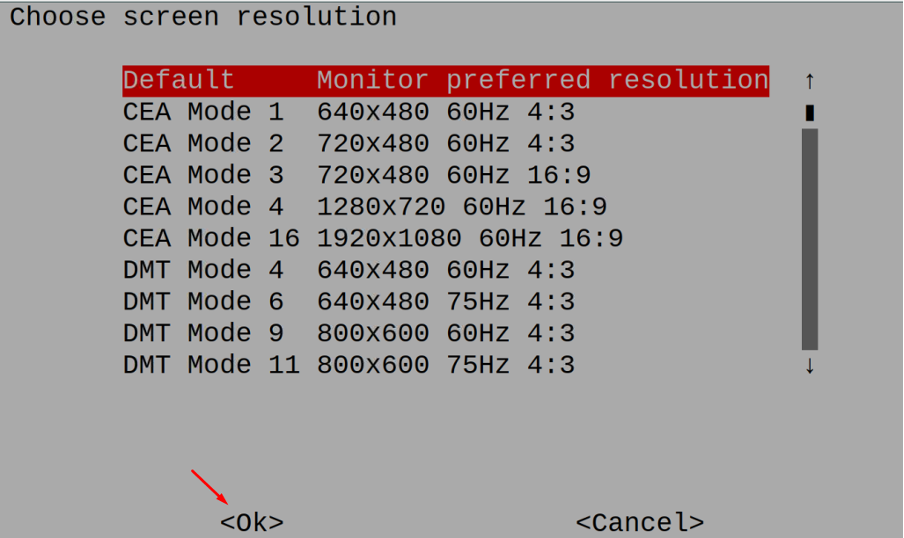
Different types of resolutions are listed in the menu from which you can choose but the recommended one is to choose “Monitor Preferred Resolution” as it will set the resolution automatically according to the monitor and click on the “Ok”:
Other options of the “Display Options” are:
| Display Options | Explanation |
|---|---|
| D2 Underscan | It will remove the black border around the screen |
| D3 Pixel Doubling | It is used to enable or disable the 2×2 mapping of the pixels |
| D4 Screen Blanking | It is used to enable or disable the screen blanking |
How to configure the interface of the Raspberry Pi
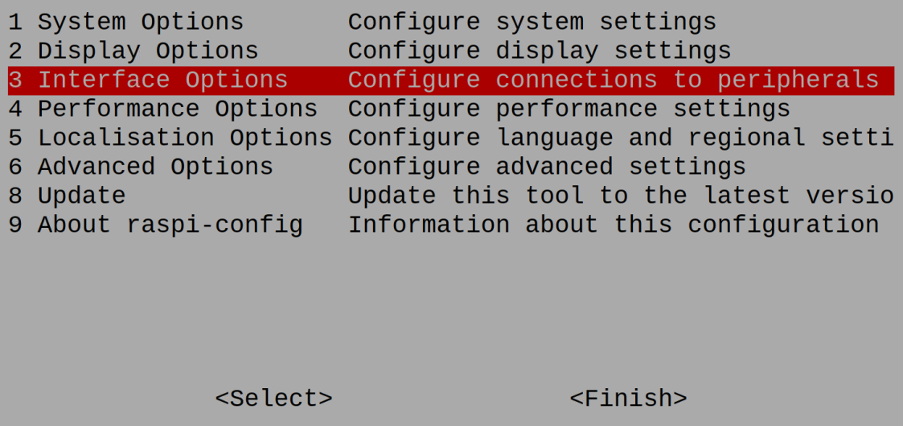
We can also customize the interface of the Raspberry Pi by configuring different options, for this, we have to choose the “Interface Options” from the “raspi-config” menu and click on the “Select”:
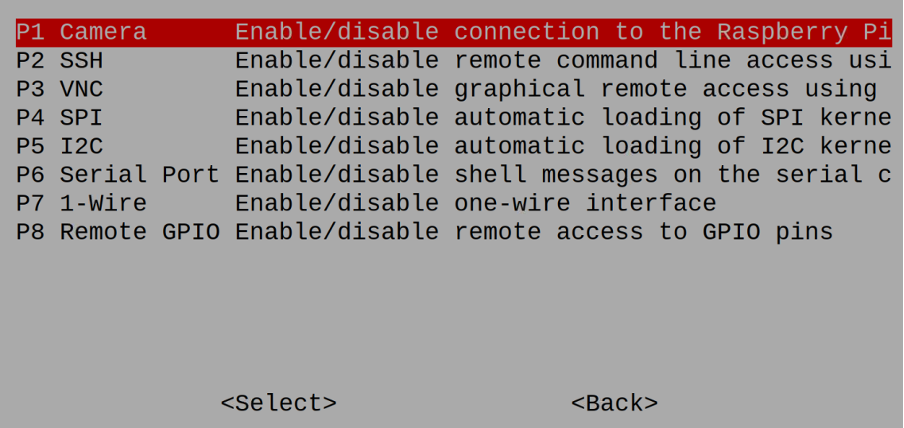
It will display different options:
These options are used to configure the settings of the “Camera”, “SSH”, “VNC”, “SPI”, “I2C”, “Serial Port”, “1-Wire”, and remote “GPIO”.
How to configure the performance of Raspberry Pi using the raspi-config
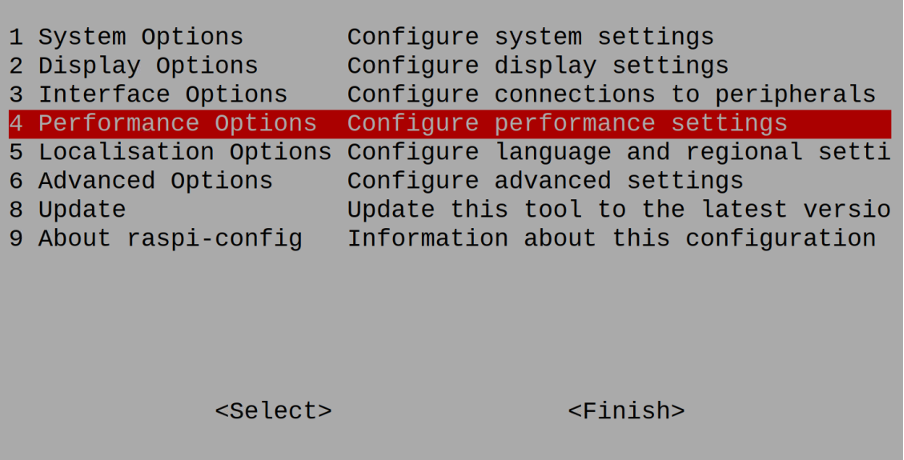
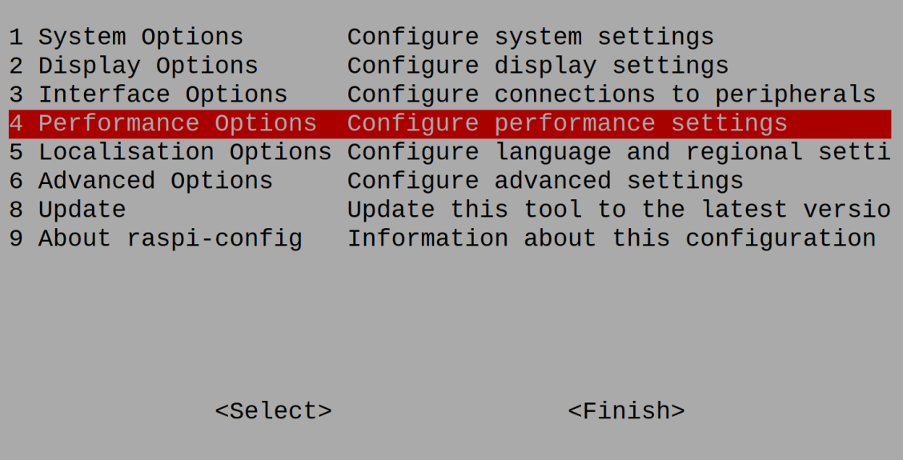
Choose the “Performance Options” from the main menu of the “raspi-config” and click on the “Select”:
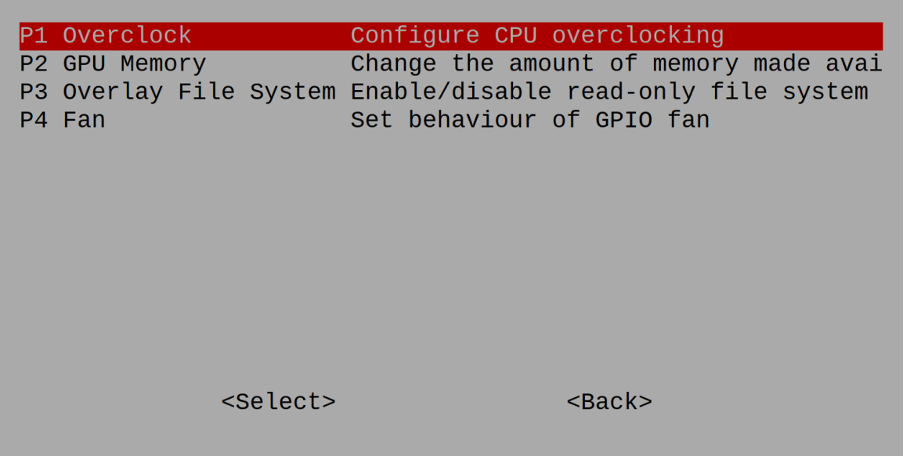
From the following menu that appears, you can configure the behavior of the “CPU overclocking”, modify the memory of the GPU, enable or disable the overlay file system, and can set the behavior of the fan of the Raspberry GPIO fan:
How to set the region and time of the Raspberry Pi using the raspi-config
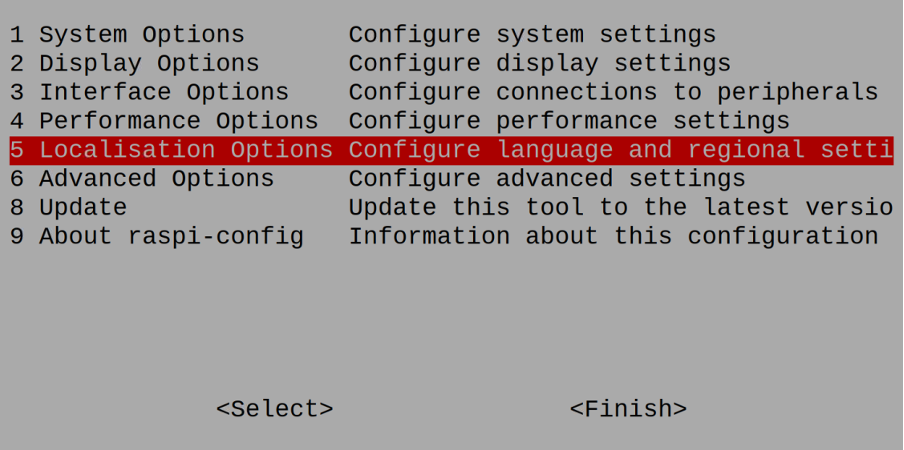
We can set the language, time, and region by choosing the “Localisation Options” from the main menu of the raspi-config:
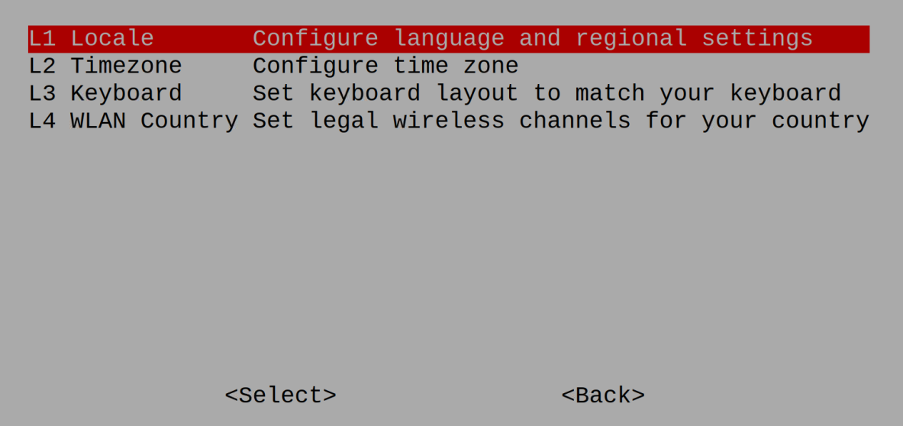
A menu will appear to change the time zone, language, keyboard layout, and WLAN concerning the country you are living and using the Raspberry Pi OS:
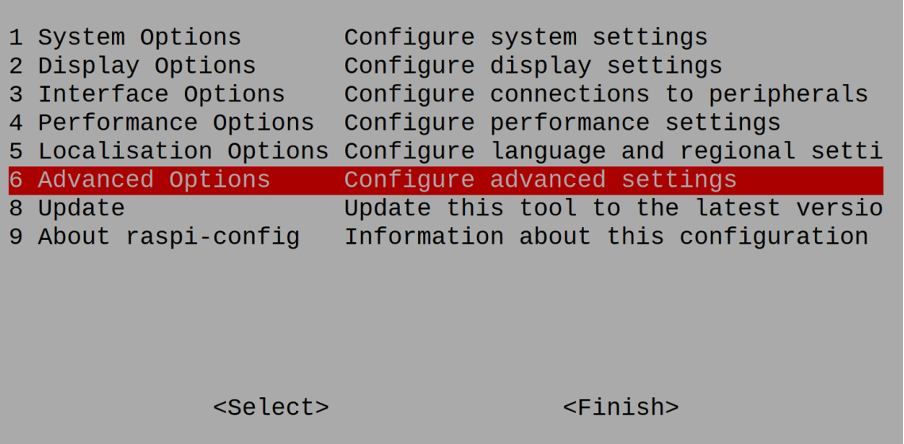
What are the “Advanced Options” in the raspi-config
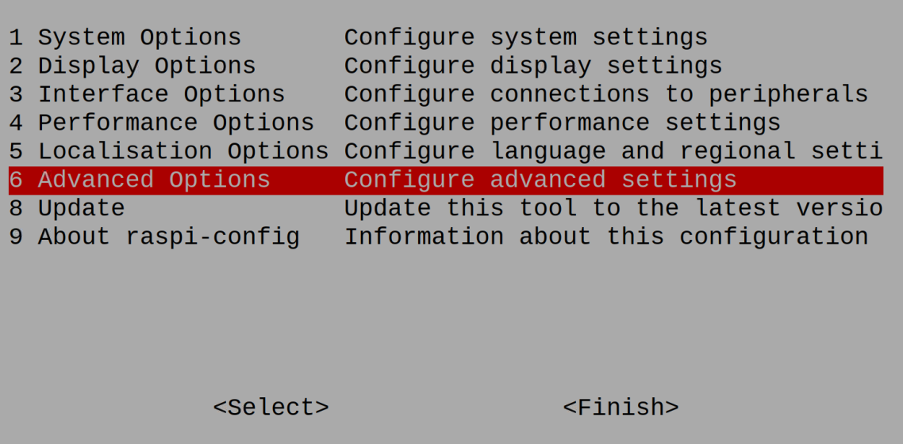
To configure some advanced settings of the Raspberry Pi OS, choose the “Advanced Options” from the “raspi-config”:
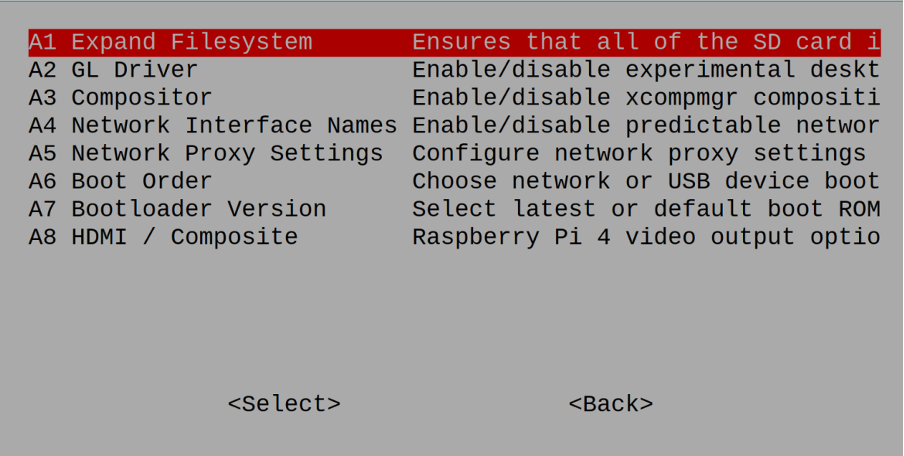
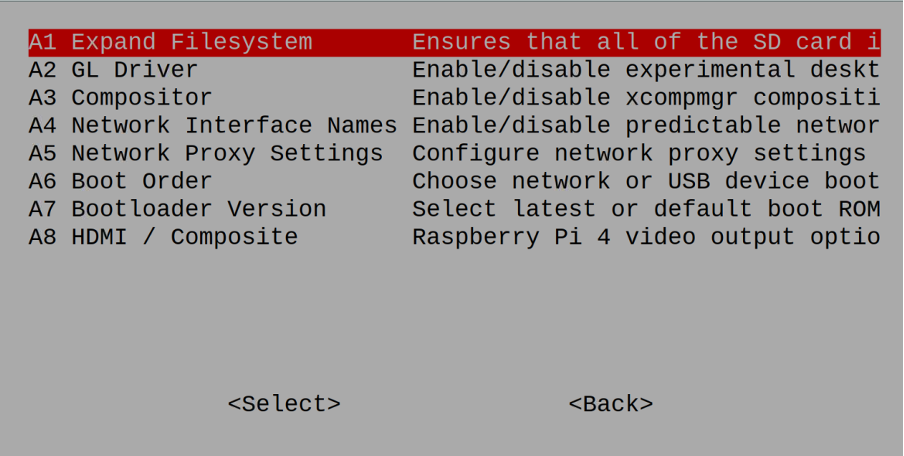
Different options will appear on the screen to expand the filesystem memory, to enable or disable the GL driver, xcompmgr, and network interface. Also, the options to configure network proxy settings, Boot order, Bootloader Version, and the option to set the video output options are included in this menu.
How to update the raspi-config to its latest version
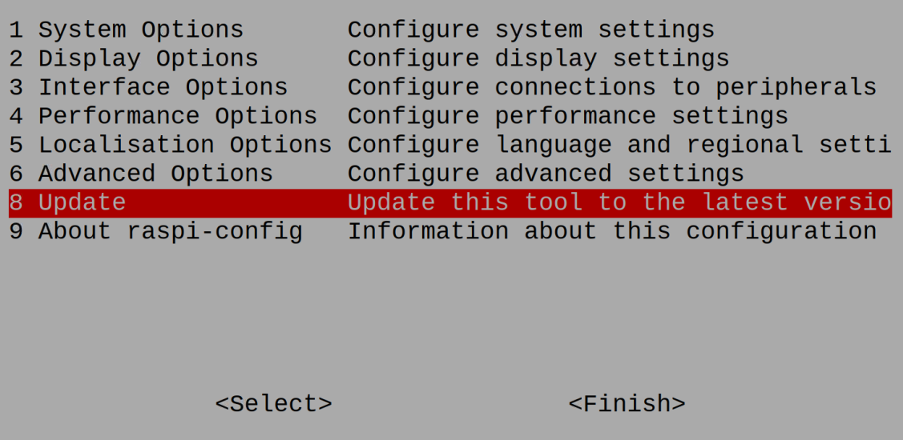
To update the raspi-config, we can go to the “Update” option in the main options of the raspi-config:
How to reset the raspi-config on Raspberry Pi
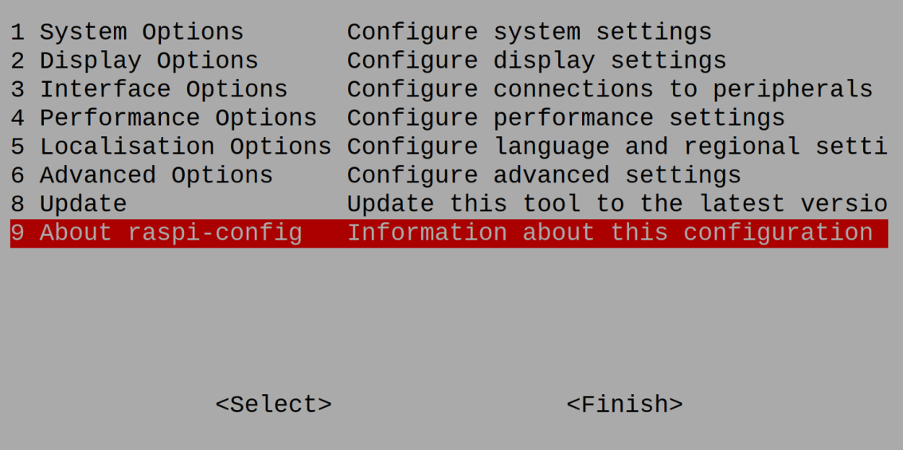
If you want to reset all the configuration settings of the Raspberry Pi to default, then choose the “About raspi-config” from the main menu of the “raspi-config”:
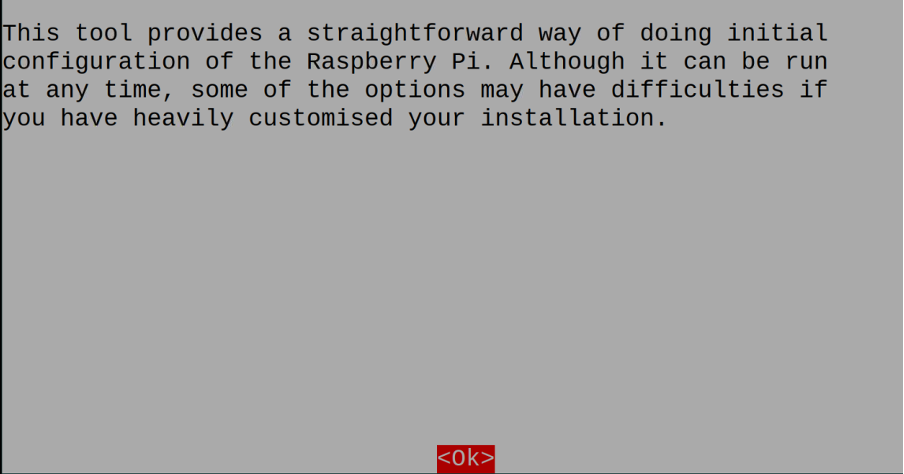
A warning will appear, click on the “Ok” and the settings are set to the default settings:
How to configure the raspi-config from the GUI method
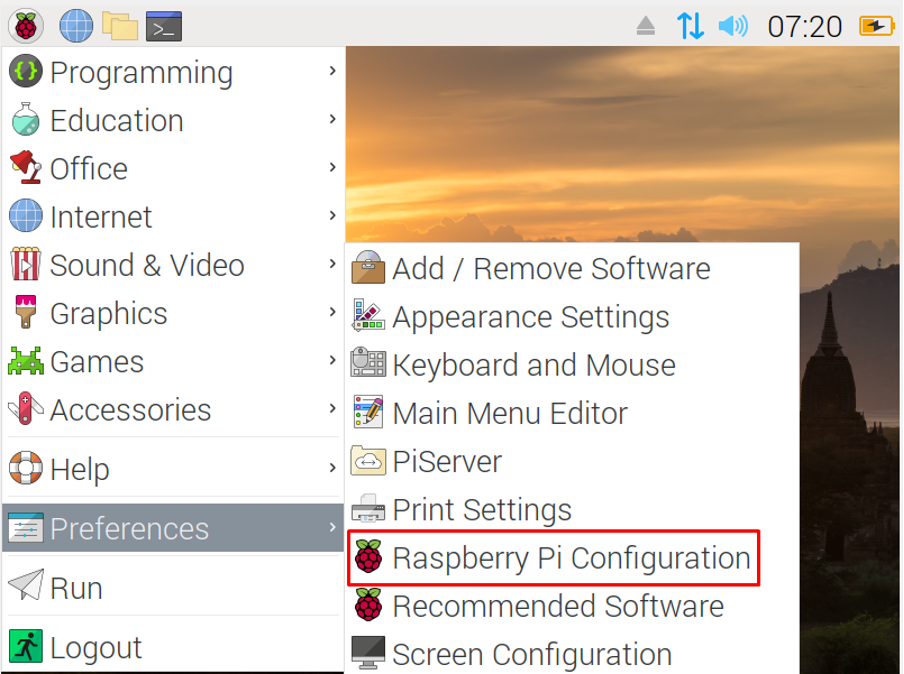
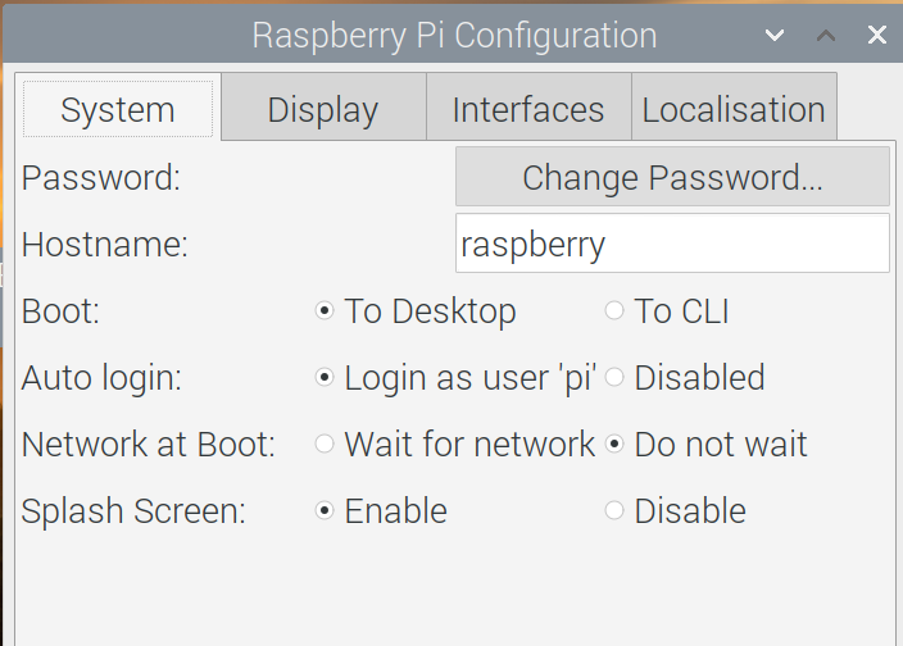
We can also configure the raspi-config from the GUI method, for this, go to Application Menu, then choose the “Preferences”, and then click on the “Raspberry Pi Configuration”:
A menu will be appeared:
From this menu, you can configure the System, Display, Interfaces, and Localisation configurations of the Raspberry Pi operating system.
How to tweak the Raspberry Pi to enhance its performance
Tweak means to modify the settings of Raspberry Pi to improve the performance of the operating system; in the Raspberry Pi 4, we can improve its performance by the following steps:
SD memory card: We know that in the Raspberry Pi 4, we insert a micro SD card on which the Raspberry Pi has been written by using the Raspberry Pi imager. This card contains the operating system which is used on the Raspberry Pi. To enhance the performance of the Raspberry Pi 4, we should use the SDHC card of minimum class 2 or above.
Partition memory: Second tweak to enhance the performance of the Raspberry Pi, we should increase the partition memory of the installed operating system. To do this by using the raspi-config command, use the command in terminal:
Go to the “Advanced Options” in the menu appear:
And now choose the “Expand Filesystem ” to increase the allocated memory to the installed operating system:
Overclock: If you are using the Raspberry Pi 1 or 2, you can improve their performance of them by overclocking for that go to “Performance Options”:
Then click on the “Overclock”:
For those who don’t know about overclocking, the overclock runs the lower-spec chip at a faster CPU rate to process the tasks by increasing the processor’s multiplier.
Boot it in CLI: The last tweak to improve the performance of the Raspberry Pi, if you don’t need the GUI mode, then disable the GUI mode, by going to the “System Options” in the raspi-config menu:
Then choose the “S5 Boot/ Auto Login” to boot from the CLI, this will prevent you from the lag which occurs due to the GUI and increase the performance of the Raspberry Pi:
Conclusion
The configuration settings of any operating system are changed either to increase the operating system’s performance or for some specific customized requirements. In the Raspberry Pi, we can configure its settings by using the “raspi-config” package and configure it according to the requirements. In this write-up, we have discussed the raspi-config package in detail, exploring its different options, and discussed some tweaks by which we can enhance the performance of the Raspberry Pi.

