What is Arduino Nano
Arduino Nano is a compact and breadboard friendly board that uses an 8-bit microcontroller ATmega328. Functionality of the Nano is the same as the Uno but in a smaller size. Like Uno, it can be programmed via USB cable, it has a number of input output pins. Only thing it lacks is a DC jack, it cannot be powered up using external power supply.

Following are some technical specifications to give better idea about Nano:
- It has 22 I/O pins
- 14 pins are digital
- Nano has 8 analog pins
- It has 6 PWM pins among digital
- Uses 16MHz clock speed
- Operating voltages 5V to 12V
- It supports serial, I2C and SPI protocols.
- It has a reset button.
- It has mini–USB B pin to upload code
- It has flash memory of 2kb
- SRAM memory is 8kb
- EEPROM memory is 1kb
How to Program Arduino Nano
Arduino Nano can be programmed in a similar way like other Arduino boards. It uses the same official Arduino software commonly known as Arduino IDE.
Equipment required
- Arduino Nano
- Mini USB B cable
- Arduino IDE
- PC/Laptop
Arduino IDE Installation
For uploading our first program into Arduino Nano first set up the IDE first. Follow these steps to complete installation of IDE.
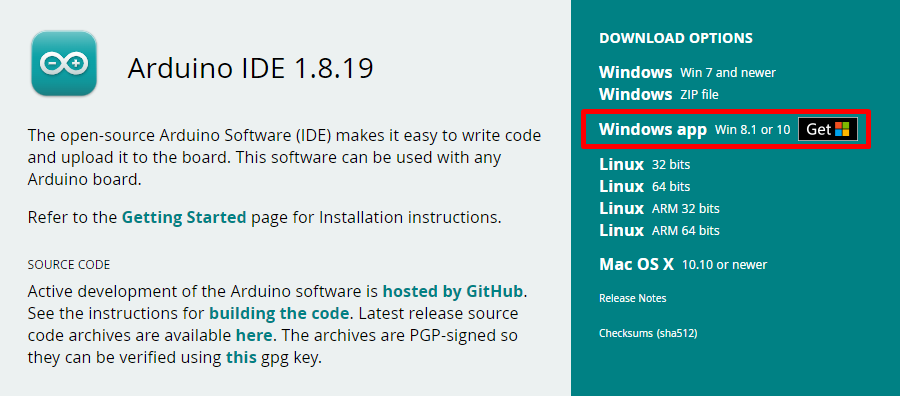
Step 1: Download Arduino IDE from Arduino official site by clicking here.
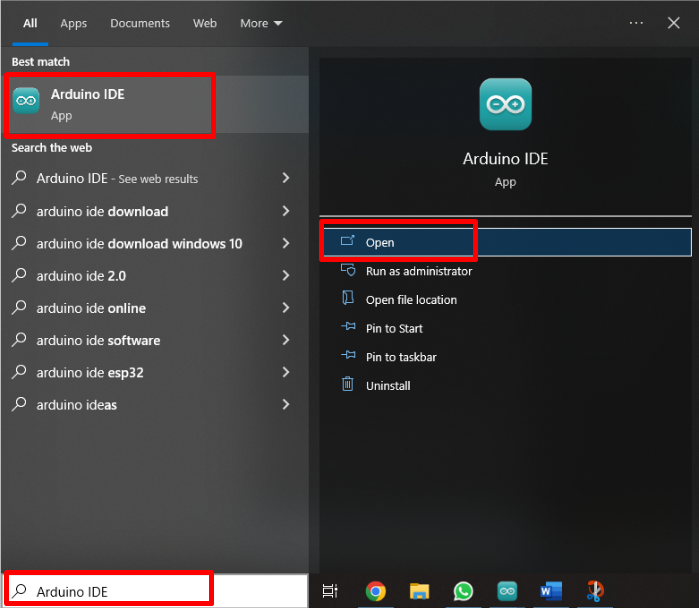
Step 2: Once the Arduino IDE is downloaded. After installing IDE press the Windows key and type IDE in the search bar then click Open as shown below:
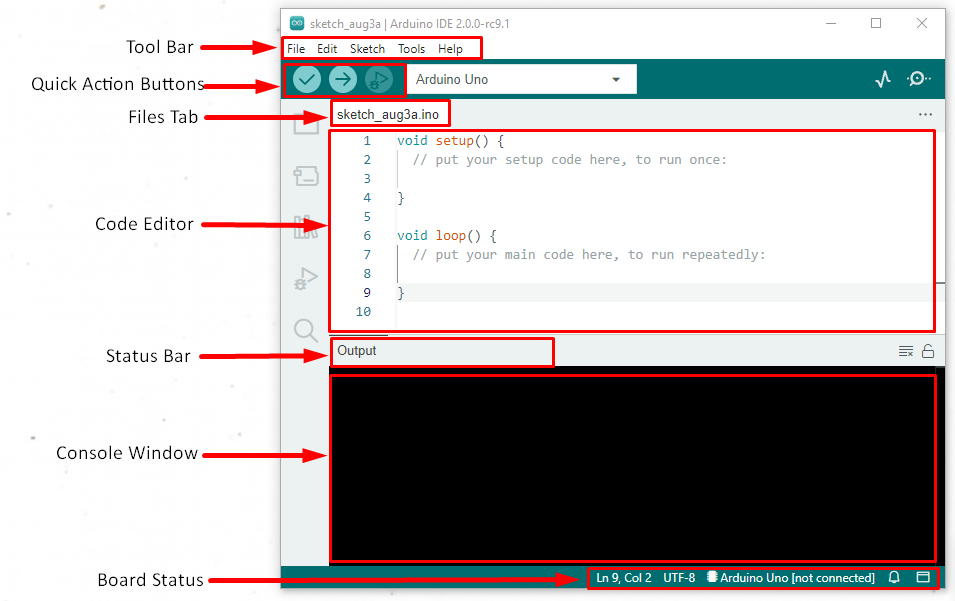
Step 3: New window will open showing the Arduino IDE default program.
How to Setup Arduino Nano with IDE
After completing Arduino IDE installation it’s time to set up our hardware.
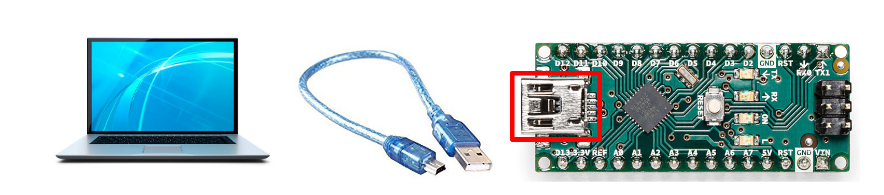
Step 1: Configure Arduino Nano with PC
Connect Arduino Nano with PC using mini-USB cable:
Step 2: Selecting the Right Board and Port
Once a connection is established between our PC and Arduino Nano, the IDE software will configure the COM port for Arduino Nano.

Latest versions of IDE can configure the Arduino port itself; some older versions might be unable to do that so here is a manual way to do it.
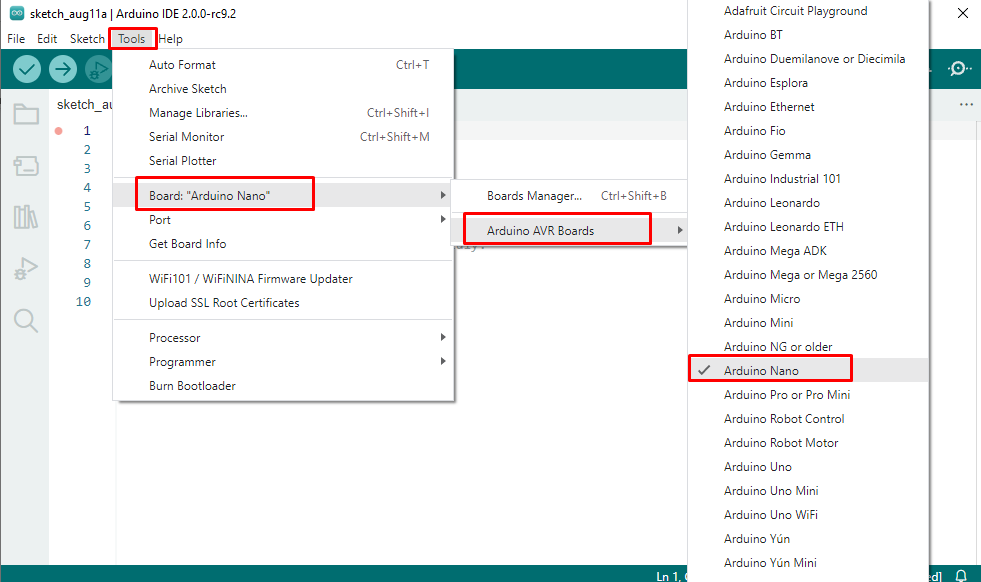
First select Arduino board, select menu item Tools>Board>Arduino AVR Boards>Arduino Nano:
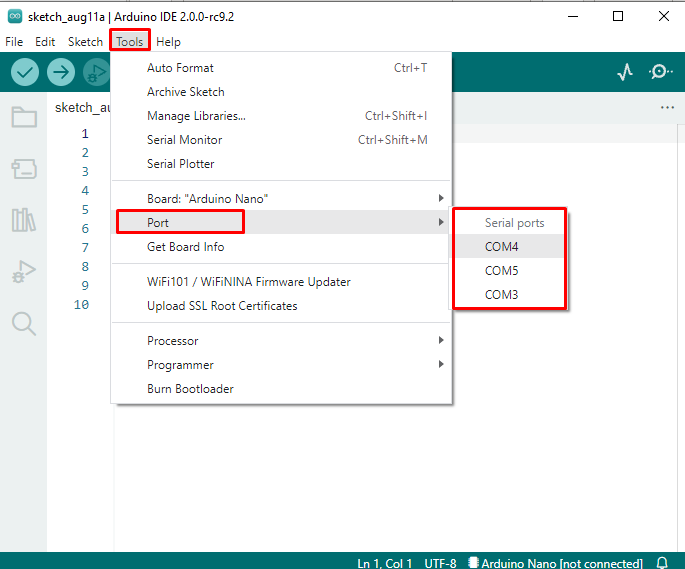
Now select the COM port at which Arduino is connected. Select menu item Tools>Port>COM:
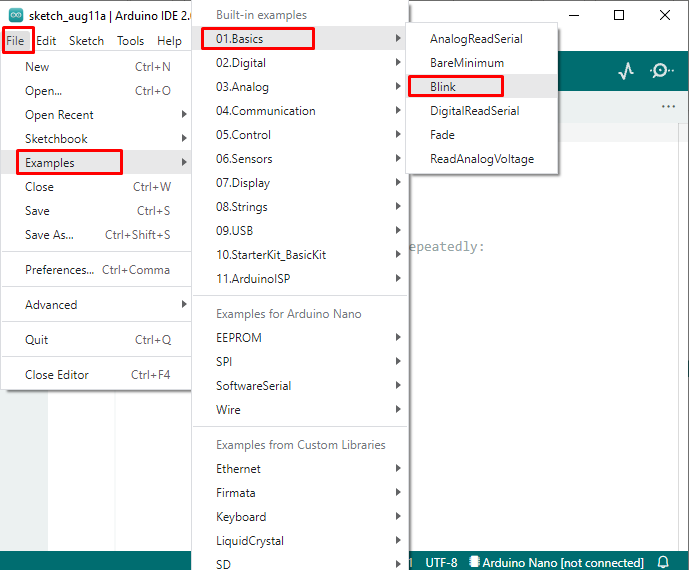
Step 3: Opening an Example Program
Go to menu item File>Examples>Basics>Blink:
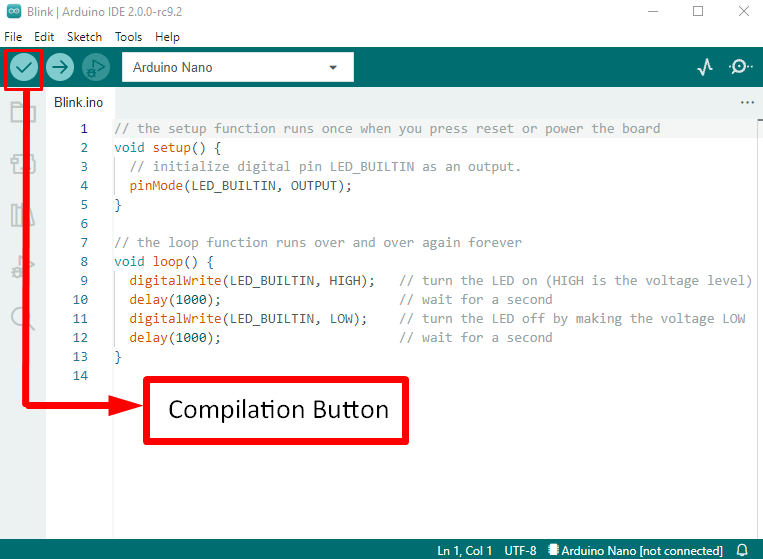
Step 4: Compile the Program
Now we have to compile this program using the tick button on the top left corner of the IDE. Message will appear in output window that says “Done Compiling”:
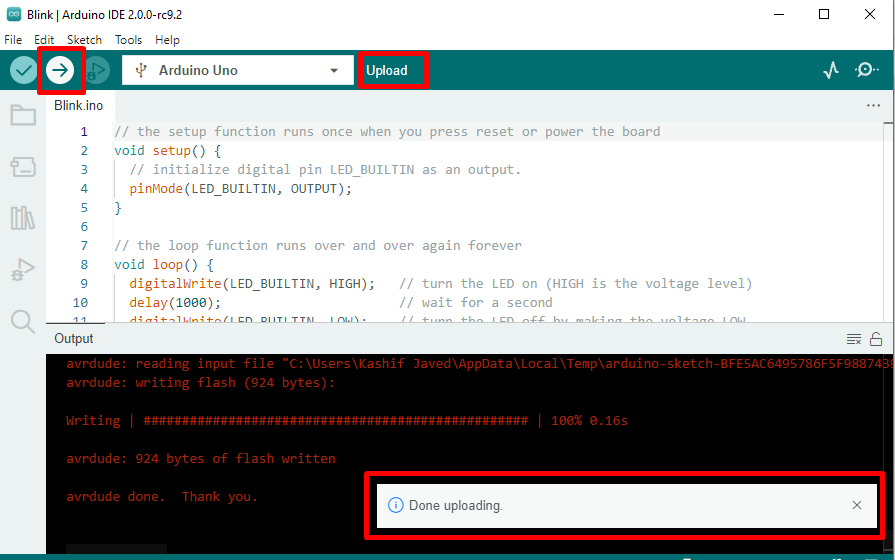
Step 5: Upload the Program
After compiling the program, now we have to upload it to Arduino Nano using the Arrow button on top, second from left. After clicking the upload message will appear “Done uploading”.
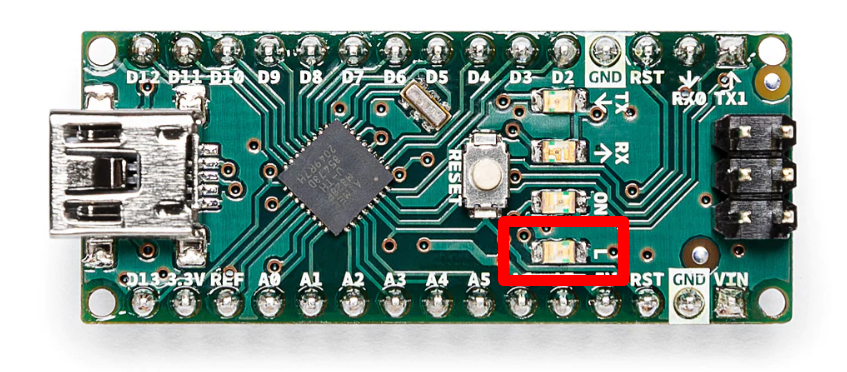
Step 6: Running Program
After successful upload an I/O LED will start blinking on Arduino Nano in a pattern of 1 second on and 1 second off repeatedly until we remove the power or upload a new sketch in Arduino Nano.
Conclusion
Arduino Nano is the most compact and lightweight board having the same microcontroller as UNO. It can fit in small size projects. It can reduce overall project size. As a beginner everyone needs some guidance to start with Arduino. Here we have covered how we can upload code in Arduino Nano. Following all the steps described above any Arduino code can be uploaded in Nano.