Cryptocurrency mining has long affected the passion of technology addicts, pushing them to design new algorithms to defend networks, mining pools, and innovative ways to build mining systems. If you are among the Raspberry Pi users and you want to start your Cryptocurrency mining journey, you can do it on your Raspberry Pi operating system. This requires your efforts and some time so that you can begin mining Cryptocurrency on Raspberry Pi.
Raspberry Pi for Crypto Mining
If you are looking for guidance on how you can start Crypto Mining on Raspberry Pi, you will get help from this article as here you will get step by step guidance to perform Crypto Mining on Raspberry Pi operating system.
There are several methods to do Crypto Mining on Raspberry Pi, but if you are a beginner and you don’t have enough knowledge about Crypto Mining then don’t worry you will find the easiest method here in this article.
Different types of Cryptocurrencies are available nowadays but here we will perform mining the most used Bitcoin Cryptocurrency. Bitcoin is a decentralised currency and blockchain is a system that allows you to maintain your transaction record and you have to govern it by yourself. In order to start mining Bitcoin Cryptocurrency, see the given step provided below.
Requirements
In order to start mining, you will need to have a Raspberry Pi, a pool account, a bitcoin wallet and a mining pool to start mining your Bitcoin cryptocurrency. Then you will need to do the below mentioned steps to use Raspberry Pi for Crypto Mining.
Step 1: Updating the packages on Raspberry Pi
The first step you will need to do is to check for the updates on your Raspberry Pi terminal using the update and upgrade commands.
To check for the updates on Raspberry Pi, use the below mentioned command line in the terminal.
If you are using the old version of Raspberry Pi, you will need to upgrade your packages as well using the below command.
If your operating system is already upgraded, you will receive the above message in the terminal which confirms that you are using the latest version of Raspberry Pi.
Step 2: Create a Bitcoin Wallet
The next step is to create a Bitcoin wallet so that you can receive your mined Bitcoins. Bitcoin wallets are classified into two types:
- Online wallets
- Offline wallets
The online wallet requires an internet connection, while the offline wallet does not. You must create an online wallet so that your data is permanently stored, as opposed to an offline wallet where you will have no backup if your system crashes.
In order to create an online wallet go to coin.space and click on the “Create online Wallet” option as shown below in the image.
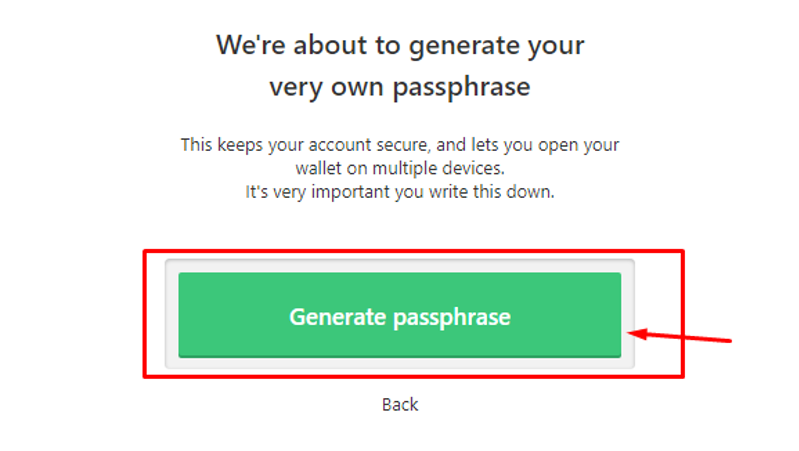
Next, click on the “Generate passphrase” option.
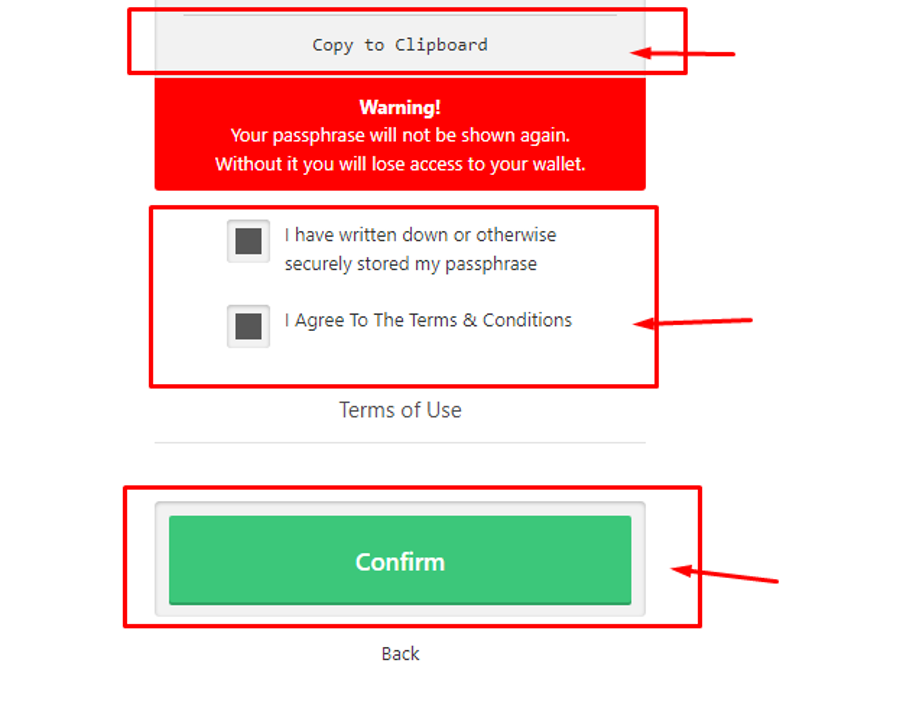
Now, you will need to save your passphrase as a backup because it won’t show you again and checkbox the “I have written down or otherwise securely stored my passphrase” and “I Agree to the Terms and Condition” options and confirm it to proceed to the next step.
You have to write the word number of your passphrase in the next option as shown below.
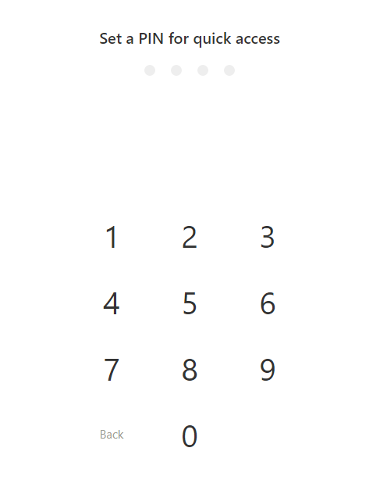
After writing the word number, you will have to set your pin in the next step as shown below.
After adding the pin, you will get success in creating your Bitcoin wallet.
Step 3: Enter a Mining Pool
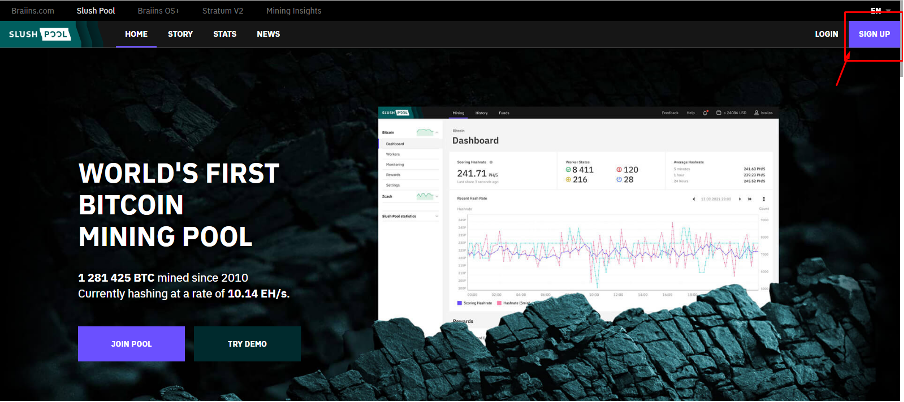
A mining pool is an online pool that allows the user to share their processing power and rewards equally. For this purpose, go to the webpage of “Slush Pool” and sign up there.
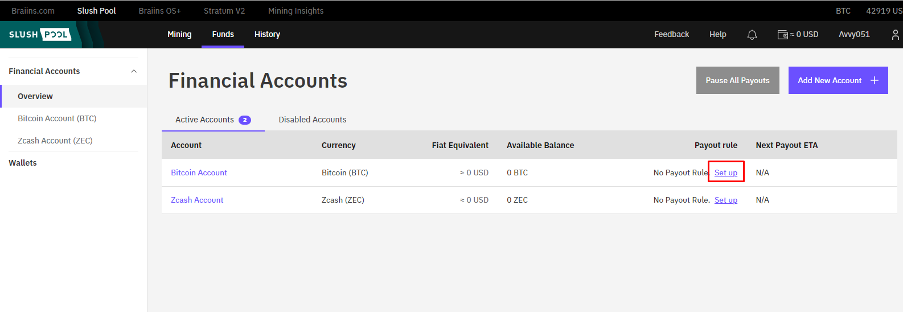
After signup and login from the account, click on the wallet option.
Now click on Bitcoin account setup.
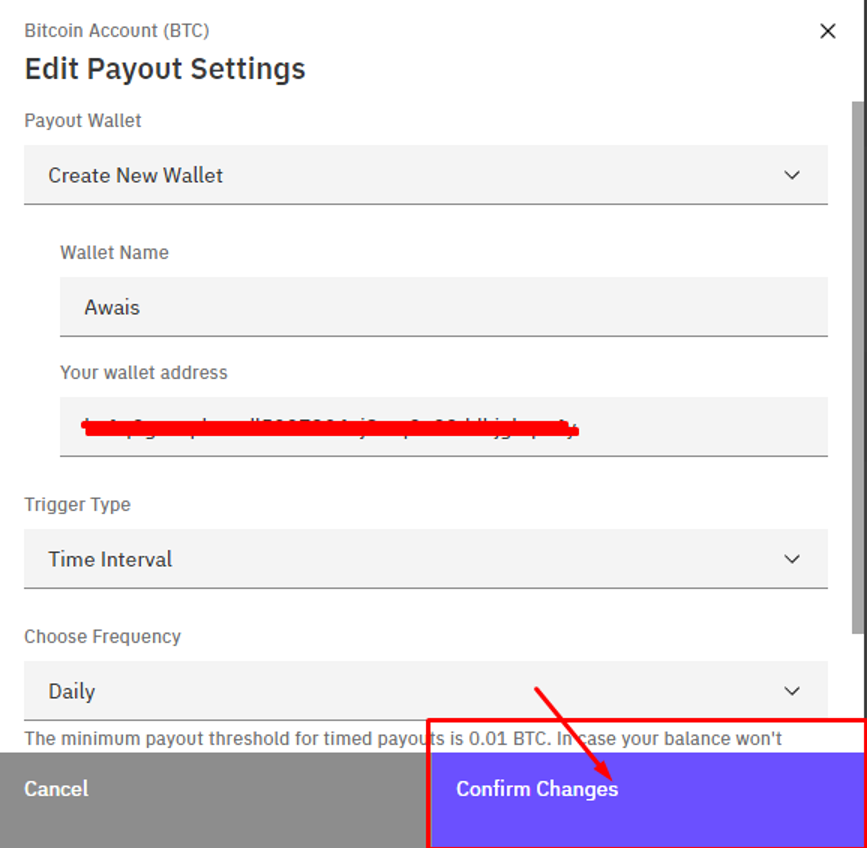
Next, you will be required to choose “Create New Wallet Option” and choose your wallet name and provide your wallet address. In addition, you will need to provide Trigger Type and the frequency of your choice and then confirm changes as shown in the image below.
After providing the password, you can now check your email which confirms that you can now successfully mine.
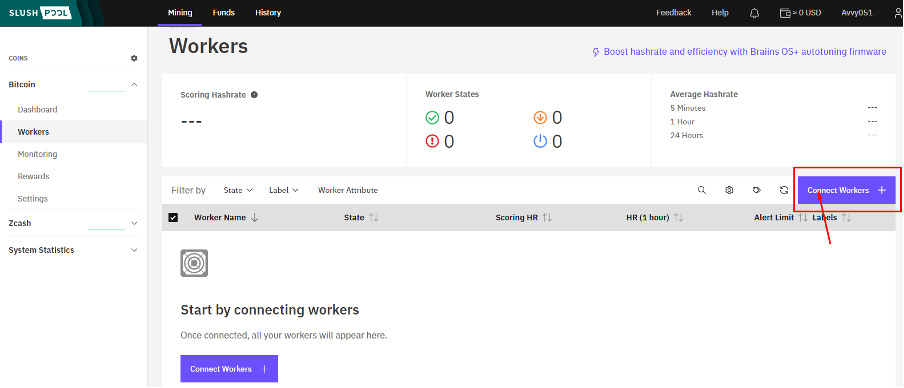
After confirming the email, you will get success in adding your wallet on Slushpool. You can easily create a worker in the Slush Pool option from the worker tabs.
Click on the “Connect Workers” option
Step 4: Install the Miner
Now the next step is to install the miner which takes the responsibility of performing mining. You can use cpuminer on Raspberry Pi for this purpose.
First, you are required to install the required dependencies for the cpuminer using the below given command.
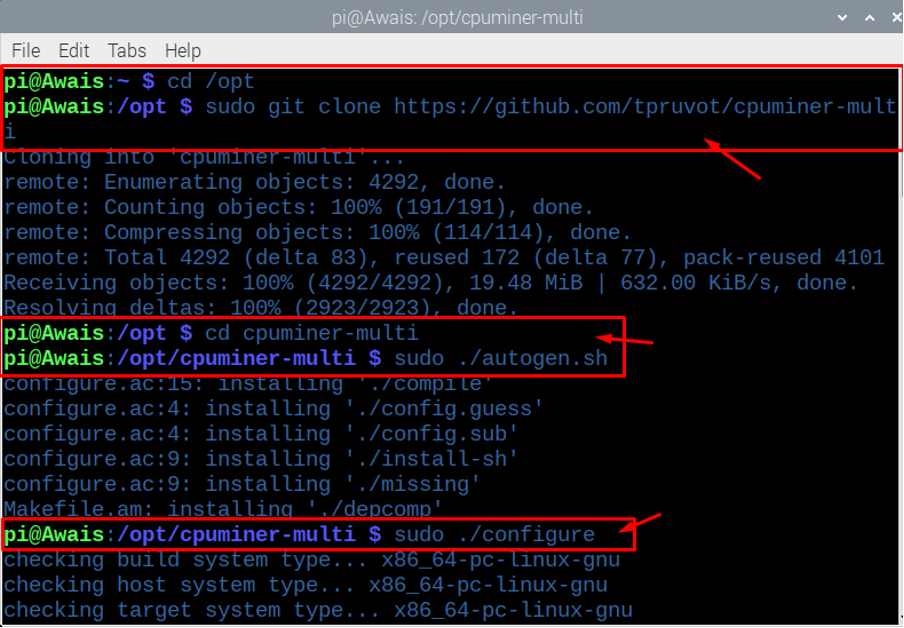
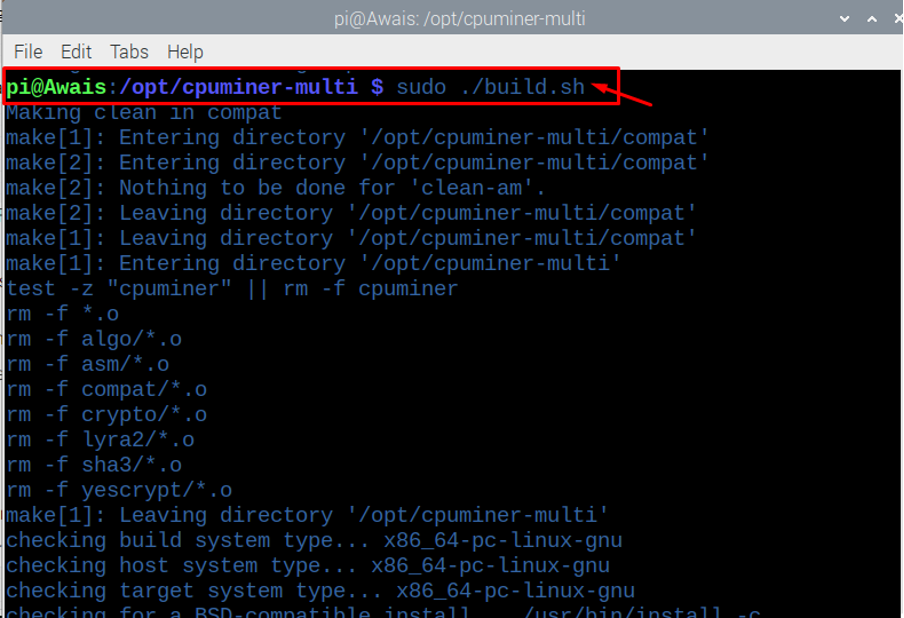
This process will take some time so you have to wait for that, you may need to update and upgrade the packages again if an error occurs during the installation. After the installation is completed, you then need to configure the miner using the commands shown below. You have to run these commands step by step. The “.sh” commands involve compilation and the installation used for performing the mining process. It takes some time so sit back and wait for the process to complete.
$ cd cpuminer-multi
$ sudo ./ autogen.sh
$ sudo ./configure
$ sudo ./build.sh
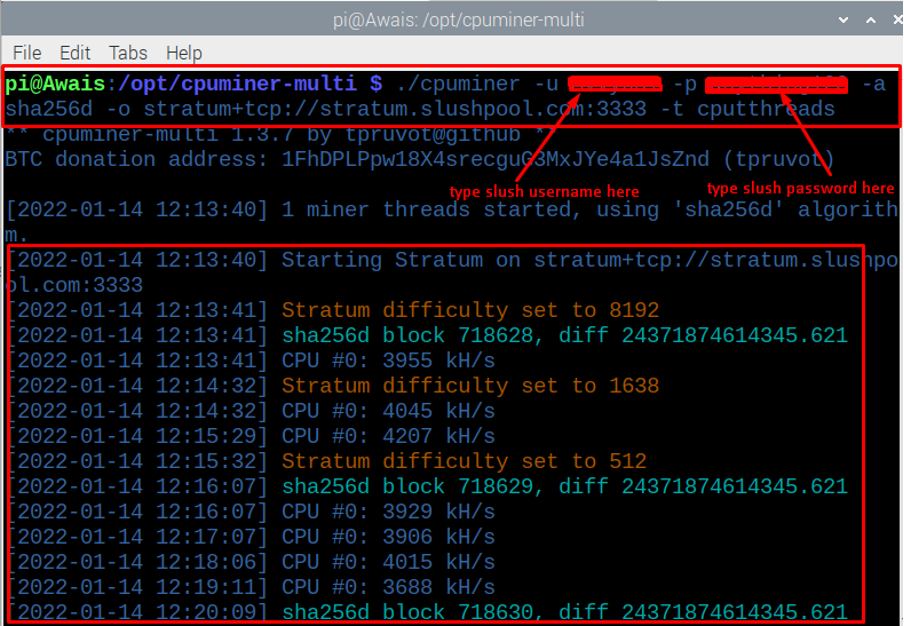
Now, when you are ready to start the miner using the below given command which requires your username and password. In the below image, you will have to type your slushpool username and password to start the mining process. The mining will be installed when you press the enter button.
The above information tells us that we are successfully mining but that doesn’t mean that you will get bitcoin in your wallet. It means that you are starting to build a share in the pool and you will need to have many shares before you get a pay-out.
Conclusion
If you are faimilar with crypto mining, you will be glad to try it on your Raspberry Pi. The above mentioned crypto mining process is just to guide you how you can mine on Raspberry Pi and it’s a lot easier than you expect and is a good step to establish yourself into the cryptocurrency world.


