This article will explain the steps for interfacing a MicroSD card with an ESP32 board using the Arduino IDE.
Table of Contents:
2. How to Interface ESP32 with MicroSD Card Module
6. Performing Different Functions on MicroSD Card Using ESP32
- 6.1. Creating Directories in MicroSD Card
- 6.2. Listing Directories in MicroSD Card
- 6.3. Removing Directories
- 6.4. Get MicroSD Card Type
- 6.5. Get SD Card Size
1. MicroSD Card Module
The MicroSD card module is an ESP32 sensor that can connect the SD card to your microcontroller board. It works over the SPI communication protocol. It allows the ESP32 or any other microcontroller board like Arduino to access the data stored on the SD card over the SPI protocol.
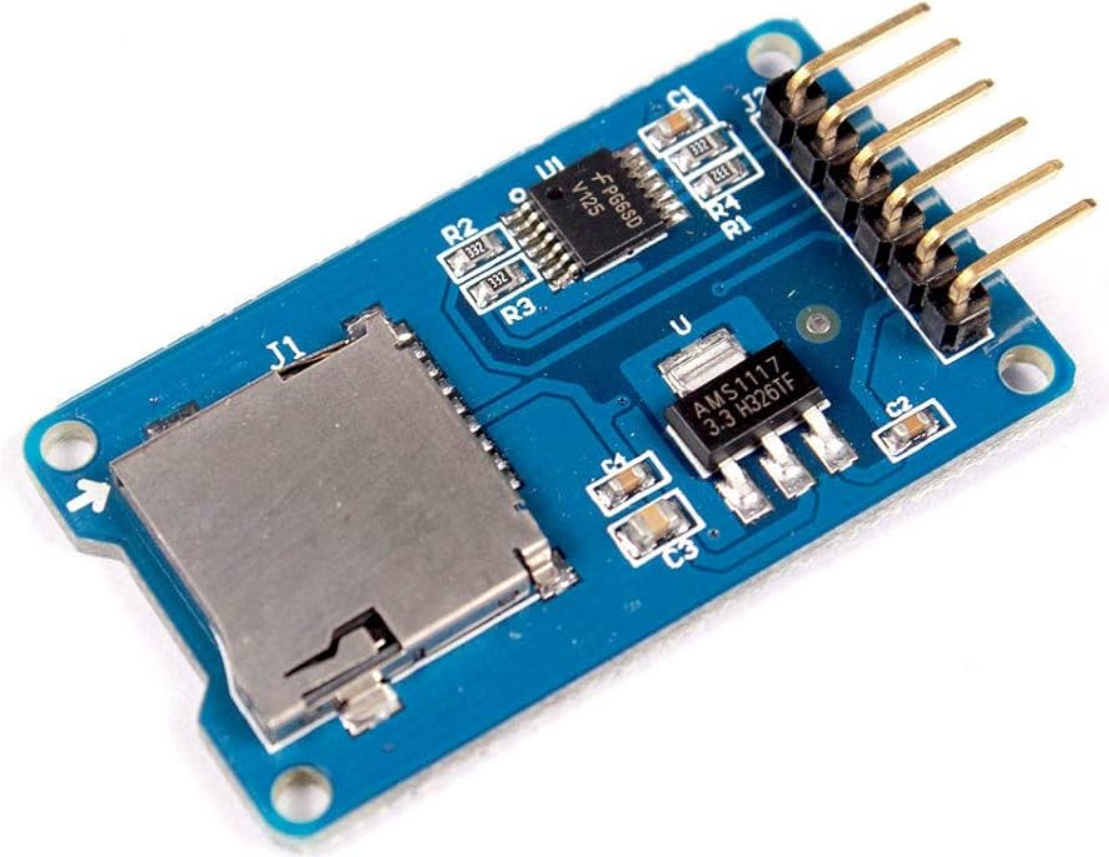
The working voltage for the SD card module is 3.3V, so it’s not possible to directly connect it to the ESP32 or any other microcontroller board. For that, we need to use the SD card module or sensor that works over 5V.
1.1. Pinout
The MicroSD card features a total of six pins. Two of them are power pins: VCC and GND. While the reading four pins are used for SPI communication protocol. Following are the details for all of these six pins:
Power Pins:
- VCC: Connects to the ESP32 5V pin.
- GND: Connects to the ESP32 ground (GND) pin.
SPI Pins:
- MISO: (Master In Slave Out) Connects to the ESP32 MOSI (Master Out Slave In) pin.
- MOSI: Connects to the ESP32 MISO (Master In Slave Out) pin.
- SCK: Connects to the ESP32 SCK (Serial Clock) pin.
- SS: (Slave Select) Connects to the pin specified in the Arduino code as the SS (Slave Select) pin.
2. How to Interface ESP32 with MicroSD Card Module
To interface ESP32 with MicroSD card module, you will need to set up the power pins for your SD card sensor. Next set up the SPI pins. Here you have two choices, you can either set the default SPI pins or define your own custom SPI pins.
When using default SPI pins, we are going to add the SD.h and SD_MMC.h libraries. By default, these libraries take the VSPI SPI pins (23, 19, 18, 5) for SPI communication. However, you can also set other pins for SPI communication.
The ESP32 contains two SPI interfaces HSPI and VSPI with their pins detail as follows:
| SPI | MOSI | MISO | CLK | CS |
| VSPI | D23 | D19 | D18 | D5 |
| HSPI | D13 | D12 | D14 | D15 |
Related: ESP32 Pinout Reference – A Complete Guide
2.2. Get the SD Card Ready
Next, before you can proceed with reading and writing data to a MicroSD card, first, you first have to set up it by formatting any previous data in it.
Open your SD card using any card reader and format it.
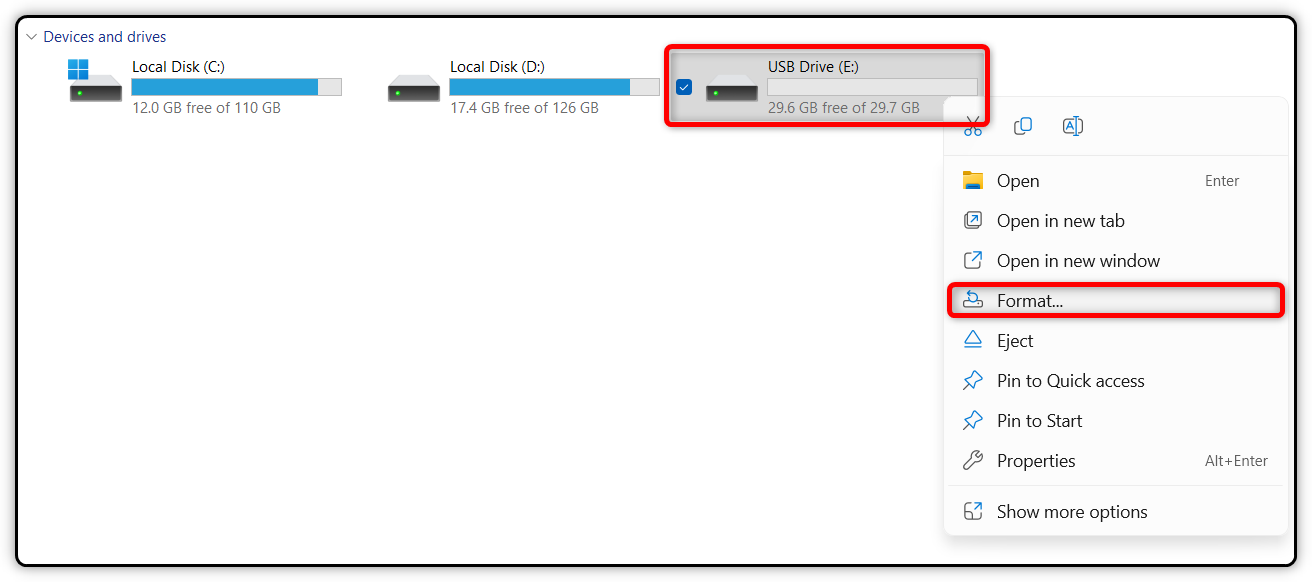
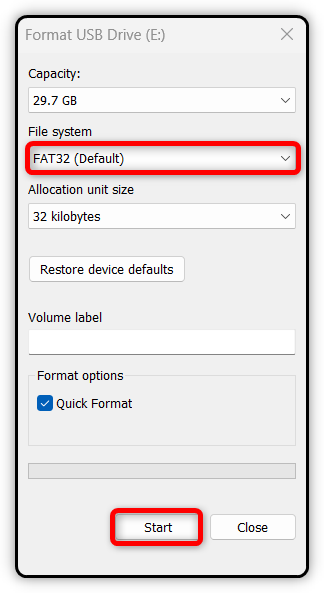
Select the FAT32 for your card file system and click Start.
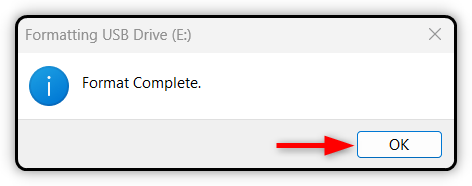
After formatting the card, select OK.
Now your SD card is ready to be interfaced with ESP32 using the SD card module.
2.3. Schematic Diagram
To connect the MicroSD card sensor with ESP32, follow the below given configuration:
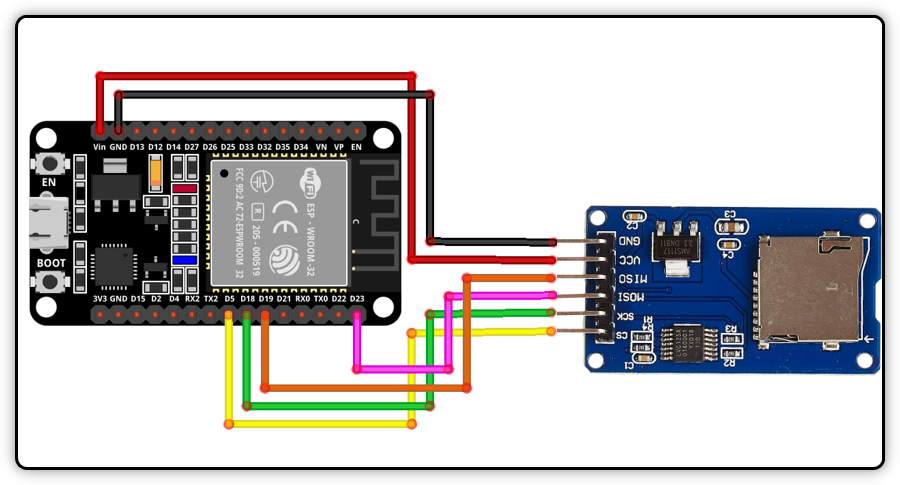
Following is the table for pin configuration of the connection wire:
| MicroSD Card | ESP32 |
| GND | GND |
| VCC | VIN |
| CS | D5 |
| MOSI | D23 |
| SCK | D18 |
| MISO | D19 |
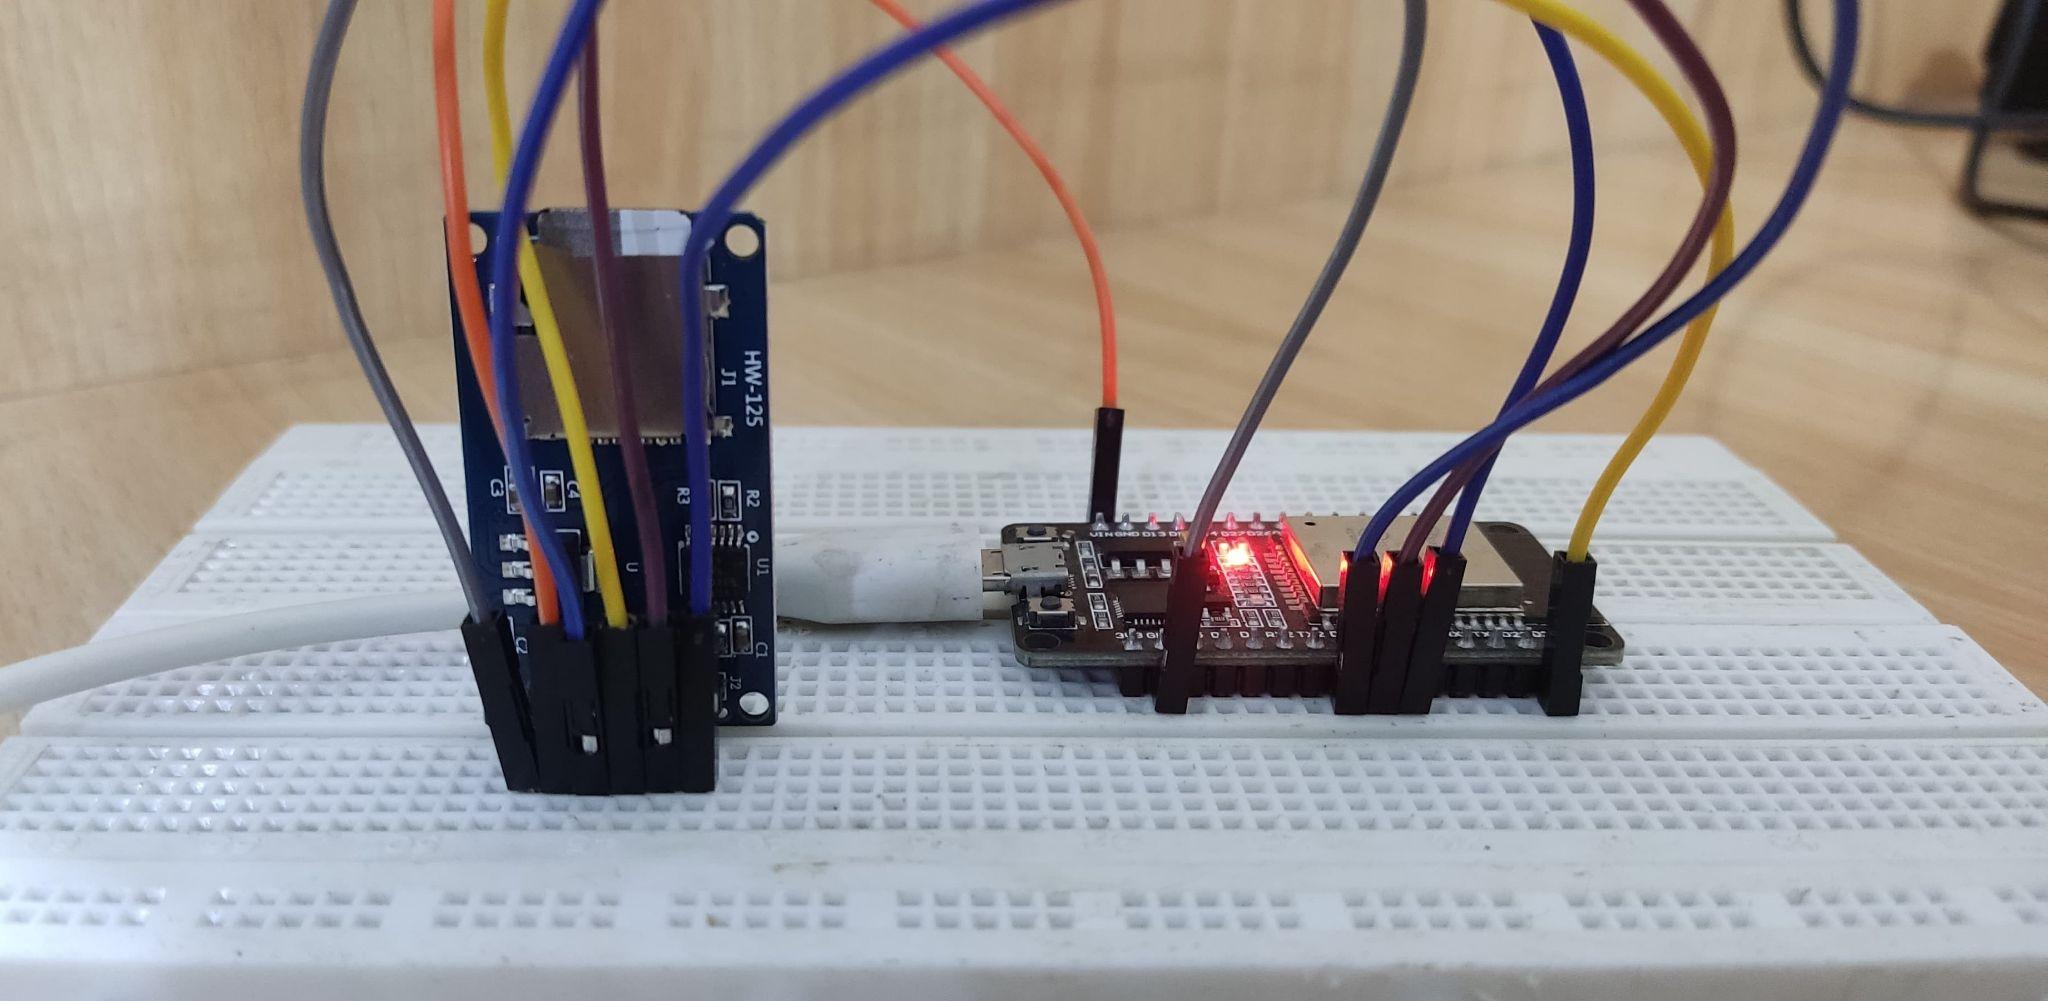
3. Hardware
For hardware, you just need some jumper wires a breadboard along with ESP32 and SD card module.
4. Code
Now we will write a code that will create a text file inside the MicroSD card and after that, it writes some text string to that. Once done, we will read the content of the text file on the Arduino IDE serial monitor.
Start Arduino IDE and compile the given code. After that burn it to your ESP32 board:
#include <SD.h>
File myFile;
const int CS = 5;
// Write the given message to a file at the specified path
void WriteFile(const char * path, const char * message) {
// Open the file. It supports one file to open at a time
// close the other file before opening a new file
myFile = SD.open(path, FILE_WRITE);
if (myFile) {
Serial.printf("Writing to %s ", path);
myFile.println(message);
myFile.close(); // Close the file
Serial.println("completed.");
} else {
Serial.println("error opening file ");
Serial.println(path);
}
}
// Print file content at the specified path
void ReadFile(const char * path) {
// Open file
myFile = SD.open(path);
if (myFile) {
Serial.printf("Reading file from %s\n", path);
// Read complete file till reach the last
while (myFile.available()) {
Serial.write(myFile.read());
}
myFile.close(); // Close the file
} else {
// If file failed to open, print an error:
Serial.println("error opening test.txt");
}
}
void setup() {
Serial.begin(9600);
delay(500);
while (!Serial) { ; }
Serial.println("Initializing SD card...");
if (!SD.begin(CS)) {
Serial.println("Initialization failed!");
return;
}
Serial.println("Initialization done.");
WriteFile("/test.txt", "Linuxhint.com");
ReadFile("/test.txt");
}
void loop() {
}
4.1. Code Explanation
For better understanding, we will divide this code into subparts.
Initialization and Setup: First, the code started by including some important libraries related to the SD card module. The SPI.h library is added for communication with the SD card and SD.h for handling SD card operations. Next, it defines a global variable myFile of type file to manage file operations. The CS constant is set to pin 5, which will be used as the Chip Select (CS) pin for the SD card.
Setup() Function: Inside the setup function, serial communication is started. After that, we initialized the SD card module using the SD.begin(CS) function. Further, we also have defined two different functions for reading and writing text to a text file.
Writing to the SD Card: The WriteFile() function opens the file test.txt for writing using SD.open(path, FILE_WRITE). After that, it writes the string Linuxhint.com to the file using myFile.println(message).
Reading from the SD Card: To read the file content, we have used the ReadFile() function. If successfully read, the data will be sent to the Arduino serial port and displayed on the Arduino IDE serial monitor.
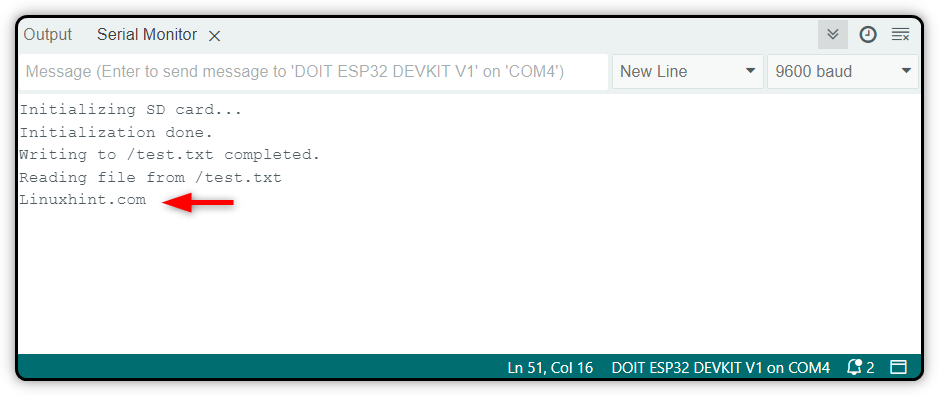
5. Output
In the output, you can see the same string that we defined inside the Arduino IDE code is displayed on your Arduino IDE serial monitor.
6. Performing Different Functions on MicroSD Card Using ESP32
We can perform various operations like creating, removing, or adding directories in MicroSD cards directly through the Arduino IDE code.
6.1. Creating Directories in MicroSD Card
The below code will create a new directory inside the MicroSD card. It defines a function called createDir that takes a file system object (fs::FS) and a path as input. This function attempts to create a directory with the specified path and prints messages indicating success or failure.
#include "SD.h"
#include "SPI.h"
void createDir(fs::FS &fs, const char * path){
Serial.printf("Creating Dir: %s\n", path);
if(fs.mkdir(path)){
Serial.println("Dir created");
} else {
Serial.println("mkdir failed");
}
}
void setup(){
Serial.begin(115200);
// Initialize SD card
if(!SD.begin()){
Serial.println("Card Mount Failed");
return;
}
// Create a directory named "mydir"
createDir(SD, "/mydir");
}
void loop(){
}
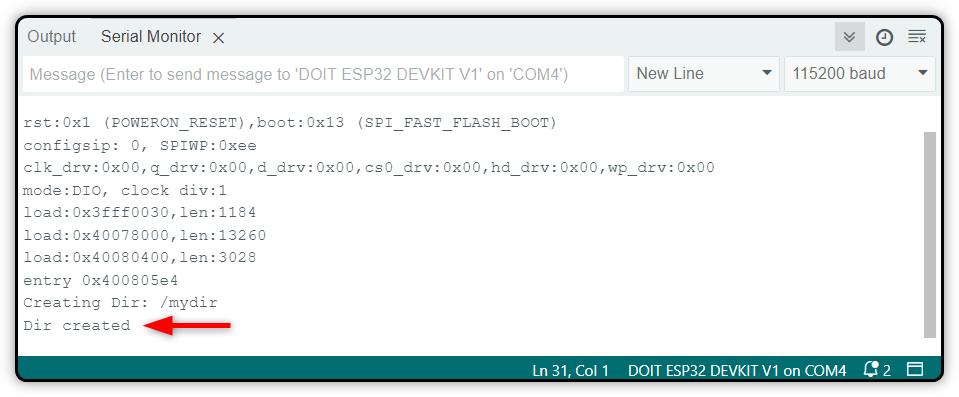
In the output, you can see a new directory is created with /mydir name.
6.2. Listing Directories in MicroSD Card
In the below code, we are going to list the all directories present inside the MicroSD card. The listDir function recursively lists the contents of a directory on an SD card. It prints information about both directories (prefixed with “DIR”) and files (prefixed with “FILE”), including their names and sizes.
#include "SD.h"
#include "SPI.h"
void listDir(fs::FS &fs, const char * dirname, uint8_t levels) {
Serial.printf("Listing directory: %s\n", dirname);
File root = fs.open(dirname);
if (!root) {
Serial.println("Failed to open directory");
return;
}
if (!root.isDirectory()) {
Serial.println("Not a directory");
return;
}
File file = root.openNextFile();
while (file) {
if (file.isDirectory()) {
Serial.print(" DIR : ");
Serial.println(file.name());
if (levels) {
listDir(fs, file.name(), levels - 1);
}
} else {
Serial.print(" FILE: ");
Serial.print(file.name());
Serial.print(" SIZE: ");
Serial.println(file.size());
}
file = root.openNextFile();
}
}
void setup() {
Serial.begin(115200);
if (!SD.begin()) {
Serial.println("Card Mount Failed");
return;
}
listDir(SD, "/", 0);
}
void loop() {
}
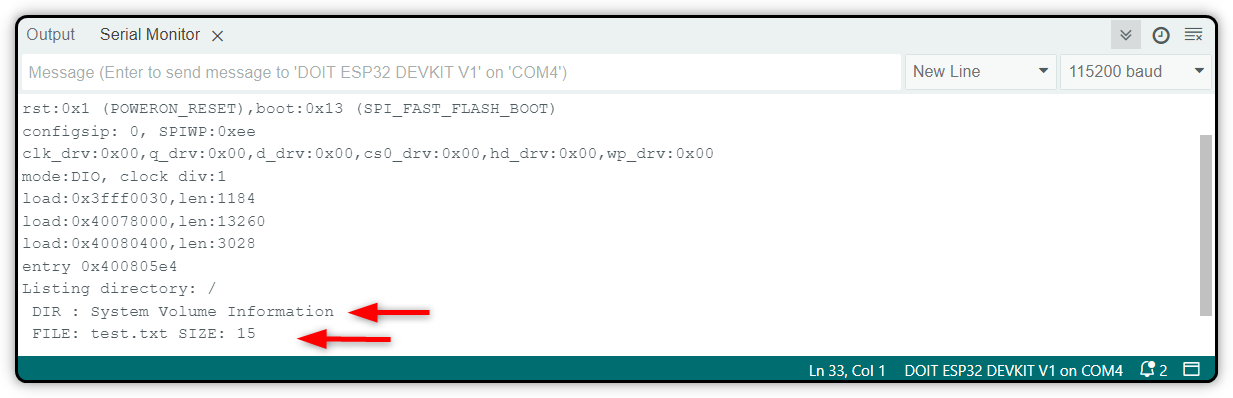
In output, you can see two different files. One is a text file and the other one is a directory which we created inside in previous code.
6.3. Removing Directories
Now we will remove the previously created directories and text files. For that we are going to use the removeDir function, It will attempt to remove a directory specified by the path. If successful, it prints Dir removed; otherwise, it prints rmdir failed.
#include "SD.h"
#include "SPI.h"
void removeDir(fs::FS &fs, const char *path) {
Serial.printf("Removing Dir: %s\n", path);
if (fs.rmdir(path)) {
Serial.println("Dir removed");
} else {
Serial.println("rmdir failed");
}
}
void setup() {
Serial.begin(115200);
if (!SD.begin()) {
Serial.println("Card Mount Failed");
return;
}
}
void loop() {
}
6.4. Get MicroSD Card Type
MicroSD card or Secure Digital card was designed originally by the SD card association, and designed for use in portable devices like smartphones and cameras. SD cards mainly contain four types of families:
- SDSC (Standard Capacity SD): These cards offer a modest range of storage capacity of 2GB and use the FAT-12 and FAT-16 file systems.
- SDHC (High Capacity SD): These cards range from 2GB to 32GB and use the FAT-32 file system.
- SDXC (eXtended Capacity SD): These cards use the exFAT file system and start from 32GB to as high as 2TB.
- SDIO: SDIO cards serve a dual purpose by combining the data storage with INPUT/OUTPUT functions.
To check your card type, run the below code:
#include "SD.h"
#include "SPI.h"
void setup() {
Serial.begin(115200);
if (!SD.begin()) {
Serial.println("Card Mount Failed");
return;
}
uint8_t cardType = SD.cardType();
if (cardType == CARD_NONE) {
Serial.println("No SD card attached");
return;
}
Serial.print("SD Card Type: ");
if (cardType == CARD_MMC) {
Serial.println("MMC");
} else if (cardType == CARD_SD) {
Serial.println("SDSC");
} else if (cardType == CARD_SDHC) {
Serial.println("SDHC");
} else {
Serial.println("UNKNOWN");
}
uint64_t cardSize = SD.cardSize() / (1024 * 1024);
Serial.printf("SD Card Size: %lluMB\n", cardSize);
}
void loop() {
}
As I have a 32GB card, you can see that it lies in the range of SDHC cards.

6.5. Get MicroSD Card Size
You can also get the size of the SD card by uploading the below code to your ESP32 board.
#include "SD.h"
#include "SPI.h"
void setup() {
Serial.begin(115200);
if (!SD.begin()) {
Serial.println("Card Mount Failed");
return;
}
uint8_t cardType = SD.cardType();
if (cardType == CARD_NONE) {
Serial.println("No SD card attached");
return;
}
uint64_t cardSize = SD.cardSize() / (1024 * 1024);
Serial.printf("SD Card Size: %lluMB\n", cardSize);
// Other functions (listDir, createDir, removeDir, etc.) can be called here
}
void loop() {
}
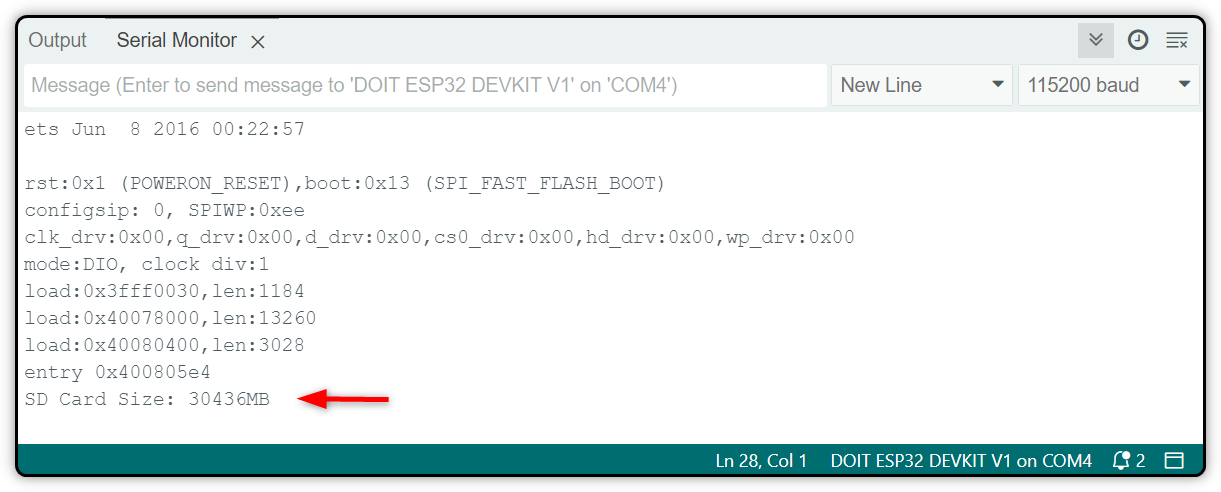
From the output, you can see I have an SD card of approximately 30GB.
Conclusion
A MicroSD card module is used to read and write the data from the SD card using the ESP32 board. The MicroSD card module communicates with the microcontroller by using the SPI interface. So you can either use the SPI library or define your own SPI pins inside the code. Once connected, you can read write a text file, or create new directories in your SD card.