ESP32 is a commonly used microcontroller based IoT board. It is a low cost and low power microcontroller board that can control multiple devices and can also act as a slave in an IoT projects. ESP32 improves users’ experience with the IoT world as it has integrated Wi-Fi and Bluetooth modules.
As we are talking about wireless applications of ESP32 we can also integrate external sensors with it to perform different tasks such as measuring distance of objects using ultrasonic sensors. Now let’s talk about how to do this in detail.
ESP32 with HC-SR04 Ultrasonic Sensor
ESP32 can be easily integrated with an ultrasonic sensor. We just need two wires to measure any object distance without any need of a ruler or measuring tape. It has a vast application where it’s hard to use any other means for measuring distance. Multiple sensors are available which can be integrated with ESP32.
HC-SR04 is a widely used ultrasonic sensor with ESP32. This sensor determines how far an object is. It uses SONAR to determine object distance. Normally it has a good range of detection with accuracy of 3mm however sometimes it is difficult to measure soft materials distance like cloth. It has a built-in transmitter and receiver. Following table describes the technical specifications of this sensor.
| Characteristics | Value |
| Operating Voltage | 5V DC |
| Operating Current | 15mA |
| Operating Frequency | 40KHz |
| Min Range | 2cm/ 1 inch |
| Max Range | 400cm/ 13 feet |
| Accuracy | 3mm |
| Measuring Angle | <15 degree |
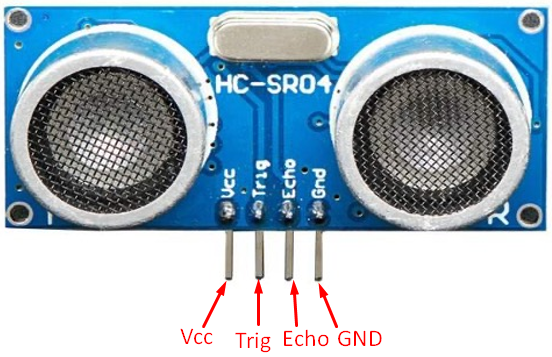
HC-SR04 Pinout
Ultrasonic sensor HC-SR04 has four pins:
- Vcc: Connect this pin to ESP32 Vin pin
- Gnd: Connect this pin with ESP32 GND
- Trig: This pin receives controlling signal from ESP32 digital pin
- Echo: This pin sends a pulse or signal back to ESP32. Received back pulse signal is measured to calculate distance.
How Ultrasonic Works
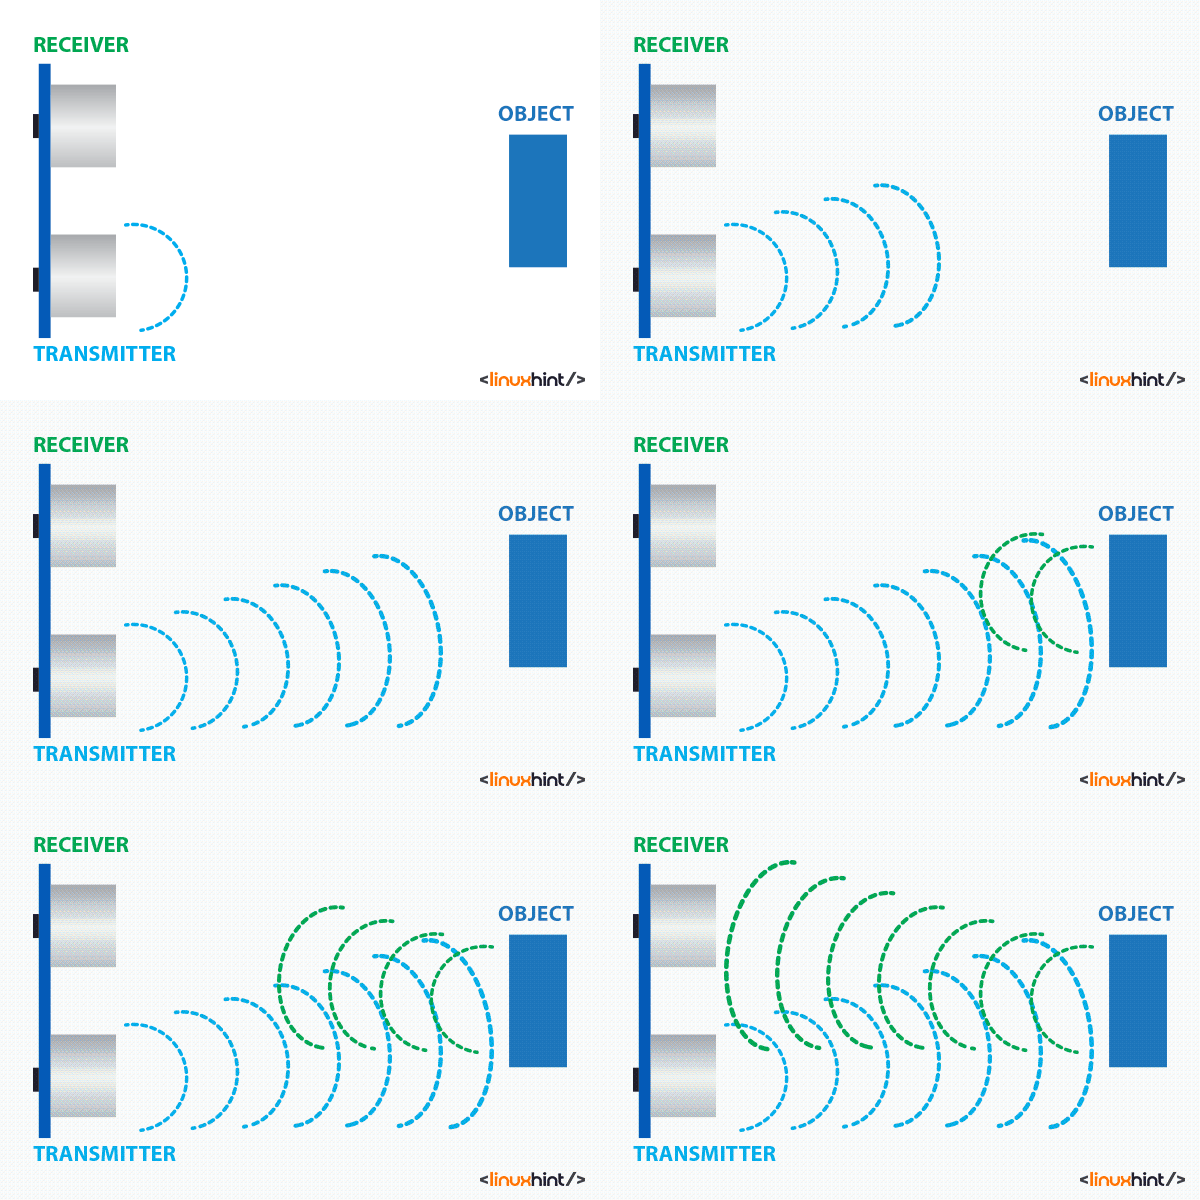
Once the ultrasonic sensor is connected to ESP32, the microcontroller will generate a signal pulse on the Trig pin. After sensors receive an input at the Trig pin an ultrasonic wave is automatically generated. This emitted wave will hit the surface of an obstacle or object whose distance we must measure. After that, the ultrasonic wave will bounce back to the receiver terminal of the sensor.
Ultrasonic sensor will detect the reflected wave and calculate the total time taken by wave from sensor to object and back to sensor again. Ultrasonic sensor will generate a signal pulse at Echo pin which is connected to ESP32 digital pins once the ESP32 receives signal from Echo pin it calculates the total distance between object and sensor using Distance-Formula.
Here we divided distance with 2 because multiplying speed with time will give the total distance from object to sensor and back to sensor after reflecting from object surface. To get real distance we divide this distance into half.
Circuit
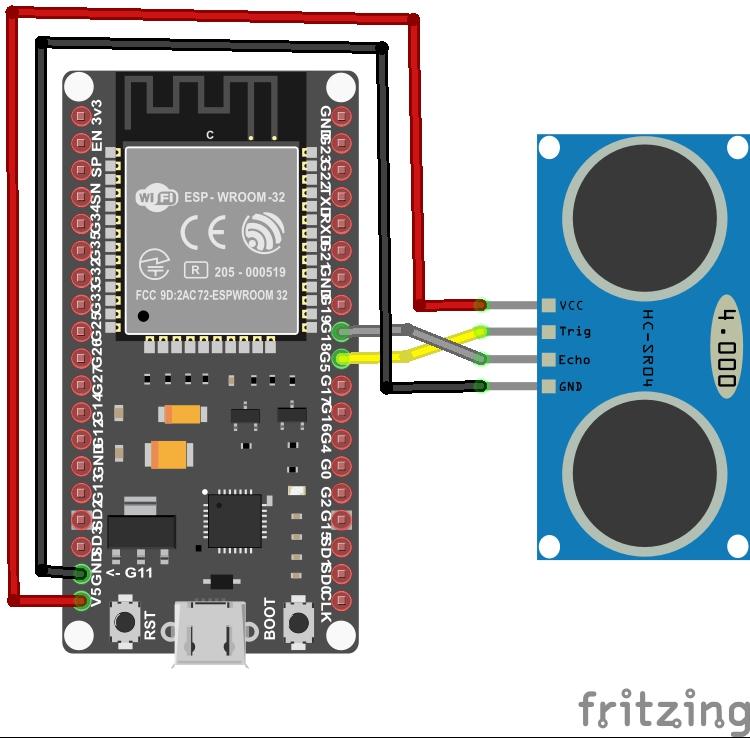
Interface ESP32 with ultrasonic sensor using the four pins as shown in image below:
Following configuration will be followed for connecting ESP32 with ultrasonic sensor. Trig and Echo pins will be connected at GPIO 5 and 18 pins of ESP32.
| HC-SR04 Ultrasonic Sensor | ESP32 Pin |
| Trig | GPIO 5 |
| Echo | GPIO 18 |
| GND | GND |
| VCC | VIN |
Hardware
For interfacing ESP32 with ultrasonic sensor following equipment is required:
- ESP32
- HC-SR04
- Breadboard
- Jumper Wires
Code in Arduino IDE
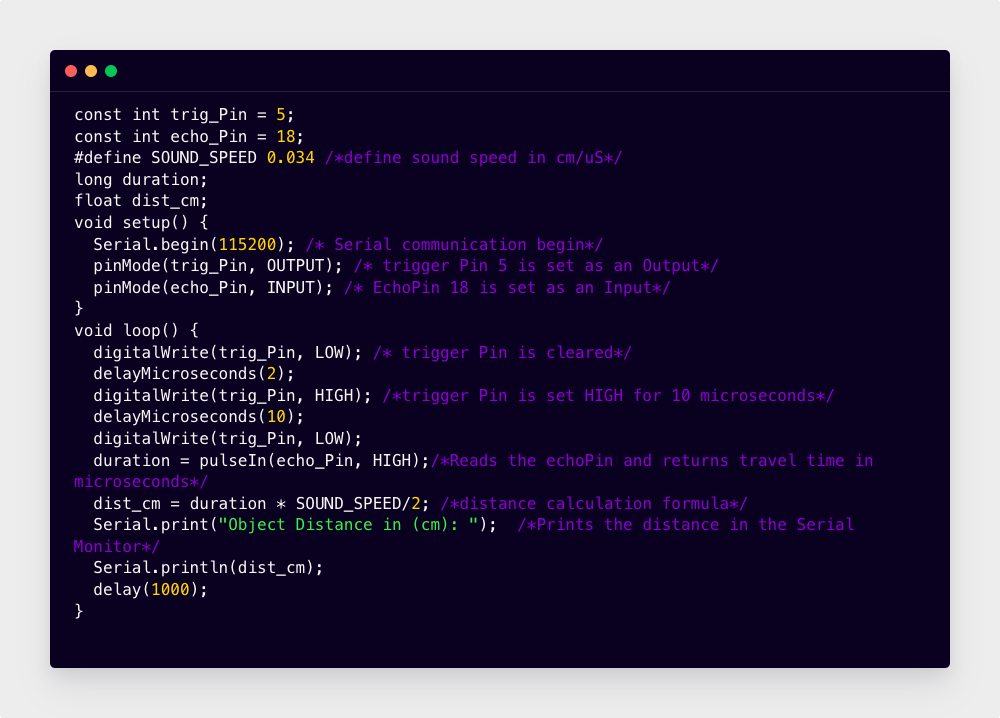
To program ESP32 we will be using Arduino IDE, as ESP32 and Arduino have a lot in common in programming so it’s best to use the same software to program them. Open Arduino IDE and type the following code:
const int echo_Pin = 18;
#define SOUND_SPEED 0.034 /*define sound speed in cm/uS*/
long duration;
float dist_cm;
void setup() {
Serial.begin(115200); /* Serial communication begin*/
pinMode(trig_Pin, OUTPUT); /* trigger Pin 5 is set as an Output*/
pinMode(echo_Pin, INPUT); /* EchoPin 18 is set as an Input*/
}
void loop() {
digitalWrite(trig_Pin, LOW); /* trigger Pin is cleared*/
delayMicroseconds(2);
digitalWrite(trig_Pin, HIGH); /*trigger Pin is set HIGH for 10 microseconds*/
delayMicroseconds(10);
digitalWrite(trig_Pin, LOW);
duration = pulseIn(echo_Pin, HIGH);/*Reads the echoPin and returns travel time in microseconds*/
dist_cm = duration * SOUND_SPEED/2; /*distance calculation formula*/
Serial.print("Object Distance in (cm): "); /*Prints the distance in the Serial Monitor*/
Serial.println(dist_cm);
delay(1000);
}
Above code explains working of ultrasonic sensor with ESP32 module. Here we started our code by defining trigger and echo pins. Pin 5 and Pin 18 of ESP32 are set as trigger and echo pin respectively.
const int echo_Pin = 18;
Speed of sound is defined as 0.034 cm/uS at 20ºC. We are taking values in cm/uS for more precision.
Then we initialize two variables duration and Dist_Cm as follows
float dist_cm;
The duration variable will save ultrasonic wave traveling time. Dist_Cm will save the measured distance.
In the setup() part first initialized communication by defining baud rate. Two pins defined earlier will now be declared as input and output. Trigger pin 5 is set as output while Echo pin 18 is set as input.
pinMode(trig_Pin, OUTPUT);
pinMode(echo_Pin, INPUT);
In the loop() part of code first we will clear the trigger pin by setting it LOW and give 2 microseconds delay then we will set this pin as HIGH for 10 microseconds. The reason we are doing this is to ensure correct reading while measuring distance it will give us a clean HIGH pulse.
delayMicroseconds(2);
digitalWrite(trig_Pin, HIGH); /*trigger Pin is set HIGH for 10 microseconds*/
delayMicroseconds(10);
digitalWrite(trig_Pin, LOW);
Next using pulseIn function we will read sound wave travel time. pulseIn function reads an input as HIGH or LOW. It returns pulse length in microseconds using this length of pulse we can calculate total time taken by wave from sensor to object body and back to receiving end of sensor.
Then using the speed formula, we calculated the total distance of the object:
Object measured distance is printed on serial monitor:
Serial.println(dist_cm);
When Object is Near
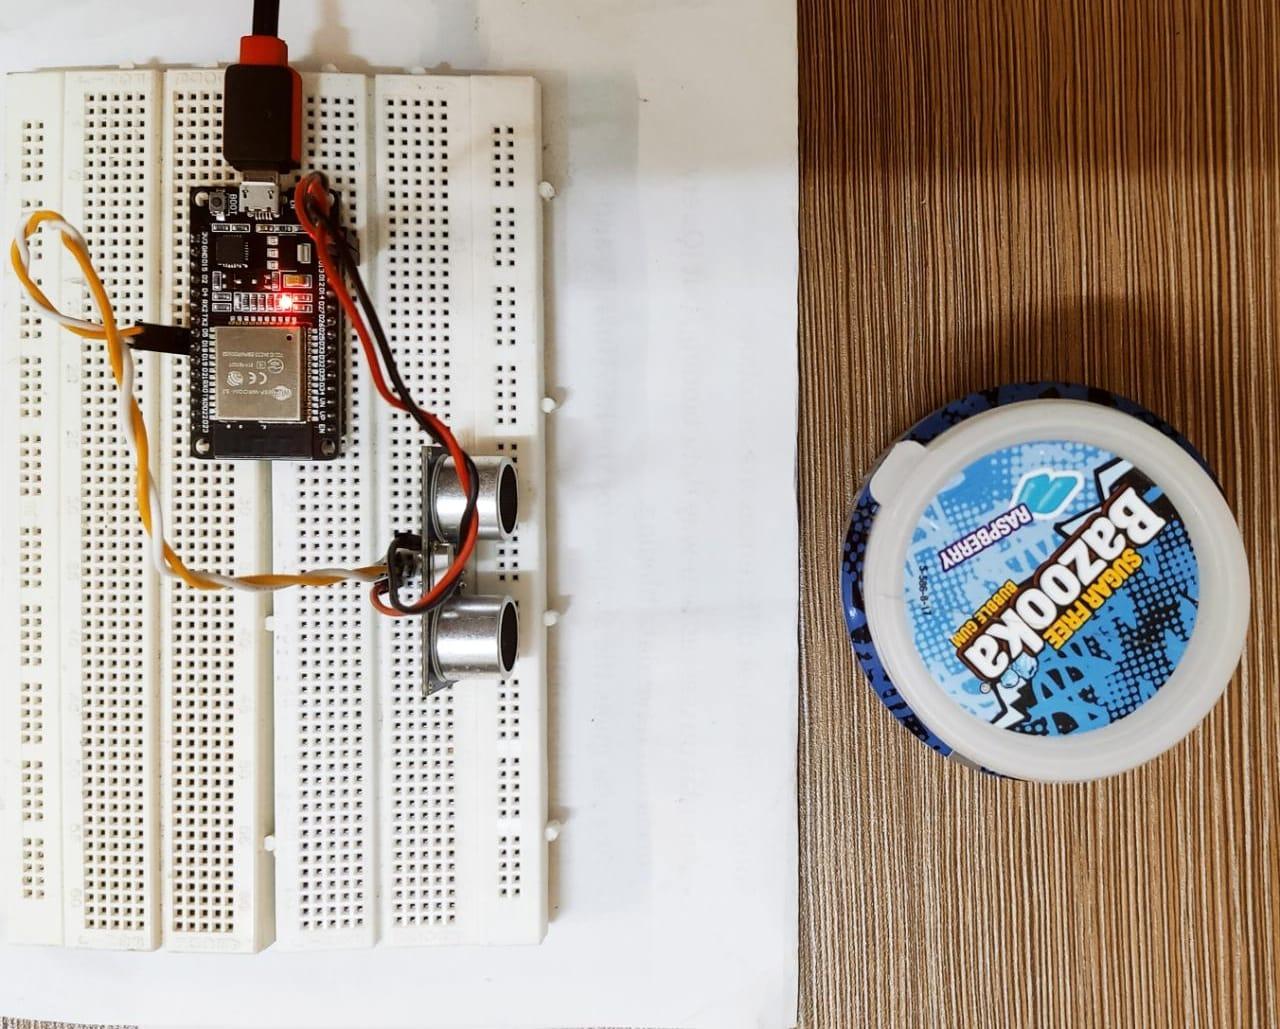
Now place an object near the ultrasonic sensor and check the measured distance on the serial monitor window of Arduino IDE.
Output
Object distance is shown in the output terminal. Now object is placed at 5 cm from the ultrasonic sensor.
When Object is Far
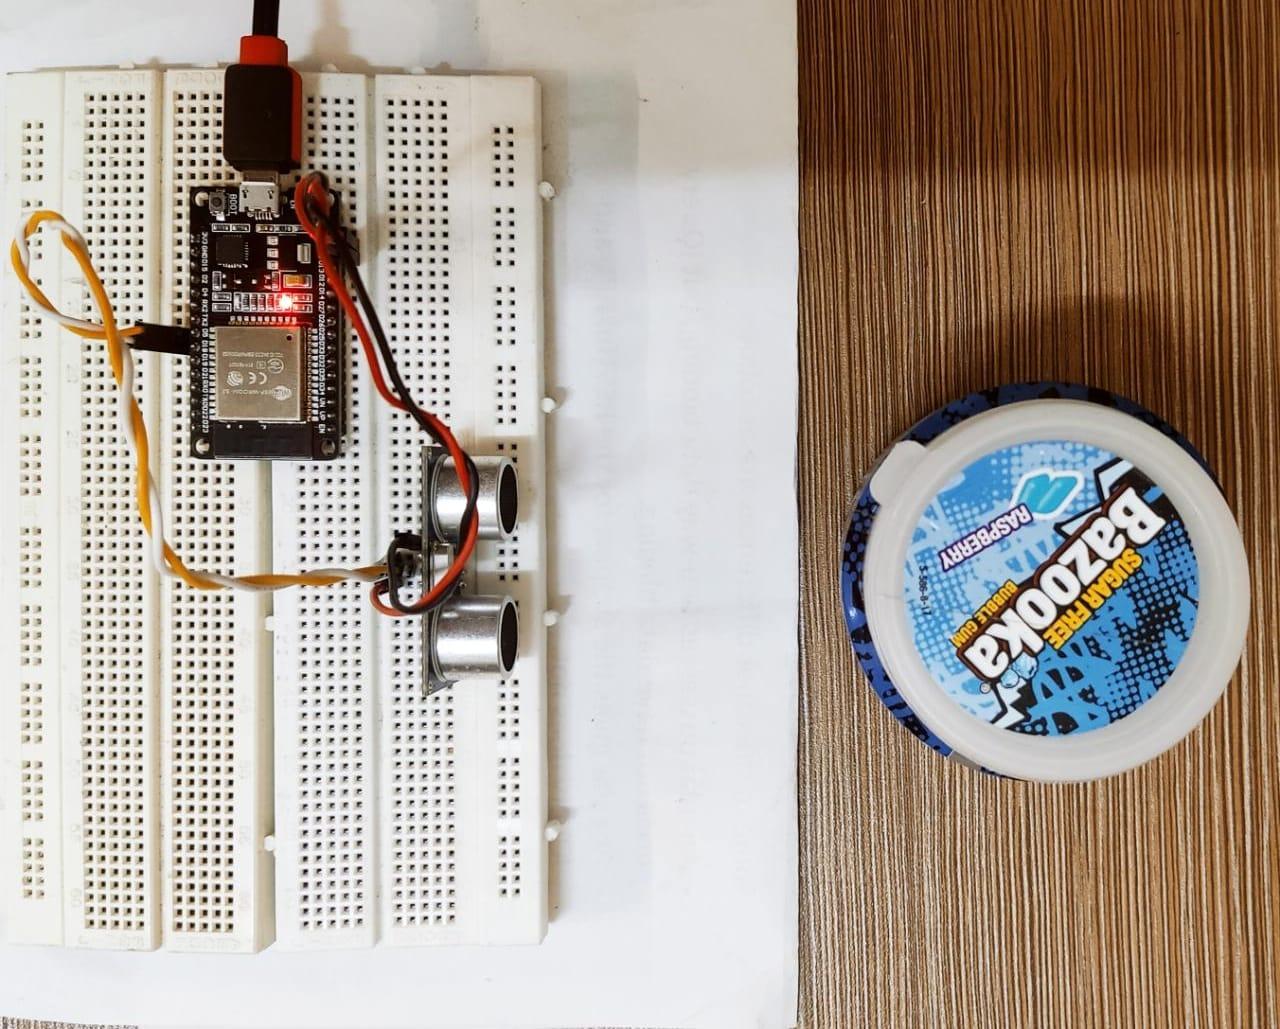
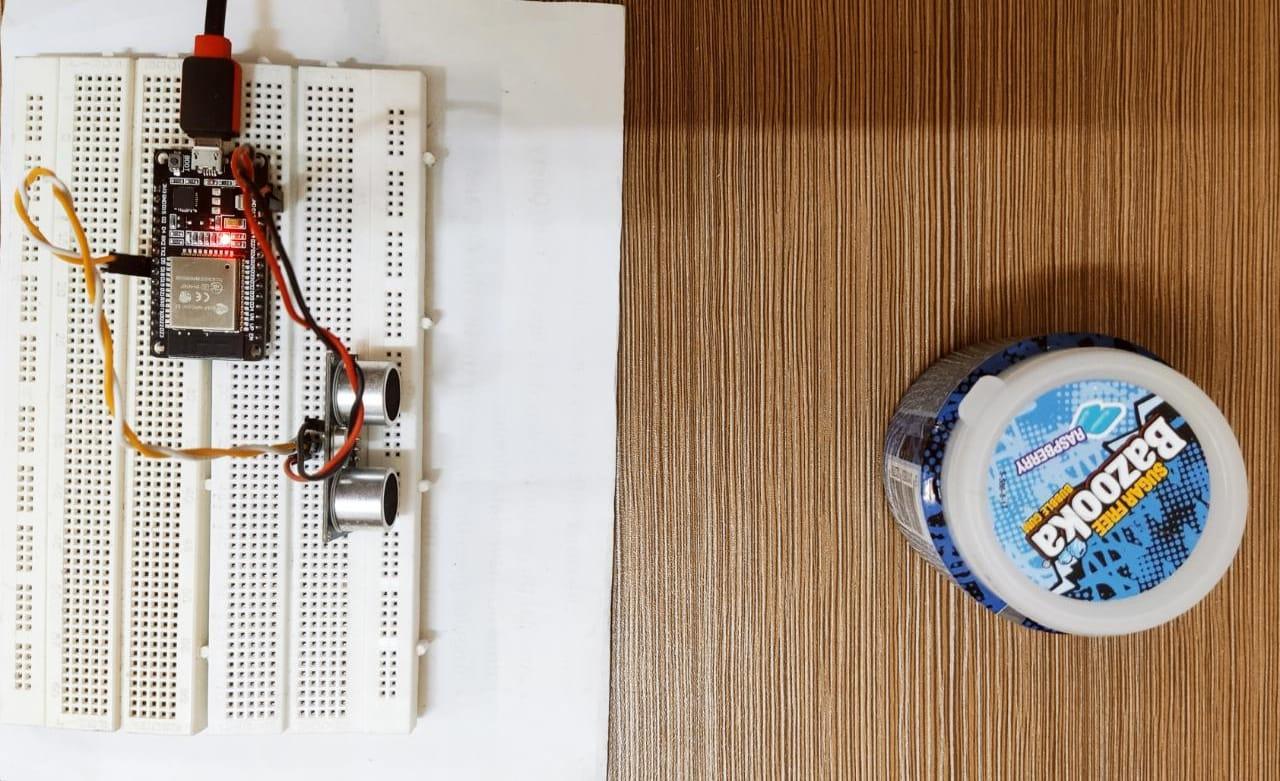
Now to verify our result we will place objects far from the sensor and check the working of the ultrasonic sensor. Place objects like shown in image below:
Output
Output window will give us a new distance and as we can see that object is far from the sensor so the measured distance is 15 cm from the ultrasonic sensor.
Conclusion
Measuring distance has a great application when it comes to robotics and other projects, there are different ways to measure distance one of the widely used methods of measuring distance with ESP32 is using an ultrasonic sensor. Here this writeup will cover all the steps one needs to integrate and start measuring sensors with ESP32.

