What is LM35
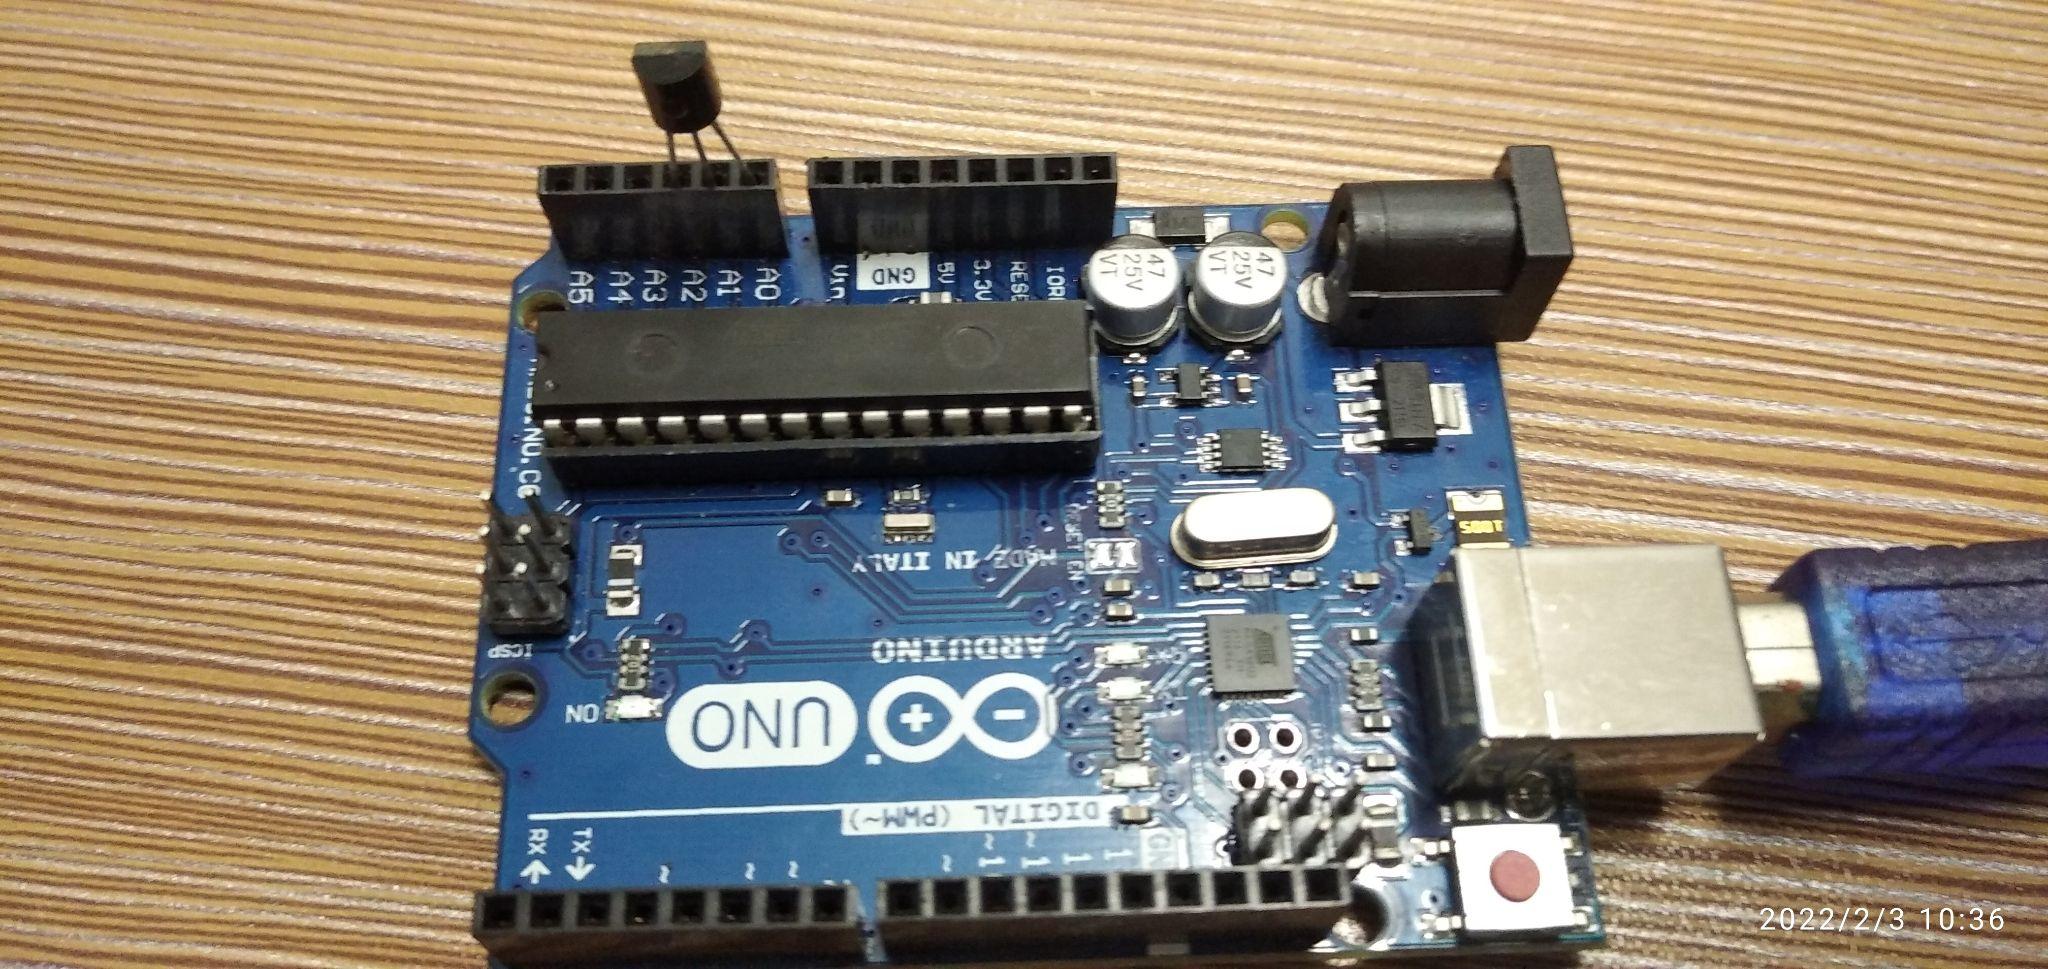
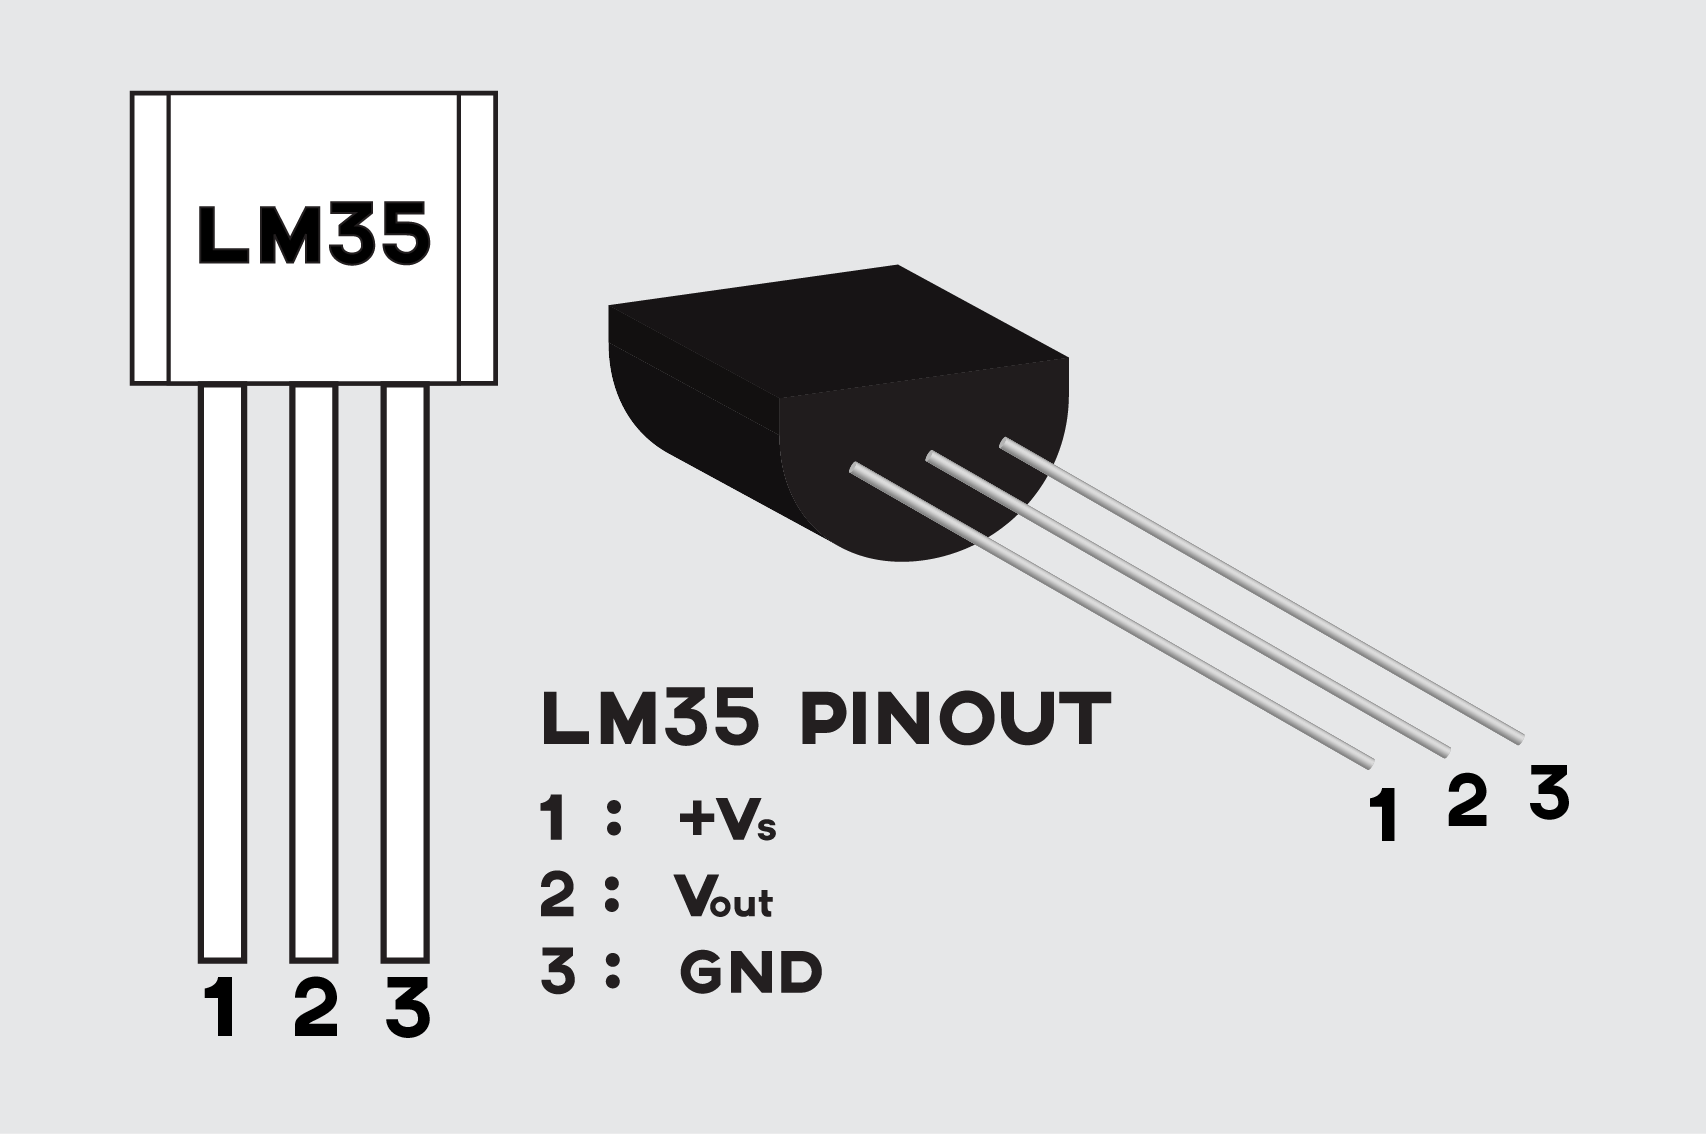
The LM35 is a temperature measuring sensor which is an analog device and has these interfacing pins. The middle pin of the sensor is used to collect the output from the sensor and the other two pins can be used as voltage supply and ground pins for the sensor. The range for the operating voltage of this temperature sensor is between 4 to 20 volts and since it’s an analog device so to convert its values into temperature the scalziation factor is 0.01V rise per degree centigrade.
Measuring temperature using Arduino
To make a temperature measuring device using Arduino the following are the components that are necessary:
- Arduino Uno
- Temperature sensor (LM35)
- LCD
- One 10K Potentiometer
- Jumper wires
- Breadboard
The LM35 is the temperature sensor that can be directly connected to the Arduino using its analog pins like this:
As the output of the temperature sensor is in the form of analog values of voltage ranging from 0 to 1023 that is for 0 volts the value will be 0 and for the value 1023 the voltage will be 5 volts.
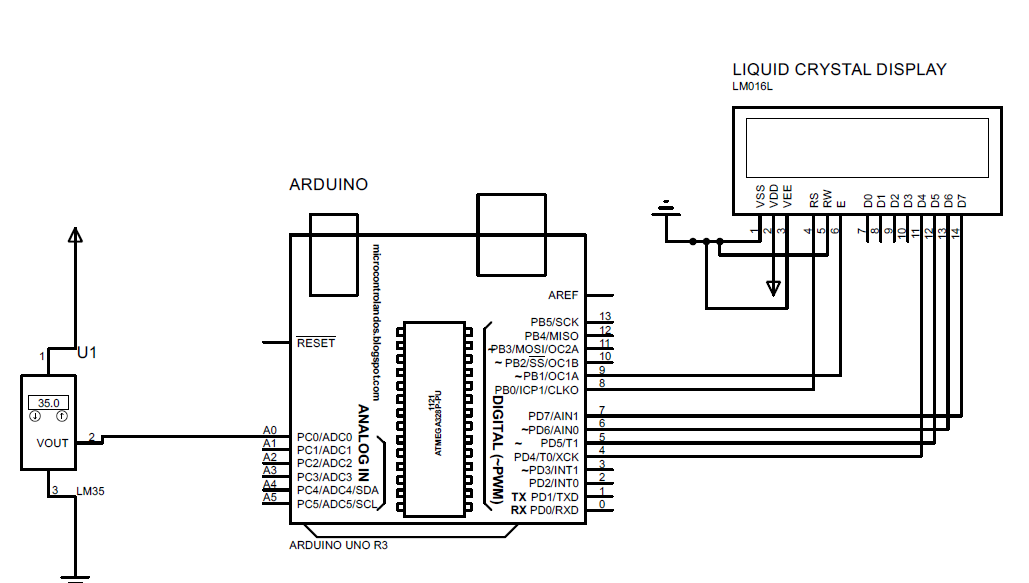
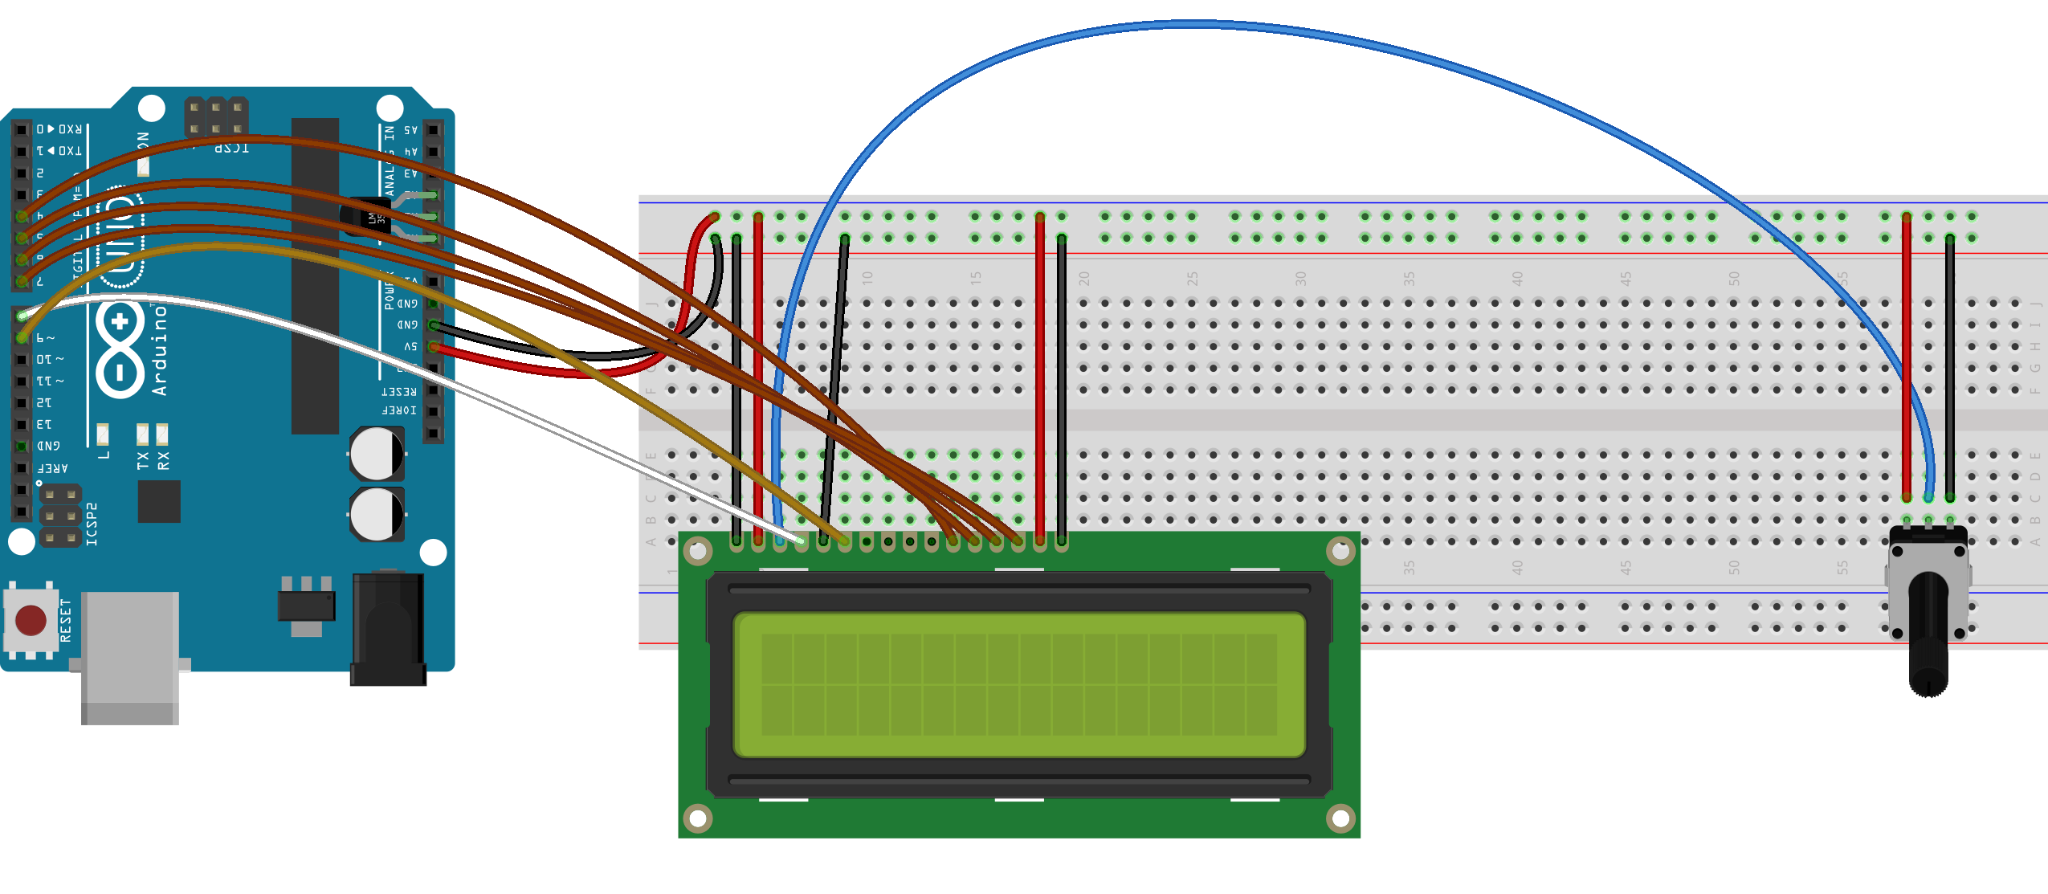
So, we have divided 500 by 1023 which is 0.488 as this is an increase of 10 millivolts per degree Celsius increase in temperature. This value will be the value for the change in the one degree Celsius of the temperature. The potentiometer used in the circuit is just to adjust the brightness of the LCD and the schematic of the project is given followed by the Arduino code.
Schematic
Arduino code
LiquidCrystal lcd(8,9,4,5,6,7); // pin of Arduino given to LCD
// declaring the variables
int vcc=A0; // A0 pin supply of LM35
int vout=A1; // A1 pin for the output of the LM35
int gnd=A2; //A2 pin for the output of the LM35
float value=0; // variable used for the values coming from the sensor
float temp=0.0; // variable used for values of the sensor in celsius
float tempF=0.0; // variable for the storing the values in fahrenheit
void setup()
{
// defining the mode of the sensors pin
pinMode(A0,INPUT);
pinMode(vcc,OUTPUT);
pinMode(vout,INPUT);
pinMode(gnd,OUTPUT);
// defining the states for the supply and ground pins for the sensors
digitalWrite(vcc,HIGH);
digitalWrite(gnd,LOW);
Serial.begin(9600);
lcd.begin(16,2); // dimensions of LCD
}
void loop()
{
value=analogRead(vout); // reading the output of the sensor
temp= value*(500/1023); // converting the values in celsius
tempF=temp*9/5+32; // converting the values in fahrenheit
// displaying the values on the LCD
lcd.setCursor(0,0);
lcd.print("TEMP = ");
lcd.print(temp);
lcd.print(" C");
lcd.setCursor(0,1);
lcd.print("TEMP = ");
lcd.print(tempF);
lcd.print(" F");
delay(2000);
}
In the Arduino code first we have defined the library for the LCD and assigned Arduino pins for the LCD module. Then we have declared three analog pins of Arduino for the pins of the temperature sensor and to give each pin its mode using the PinMode() function. Similarly after that state high is assigned to the analog pin A0 of the Arduino as it is the supply pin for the Arduino and the analog pin A2 is given the state low to act as the ground pin for the sensor.
The output of the sensor is read using the analogRead() function and then it is converted into degree celsius by dividing (500/1023) to get the change in the value per centigrade. This formula is used because there is a scaling factor for converting voltage into temperature that is 0.01V rise in voltage per degree celsius. The maximum voltage is 5 volts and the analog value for it is 1023 and if we say that for 1 volt the value for the temperature is 100 degrees.
So, for 5 volts the temperature will be 500 degrees and then we divide it with 1023 as it is the maximum value given by the sensor and the result will be multiplied with the output value of the temperature sensor.
Then the degree celsius is converted into the fahrenheit using its conversion formula and both the values are then displayed using the lcd.print() function.
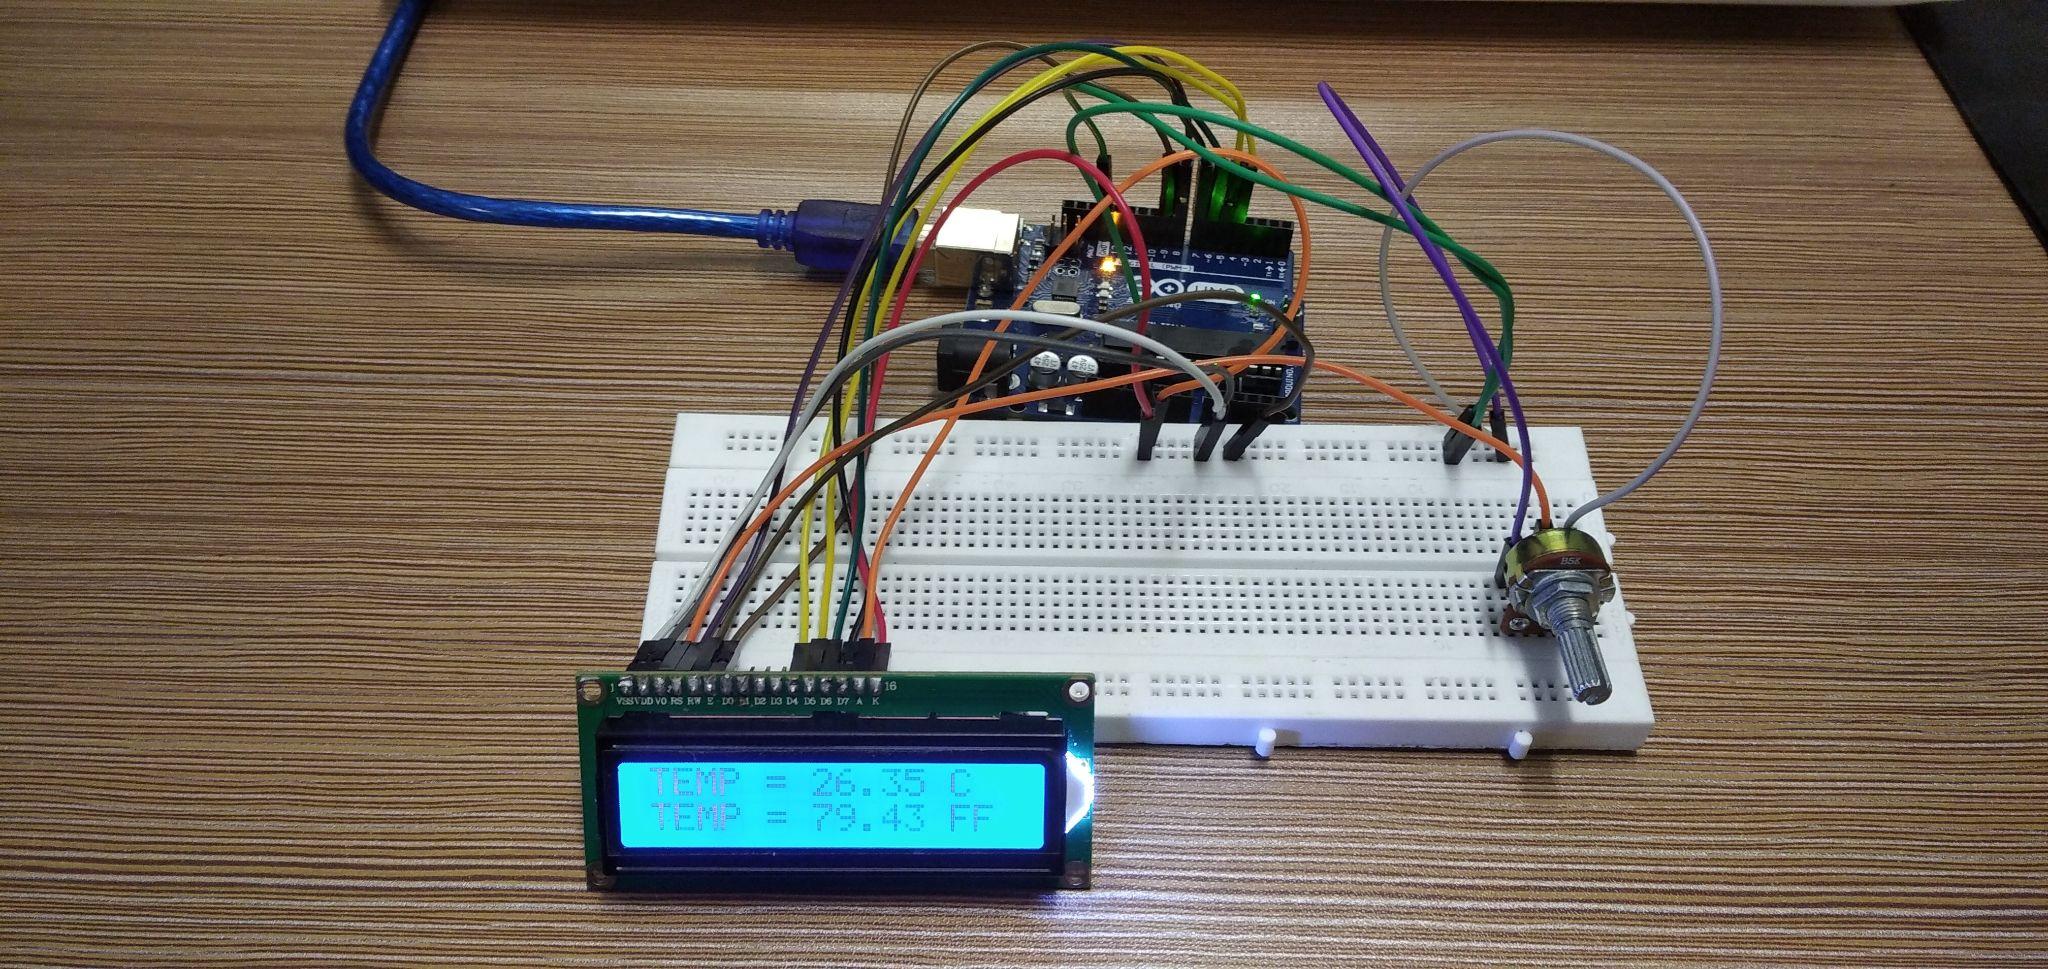
In a nutshell the project works in such a way that first the analog input from the temperature sensor is converted into the degrees and then displayed on the liquid crystal display. Similarly, the temperature is also shown in Fahrenheit that is:
Conclusion
Using the Arduino platform different do-it-yourself (DIY) projects can be made easily. Arduino boards have made it easier for the users to interface a variety of sensors with the microcontroller. In this write-up a project for sensing the temperature is made using the LM35 temperature sensor. There are also other types of sensors like thermistor or thermocouples that can be used with Arduino to measure the temperature. Here the reason behind using the LM35 module is that it is easy to configure with Arduino as compared to the other sensors.

