How to use the map function in Arduino
The map function changes the range of the given value into another specified range given by the user. In other words, it maps the proportional value of the given range, and we can call this process the scalarization of the value. To use this function in the Arduino you have to follow the following syntax:
The map function has 5 argument which are:
Value: The integer type data that is to be scalarized
From Low: The minimum number of the present range of the value
From High: The maximum number of the present range of the value
To Low: The minimum number of the desired range to which the value is to be mapped
To High: The maximum number of the desired range to which the value is to be mapped
Example Arduino code for using the map function
To illustrate the working of the map function we have controlled the brightness of the LED using the potentiometer. The purpose of using map function in this application is that the potentiometer is an analog value, and we cannot determine the brightness of the LED by looking at the values of the potentiometer as its value ranges from 0 to 1023. So, to scalarize the value in the range of 0 to 100 we have used the map function and we have displayed the values on the serial monitor:
Here is the example Arduino code for using the map function:
int led = 6;/* defining the LED pin for Arduino */
int Value = 0;/* declaring variable for storing the potentiometer value*/
int LEDvalue = 0; /* variable that will store the scalarized value of pot*/
void setup() {
Serial.begin(9600);
pinMode(led, OUTPUT); /* defining the output mode for LED*/
}
void loop() {
Value = analogRead(pot);/* getting the value of potentiometer*/
LEDvalue=map(Value, 0, 1023, 0, 100); /* scalarizing the analog values in the range of 0 to 100*/
analogWrite(led, LEDvalue); /* assigning the scalarized values to the LED */
Serial.print("unmapped value :");
Serial.print (Value);// printing the POT values in the serial monitor
Serial.println("");// adding space to organize the data
Serial.print("mapped value :");
Serial.print(LEDvalue);/* displaying the scalarized value assigned to LED */
Serial.print("%");/* display the parentage sign */
Serial.println("");// adding space to organize the data
}
In the code you can see that we have given the present value of the potentiometer and the present range to the potentiometer that is 0 to 1023(analog) and also, we have given the range that 0 to 100 in which the values are to be mapped.
You can map the values into any range as there is no limit or conditions for scalarizing the value. We have scalarized the value in 0 to 100 to let us know the value of brightness in percentage. Here is the output of our code in the serial monitor of the Arduino IDE:
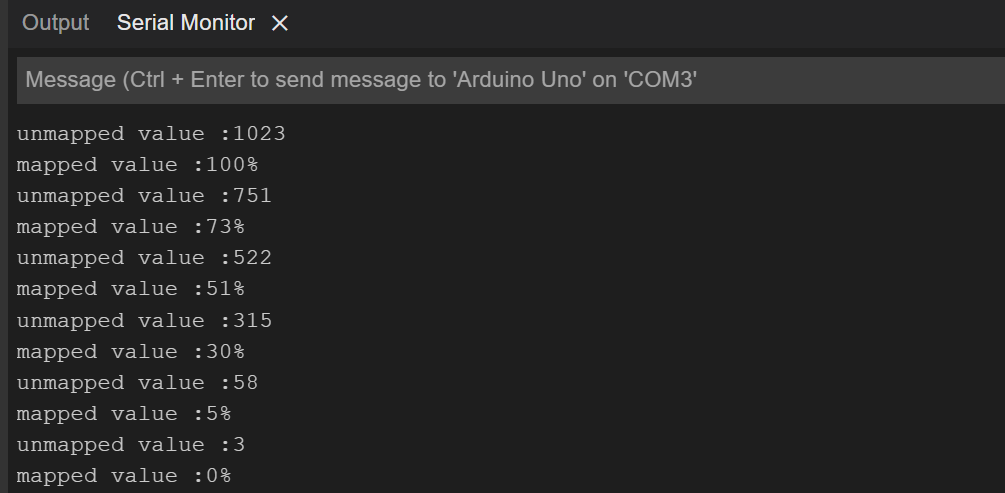
As you can see in the image above when the analog value is 1023 then the mapped value will be 100 and as the analog value is decreased the mapped value also decreases.
Conclusion
The primary function of the map() is to scalarize or map the given values from one range to another desired range. For the purpose of illustrating the working of map function we have given the example code of Arduino that converts the analog values of potentiometer used to control the brightness of the LED into the range of 0 to 1023 to 0 to 100.