In this write-up, the setCursor() function for managing the cursor is explained with the help of an example.
How setCursor() is used for managing the cursor on LCD using Arduino
Before understanding the utilization of the setCursor() function in Arduino, we should revise the basics of 16×2 LCD. The 16×2 LCD is a module that is used to display the characters on screen and it has two rows and 16 columns, moreover, the values of the LCD are demonstrated in the figure.
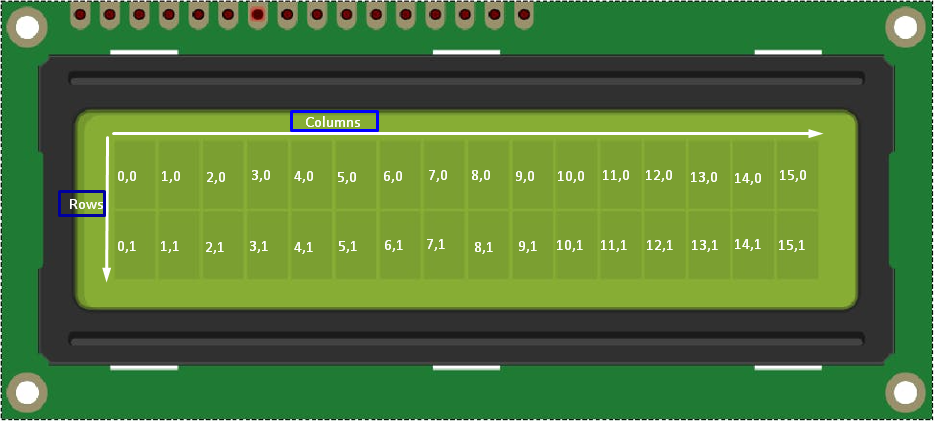
In the above figure, it is clear that the 16×2 LCD has two rows and 16 columns, and each box is denoted by two digits, for example, (2,1). In (2,1), the number “2” is denoting the column “1” and the number one is denoting the row number.
We can use the setCursor() function to start displaying the output from any of its locations, for example, we can print the text from 0,0 position as well as from 5,1 position. Just we have to set the cursor there which we can do by using the setCursor() function.
The general syntax of using the setCursor() function is:
The syntax of using the setCursor() function is as simple as just calling the function using “lcd” and mentioning the column and the row number where you want to set the cursor to start displaying the output.
Examples of using setCursor() on LCD
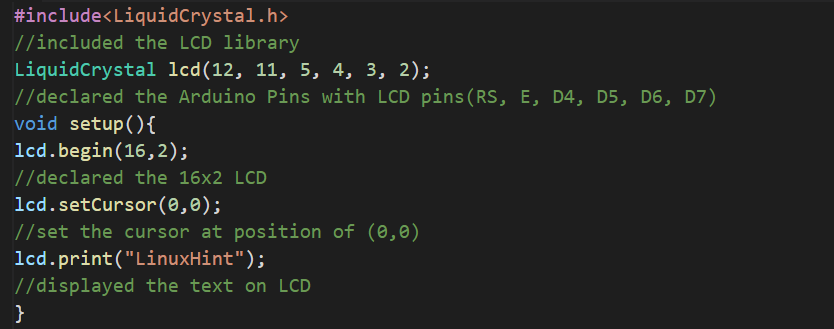
We will print the “LinuxHint” from the 0,0 position of the LCD using the code:
//included the LCD library
LiquidCrystal lcd(12, 11, 5, 4, 3, 2);
//declared the Arduino Pins with LCD pins(RS, E, D4, D5, D6, D7)
void setup(){
lcd.begin(16,2);
//declared the 16x2 LCD
lcd.setCursor(0,0);
//set the cursor at position of (0,0)
lcd.print("LinuxHint");
//displayed the text on LCD
}
void loop() {
}

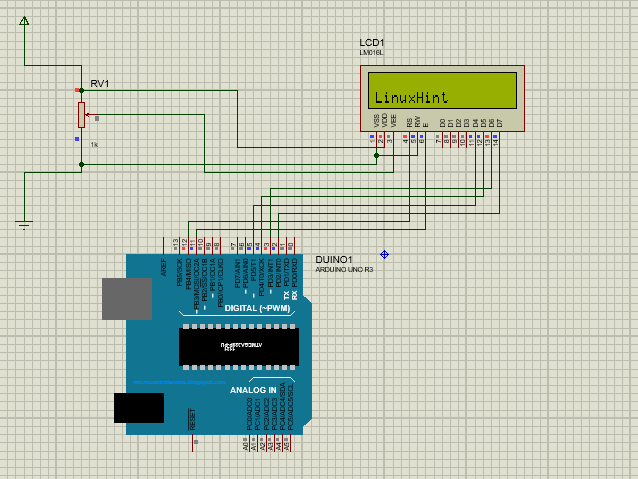
We will visualize the output of the above code in the simulation:

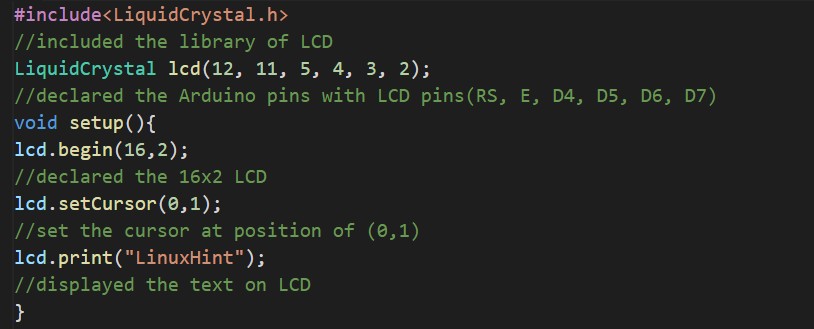
We can see in the above output, the text displayed from the first column and first row of the LCD. If we want to display the “LinuxHint” on (0,1) position, then we will use the code:
//included the library of LCD
LiquidCrystal lcd(12, 11, 5, 4, 3, 2);
//declared the Arduino pins with LCD pins(RS, E, D4, D5, D6, D7)
void setup(){
lcd.begin(16,2);
//declared the 16x2 LCD
lcd.setCursor(0,1);
//set the cursor at position of (0,1)
lcd.print("LinuxHint");
//displayed the text on LCD
}
void loop() {
}

The output of the above code is:
The “LinuxHint” is displayed from the second row and first column of the LCD. Finally, we set the cursor at position (5,0) and print the “LinuxHint” using the code:
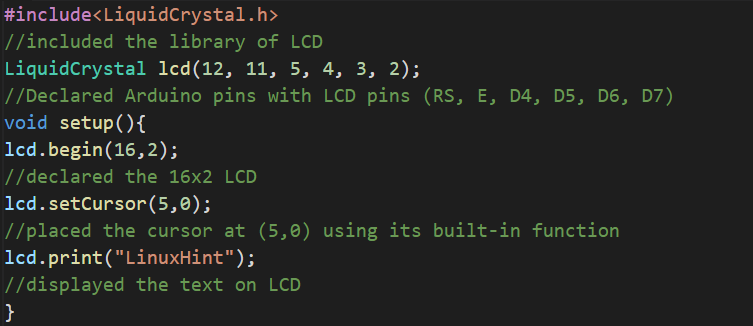
//included the library of LCD
LiquidCrystal lcd(12, 11, 5, 4, 3, 2);
//Declared Arduino pins with LCD pins (RS, E, D4, D5, D6, D7)
void setup(){
lcd.begin(16,2);
//declared the 16x2 LCD
lcd.setCursor(5,0);
//placed the cursor at (5,0) using its built-in function
lcd.print("LinuxHint");
//displayed the text on LCD
}
void loop() {
}

The output is:
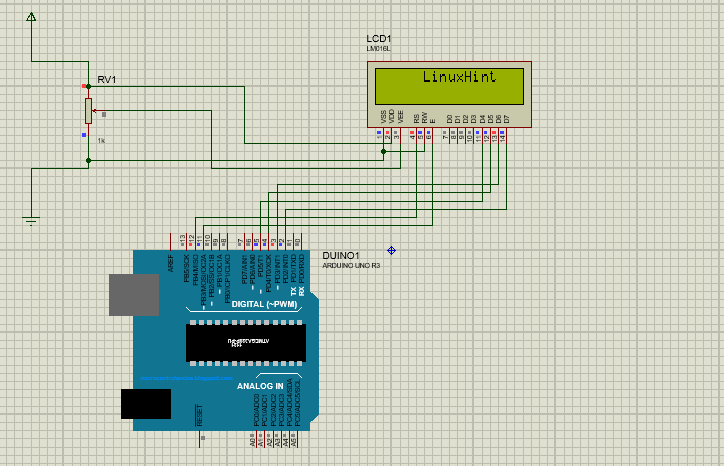
The output is displayed from the fifth column and first row of the LCD.
Conclusion
The cursor of the LCD can be managed with the setCursor() function to display the output from any specific position of the LCD. The function of the setCursor() only needs two parameters that are column and row positions from which it has to start displaying the output. In this write-up, the setCursor() function has been explained with some examples to understand the usage of this function more clearly.