Referencing to the beginner level projects there is a project that counts the number of visitors entering any facility. This could be either a shop, a factory or a school classroom. Counting the number of people automatically instead of manual counting can be more accurate and will make it easy to keep a check on the people entering an area. So, to make a visitor counter we have interfaced an infrared module with Arduino.
How to make visitor counter using Arduino Uno
To count the number of people entering any facility the easier way is to create a machine that automatically counts the people coming in. This can be achieved by using a sensor that detects any interference in its path and that is the infrared sensor. This sensor works by emitting infrared radiation and detects the radiation that is reflected back after colliding with any object.
In the case of the visitor counter when any person passes this sensor it senses the reflected wave and, in this way, counts the number of persons. In other words, we can say that whenever the sensor detects the infrared radiation it considers that a person has entered the facility.
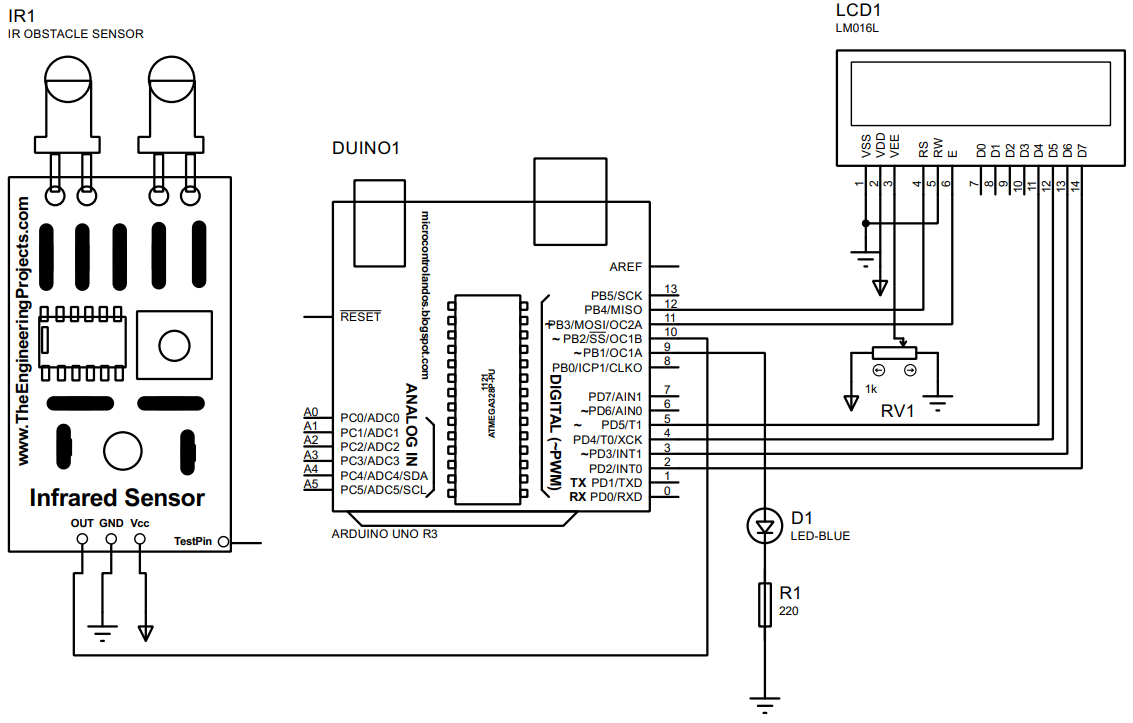
To make the visitor counter we have designed a circuit whose schematic is given in the image given below
Hardware assembly for creating a visitor counter using Arduino Uno
To create the visitor counter, we have used the following components
- Arduino Uno
- Breadboard
- 1 LED
- 1 resistor (220 ohm)
- 16×2 Liquid crystal display (LCD)
- Connecting wires
- Infrared Module
- Potentiometer
We have posted the image of the Hardware assembly for better understanding of the interfacing of all the components with Arduino Uno.
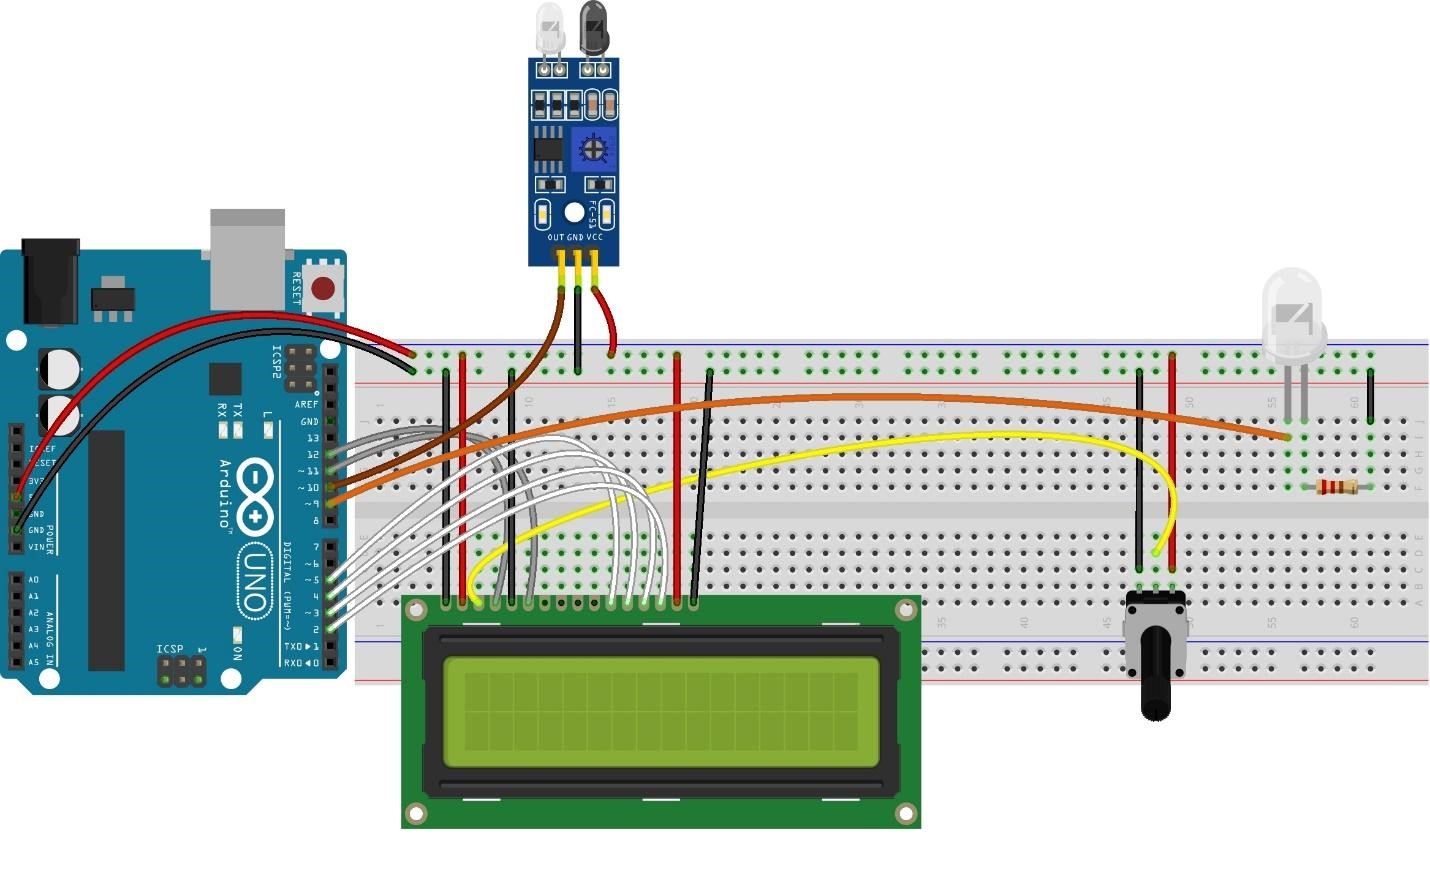
We have assembled the components starting by first placing the LCD LED and potentiometer on the breadboard. Next, we have connected the LCD with Arduino by assigning pins 5,4,3,2 of Arduino Uno to the data pins of the LCD using the white color wires and 12 and 11 pins for the register select and enable pin of the LCD using the gray color wires.
To adjust the brightness of the LCD, we have connected the potentiometer with LCD on its V0 pin using the yellow wire. To interface the IR module, we have connected its output using pin 10 of Arduino and it is represented by the brown wire connected to pin 10.
For indication of the visitors coming we have used the LED which is connected to the pin 9 of the Arduino using the orange wire. Moreover, to connect the components with the supply we have used the 5 volts and ground pin of Arduino and they are connected to the slots of the bread board dedicated for connecting the components with voltage supply.
Arduino code for creating a visitor counter using infrared (IR) module
The compiled Arduino code for the visitor counter project is given below:
LiquidCrystal lcd(12, 11, 5, 4, 3, 2);//assigning of Arduino to LCD
unsigned int count=0;// variable to count the number of visitors
int ir;// variable to store the value of the sensor
int vis;// variable that stores the number of visitors
#define irpin 10 // Arduino pin for IR sensor
#define LED 9// Arduino pin for LED
void setup()
{
Serial.begin(9600);// initializing the Serial communication
lcd.begin(16,2); // initializing the dimensions of the LCD
pinMode(irpin, INPUT);// assigning the sensor as a input to Arduino
pinMode(LED, OUTPUT);// assigning the LED as output of Arduino
lcd.setCursor(0,0);/* setting the place for the data that is to be displayed*/
lcd.print("visitor Counter");// displaying data on LCD
}
void loop(){
ir=digitalRead(irpin);// reading the output of the sensor
if(ir==HIGH){// if the sensor detects the any reflected radiation
digitalWrite(LED,HIGH);// turn on the LED
vis=count++;// increment in the number of visitors
lcd.setCursor(1,1);/* setting the place for the data that is to be displayed*/
lcd.print(vis);// displaying the number of visitors
}
else {
digitalWrite(LED,LOW);// otherwise keep the LED in off state
}
}
To compile the Arduino code first we have defined the necessary libraries and variables and then assigned the Arduino pins for the respective components.
In the setup section we have given the operating modes for the IR module and LED and in the loop section we have read the output of the IR module using the digitalRead() function.
Next to count the visitors we have used the if condition that validates if the output of the module is HIGH then increment in the number of the visitors and turn the on the LED otherwise keep the LED in off state and do not increment in the number of visitors.
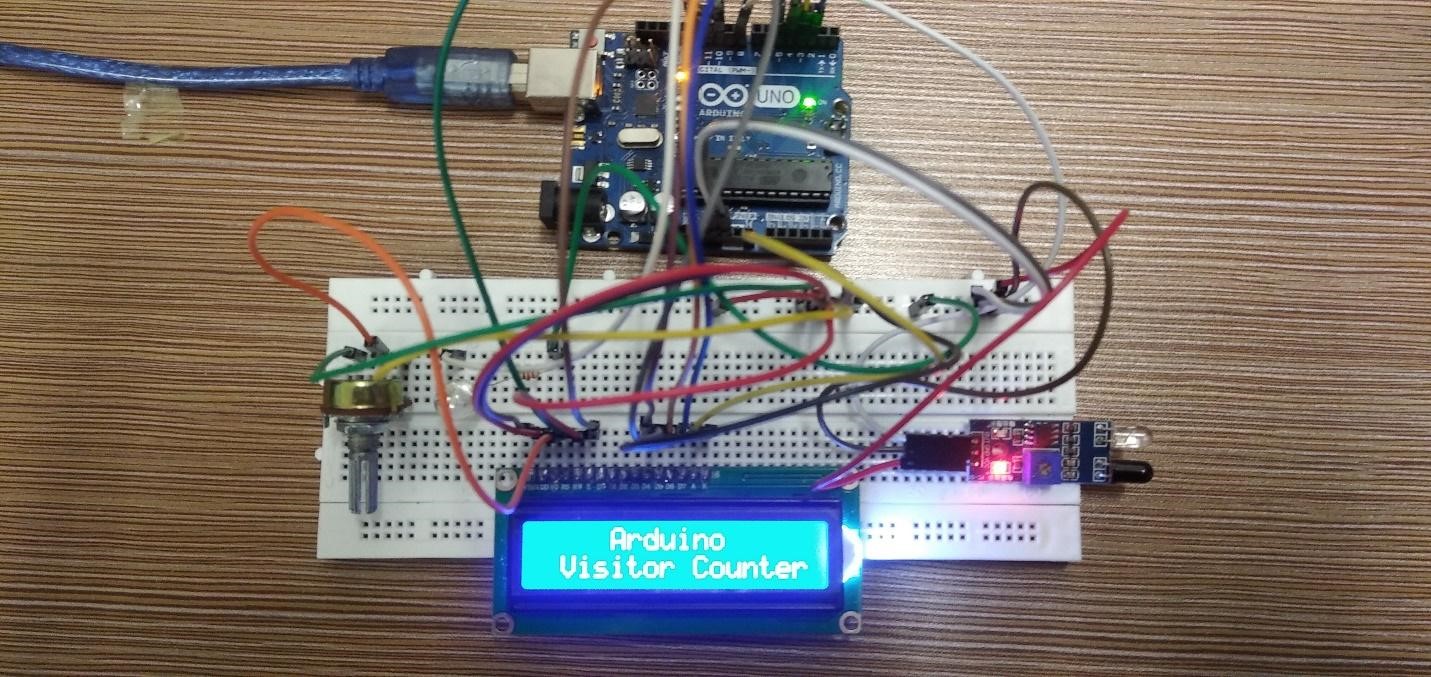
Hardware implementation of Visitor counter using IR module
Below is the figure of the hardware assembled on breadboard for creating the visitor counter:
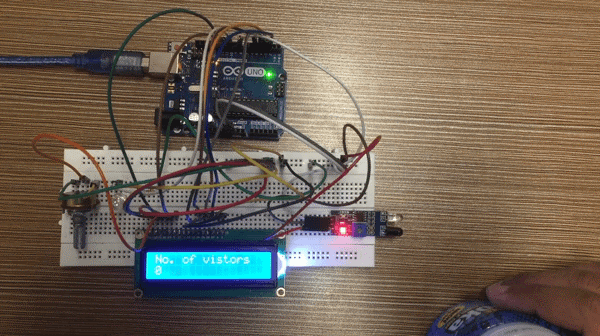
To demonstrate how the Arduino code works and counts the visitor we have posted an animation below:
Conclusion
The interfacing of multiple devices with microcontrollers has been made easy with the help of Arduino boards. So now one can create a large variety of projects using Arduino and learn more about circuits. In this write we have also created a project that counts the number of visitors and displays it on the LCD.