The Arduino is a very diverse platform which provides the user with a wide variety of options when designing a hardware for any type of project. On the hardware prospective Arduino provides a variety of microcontroller boards that can be selected on the basis of the level of the projects. The most popular among the Arduino boards is the Arduino Uno board because of its simplicity and compatibility. Furthermore, using the Arduino platform, we can interface different devices including sensors and modules with the microcontrollers. We have used Arduino Uno for creating a speed tracker system that measures the speed of any moving object using the infrared sensor module.
How to make speed tracker using IR module with Arduino Uno
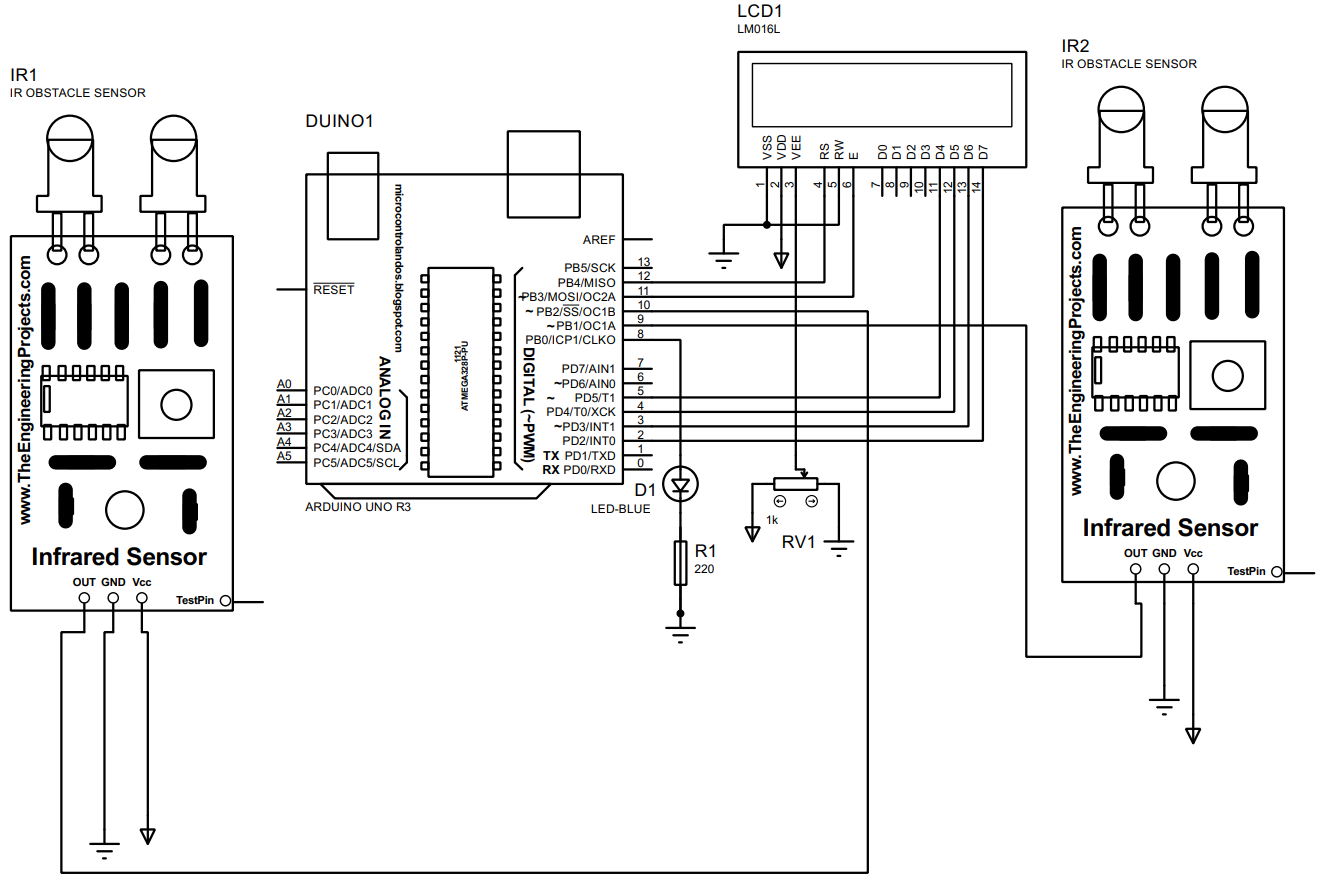
To measure the speed of a moving object we have used two IR modules with Arduino Uno. So when the object passes through both the modules we can measure the speed by taking the difference of the time at which the object passed through each module. We have posted the image for the schematic of the circuit designed for the speed tracking project.

Hardware assembly for Arduino Uno speed tracker using IR module
The list of required components for making speed tracker using the IR module with Arduino Uno is given below
- Arduino Uno
- Connecting wires
- 16×2 Liquid Crystal Display (LCD)
- 1 potentiometer
- 1 220 ohm resistor
- 1 LED
- 2 IR modules
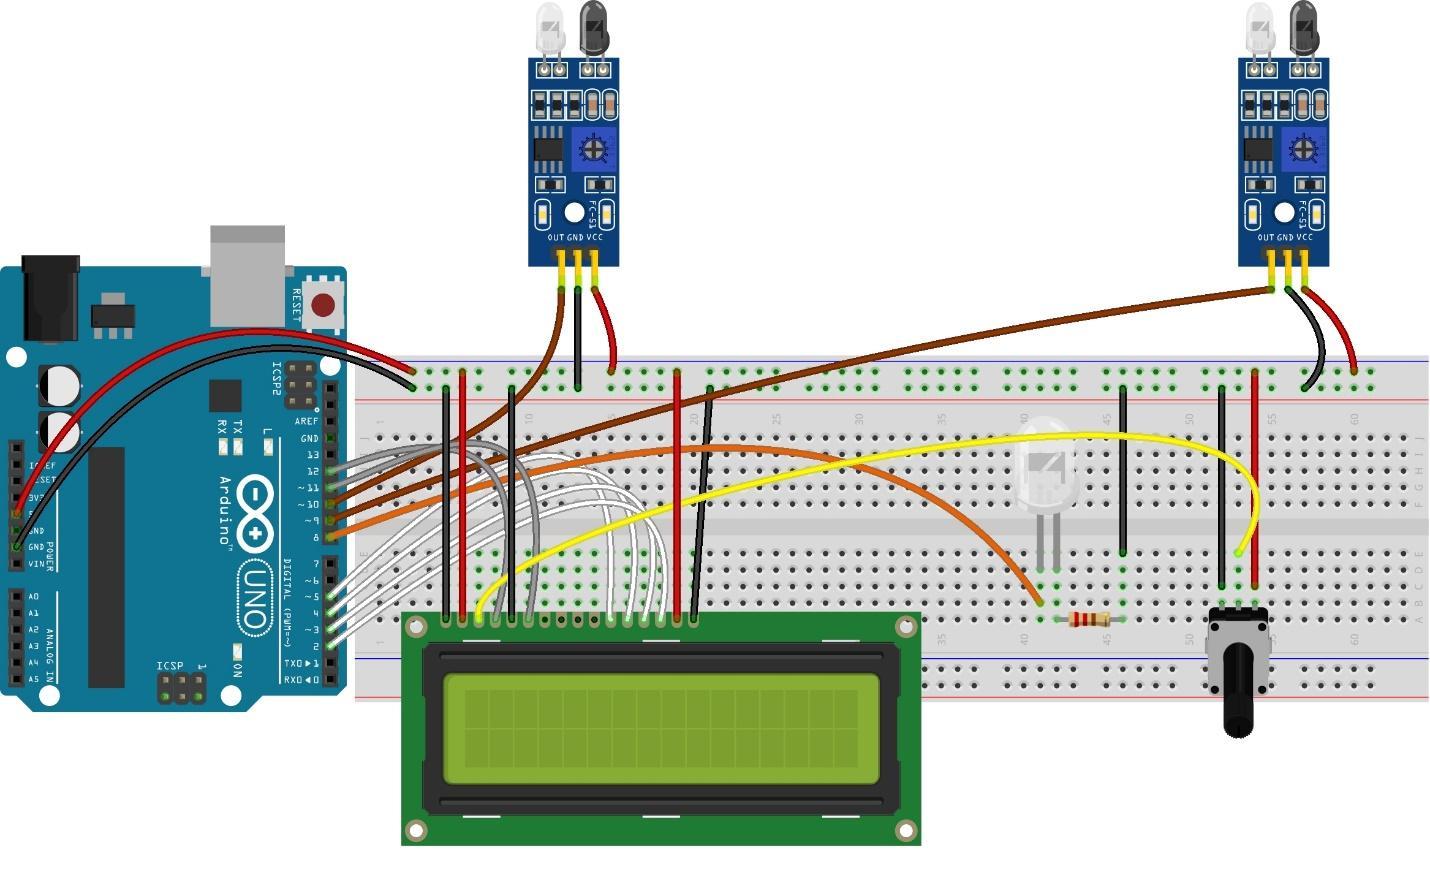
Below is the image of the hardware assembly which gives a clear understanding of the connections of the components listed above:
We have assembled the hardware in such a way that first we placed LCD, LED and potentiometer on the breadboard and then interfaced the LCD with Arduino Uno using its 5,4,3,2 as the data pins of the LCD using the white color wire. Next to adjust the brightness of the LCD we have connected the V0 pin of the LCD with the output of the potentiometer using the yellow color wire. Similarly after that we have connected the register select and the enable pin of LCD with Arduino and it is represented by the gray wire in the picture.
Coming to the IR modules we have connected the output of the IR modules with Arduino using its pin 10 and 9 and connections are done using the brown color wire and to connect the LED on the pin 8 of the Arduino we have used the orange color wire.
To connect the components with voltage supply we have used the 5 volt and ground pin of the Arduino Uno and connected it to the breadboard dedicated pins for supply and ground.
Arduino code for speed tracker using IR module
The Arduino code compiled for measuring the speed of any moving object is given below:
LiquidCrystal lcd(12,11,5,4,3,2);// assigning the Arduino pins for the LCD
const int led = 8;// Arduino pin for the LED
byte ir1 = 10;// Arduino pin for the first IR module
byte ir2 = 9;// Arduino pin for the second IR module
byte irVal1;// variable to store the value of first IR module
byte irVal2;// variable to store the value of second IR module
float diff; /*variable to save the difference of time between the two modules*/
float velocity; // variable for saving the speed value
unsigned long time1;/* variable for storing the time for first IR module*/
unsigned long time2;/* variable for storing the time for second IR module*/
float speedConst = 453.6; //distance between two IR modules in km/h
void displayLCD(){ // creating the function for displaying the data
lcd.setCursor(0, 0);/*setting the place for the data to be displayed*/
lcd.print("speed tracker");// data to be displayed
lcd.setCursor(0,3);/*setting the place for the data to be displayed*/
lcd.print("Speed:");// data to be displayed
}
void setup()
{
/*assigning the modes to the IR modules and LED*/
pinMode(ir1, INPUT);
pinMode(ir2, INPUT);
pinMode(led, OUTPUT);
Serial.begin(9600);// initializing the Serial communication
lcd.begin(16,2);// initializing the dimensions of LCD
lcd.setCursor(0, 0);/*setting the place for the data to be displayed*/
lcd.print("speed tracker");// data to be displayed
lcd.setCursor(0,3);/*setting the place for the data to be displayed*/
lcd.print("Speed:");// data to be displayed
}
void loop()
{
irVal1 = digitalRead(ir1); /*reading the output of the first IR module*/
irVal2 = digitalRead(ir2);/*reading the output of the second IR module*/
if (irVal1 == HIGH){ /* if the output is HIGH then note the time and turn the LED on */
time1 = millis();// saving the time for first module
digitalWrite(led, LOW);// turning the LED on
delay(30);
}
if (irVal2 == LOW){/* if the output if the second module is HIGH the calculate the difference of time and calculate the velocity */
time2 = millis();// saving the time for second IR module
diff = time2 - time1; /*calculating difference of time between the two IR modules*/
velocity = speedConst / diff;//get the Speed converted from mm/millis to km/h.
lcd.setCursor(6,3);/*setting the place for the data to be displayed*/
lcd.print(velocity);// data to be displayed
lcd.print("km/h");// data to be displayed
delay(1000); // time for which the data will be displayed on LCD
lcd.clear();// clearing the LCD
displayLCD();/* calling the display function to display the data*/
digitalWrite(led, LOW);// giving the LED LOW state
}
}
The Arduino code for the speed tracker is compiled in such a way that first we have assigned the pins of Arduino used for interfacing each component with Arduino Uno and then necessary variables are declared. Next we have given the modes of operation to each component and we have created a display function for the LCD for displaying the necessary data on the LCD.
To calculate the speed of the object we have first measured the distance between our two IR modules, in our case both modules are approximately 126 mm apart. Since the speed is measured in KM/h we have converted the distance in km/h from mm by using the following formula:
Next to calculate the speed of the object we have used the formula given below.
In the above formula the time is the difference of the time of both IR modules.
To summarize the working of the Arduino code we can say that when the output of the first IR module is HIGH that time will be saved using the millis() function and then when the output of the second IR module is HIGH its time is also saved. Next the difference of both times will be calculated and the value will be placed in the formula used for speed calculation and the calculated speed will be displayed on the LCD.
Hardware implementation for speed tracking with IR module using Arduino Uno
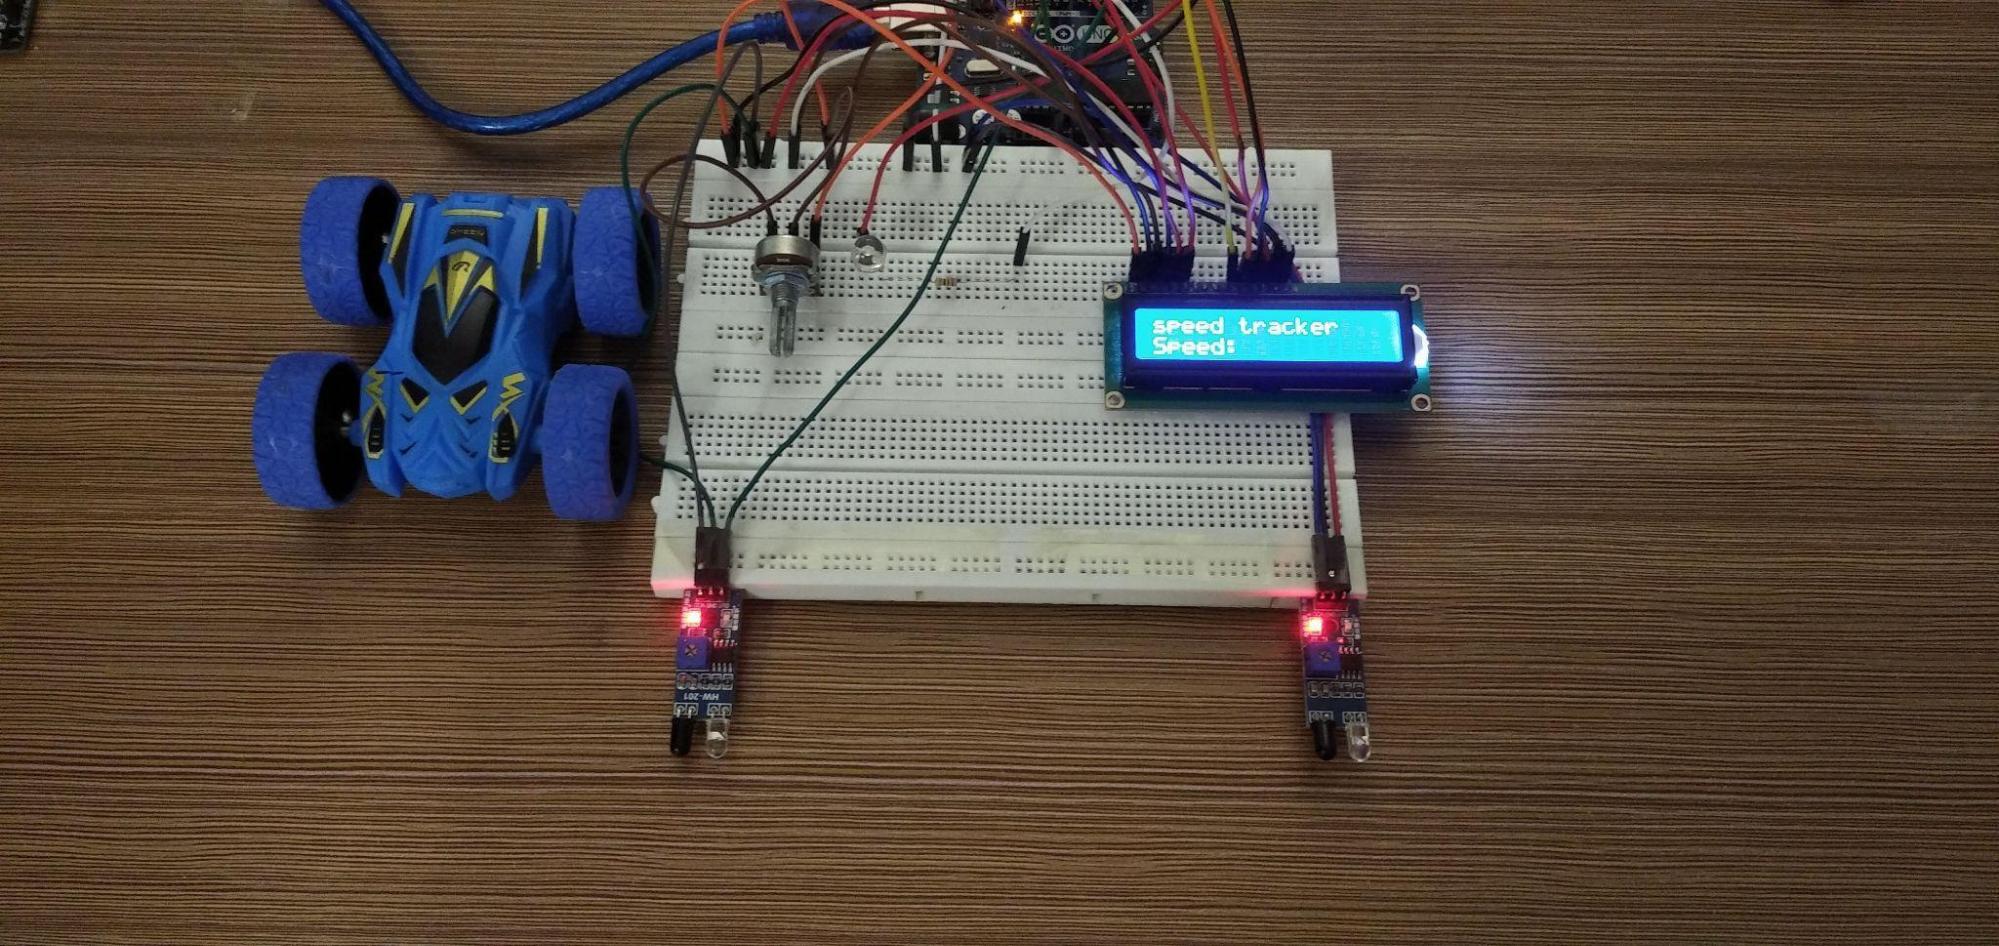
We have posted the image below to show the hardware assembled for the Arduino speed tracker project.
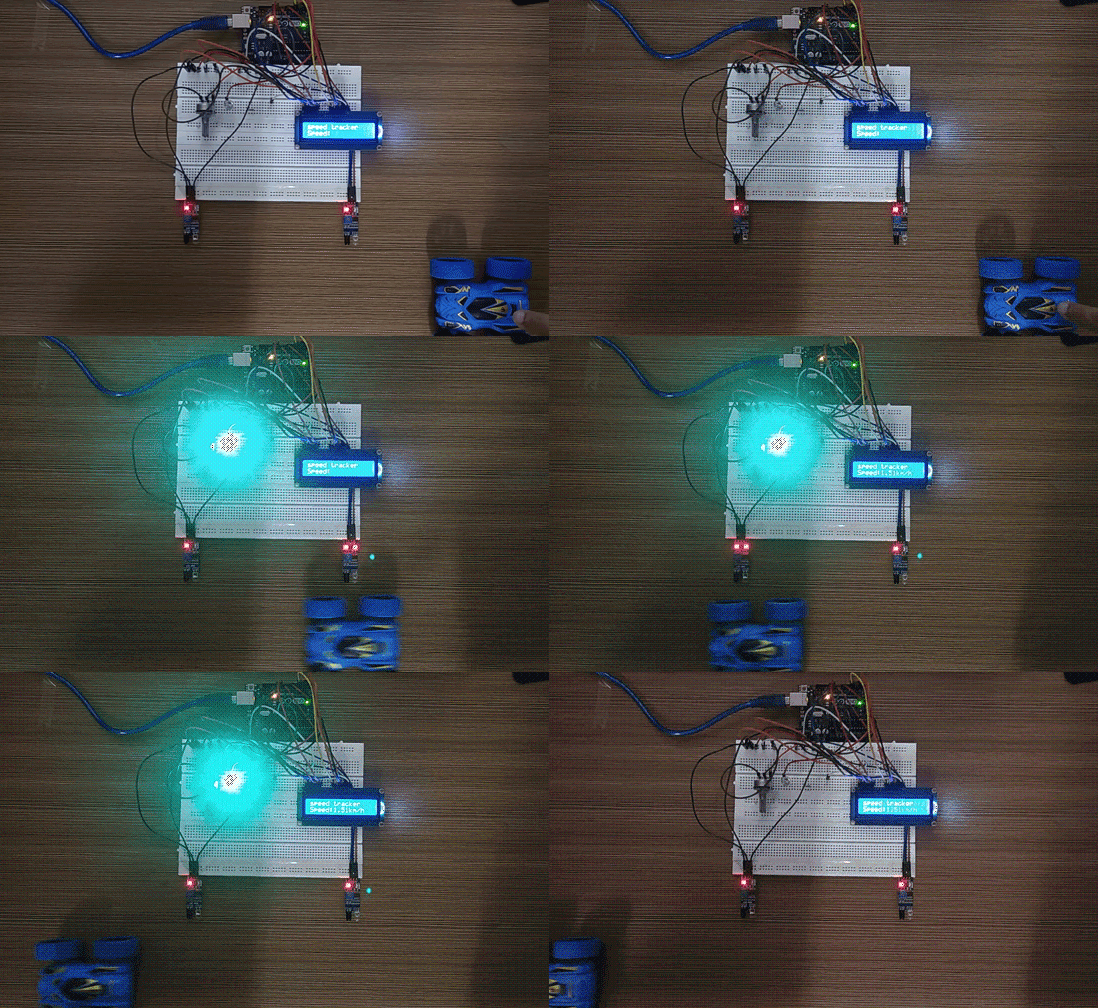
We have posted an animation to demonstrate the working of the how we can measure the speed of a moving object:
Conclusion
The infrared modules are mainly used for the detection of obstacles, measuring of speed , measuring of temperature and many other applications. These modules are easy to interface with Arduino boards and can be used in a vast number of projects for different applications. We have also used the infrared modules to calculate the speed of a moving object using the Arduino Uno.


