What is a Raspberry Pi 4
The Raspberry Pi 4 is a computer board launched by the Raspberry foundation and is used to build projects like automation, security alarms as well as for robotics. The Raspberry Pi 4 contains the GPIO pins embedded on the board and using the Python code we can easily utilize them for different applications.
The Raspberry Pi was initially launched for the understanding of the computer concepts at the school level but later on, because of its popularity and improvements in the development of the board, it is being used for many electronic projects.
Intruder security alarm using the PIR sensor and Raspberry Pi
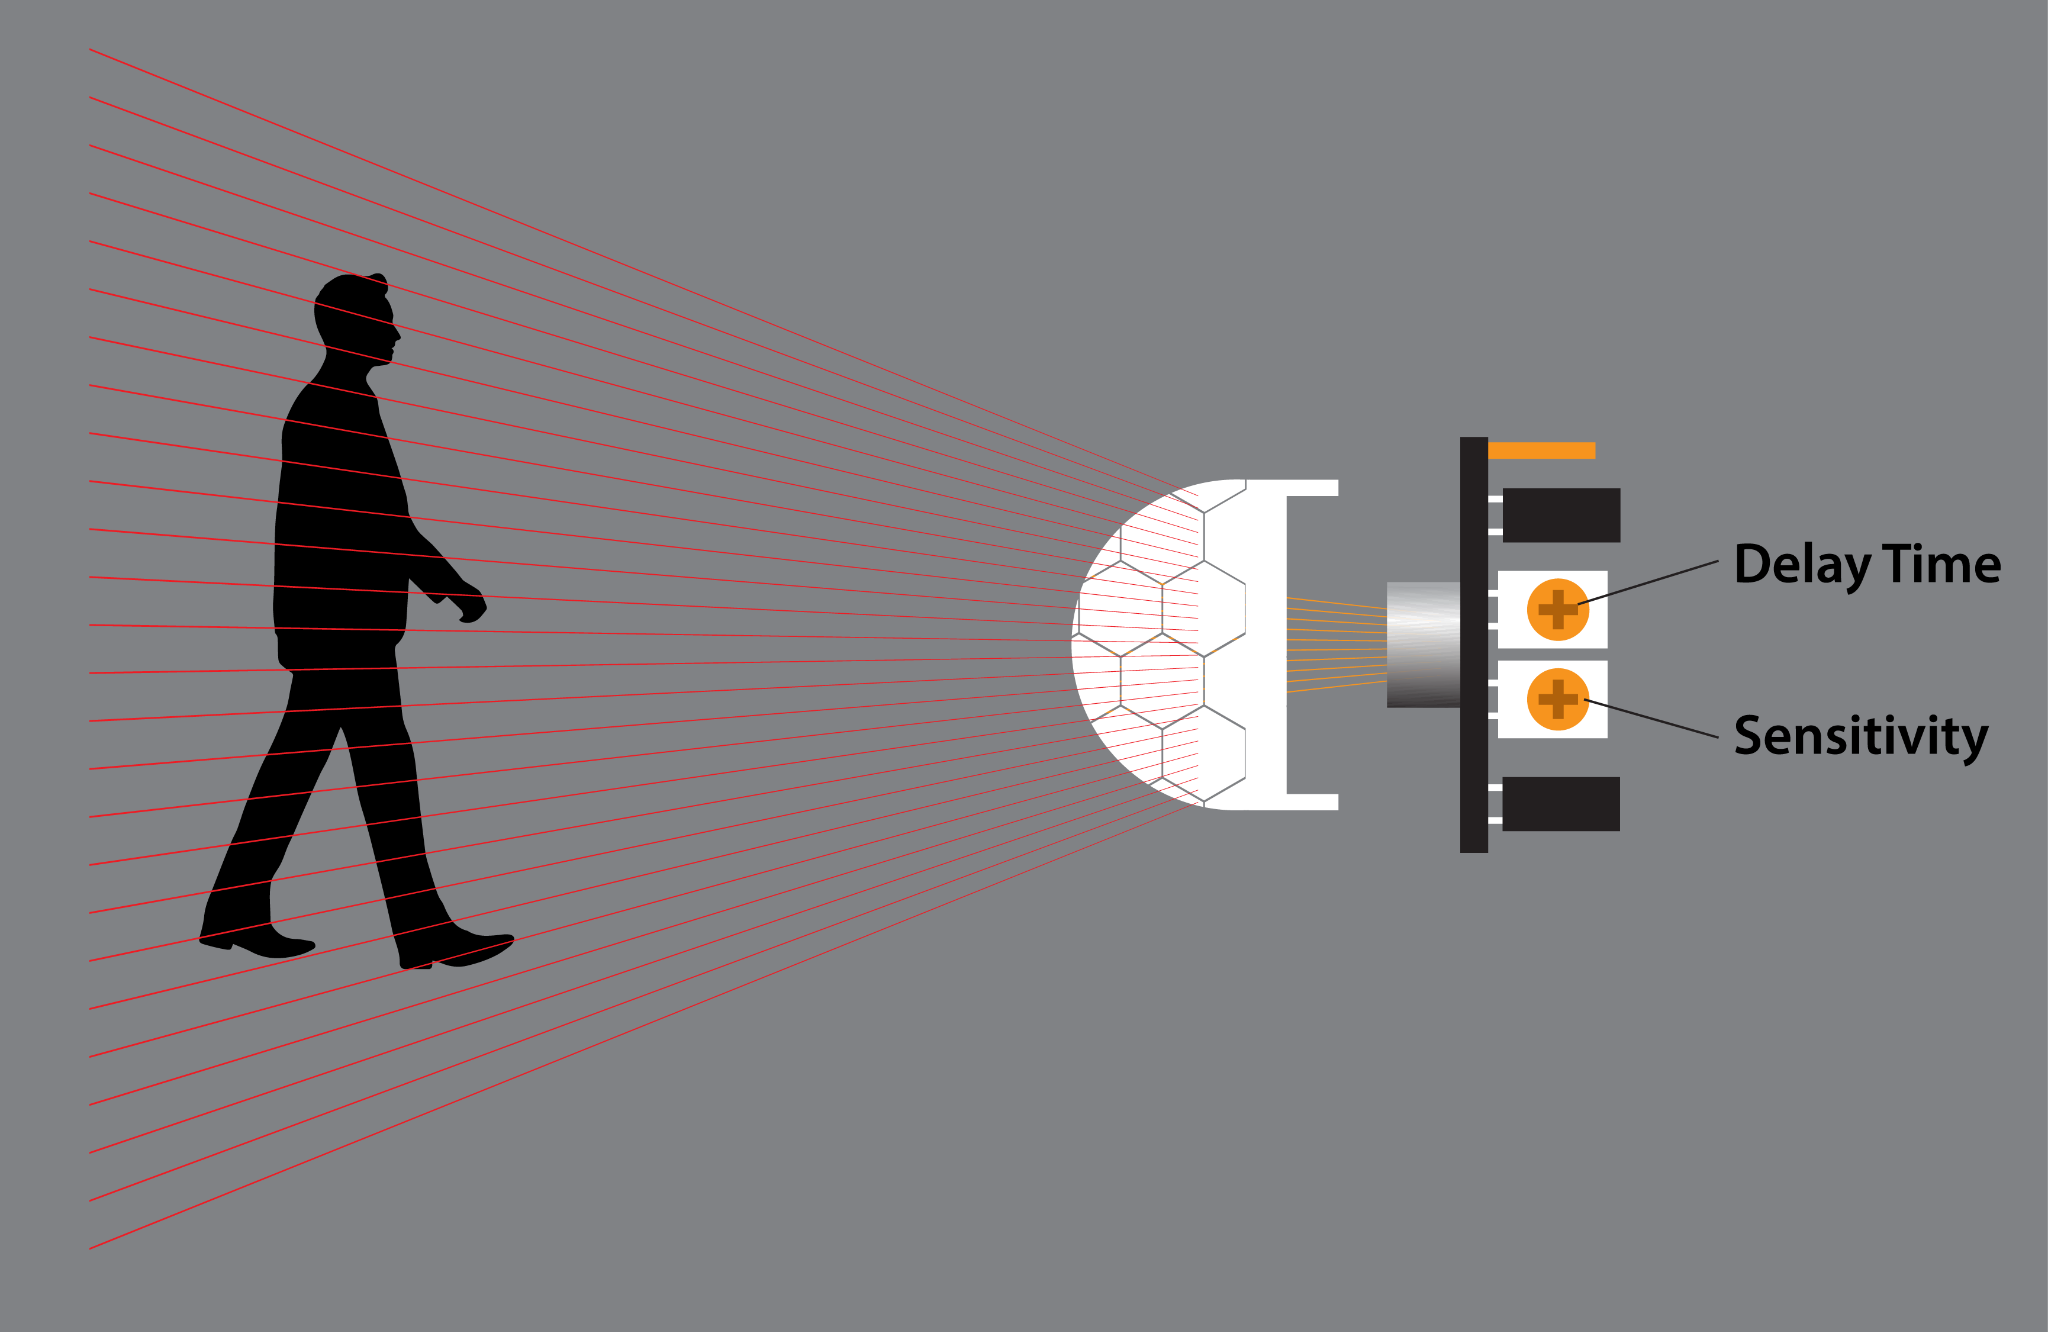
An intruder alarm is used for security purposes as it is installed in the surroundings of doors and windows so that when the movement is sensed by the PIR sensor, it generates the alarm about the unauthorized motion in the sensitive places. For those who don’t know about the PIR sensor, the Passive Infrared (PIR) sensors are used for detecting the motion of human beings, animals, or even any other object.
How can we make an intruder security alarm with Raspberry Pi 4
To make an intruder security alarm using Raspberry Pi, we need the following electronic components:
- PIR sensor module
- Breadboard
- Jumper wires
- LED
- Piezoelectric buzzer
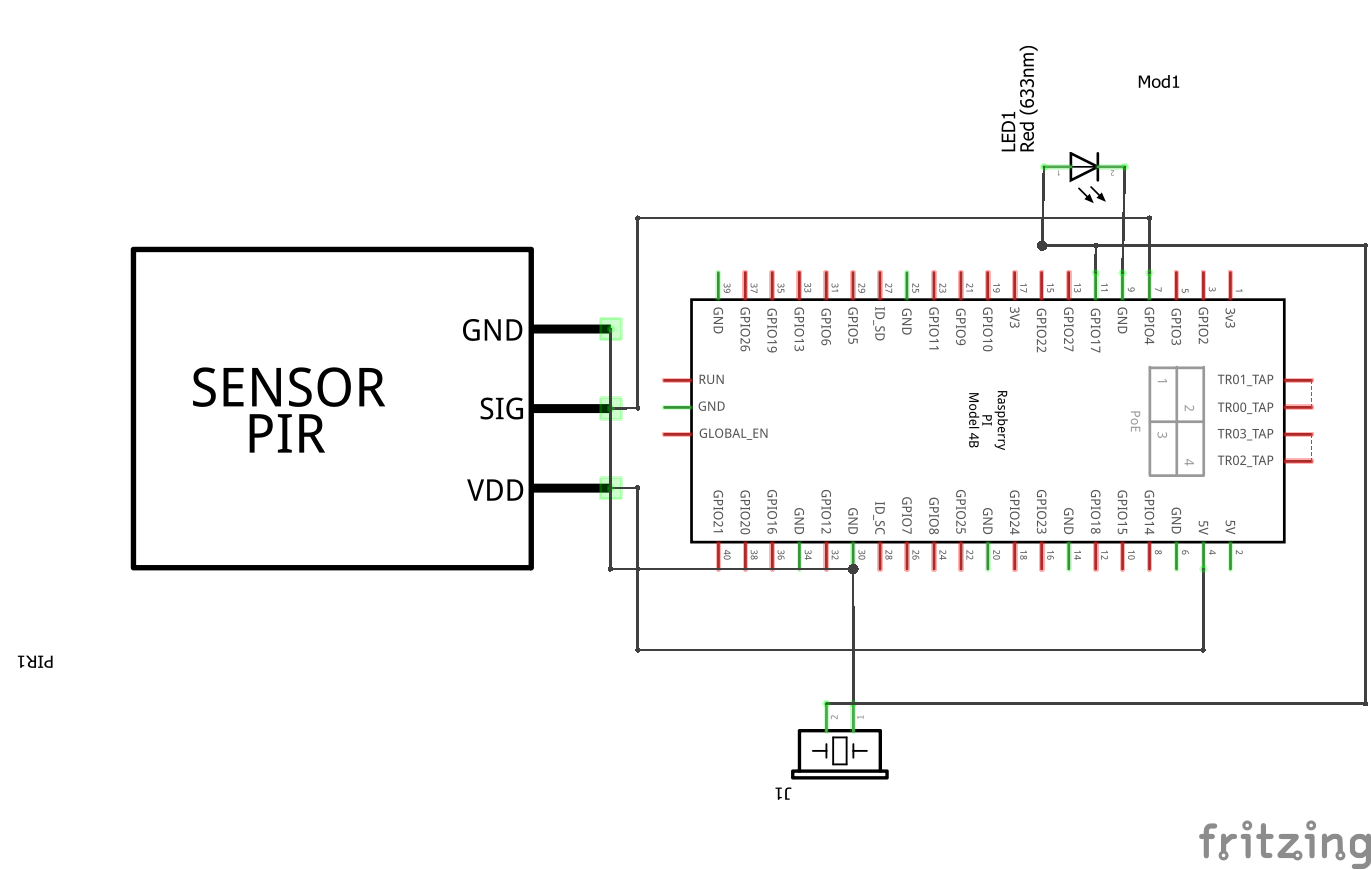
The schematic circuit diagram of an intruder security alarm using the Raspberry Pi 4 will be:
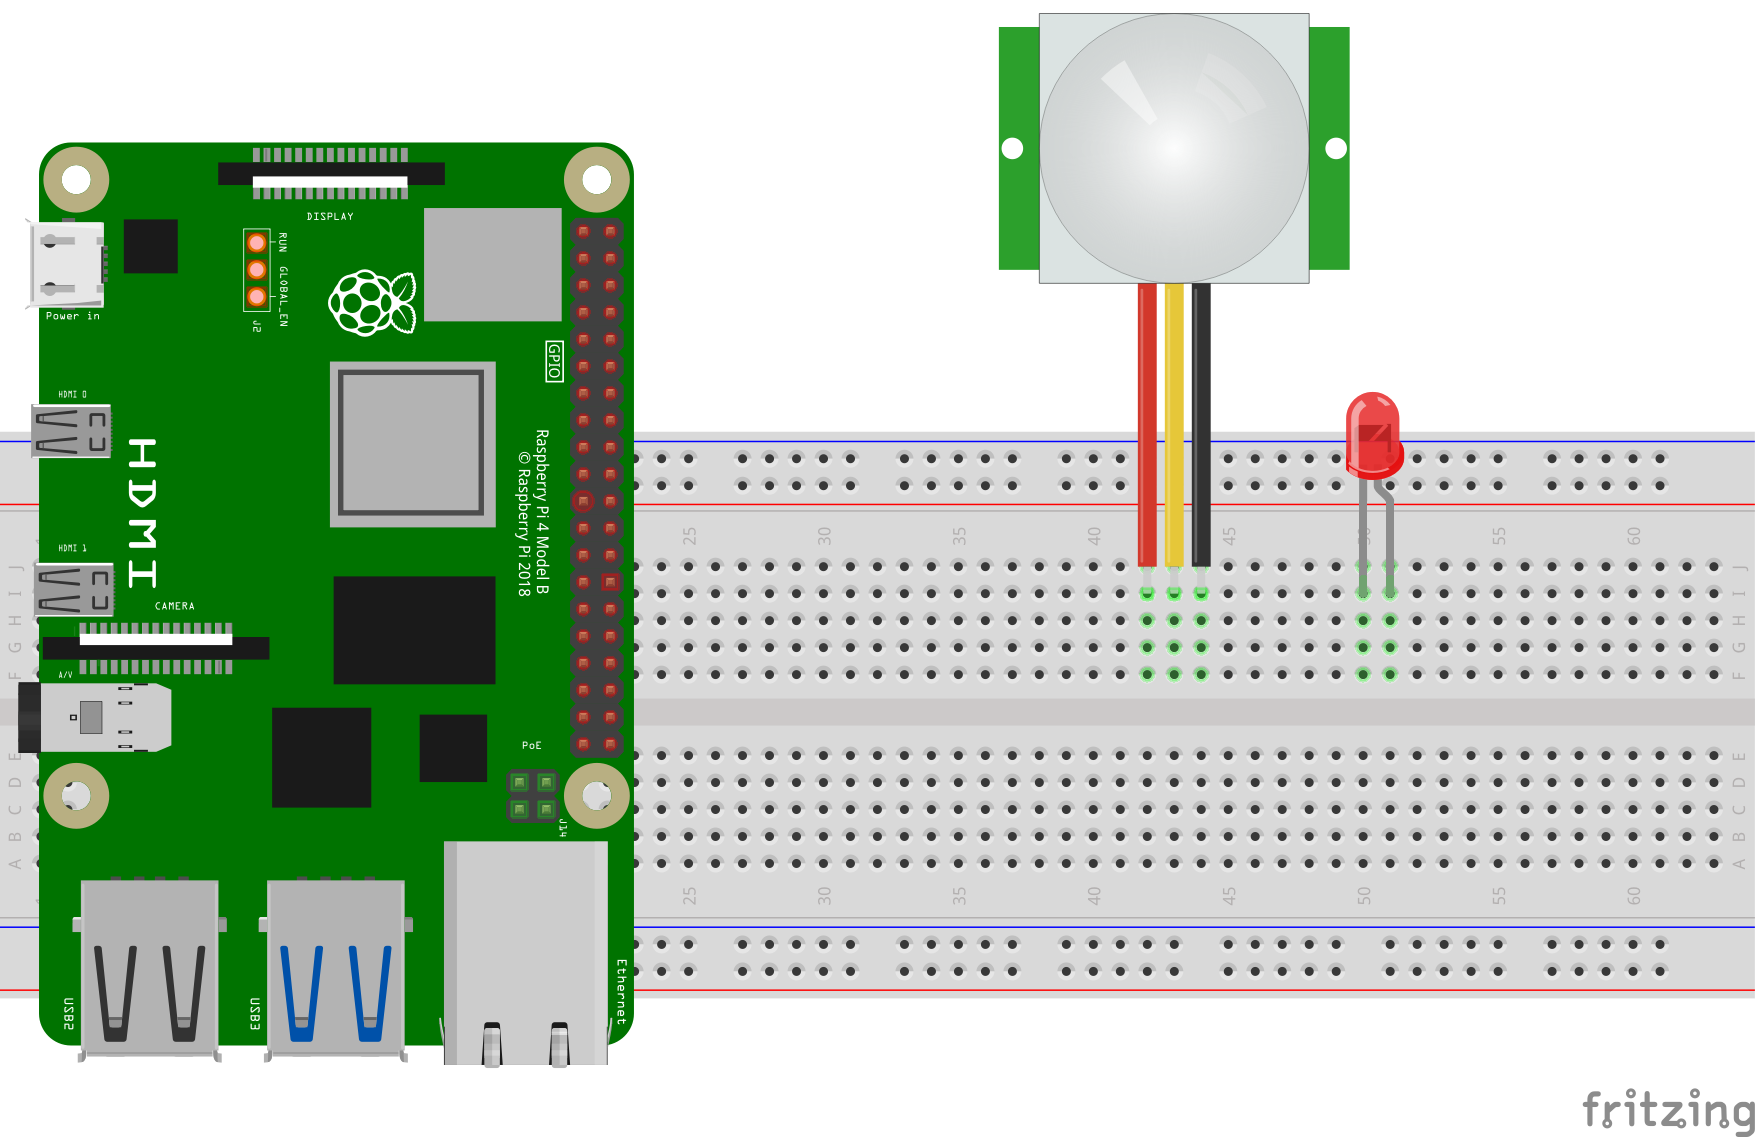
To configure the circuit of an intruder security alarm according to the above circuit diagram, we will first place a PIR sensor and a Raspberry Pi 4 on the circuit board:

Please note that the PIR sensor has three terminals, black one is for ground, the middle yellow one is for the output, and the red one is for the power supply and next, we will place an LED on the breadboard:
Then we will placed the piezoelectric buzzer with the LED on the breadboard:

Now, we will make the connections of all the modules with the Raspberry Pi according to the table given below:
| Ground of PIR sensor | Connect it with the series short ports (-ve) |
| Output of PIR sensor | Connect it with the GPIO pin 4 of Raspberry Pi 4 |
| Vcc of PIR sensor | Connect it with the other series short ports (+ve) |
| Cathode of LED | Connect it with the series short ports (-ve) |
| Anode of LED | Connect it with the series short ports (+ve) |
| Cathode of piezoelectric bulb | Connect it with cathode of LED |
| Anode of piezoelectric bulb | Connect it with the GPIO pin 17 of Raspberry Pi 4 |
| Series short port of breadboard (-ve) | Connect it with ground port of Raspberry Pi 4 |
| Series short port of breadboard (+ve) | Connect it with “5 volts” port of Raspberry Pi 4 |
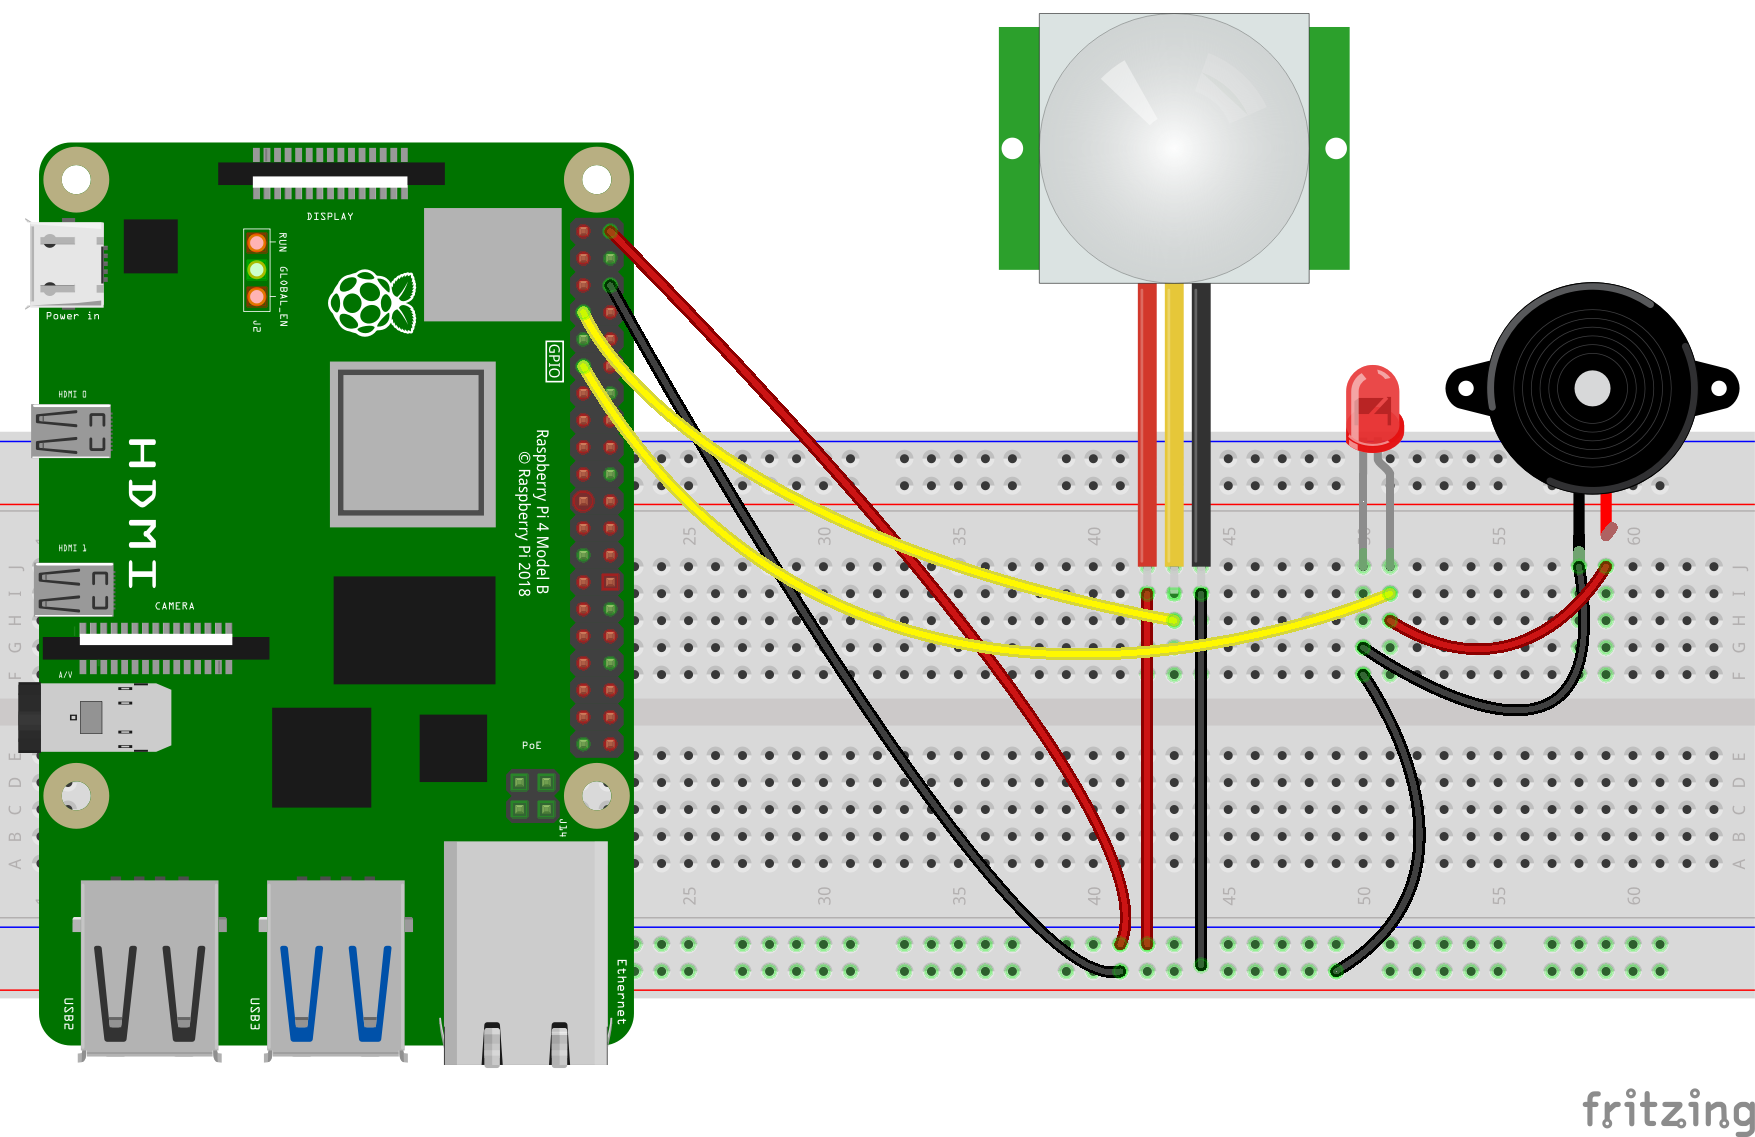
The complete circuit assembled on breadboard:
What is the Python code for an intruder security alarm with Raspberry Pi
Once all the connections are done, open the terminal and using the nano editor make a file with name “python my_pir_code.py” using the command:

Type the following code in the opened file:
from gpiozero import MotionSensor # import the MotionSensor library
led = LED(17) # declare the GPIO pin 17 for the led output
sensor = MotionSensor(4) # declare the GPIO pin 4 as motion sensor output
led.off() # turn off the LED
while True: # initialize a infinite while loop
sensor.wait_for_motion() # it will wait for the motion detection
led.on() # turn on the LED
sensor.wait_for_no_motion() # it will wait for the motion detection
led.off() # turn off the LED

What is in the above Python code
We have first imported two libraries of “LED” and “MotionSensor” from the gpiozero. Then declare the GPIO pin 17 of Raspberry Pi for LED and GPIO pin 4 for the PIR sensor and save the values in led and sensor variables respectively. Finally, in the infinite while loop, turn on the led if the motion is detected and turn off it when there will be no motion detected.
Note: The piezo buzzer is connected parallel to the LED, so there is no need to write code for the buzzer as it will turn on and off with the operation of the LED.
The working of the intruder security alarm is:
What should we do if the LED is remain turned on
There is no need to be worried that your configured project is not working properly, place the PIR sensor in front of you and rotate its knobs to the extreme left, this will reduce the delay time and the sensitivity to the lowest value. Once done with it, connect the Vcc pin of the PIR sensor and let it aside for one minute as it will take time to energize after one minute connect the output pin to the GPIO pin 4 of the Raspberry Pi and enjoy the operation of the project.

Conclusion
The intruder security alarm is used to detect the motion in its surroundings with the help of a PIR sensor. This project is very useful to apply in the sensitive doors or lockers so that when an unauthorized person tries to enter that room, the alarm will notify the concerned security personnel about that unauthorized motion. In this write-up, we have made the intruder security alarm with the Raspberry Pi using a PIR sensor.