How to make non touch doorbell using distance sensor with Arduino Uno
To make the doorbell which does not require any human interface we have used an ultrasonic distance sensor (HC-SR04) by giving a minimum distance to detect the hand of the visitor. When the visitor brings his/her hand within the defined range of the sensor it will trigger the doorbell.
In order to create the non-touch doorbell, we have designed a circuit for it and for that we have to shortlist the components that are required to design the circuit for the non-touch doorbell.
- Distance sensor (HC-SR04)
- Breadboard
- Buzzer as a doorbell
- Jump wires
- Arduino Uno
- LED
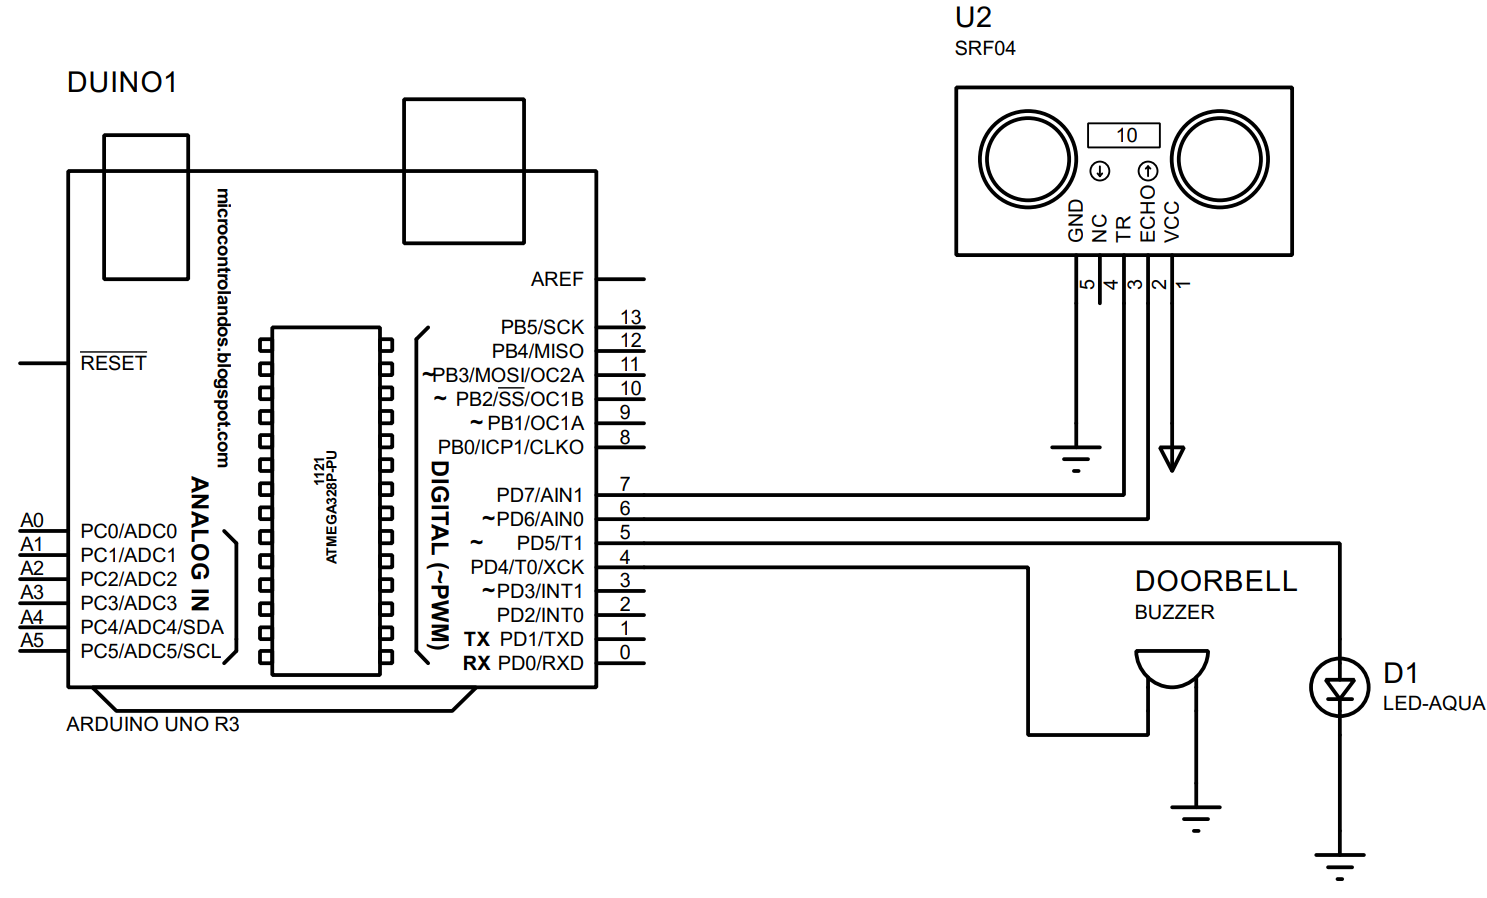
After finalizing the necessary components we can now create a circuit and we have given the schematic below that shows the design of the circuit.
Hardware assembly for creating a touchless doorbell using Arduino Uno
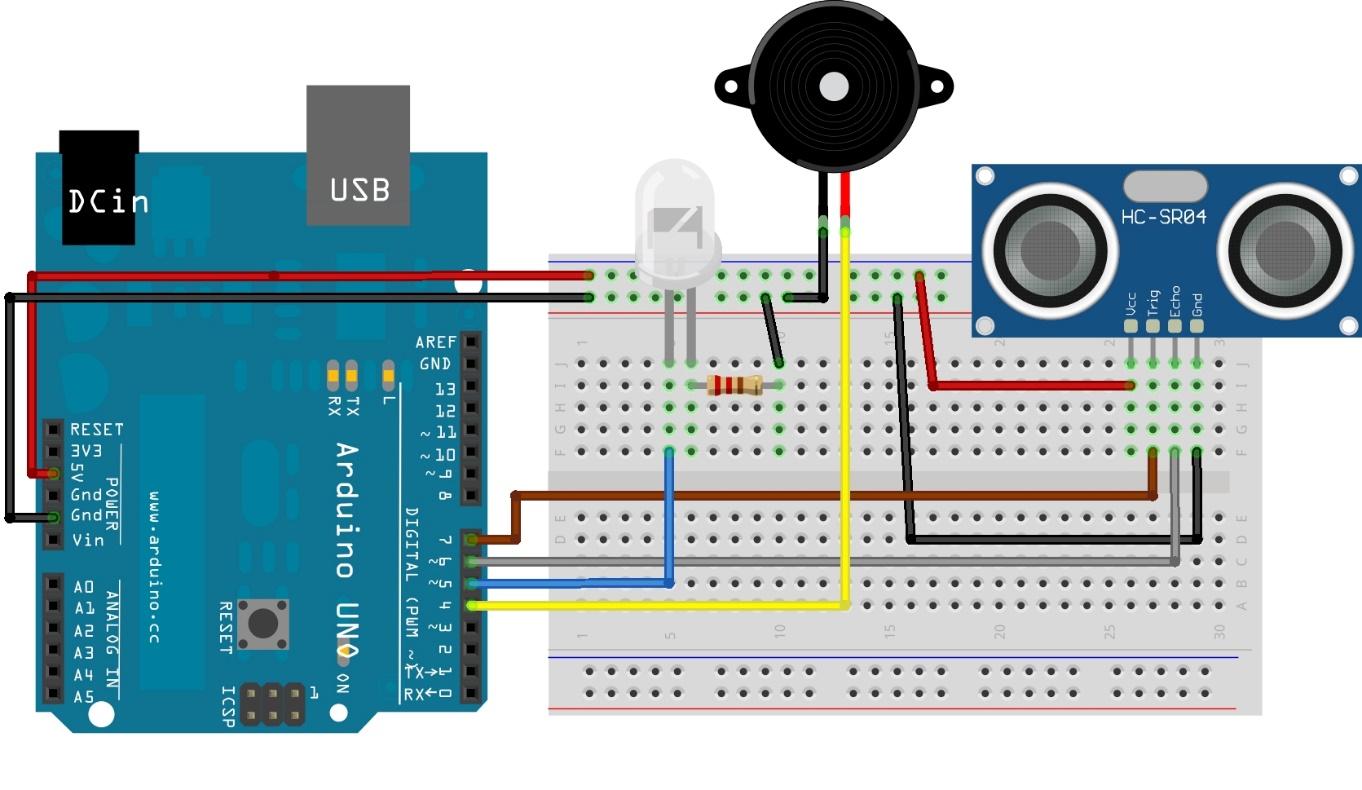
To implement the circuit design given above we have to create the hardware assembly as shown below.
The hardware assembly gives the idea of what the circuit will look like on the actual hardware and also it further clarifies the connection of each component used in the circuit.
We have used the distance sensor (HC-SR04) to detect the hand and to connect it with Arduino we have used pin 6 and 7 and the connection is represented by the brown and gray wire. If you want to understand the working of the distance sensor you must first check interfacing distance sensor with Arduino Uno.
To connect the buzzer with Arduino we have used the Arduino pin 4 and the connection is represented by the yellow wire. Similarly, we have also used the LED for indication which is connected to the pin 5 of the Arduino using the blue color wire.We have supplied 5 volts to the topmost pin rows of the breadboard using the 5 volt pin of Arduino and from there we have connected each component with supply.
Arduino code for making the touchless doorbell using distance sensor with Arduino Uno
To create a doorbell that does not require any human interface we have programmed the microcontroller using the Arduino IDE and the respective code is given below:
#define led 5 //assigning Arduino Pin for LED
#define buzzer 4/*assigning Arduino Pin for buzzer */
int duration;
void setup(){
/* assigning pin modes for the components */
pinMode(trig, OUTPUT);
pinMode(echo, INPUT);
pinMode(led, OUTPUT);
pinMode(buzzer, OUTPUT);
}
void loop()
{
long dist; /* defining the variable that will store the distance value*/
digitalWrite(trig, LOW); // assigning LOW state to trigger pin
delayMicroseconds(2); /*trigger pin will be on LOW state for 2 microseconds*/
digitalWrite(trig, HIGH);// assigning HIGH state to trigger pin */
delayMicroseconds(10); /* for 10 microseconds trigger pin will remain in HIGH*/
digitalWrite(trig, LOW); // assigning the trigger pin the LOW state
duration = pulseIn(echo, HIGH);/*detecting the pulse in the HIGH state of sensor */
dist = (duration / 2) / 29.1; /* formula for calculating the distance in cm*/
if (dist <= 10) // if hand comes in 10 cm range of sensor
{
digitalWrite(led, HIGH);/* turn the LED on */
digitalWrite(buzzer, HIGH);/* turn in the doorbell*/
delay(700);/* the doorbell will remain on till 7 milliseconds*/
digitalWrite(led,LOW);/* turn off the LED*/
digitalWrite(buzzer, LOW);/* turn off the doorbell*/
delay(5000);/* the doorbell will remain off till 5 seconds after first ring*/
}
else { /* if there is no hand in the 10 cm range*/
digitalWrite(led, LOW);/* keep the LED off*/
digitalWrite(buzzer, LOW); /* keep the doorbell off*/
delay(700);
}
}
The compiled Arduino code for making the contact-less doorbell is quite simple. First we have assigned the pins for each component and declared some variables for storing the values. After that we assigned modes to each component and in the loop section of the sketch, we first generated the pulse using the trigger pin of the sensor.
To detect the incoming pulse, we have used the pulseIn() function and then we have calculated the distance in centimeters using the following formula:
To understand how we have used this formula read more from here. To turn the doorbell on we have used the if else conditions so that when the distance is less than 10 cm turn the LED and the doorbell on. But if the person places his hand continuously within the range of 10 cm, then the doorbell will also ring continuously so to avoid that we have to turn off the doorbell for 5 seconds after its first-time ring.
Hardware implementation for designing non touch doorbell using Arduino Uno
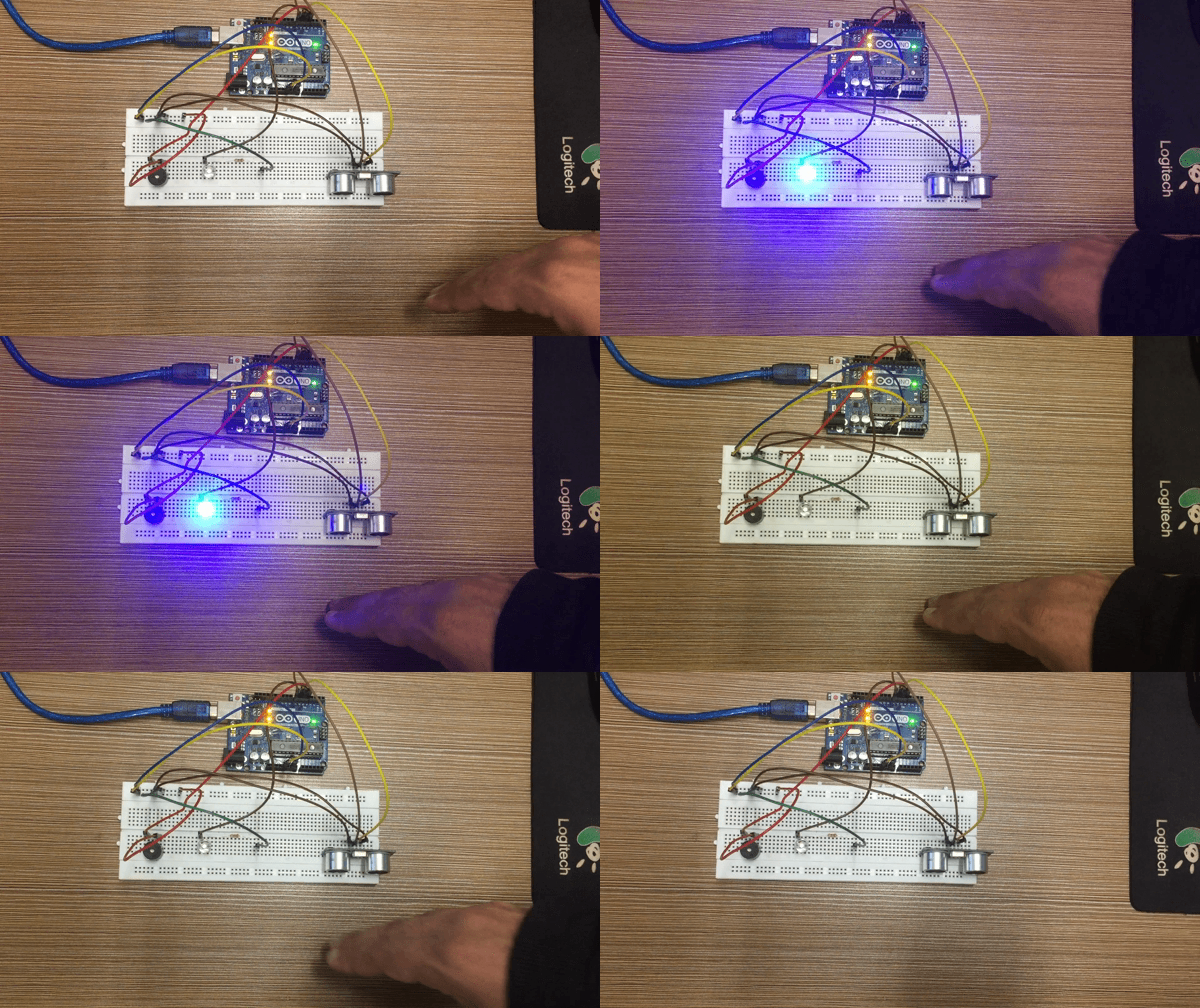
We have implemented the hardware assembly described above on the actual hardware that can be seen in the image below:
Below the animation shows the working of the sketch compiled for creating the non-touch doorbell:
Since we have used a buzzer as the doorbell in this project, we can also use the conventional doorbell. To run the doorbell on an AC supply you have to use a relay that will work according to the output of the sensor. The hardware assembly to make the AC doorbell contactless is given in the image below
Conclusion
The trend towards making devices that require no human interface has been increased recently due to ongoing pandemic and there are a number of devices that can be made functional without human interface. One of the most common devices is the doorbell and this device is also one of the frequently used devices in our daily routine. So, we have created a non-touch doorbell using the distance sensor with Arduino Uno. We have also provided the Arduino sketch used to program the microcontroller and simulation for the hardware that we have assembled.


