What is Smoke detection sensor (MQ-2)
To detect smoke the most commonly used model of the smoke sensor is the MQ-2. It is also called gas type metal oxide semiconductor as its detection is based on the change in the resistance of the material used for sensing the smoke.
The sensing material used in this sensor is made up of ceramic that is aluminum oxide and it has the coating of tin oxide which is sensitive to the combustible gasses.
The operating voltage for this sensor is 5 volts and can detect the gasses having concentration ranging from 200 to 10000 ppm(parts per million).
The sensor works in such a way that when the electrons on the surface of the sensing materials are not bonded with atoms of oxygen in the air the current in the circuit starts to flow and it turns the alarm.
To further elaborate we can say that in the normal condition the concentration of oxygen is higher, so the electrons remain bonded with the atoms of oxygen. As soon as there is any other gas the concentration of oxygen decreases. The atom of oxygen gas gets bonded with atoms of the other gasses which regulate the flow current of the sensor which in turn turns on the alarm.
This sensor comes with the potentiometer through which the sensitivity of the sensor for detecting the smoke can be adjusted. Similarly, there is a small LED on the module which will turn on when the sensor detects any gas.
This sensor comes with the 4 pins and the pin configuration of the sensor is given in the table below:
| Pin | Description |
|---|---|
| 1-(Vcc) | To supply the voltage to gas sensor |
| 2-(GND) | Pin for for grounding the gas sensor |
| 3-(D0) | Pin which tells if gas is detected |
| 4-(A0) | Pin used for knowing the concentration of the gas |
Interfacing the smoke/gas sensor with Arduino Uno
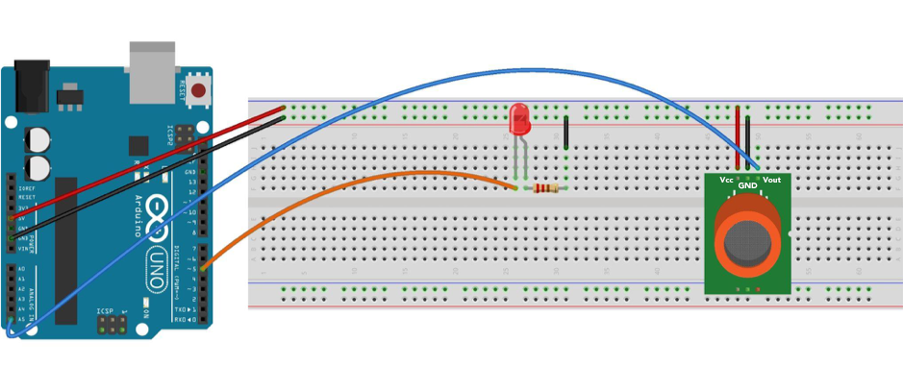
To interface the smoke sensor with Arduino the circuit schematic of the circuit is given as:
Hardware assembly for interfacing smoke/gas sensor with Arduino
The components used for interfacing the gas sensor are:
- Arduino Uno
- Breadboard
- MQ-2 gas/smoke sensor
- Connecting wires
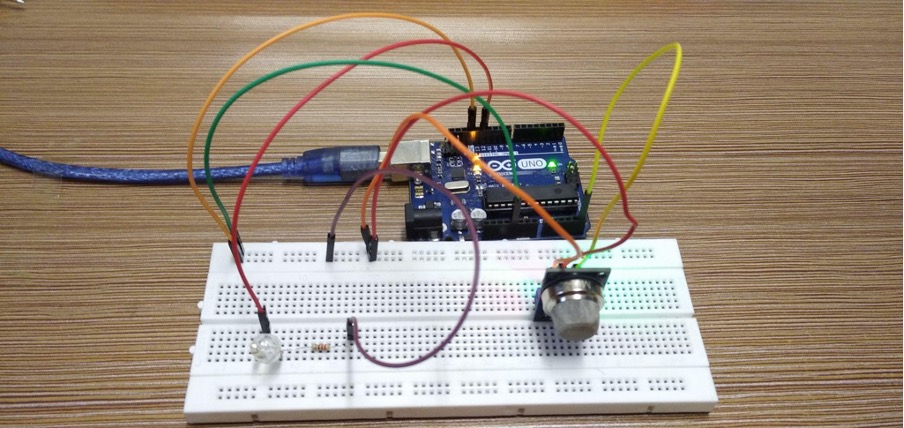
For assembling the hardware first we placed the gas sensor and LED on a breadboard and after that using the connecting wires we interfaced the components with the Arduino Uno. We have provided an image of the hardware assembly for interfacing the smoke sensor with Arduino to get a clear understanding for connection of the components.
Arduino code for interfacing smoke/gas sensor with Arduino Uno
The Arduino code compiled for interfacing the smoke sensor with Arduino is given below:
int MQ2A0 = A5;// analog pin of Arduino for the smoke sensor
// Your threshold value
int LEDvalue = 400;// value after which the will turn the led
void setup() {
pinMode(Led, OUTPUT);// setting LED as an output for arduino
Serial.begin(9600);//initializing the serial communication
}
void loop() {
int MQ2 = analogRead(MQ2A0);// reading the value of
Serial.print("Sensor A0: ");
Serial.println(MQ2);
// Checks if the LED value is reached
if (MQ2 > LEDvalue)
{
digitalWrite(Led, HIGH);// turning on the LED
}
else
{
digitalWrite(Led, LOW);// turning of the LED
}
delay(100);//time after which the loop function will start again
}
The gas sensor is connected to the analog pin of the Arduino at A5 and LED is connected to pin 5 of the Arduino and these pins are first defined in the code. Furthermore, we have declared the analog value of the smoke sensor at which the LED will turn on.
In the setup function the Serial communication is initialized by giving the baud rate and then the pins modes for the sensor and LED are given.
In the loop function first the status of the output pin of the sensor is read using the analogRead() function and then we have to use the if else conditions.
If the value is greater than 400 then turn the alarm or turn the LED on and if the value of the output is less than 400 then keep the LED in off state.
Simulation for interfacing smoke sensor with Arduino Uno
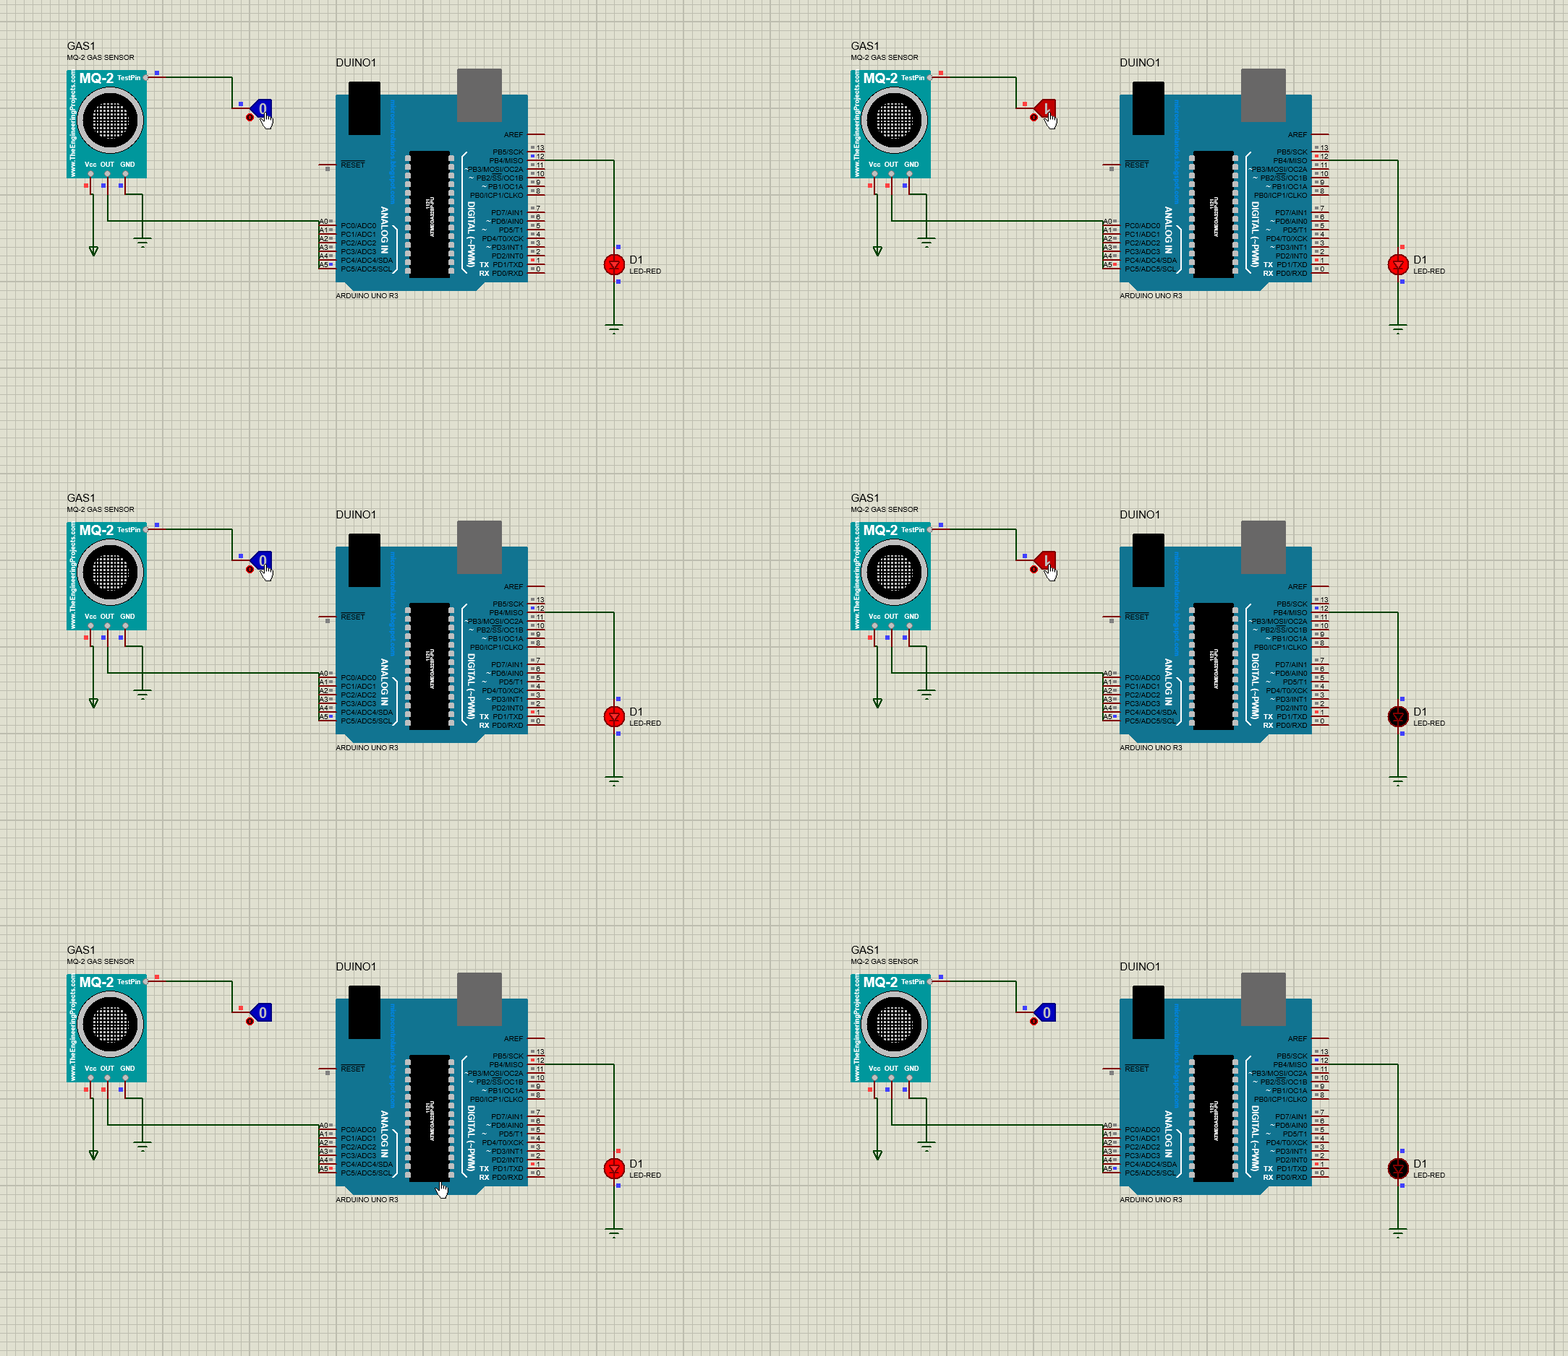
Here we have used a simulation software in which we are giving the input to the sensor on its test pin for demonstration purposes.
When we give one as an input you can see that the LED is turned on
Hardware implementation for interfacing the smoke with Arduino Uno
The image posted above is the hardware assembled for interfacing the smoke sensor with Arduino.
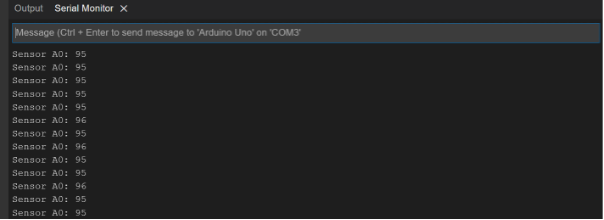
At this stage when the sensor value has not reached the trigger value the following the output at serial monitor.
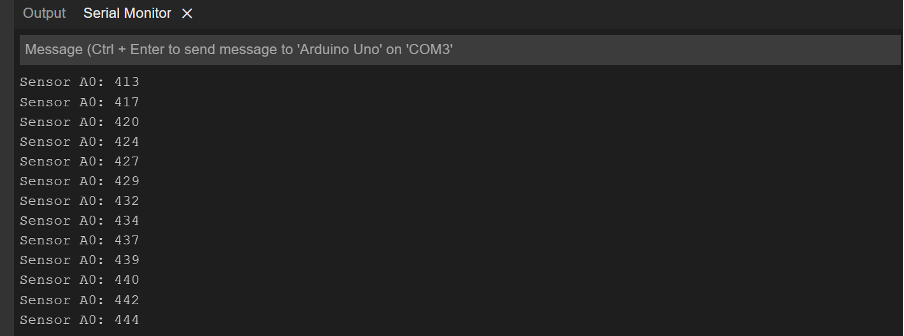
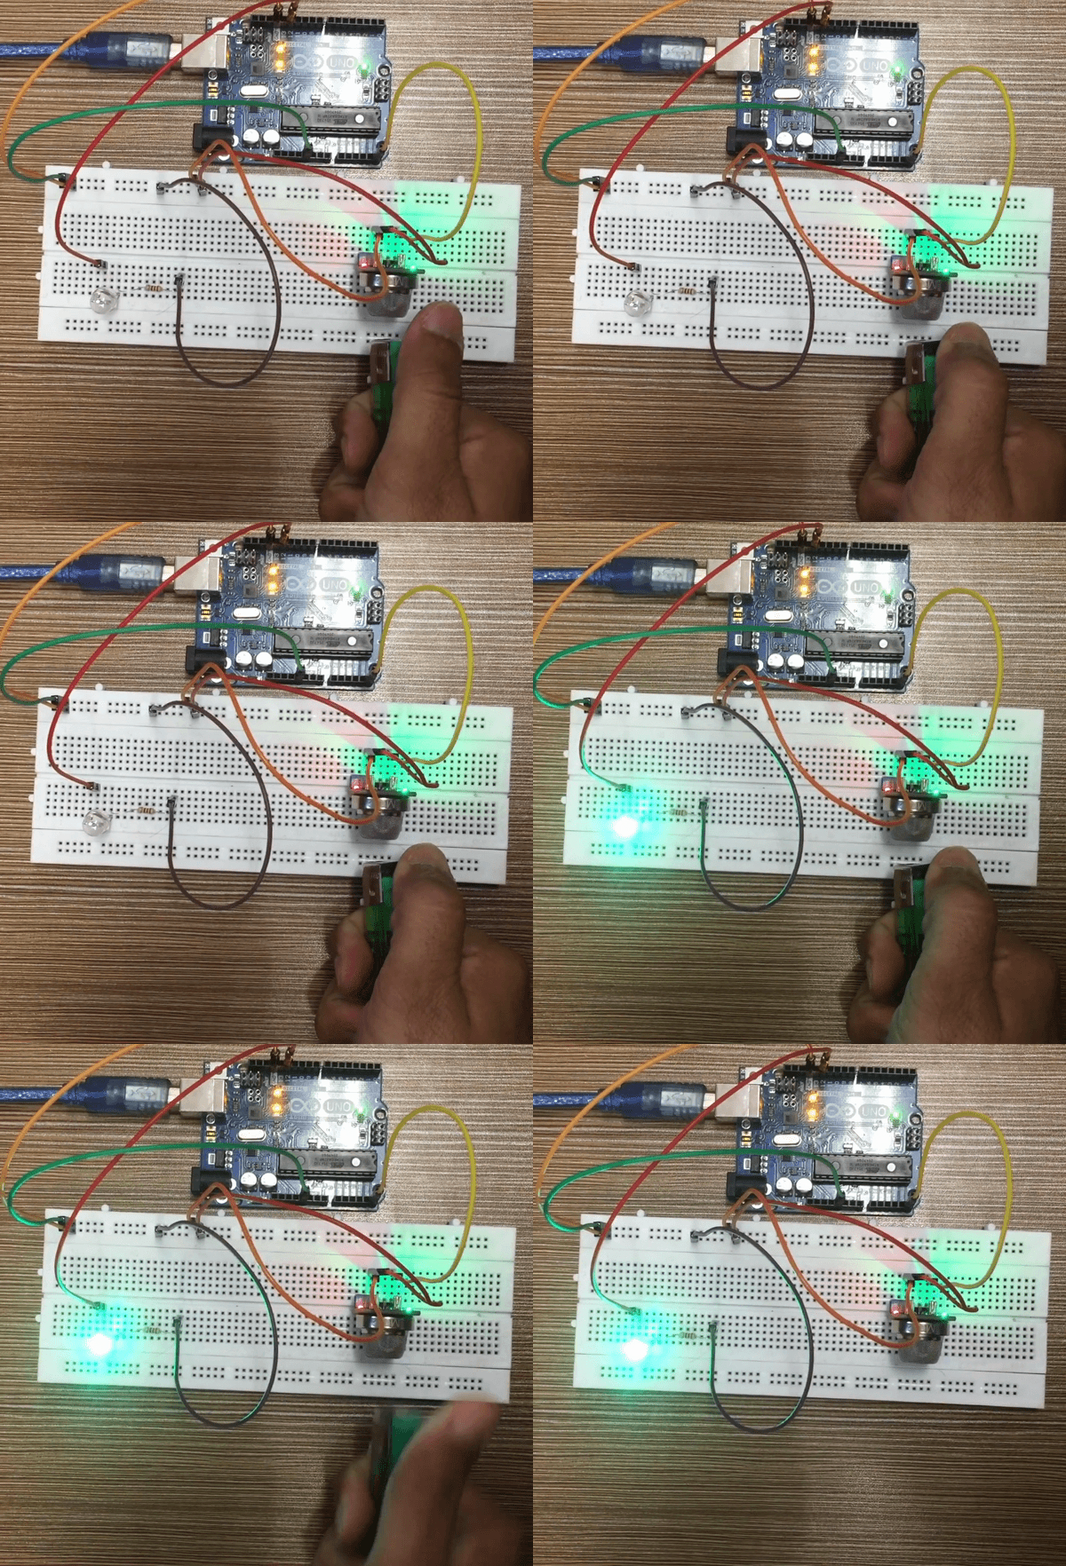
To trigger the gas sensor we have to use the cigarette lighter when the lighter emits the gas for ignition the sensor gives the signal for the LED to turn on. When the gas is detected by the sensor the output of the sensor changes and its values tend to increase and it can be seen in the image posted below:
Furthermore the working of the gas sensor is illustrated by the following image posted below.
Conclusion
For interfacing the different sensors or any other type of devices with microcontrollers the Arduino provides an effective way through which these devices can be interfaced with microcontrollers with no problem. The gas sensors are mostly used in the fire alarms to detect if there is any smoke or if any combustible gas concentration is increased in any specified area. We have interfaced a MQ2 gas sensor with Arduino and created a proteus simulation as well as implemented the circuit on hardware.


