In this write-up, we will learn the method to interface the seven-segment display with the Raspberry Pi 4 and also will explore its Python code in detail.
What is a seven-segment display?
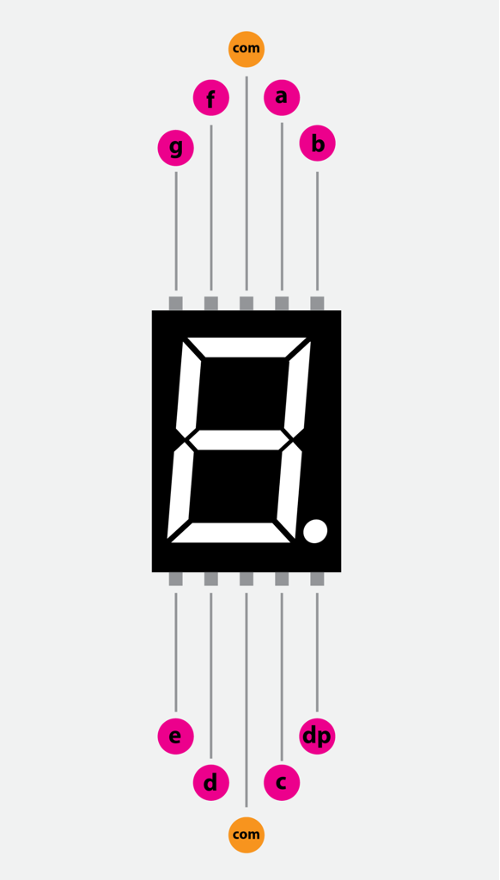
The seven-segment display is the combination of seven light segments which are labeled as a,b,c,d,e,f, and g which are shown in the image below. It has 10 terminals, among which 7 are for the light segments, one is for the decimal point and the remaining two are for the common point which is either Vcc or ground.
Types: There are two types of seven-segment displays, one is known as the anode-common display and the other is known as the cathode-common display. In cathode-common display all the cathode are connected to the common so the common point for such display is connected to the ground and in an anode-common display, all the anodes are connected to the common point for such displays common is connected to the supply.
How to interface the 7-segment display with Raspberry Pi 4
To interface the 7-segment display with the Raspberry Pi 4, we need the following electronic components:
- Seven-segment display (common-anode)
- Resistors of 33 ohms
- Breadboard
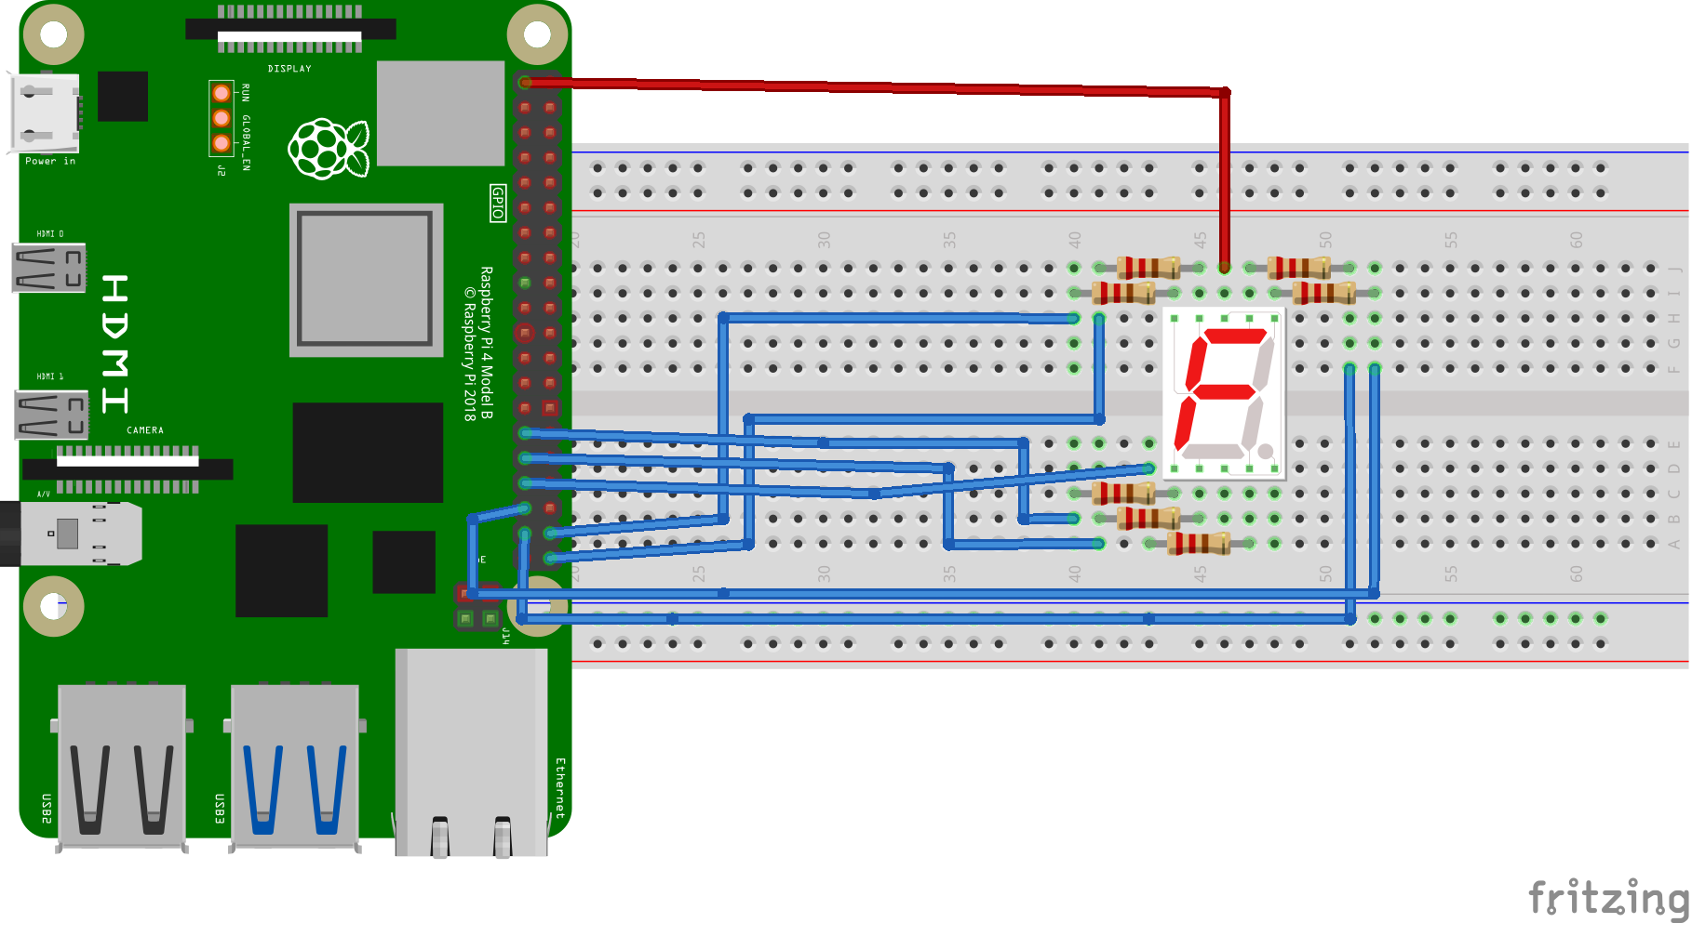
First, we will place a Raspberry Pi 4 and a seven-segment display on the breadboard:

Then we will connect the resistors of 33 ohms with every segment of the seven-segment display:

Now connect the resistors attached to the segments of the seven-segment display with GPIO pins of the Raspberry pi according to the table:
| GPIO pin | Segments of display |
|---|---|
| 26 | a |
| 19 | b |
| 13 | c |
| 6 | d |
| 5 | e |
| 21 | f |
| 20 | g |
| 3.3 Vcc | Common anode |
Python code to interface 7 segment with the Raspberry Pi 4
Once the connections are completed, we will create a text file with nano editor with the name of “segment11.py” using the command, you give any name to the file:

A file will be opened in which we will type the following code:
#import the LEDCharDisplay library from gpiozero
from time import sleep
#import the sleep library from time
display = LEDCharDisplay(26, 19, 13, 6, 5, 21, 20, active_high=False)
#declared the GPIO pins for (a,b,c,d,e,f,g) and declared its CAS
while True:
#initialize the infinite while loop
for char in '0123456789':
#initialize for loop and store 0123456789 in variable char
display.value = char
#displayed the value
sleep(1)
#generated delay of one second
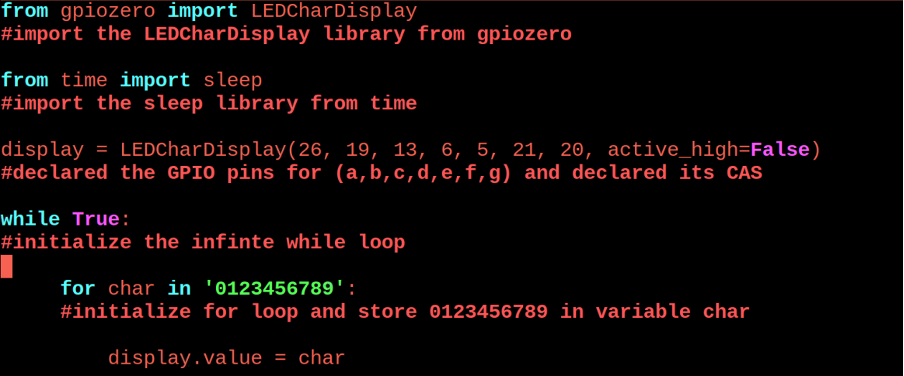

Explanation of code: In the above code, we have imported the LEDCharDisplay library from the gpiozero and sleep library from the time. Then we declare a variable “display” and, using the function of LEDCharDisplay, assign the GPIO pins 26,19,13,6,5,21, and 20 to Display segments a,b,c,d,e,f, and g. Also, active_high is False as we know we are using the anode-common seven-segment display. Then we initialize the infinite while loop and display the numbers 0-9 on the 7-segment display using a for loop.
The working of the project of interfacing seven-segment display with the Raspberry Pi 4 is:
Conclusion
The seven-segment display is an electronic module that is used in digital clocks, timers, and other electronic devices to display the numbers and characters. There are two different types of seven-segment display, one is known as common-anode (the common point is connected to supply) and the common-cathode(the common point is connected to ground). In this write-up, we have learned a method to interface the seven-segment display with the Raspberry Pi 4 with the understanding of its Python code.