The keypad contains a set of buttons that are connected with each other in such a manner that they form a matrix. These keypads are very common modules that can be used for taking inputs in different projects like a calculator.
To use the keypad, we have to interface the keypad with Arduino, and the method to interface the keypad with Arduino is explained in this write-up.
How to interface the keypad with Arduino
There are different types of keypads, the difference in them is only the number of buttons. For example, a 4×4 keypad has 4 rows of buttons or 4 columns of buttons with a total of 16 buttons and 8 pins. In the same manner, a 4×1 keypad will have 5 pins.

The pins of the keypad can be connected to the digital I/O pins to read the input from the buttons of the keypad. In this write-up, we will interface the 4×4 keypad with Arduino and print its output on the serial monitor output.
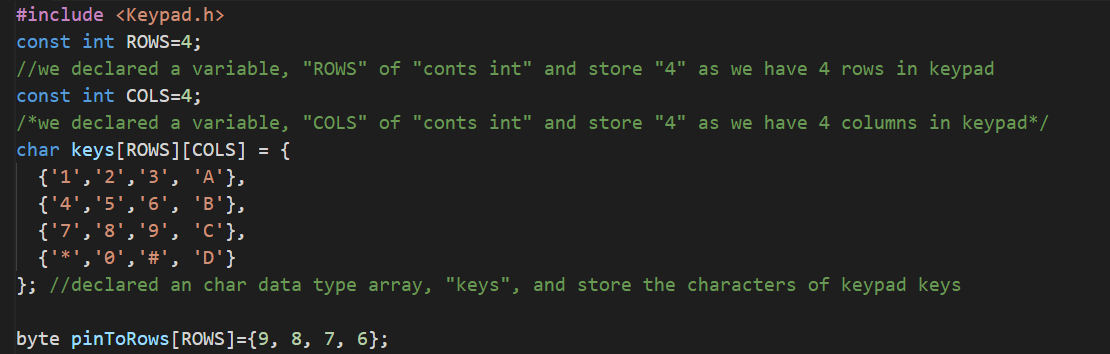
We will first write an Arduino code to interface the keypad with Arduino using:
const int ROWS=4;
//we declared a variable, "ROWS" of "conts int" and store "4" as we have 4 rows in keypad
const int COLS=4;
/*we declared a variable, "COLS" of "conts int" and store "4" as we have 4 columns in keypad*/
char keys[ROWS][COLS] = {
{'1','2','3', 'A'},
{'4','5','6', 'B'},
{'7','8','9', 'C'},
{'*','0','#', 'D'}
}; //declared an char data type array, "keys", and store the characters of keypad keys
byte pinToRows[ROWS]={9, 8, 7, 6};
//connect to the row pinouts of the keypad with Arduino digital I/O pins
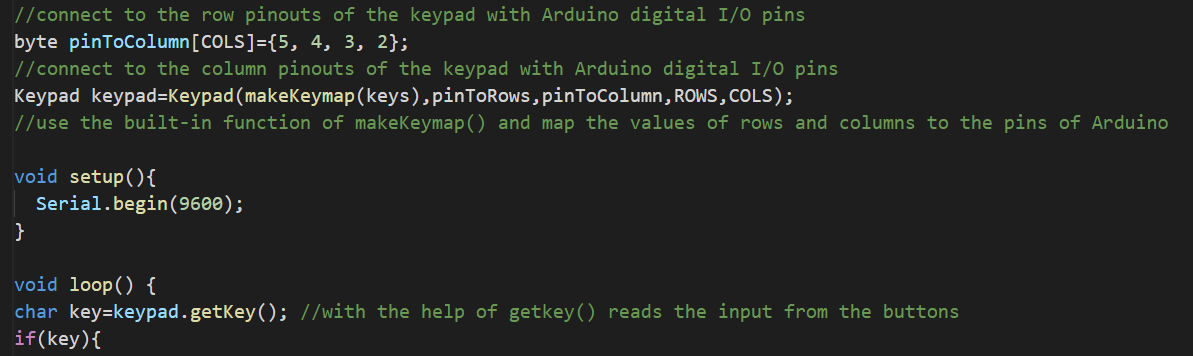
byte pinToColumn[COLS]={5, 4, 3, 2};
//connect to the column pinouts of the keypad with Arduino digital I/O pins
Keypad keypad=Keypad(makeKeymap(keys),pinToRows,pinToColumn,ROWS,COLS);
//use the built-in function of makeKeymap() and map the values of rows and columns to the pins of Arduino
void setup(){
Serial.begin(9600);
}
void loop() {
char key=keypad.getKey(); //with the help of getkey() reads the input from the buttons
if(key){
Serial.println(key); //using if condition, if the key is pressed, its value will be print
}
}

Explanation of code: In the above code, we have included the library of “Keypad.h” and used its built-in functions to initialize the keypad. Then we declared the baud rate of 9600 for the serial communication and in the loop function, we are reading the input from the keys of the keypad to print it on the serial monitor output.
Simulation and Hardware
For the above output, we need a 4×4 keypad, connecting wires, and Arduino Uno. The circuit diagram will be like this:
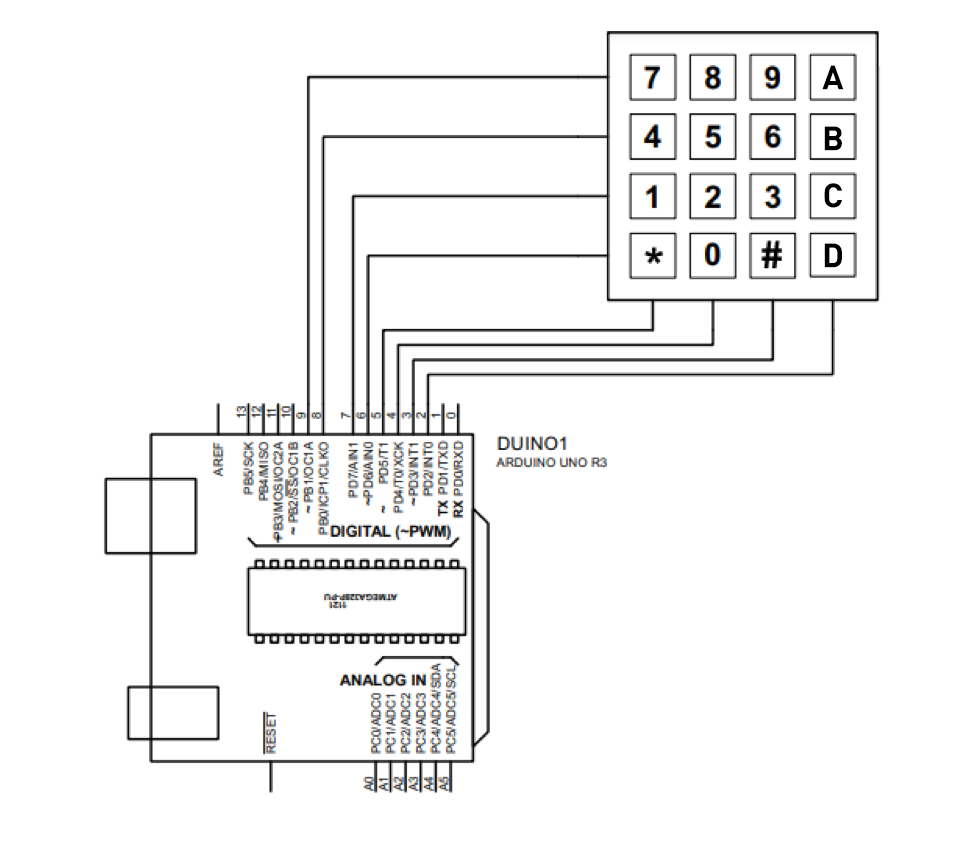
In the above circuit, we have connected the output pins of the keypad with the digital pins 9, 8, 7, 6, 5, 4, 3, and 2 of Arduino.
The hardware configuration of the above circuit is like this:
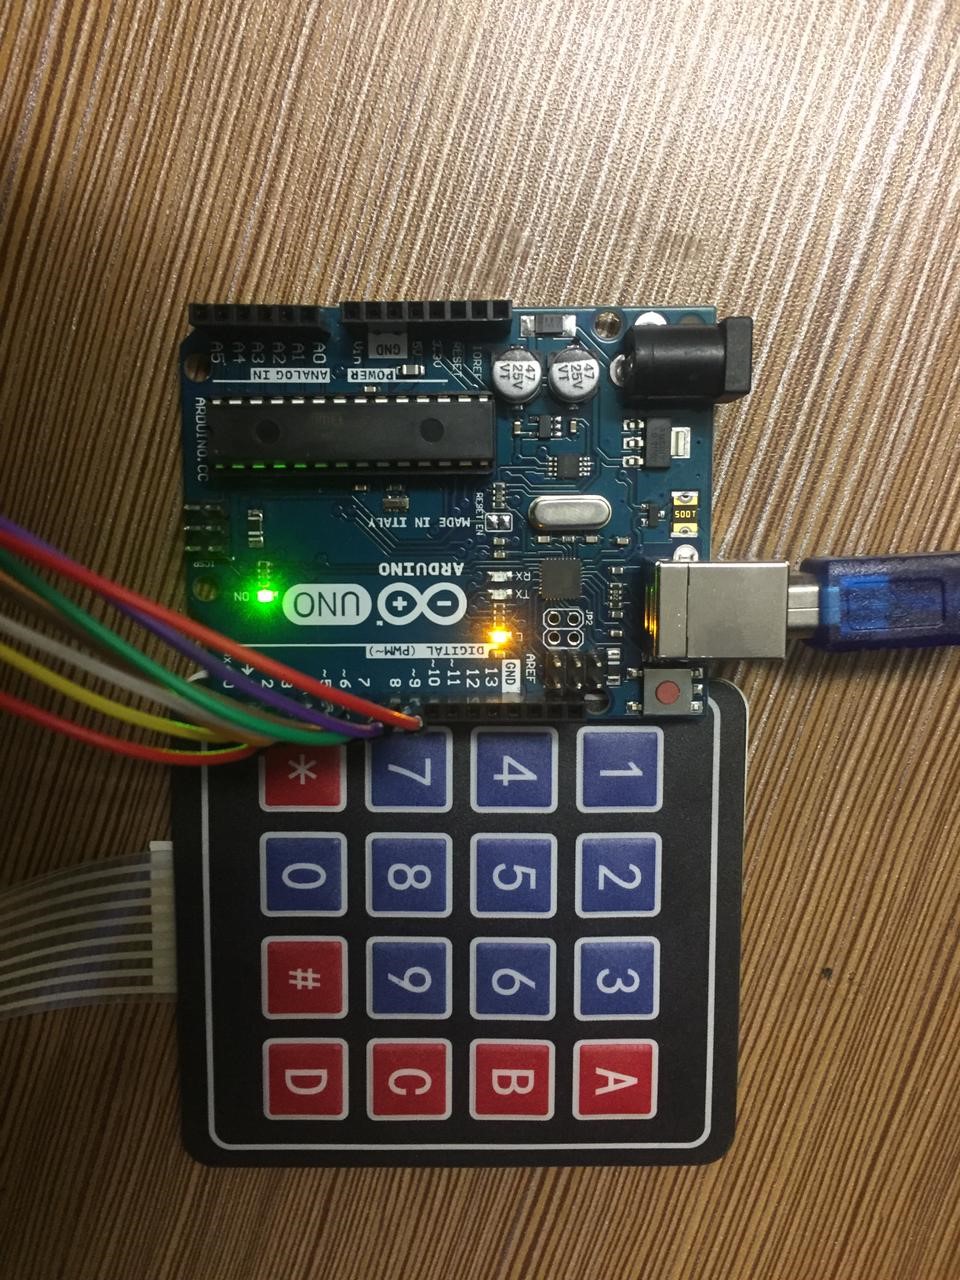
When you face the keys side of the keypad towards yourself, the first four output pins from left to right are of rows and the next 4 output pins are of the column, then connect all these output pins according to the circuit diagram.
The output on the serial monitor is:

Conclusion
A keypad of any type can easily be interfaced with Arduino by connecting its pins to the digital I/O pins of the Arduino board. The digital pins communicate the input from the key of the keypad to the Arduino and the operation of code is executed according to it. In this write-up, the 4×4 keypad is interfaced with Arduino and in the same way, we can interface any type of keypad with Arduino. The only difference is in the 4×4 keypad, we connected the 8 output pins (because it has four columns and four rows having sixteen keys) to Arduino whereas, in the 4×3 keypad (because it has four columns and three rows having twelve keys), we have to connect the 7 output pins to Arduino.