ESP32 is an IoT based microcontroller board that can be programmed just like an Arduino board and can execute instructions to generate desired outputs. Arduino IDE is a diverse programming tool using which not only can we program Arduino boards but also multiple microcontroller boards like ESP32, and ESP8266. This article will cover all steps to install an ESP32 board in Arduino IDE on Mac.
Setup Arduino IDE on Mac
First step towards the ESP32 board programming is setting the Arduino IDE editor, to do so first we need to download the Arduino in the Mac system.
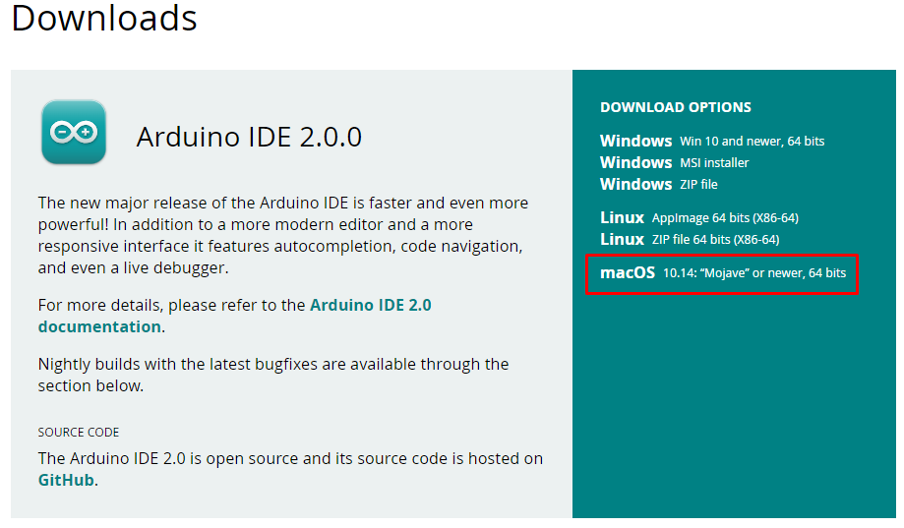
Click here to download Arduino IDE or visit their official site. Download IDE for macOS.
After the IDE finishes downloading, install Arduino IDE. During installation of IDE use default settings. Here is the guide to Installation of Arduino IDE in Mac.
Setting up ESP32 in Arduino IDE on Mac
To setup ESP32 with Arduino IDE on Mac follow the steps below:
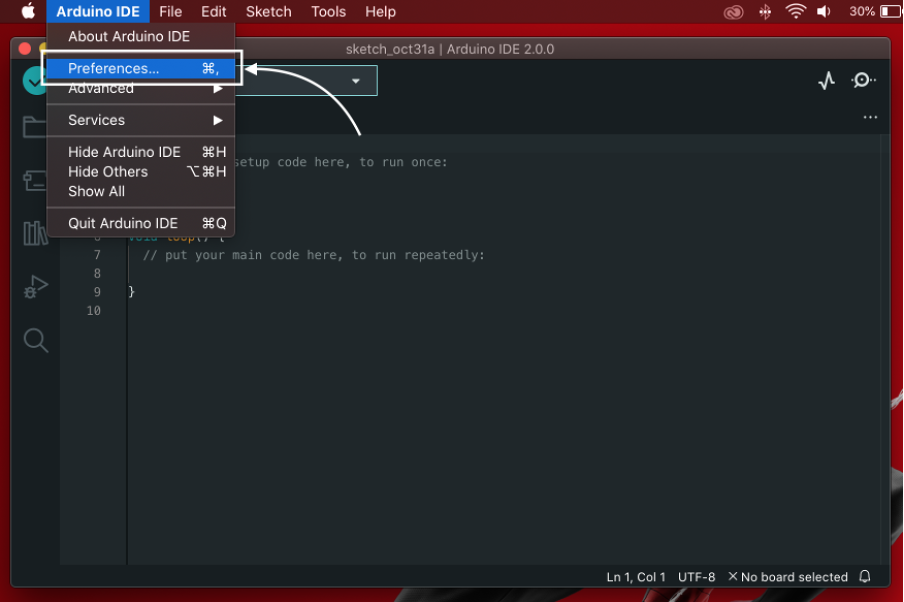
Step 1: Open Arduino IDE and Go to Arduino IDE>Preferences or press shortcut command+comma:
Step 2: Arduino Preferences will open. Type the URL given below in the Additional boards manager section and click OK:
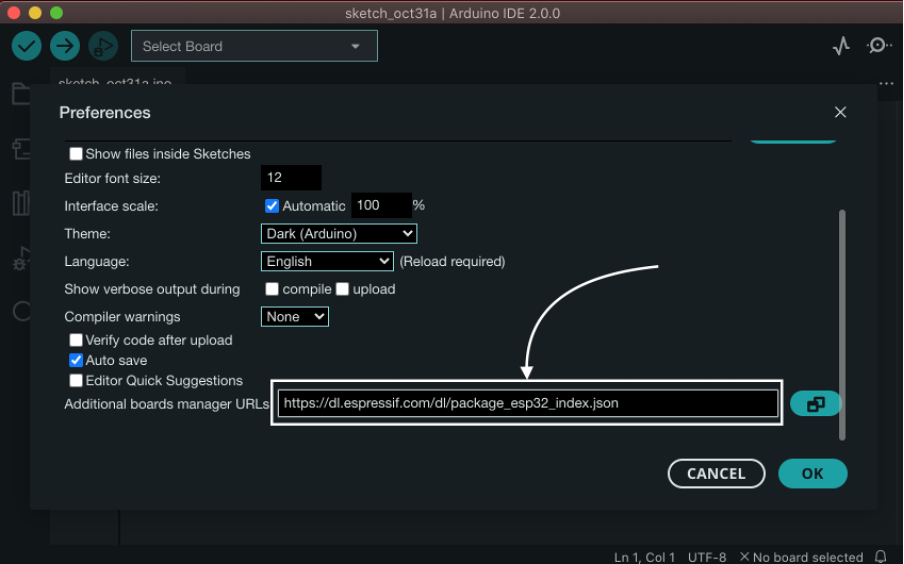
Note: Incase if any other board such as ESP8266 is already there separate both URLs using a comma.
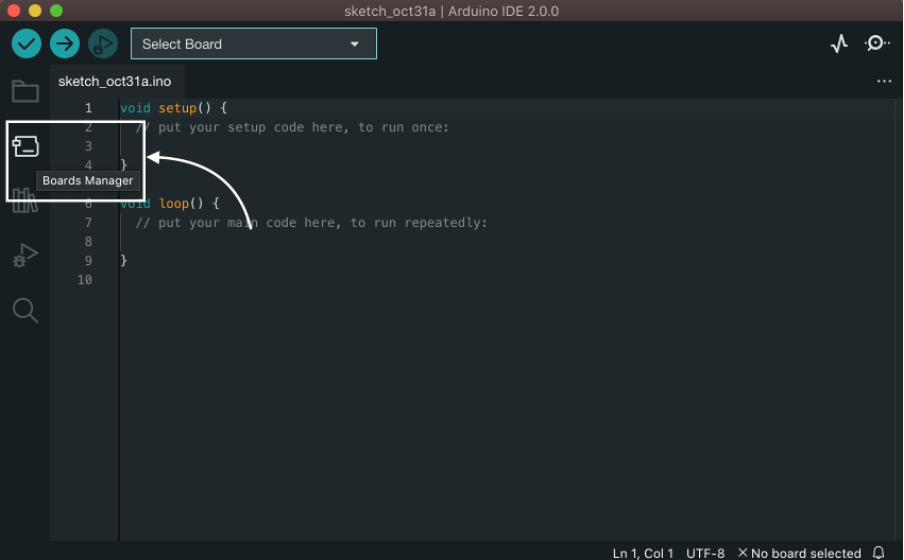
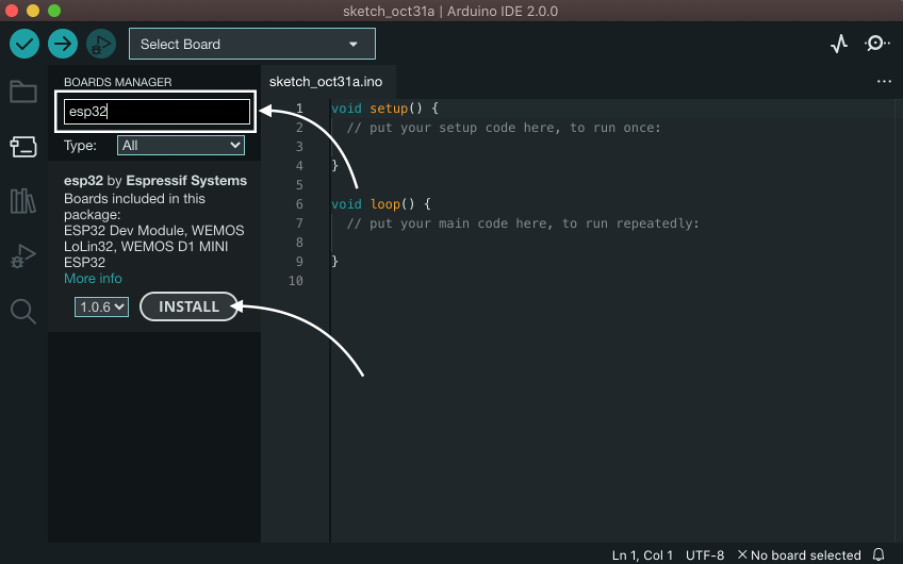
Step 3: Now select the BOARDS MANAGER option:
Step 4: Search for ESP32 board libraries. Click INSTALL, installation of library files will begin. Now wait for installation to be completed:
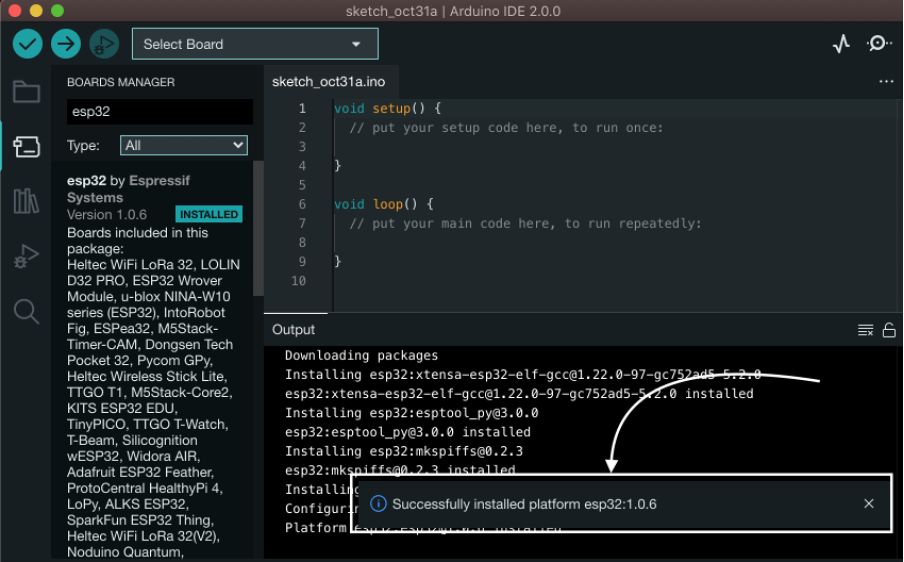
Step 5: Once all the files are installed the following message will appear:
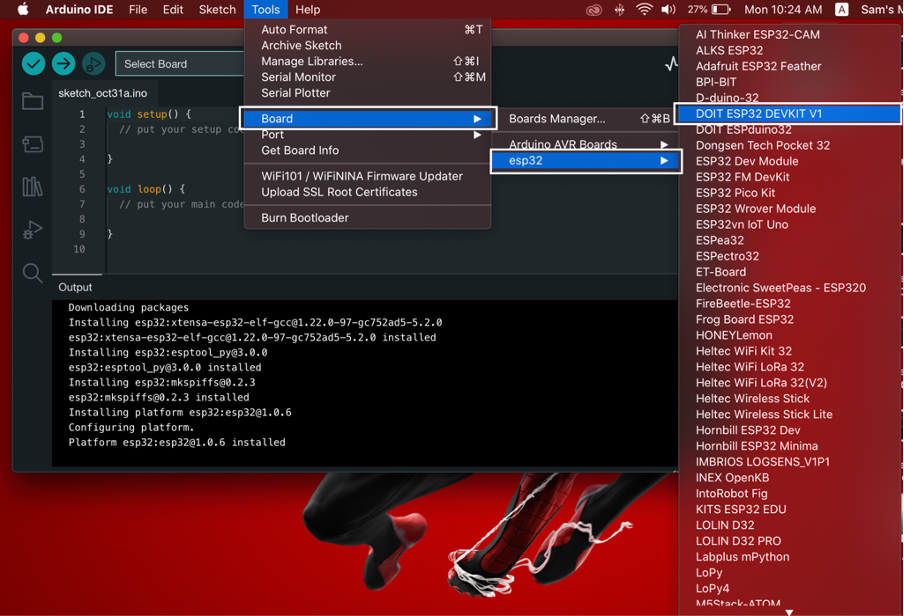
Step 6: As ESP32 is successfully added. Now we will upload the first program in the ESP32 board, to do so first we need to select the ESP32 board. The ESP32 board model name is written on a metal rectangular box under the voltage regulator or on the back side of the ESP32 board. We are working with ESP32 DEVKIT V1.
Go to: Tools>Boards>esp32>Board Type:
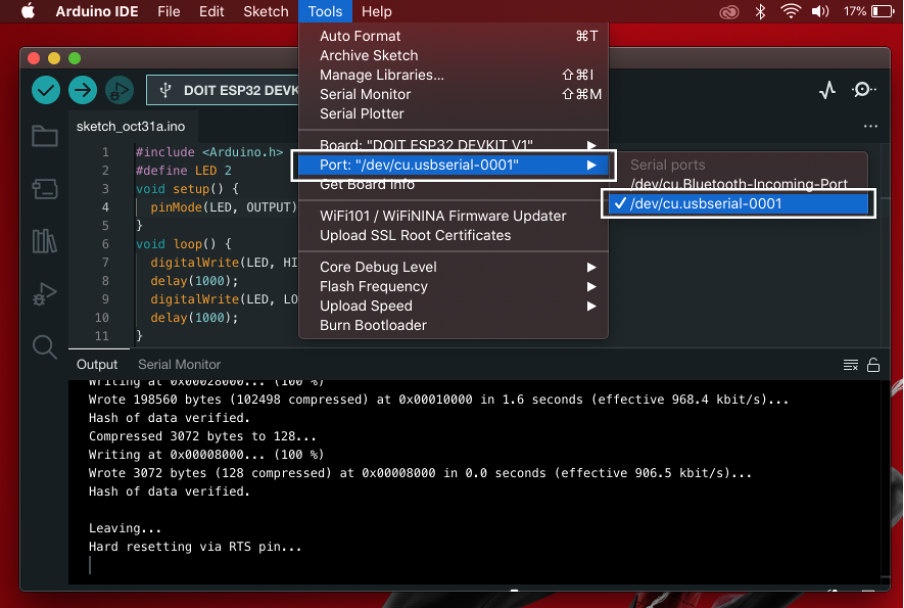
Step 7: Now select the COM port for the ESP32 board, Go to: Tools>Port>/dev/cu.usbserial-0001:
Upload LED Blink Program in ESP32
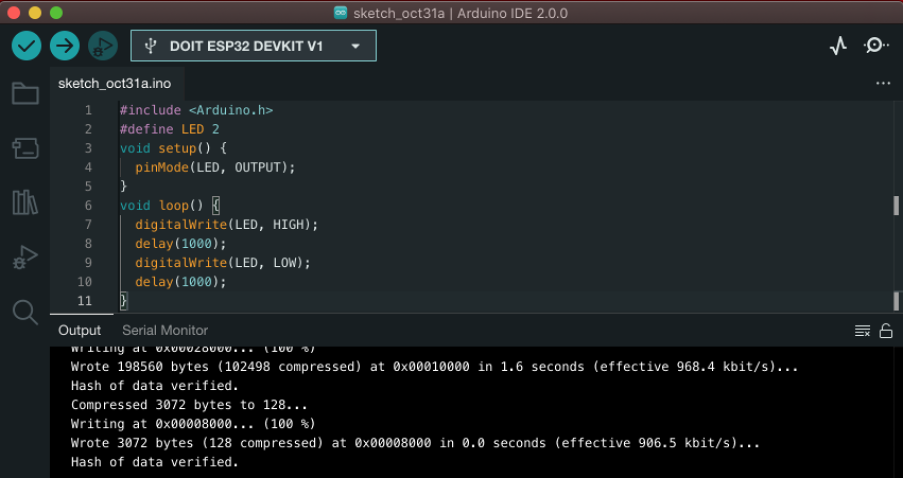
To check installation of ESP32 board upload the following code:
Code
#define LED 2
void setup() {
pinMode(LED, OUTPUT);
}
void loop() {
digitalWrite(LED, HIGH);
delay(1000);
digitalWrite(LED, LOW);
delay(1000);
}
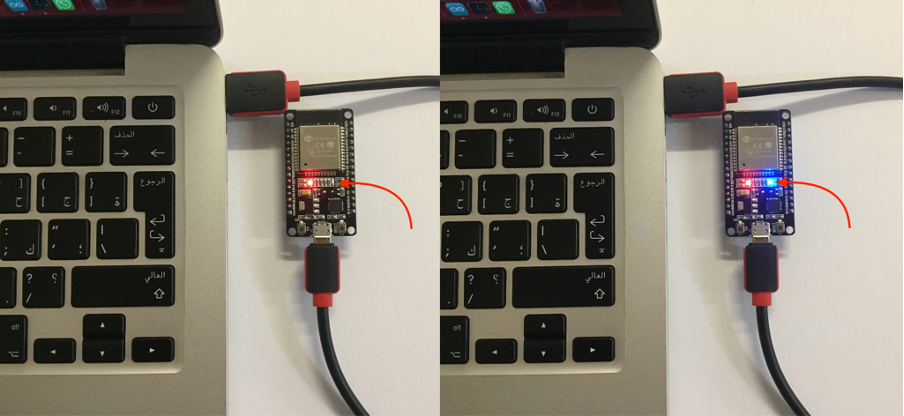
Code above will blink an onboard blue LED with a delay of 1 sec:
Output
Output of LED is shown in the following images:
So we have successfully added ESP32 board in Arduino IDE on Mac.
Conclusion
ESP32 is a microcontroller based IoT board that can be programmed using Arduino IDE. Here in this guide we have added ESP32 board in Arduino IDE on Mac OS. Once the board is added we can easily control it by writing any code inside the IDE editor window.