SQLite is also a relational database similar to the SQL database that is used to store the data of a website or a mobile application. SQLite is a lightweight database and unlike other databases, it doesn’t need a client-based database server engine as it is a self-contained system. SQLite is most suitable with Raspberry Pi because of its property of being independent of the server.
SQLite is easy to use as only we have to install it and no configuration is needed. In this write-up, the method to install SQLite on Raspberry Pi has been explained as well as the setting it up.
How to install SQLite on Raspberry Pi
Method 1 : Before going towards the installation of the Raspberry Pi, first, update the repository of the Raspberry Pi using the command:
All the packages of the repository are up to date so now we will install the SQLite using the apt package manager:
Once the SQLite has been installed, we can check the version of the installed SQLite to authenticate its installation:
The above version details the installation of the SQLite.
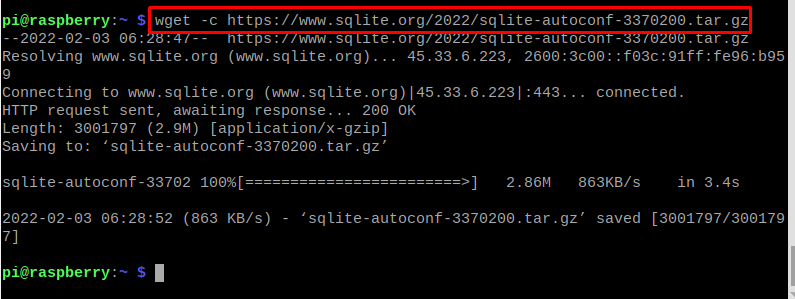
Method 2 : There is another method to install the SQLite on the Raspberry Pi from its official website using the command:
We had used the “wget” command to download the SQLite from its official website and used a “-c” flag so that if the downloading interrupts, it can resume from that interrupted point. And also, we will create a separate directory for the SQLite using the “mkdir” command and also move to that directory using the “cd” command:
We will extract the downloaded file in the newly created directory by using the command:
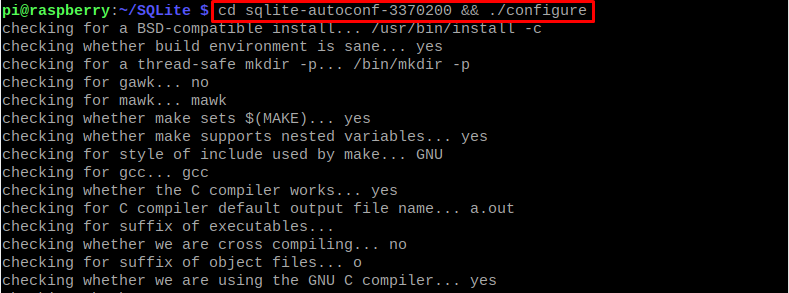
Now we will go to the extracted folder using the “cd” command and then compile it:
We will use the “make” command for building the libraries and making them executable and install the SQLite using the command:
To confirm the installation, we will check its version:
How to test the SQLite in Raspberry Pi
We will initialise the SQLite server by using the command:
To see the tables, use the command:
As we can see from the above there are no tables in the database, so we will create a table of “students_name” using the command:
To insert the values in the table of “students_name” use the command:
To view the newly created table, execute the command:
In case, we need more information about the SQLite, we can use the command:
To quit the SQLite, run the command:
Conclusion
SQLite is a relational database management system similar to MySQL which works on the SQL language. It plays the role of mediator to communicate the data from the website or application to its server. In this write-up, we have discussed two different approaches to installing SQLite on Raspberry Pi which is formerly known as Raspbian and also discuss some queries to use SQLite.


