In this article, we will discuss the method to install Serviio media server on Raspberry Pi.
Install Serviio Media Server on Raspberry Pi
To install Serviio Media Server on Raspberry Pi, follow the below-mentioned steps:
Step 1: Update/Upgrade Repository
Since most packages requires for Serviio Media Server are installed through Raspberry Pi repository so it is better to update and upgrade it through following commands before moving on to next steps:
Step 2: Install Java
As Serviio media server is Java based so it is mandatory to have Java installed on Raspberry Pi system using the below-given command:

Then verify the installation of Java by running the below-mentioned command:

Step 3: Installing Dependencies
Some dependencies are required before installing Serviio media server on Raspberry Pi and you can install them using the following command:

Step 4: Change the Directory
Then change the directory to opt as we will install the Serviio media server in this directory:
![]()
Step 5: Install Serviio
The latest version of Serviio is 2.3 and to download the tar file of the it, use the below-mentioned command:
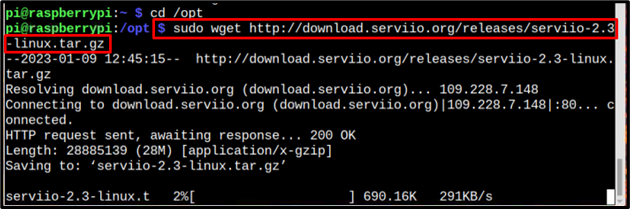
Note: Visit here for the latest update about Serviio.
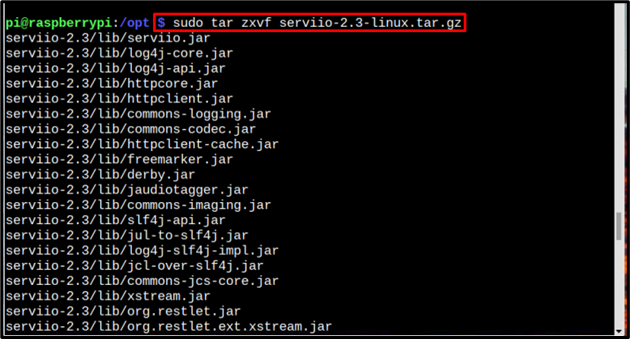
Then unpack the downloaded tar file using the below-written command:
Step 6: Create Symbolic Link for Serviio
Now create the symbolic link for the Serviio directory using the below-mentioned command: to ensure all libraries and files are in consistent places.
![]()
Step 7: Change Ownership
Then use the below-mentioned command to change the ownership for the Serviio directory:

Now you can remove the tar file as it is already unpacked and is no longer required:
![]()
Step 8: Create Serviio Service
Then create a service for Serviio server so that whenever the system starts, the Serviio will also start.
Create a Serviio service file using the nano editor:
![]()
Then paste the below-mentioned text into the serviio service file:
Description=Serviio Media Server
After=syslog.target local-fs.target network.target
[Service]
StandardOutput=null
Type=simple
KillMode=none
ExecStart=/opt/serviio/bin/serviio.sh
ExecStop=/opt/serviio/bin/serviio.sh -stop
Restart=on-abort
[Install]
WantedBy=multi-user.target
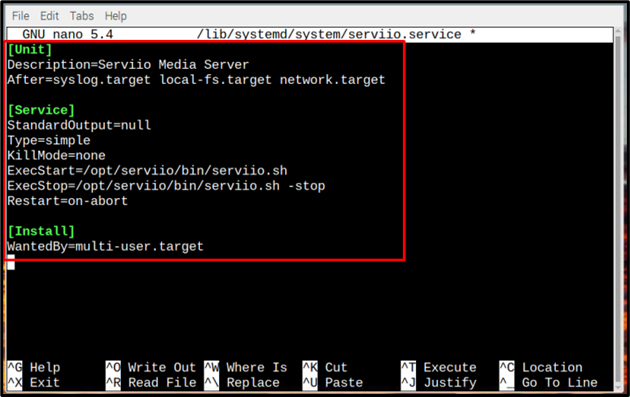
Then save the file using the shortcut keys Ctrl+X and Y.
Step 9: Enable the Serviio Service
After creating the Serviio service now it is time to enable the service, but before that reload the daemon using below-written systemctl command:
![]()
Then enable the service by using the below-written command:

Now start the Serviio service by using the below-written command:
![]()
Step 10: Reboot
Then reboot the system by using the below-written command so that the system could restart and the Serviio service gets started too:
![]()
Step 11: Accessing Serviio and Creating a User
To access Serviio media server, run the below address along with your Raspberry Pi IP address:
Note: Find Raspberry Pi IP address from the “hostname -I” command.
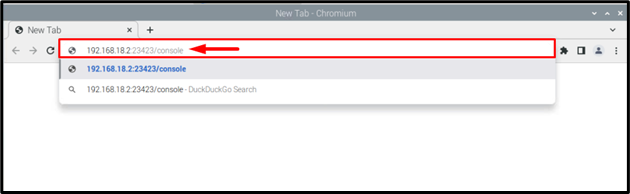
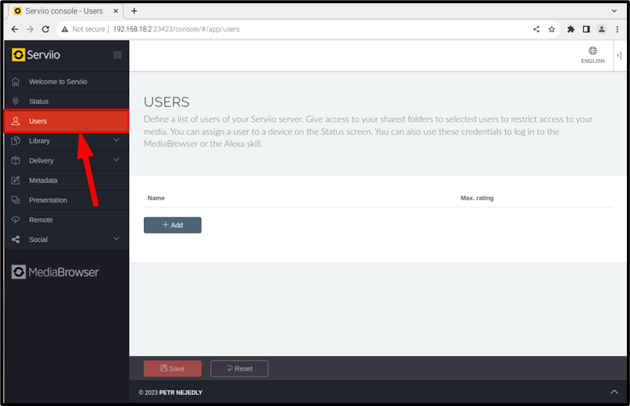
A Serviio welcome page will appear on the screen:

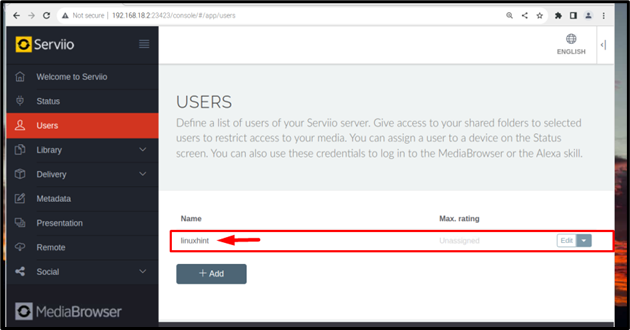
Then click on the USERS option on the left of the screen:
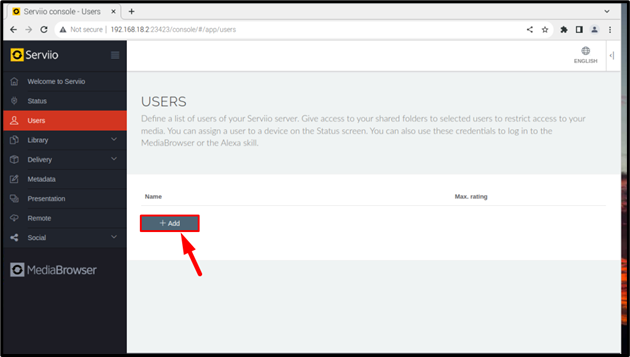
Then click on the Add button to add the new user:
Then enter the desired username and password:
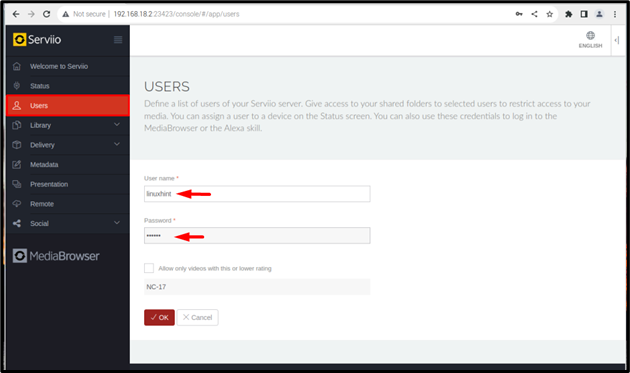
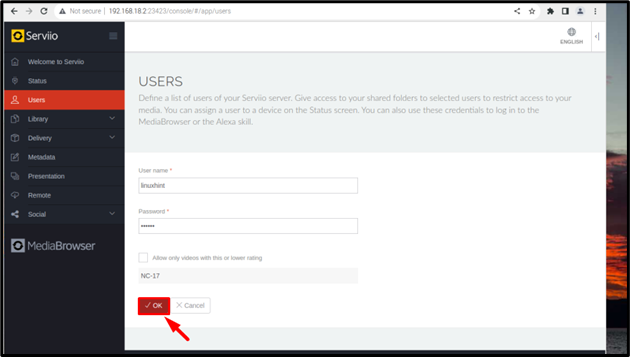
Then click on the OK:
Once the user is created the name of the user will start displaying on the Serviio page. In the same way, multiple users can also be added:
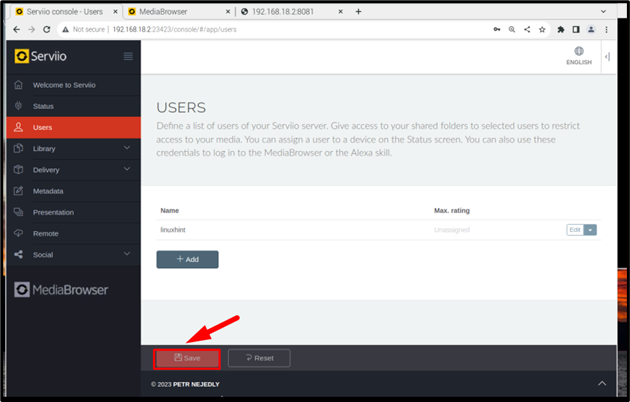
Once the required user is created, click on the Save button to save the created user:
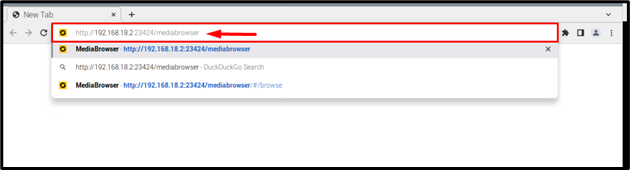
Step 12: Logging into Serviio Media Browser
Once the user account is created, now access the media browser using the below-written address:
A media browser login page will appear on the screen, enter the username and password which you have created. Then click on the Log In button:
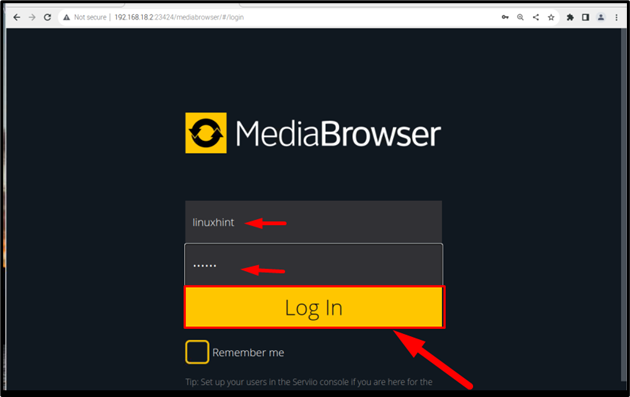
And you have finally access the Serviio media browser and now you can upload audios, images and videos or stream them:

Conclusion
The Serviio media server can be installed on Raspberry Pi by downloading the tar file from the official link using the wget command. However, before installing Serviio, ensure that Java is pre-installed as it is mandatory to run Serviio on a Raspberry Pi system. After downloading the Serviio tar file, unpack it and then create a directory link for it. Finally create a service for Serviio and enable it. Later, you can access the Serviio media server on the browser through Raspberry Pi IP address.