If you really want to use Raspberry Pi OS on your device, you need to have an SD card for that purpose. The installation of Raspberry Pi OS on its hardware is not too difficult for the Raspberry Pi users and if you are a beginner then you need to perform the steps mentioned below in this article that will help you to successfully install Raspberry Pi OS on the SD card.
How to install Raspberry Pi OS on SD card using PC
In this article, we will let you install Raspberry Pi OS on an SD card if you have a PC or laptop with you then you can install it within a few minutes. Below are the steps which need to be done in order if you want to successfully install Raspberry Pi OS on an SD card.
Step 1: Make sure that your PC is connected with the power supply and that there won’t be any power outage. In case if power goes out, your PC can still continue running with the UPS (Uninterrupted Power Supply). If you have a laptop, you will ensure that it is fully charged.
Step 2: An SD card is important for the installation of Raspberry Pi OS and you need to have a good quality SD card with you. For that purpose, you have to buy a Kingston or Samsung SD card and the size of the storage is not less than 8GB. If you use a 4GB SD card, you won’t be able to install Raspberry Pi OS on it because of the set-up size which requires a storage of around 8GB.
Step 3: An SD card cannot be inserted directly into your system. You’ll need an SD card reader, which acts as a USB storage device when you insert the SD card. Next, insert this USB storage device into the PC or laptop and ensure that the port is operational.
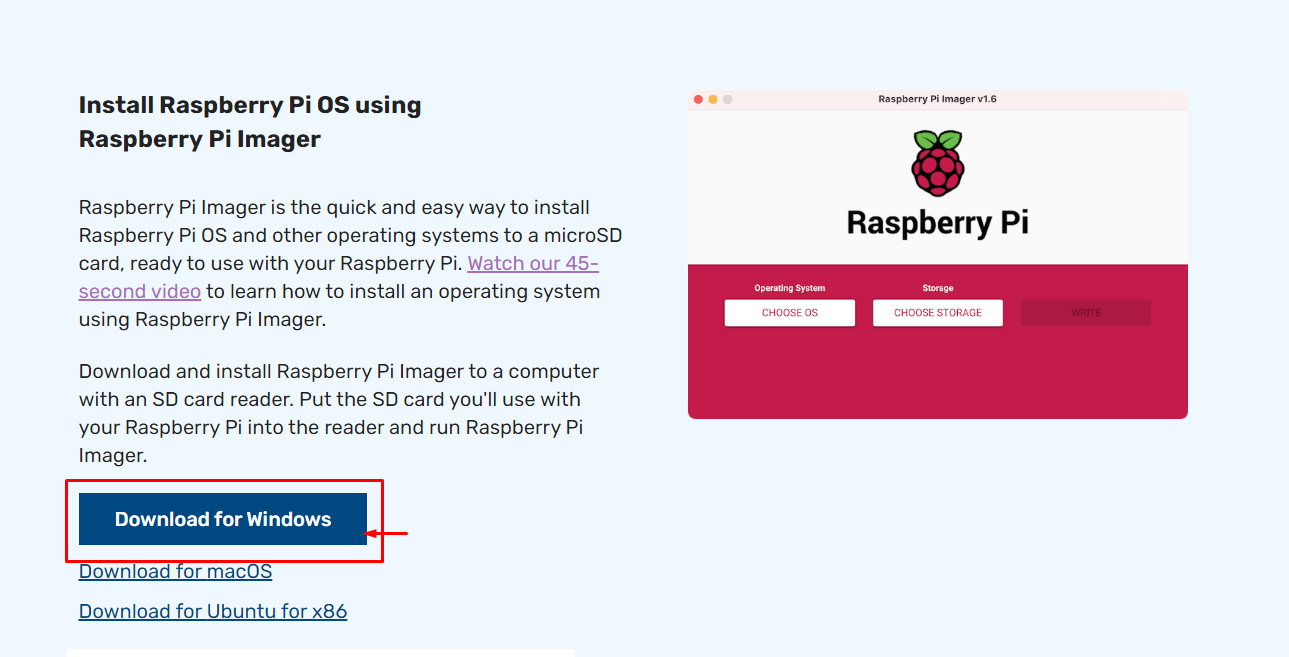
Step 4: Next, you will need to install a Raspberry Pi Imager that can create an image of your Raspberry Pi OS on your SD card. You can download it by moving towards the download page of Raspberry Pi and there you will find the Raspberry Pi Imager, so click on the “Download for Windows” option as mentioned below in the image.
Step 6: When the downloading of Raspberry Pi Imager is completed you need to open it on your windows desktop.
Step 7: You will need to format your SD card using the NTFS/FAT file system in order to successfully boot your Raspberry Pi on the device.
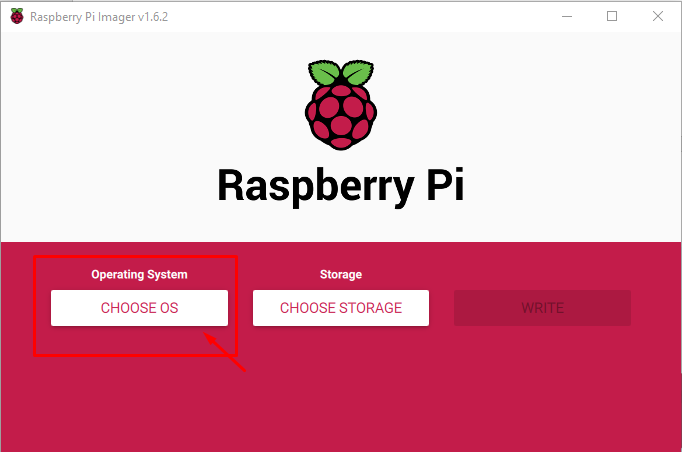
Step 8: Next, you will have to choose an operating system to be written on your SD card by clicking on the option “CHOOSE OS”.
Step 9: After completing the above step, you will be provided with a recommended option which is to install Raspberry Pi OS (32-bit). So, you will need to select the below recommended option.

Step 10: In the next step, you will have to choose the storage option, so you should go with the SD card option as shown below.

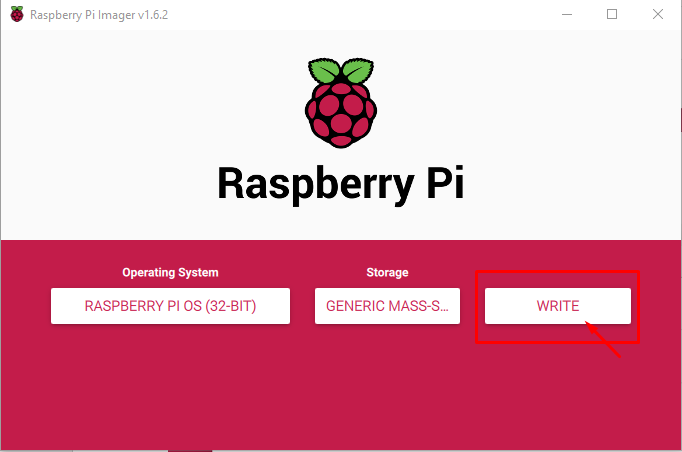
Step 11: After the completion of the above steps, finally click on the “WRITE” option to start creating an image of Raspberry Pi on your SD card.
Wait for the process to complete, do not remove your SD card as it may damage and stop your writing process.
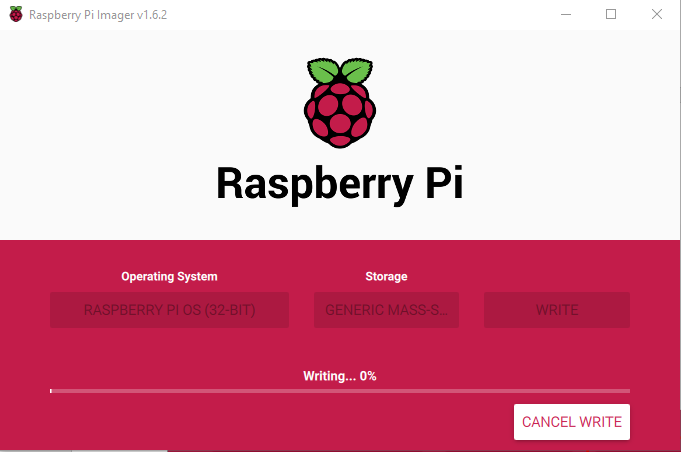
The installation will write and verify the imaging process and when it is completed; you will see a dialog box where you will get confirmation that your Raspberry Pi OS is successfully written on your SD card and that you can now safely remove your SD card from your PC or laptop. Click on the “CONTINUE” option to accept it and remove your SD card from your system.

Now your card is ready to boot the Raspberry Pi OS. You need to have an LCD monitor, HDMI Cable, C-type power supply, keyboard and mouse to set up a Raspberry Pi desktop.
Conclusion
To install Raspberry Pi OS on an SD card you need a PC, and there needs to be an operating system like Windows or macOS already installed on it. The process of installing Raspberry Pi OS on SD card takes a few minutes but it’s not hard for a beginner to do it and you can have it on your SD card. After that phase, you can then put your SD card into your Raspberry Pi device and start doing your projects on it.