How to Install Powershell on Raspberry Pi
To install Powershell on Raspberry Pi, follow the below-mentioned step-by-step guidelines.
Step 1: Install Prerequisite on Raspberry Pi
First, you should install a prerequisite on Raspberry Pi using the following command as this is needed for running the PowerShell on Raspberry Pi.
Step 2: Grab the Latest Version of PowerShell for Raspberry Pi
Head towards the GitHub release page and check the latest PowerShell version. At the time of Power Shell installation, the latest version is 7.2.6 and to download this version on Raspberry Pi, you should grab the tar.gz file using the following command.
Step 3: Create a PowerShell Directory
Next, you will need to create a PowerShell directory using the following command to extract the contents of the tar.gz file.
Step 4: Unpack the PowerShell tar.gz Contents
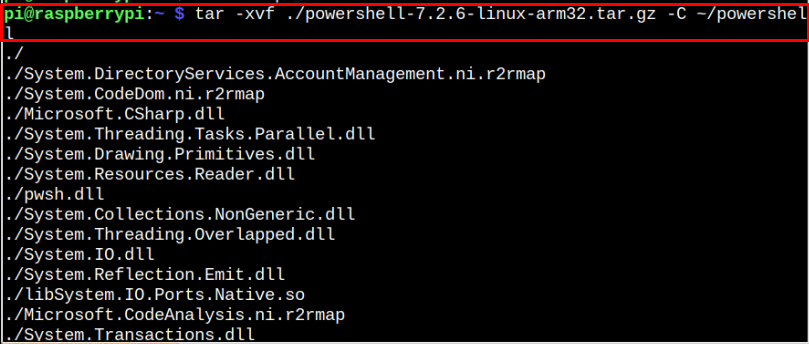
Once the PowerShell directory is created, you have to unpack the contents and copy them into the created directory using the following command:
Note that, in the above command, we are installing PowerShell for a 32-Bit system and if you are using a 64-Bit system, you must choose the arm64 version.
Step 5: Run PowerShell on Raspberry Pi
To run PowerShell on Raspberry Pi, issue the following command:
Step 6: Create Symbolic Link to Start PowerShell on Raspberry Pi
To create a symbolic link to start PowerShell on Raspberry Pi, you should apply the following command:
Once the above command is successfully executed, you can run PowerShell on Raspberry Pi through the following command:
Conclusion
PowerShell is a command-line shell for automating various administrative tasks on your system by managing them through commands. You can install it on your Raspberry Pi system by downloading the tar.gz file from GitHub and extracting the file contents within the PowerShell directory. After the installation, you can run the PowerShell from the directory location, or you can create a symbolic link to execute the shell directly through the “pwsh” command.


