Ever desired a standalone operating system for your Raspberry Pi device with a clean desktop environment and an elegant graphical user-interface? Then you should try Pop! OS for your Raspberry Pi device. It’s an open source Linux distribution with a variety of features including stunning graphics, incredible gaming experience and an interactive learning environment for all the techs out there.
It’s ideal fit for your Raspberry Pi device because of its fast and lightweight performance which do not damage your device CPU resources. The installation of Pop!_OS is not complicated and it will require only a few minutes to make itself ready on your Raspberry Pi device. This tutorial is introduced to provide you with the easiest method to install Pop!_OS on Raspberry Pi and if you want it for your device then you should look at the below guidelines.
How to install Pop!_OS on Raspberry Pi
In order to install Pop!_OS on Raspberry Pi, you will need to perform the following steps that will let you to set up the OS within a few minutes.
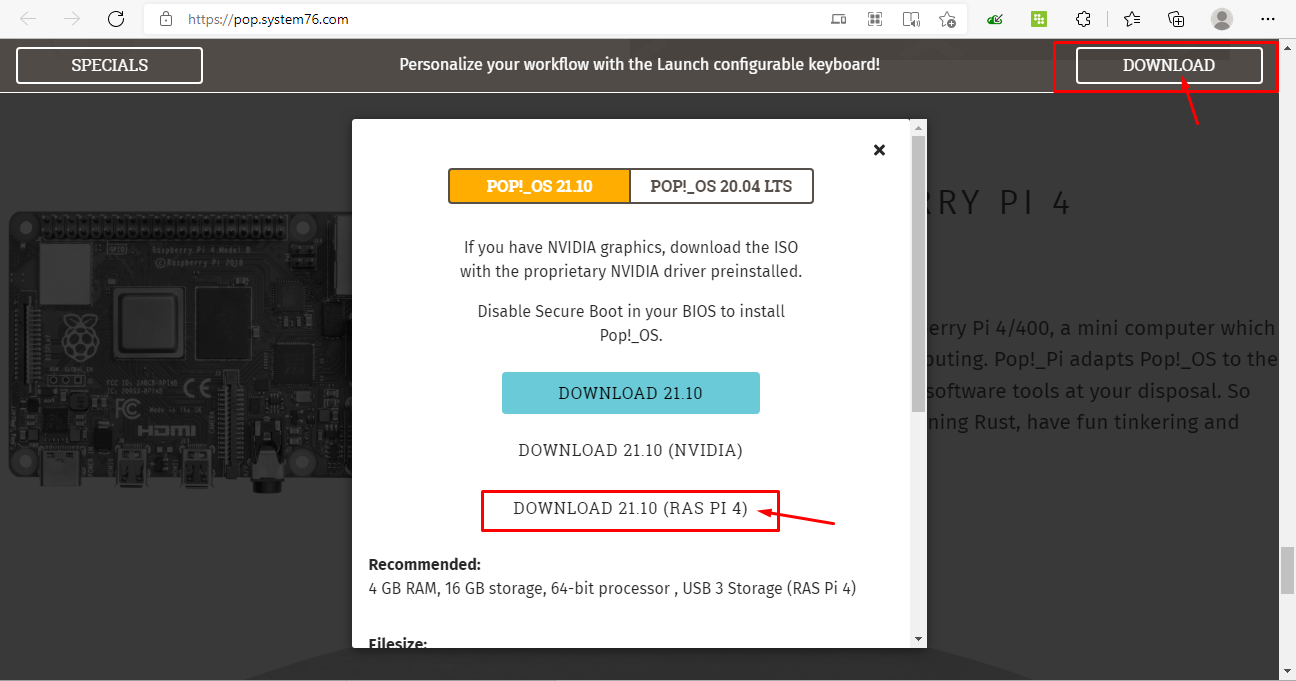
Step 1: In the initial step, you will need an image file of Pop!_OS which can easily download from the official website. When you open the website link, you will need to click on the “Download” option and a screen will appear where you will be required to choose the option “Download 21.10 (RAS PI 4) “. Once you click on the option, it will begin downloading the required image file of the OS.
Step 2: After completing the download, you will then require the services of the Balena Etcher app which you can easily download for your PC through the official website.

After the downloading is completed, you will then need to install it on your PC.
Step 3: Once the installation of balenaEtcher is completed, you will be required to prepare your SD card or USB device and once it is done insert the device into the USB port of PC. It is noted that if you have an SD card, you will require an SD card reader so that it can be easily plugged into your PC port.
In our case, we are installing the Pop!_OS image on a USB device.
Step 4: Format the USB or SD card using the FAT32 file system. The USB or SD card size must be greater than 8GB.

Step 5: Now run the Balena Etcher from your PC desktop.
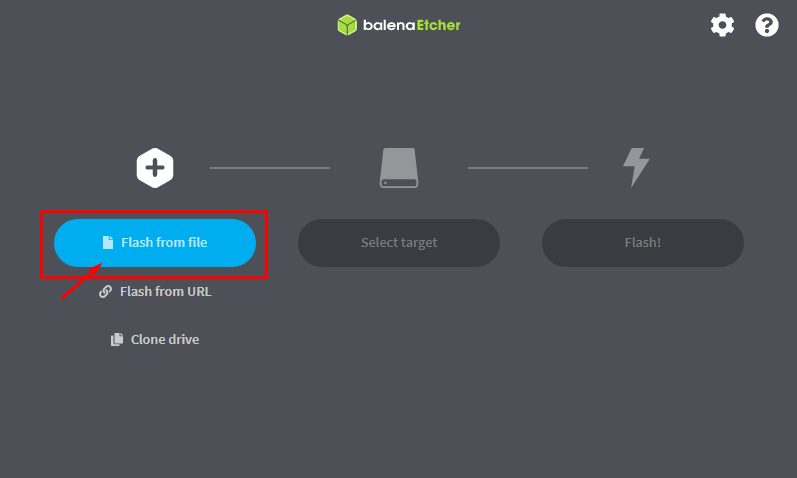
Step 6: Go with selecting the option “Flash from file” and locate the Pop!_OS downloaded image file on your PC and once it is found load it in the Etcher.

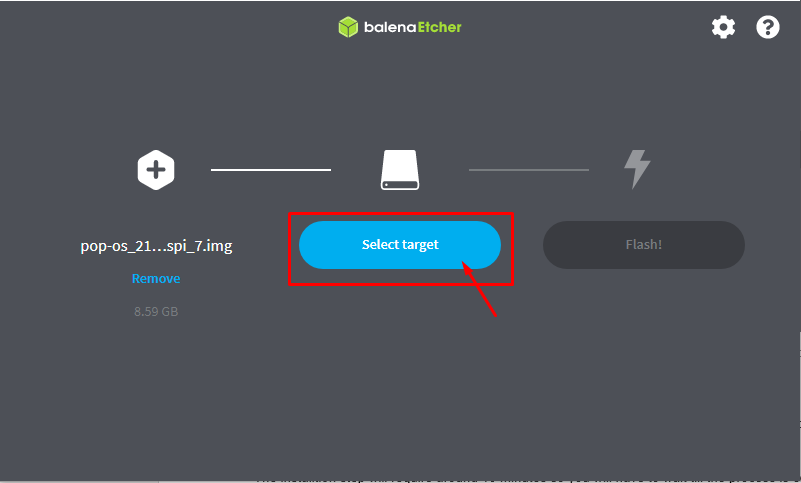
Step 7: Select your target drive where you are going to put your Pop!_OS image by clicking on the option “Select target”. In our case, it’s on USB device.

Step 8: Once the target drive is selected, choose to flash the drive by clicking on the “Flash!” option.

The installation time will be around 8-10 minutes so you will have to wait till the process is completed.
Step 9: Once the process is finished, the device can then safely be removed. After removing the USB device, switch on your Raspberry Pi device and insert the USB into the device port.
The process will take a few seconds until you will see a welcome message on your Raspberry Pi’s screen.
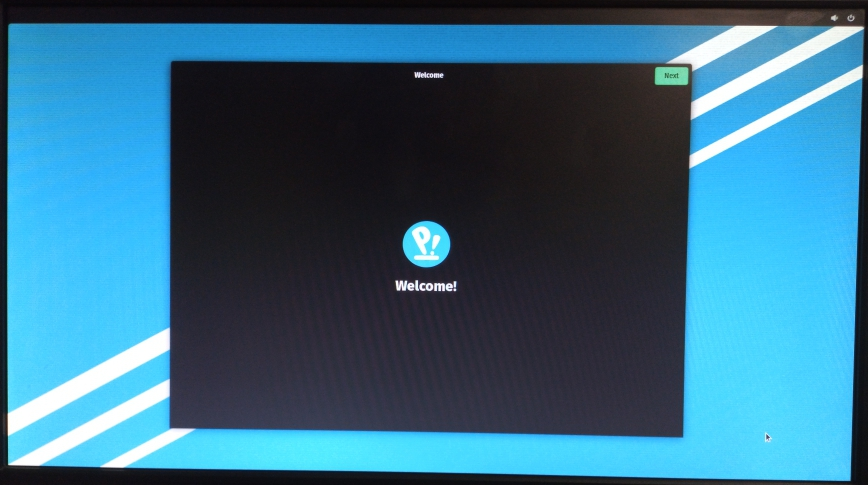
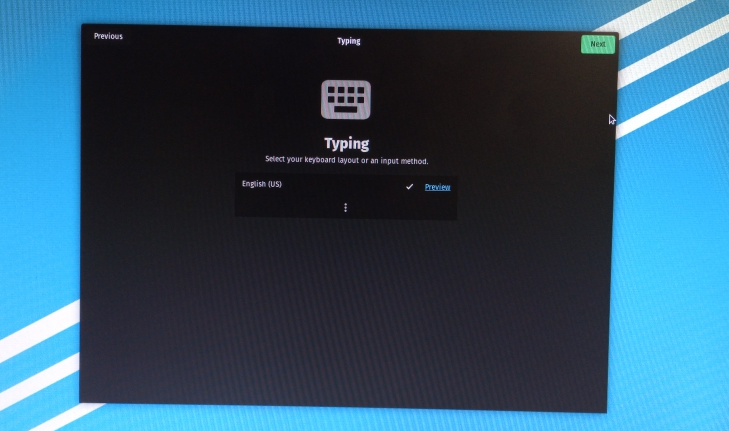
Step10: Once the Welcome screen appears, click on the “Next” option to move forward. In the next window, choose your keyboard layout according to your language and then click on the “Next” option.
Step 11: Connect the Pop!_OS to the WiFi network.
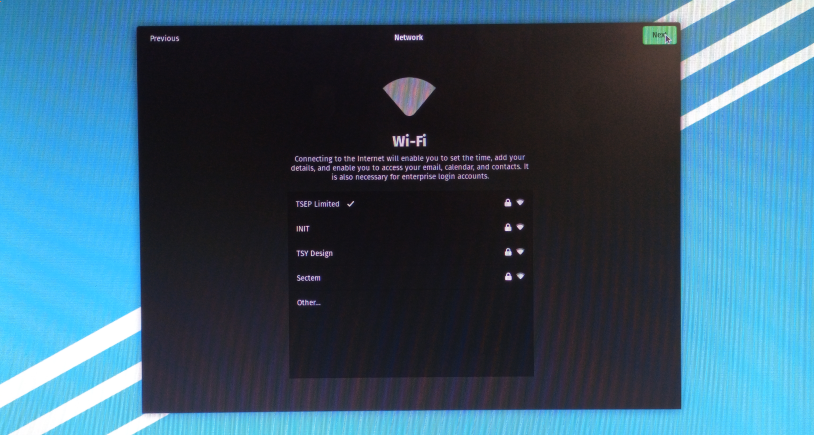
Once the WiFi connection is successfully done, choose to go with the “Next” option.
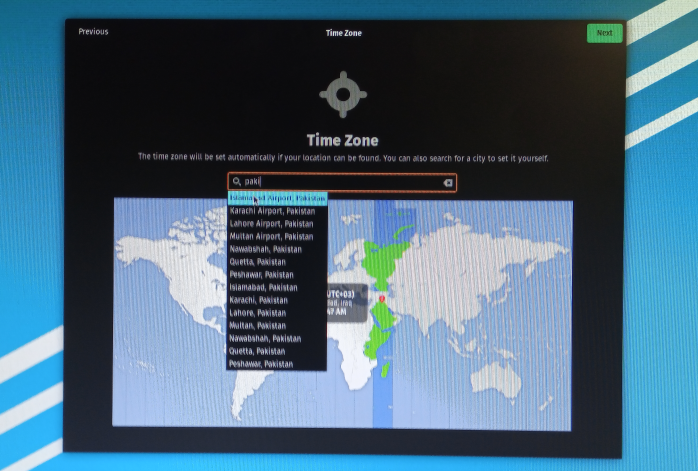
Step 12: Now, in the next window allow the applications to determine your location services by dragging the cursor towards the right direction.
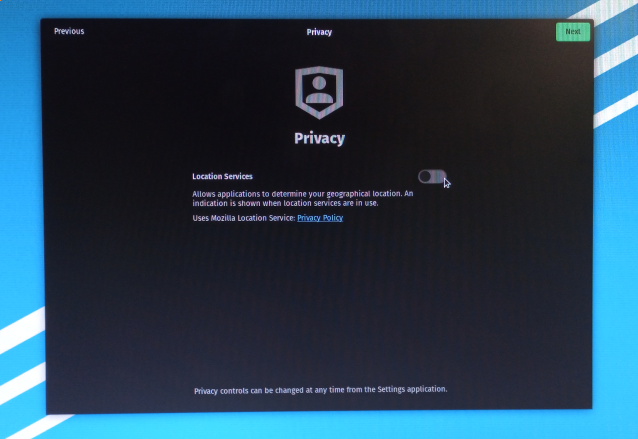
Select your desired location from the search bar that appears on your screen.
Step 13: When you click on the “Next” option, you will then need to connect to your online account and you can then choose the service where your account is created already. In our case, we choose the Gmail account.
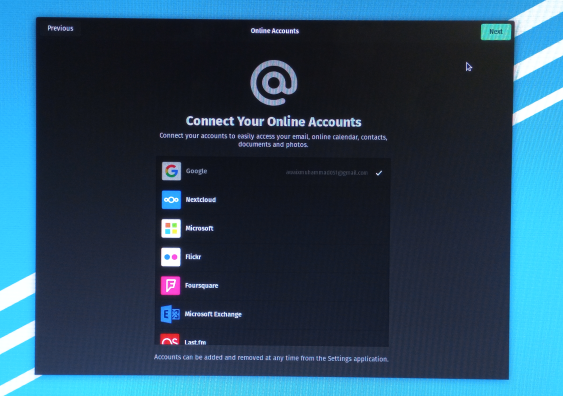
Step 14: Once you are login to your Gmail account successfully you will see a tick sign next to your account. After it appears, again click on the “Next” option.

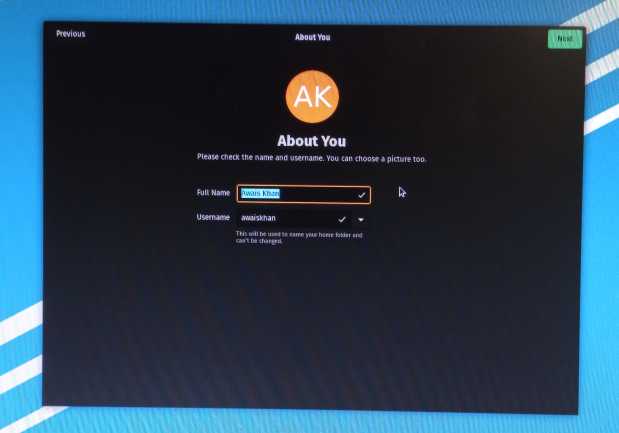
Step 15: In this step, write your “Full Name” and a “Username” for Pop!_OS and then go to the next step by clicking on the “Next” option.
Step 16: Choose a strong password for your OS.

Step 17: Once done, you will get the confirmation in the next window that you are ready to start using Pop!_OS.
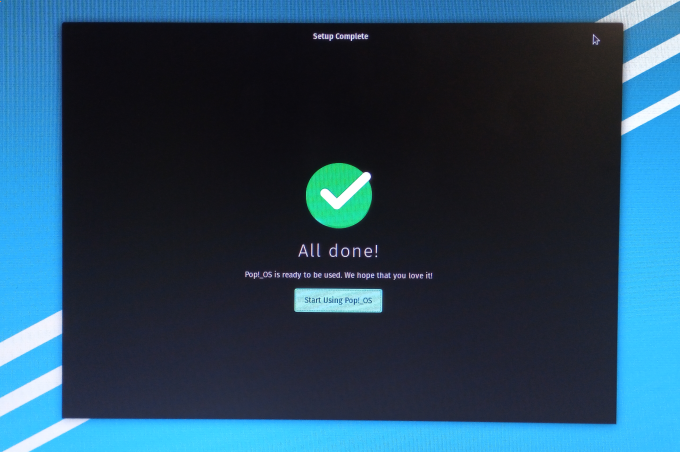
When you click on the option “Start using Pop!_OS”, you will need to do some additional steps after the above screen.

Step 18: As soon as you click on the “Next” option after the above screen, you will need to choose your desktop and layout.

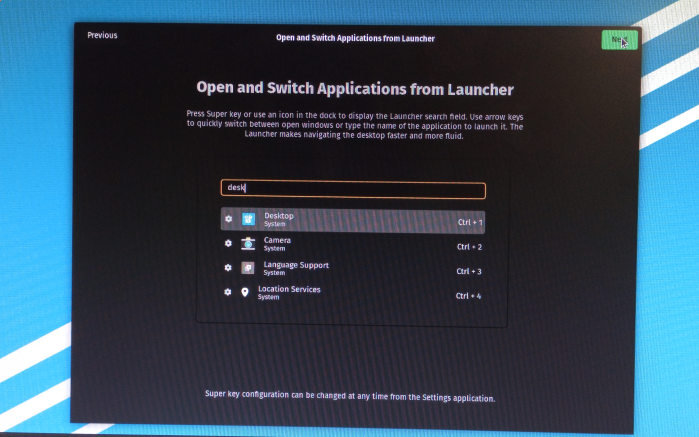
Step 19: When you click on the “Next” option after performing the above desktop setup, you will again need to go with the “Next” option on the next window.
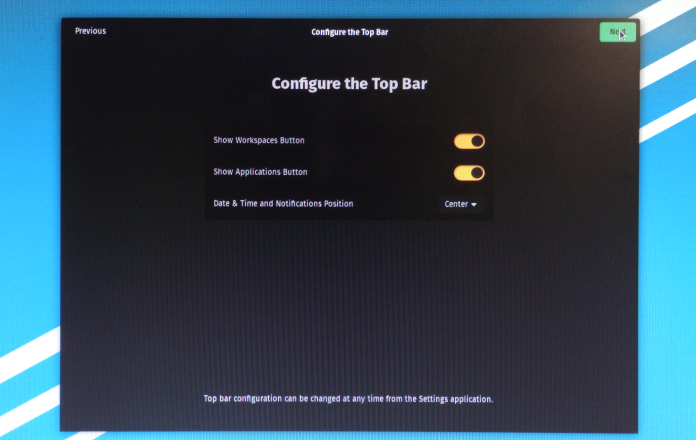
Step 20: Choose to go with clicking on the”Next” option.
In the next window Pop!_OS is showing tips for Gesture control.

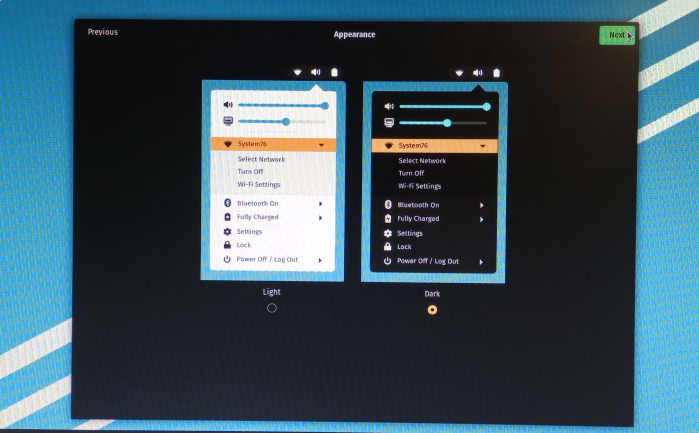
Choose appearance from “Light” and “Dark” options:

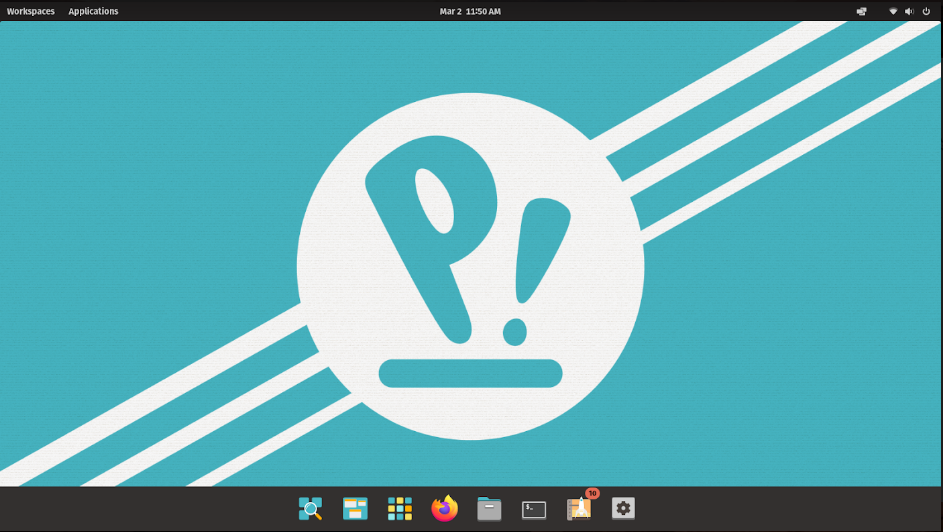
Once clicking on the “Start using Pop!_OS” option, you will see your desktop screen and then you can start using the OS features.
Conclusion
Raspberry Pi is a perfect device for the users who like to enjoy different operating systems and for the STEM and creative professionals, having a Pop!_OS for their device would become an excellent option as this will provide them the opportunity to learn something out of the box. The standalone Pop!_OS will work well on your Raspberry Pi device and the installation steps are very basic. Once you are able to install the OS on your device, it will allow you to control different devices through Python programming or other professional tools needed for your future endeavors.