Just like Facebook, Pidgin is also a chatting platform, which is free of cost and has no ads on it, it is useful for users who don’t like to get bothered while chatting. Pidgin is an open-source program, so it allows users to modify it according to their requirements. It can be installed on Windows, Raspberry Pi OS, Linux, and mac operating systems.
In this guide, you will see the Pidgin Installation on Raspberry Pi OS. Let’s begin:
How to Install Pidgin on Raspberry Pi
Installation of Pidgin on Raspberry Pi is very simple and can be done within a few steps by using the Raspberry Pi advanced package tool.
Step 1: Update the Packages List
To start with the installation process, first, we need to update our management tool apt, and to do that follow the below-given command:
Step 2: Installing Pidgin on Raspberry Pi
We will install Pidgin on Raspberry Pi through apt, so follow the below-given command:
Step 3: Check the Version of Pidgin (Optional)
By the way, this is an optional step but if you want to check the version of your Pidgin, type the below-mentioned command:
Step 4: Run Pidgin on Raspberry Pi
To run Pidgin from the terminal, follow the below-given command:
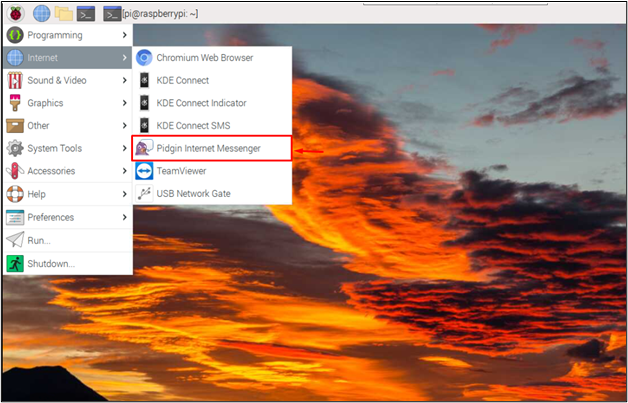
You can also run Pidgin from applications menu in the Internet section:
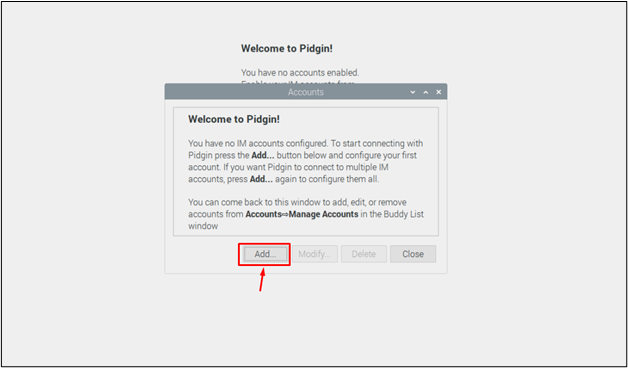
A dialogue box will appear on the screen as a result of the above command, click on Add button to add an account.
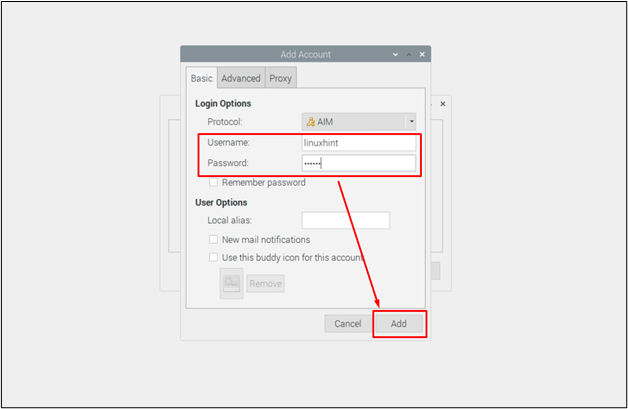
Then an Add Account box will appear on the screen asking you to create a user ID then click on the “Add” button:
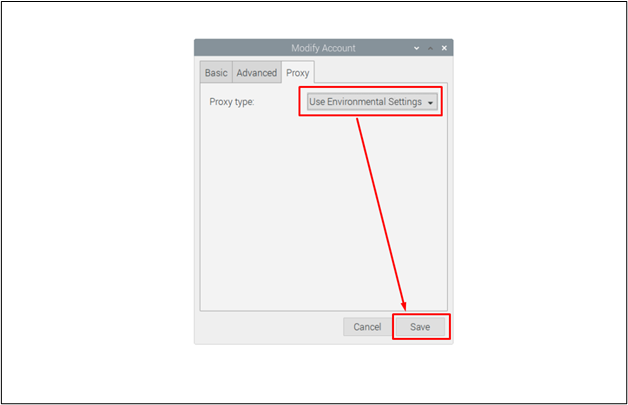
Go to the Proxy tab and choose your desired proxy type. For generalization, I am using the Use Environmental Settings from the drop-down menu.
This will create an account on Pidgin. To start chatting with your friends and family members, they must also have an account on Pidgin as well.
Remove Pidgin from Raspberry Pi
To remove Pidgin from Raspberry Pi, follow the below-given command:
That’s it for this guide your account has been created, and now you can use Pidgin for chatting.
Conclusion
Pidgin is a lightweight chatting platform that can become your primary source to connect with other people. You can install this utility on your Raspberry Pi system directly using the apt installation command that installs the package from the source repository. Afterward, you just need to create a user account, and select proxy to start using Pidgin on your Raspberry Pi system.


