The detailed procedure to install the OSMC on Raspberry Pi has been explained in this write-up.
How to download and write the OSMC image on the USB/SD card
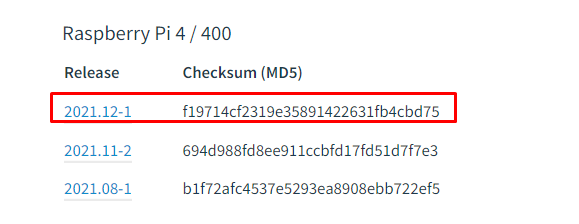
We will download the image file of the OSMC from its official website:
The image file will be downloaded in the form of zip folder, extract the file, then open the Raspberry Pi imager and choose the destination of the downloaded image file:
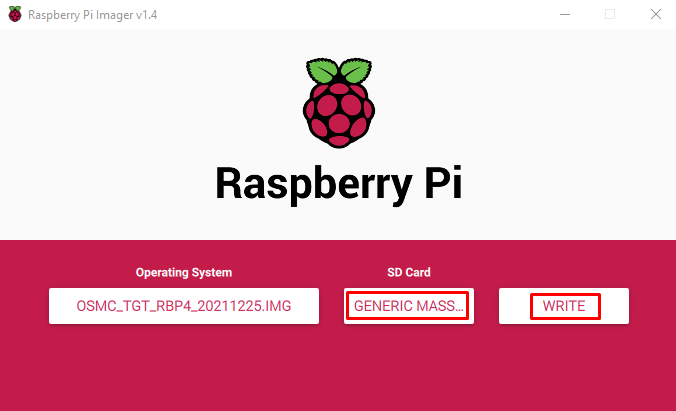
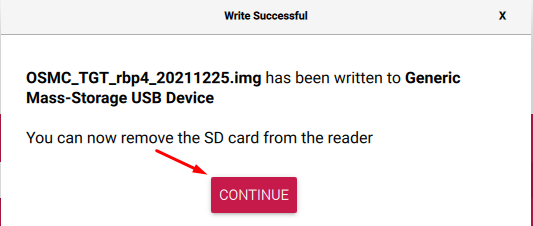
Choose the SD card, then click on the “WRITE” button and a notification will appear once the image of OSMC is successfully written on the SD card:
How to install the OSMC on Raspberry Pi
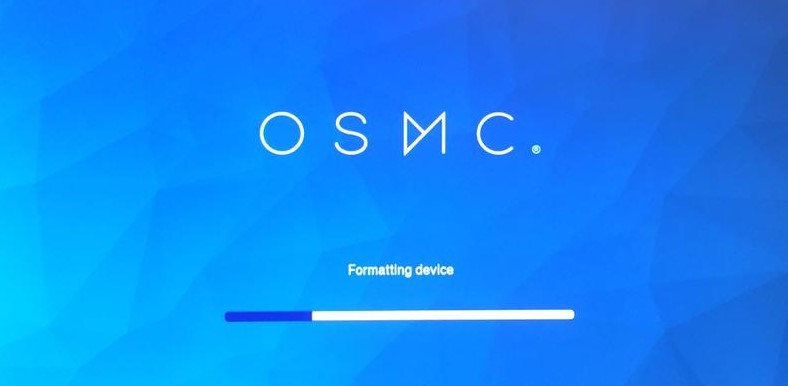
To install the OSMC on the Raspberry Pi, we will insert the SD card in the Raspberry Pi 4, on which the image file of OSMC has been written. When the Raspberry Pi is turned on the OSMC will start formatting the device:
When it is done with the formatting of the device, it will start installing the OSMC on the Raspberry Pi 4:
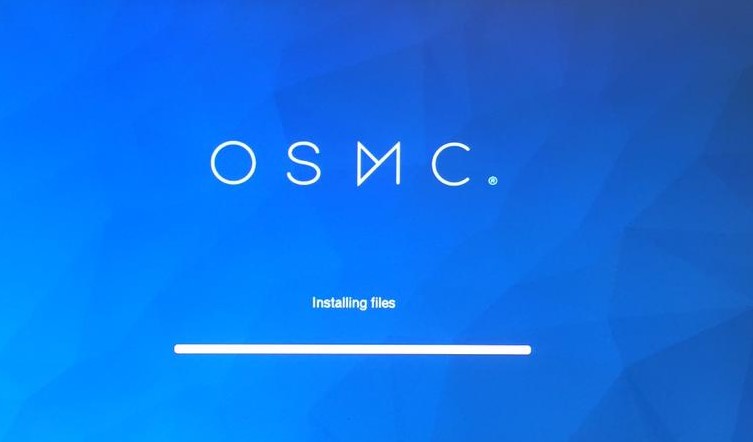
It will take only a few minutes to install the OSMC files on the Raspberry PI and when it is completed, it will reboot the system automatically.
How to start up the OSMC on the Raspberry Pi
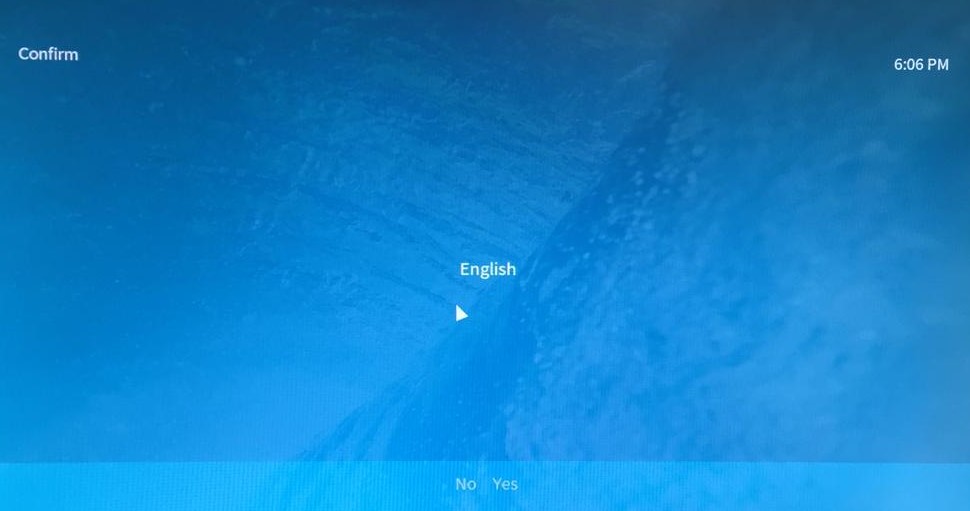
When the OSMC is installed on the Raspberry Pi as well as it is rebooted, a screen will appears that ask you to set the language for the OSMC:

Here we will choose the “English” but you have a choice, you can choose any other as well:
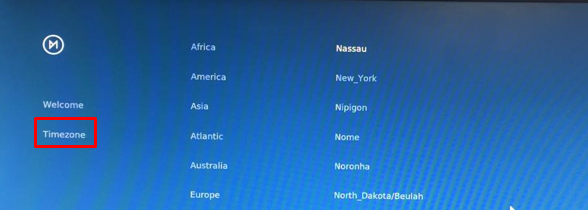
Then it will ask for the region in which you are using the OSMC to set the time zone:
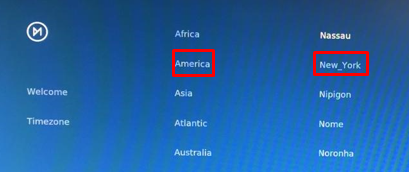
We are selecting “NewYork”:
Once it is completed the OSMC will navigate you to its home screen:
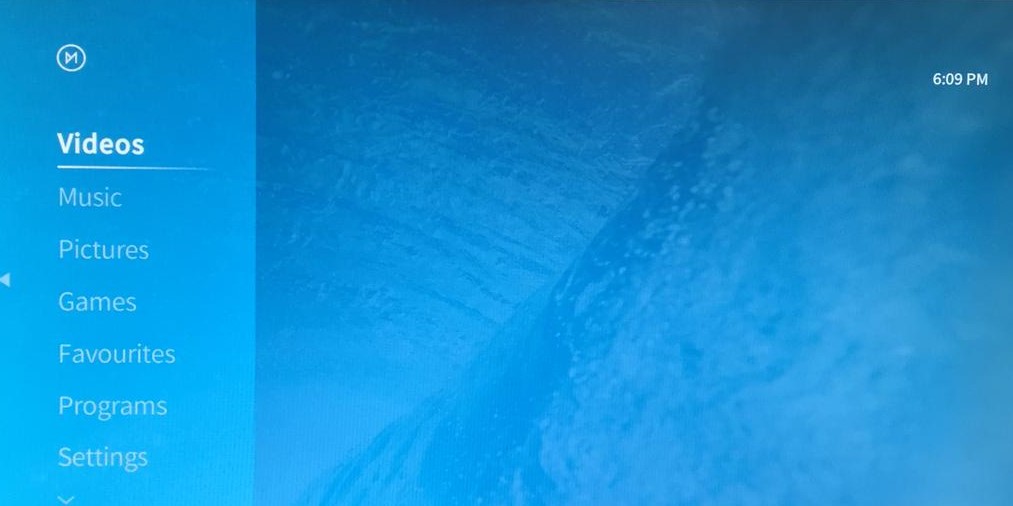
How to configure the network on the OSMC using the Raspberry Pi
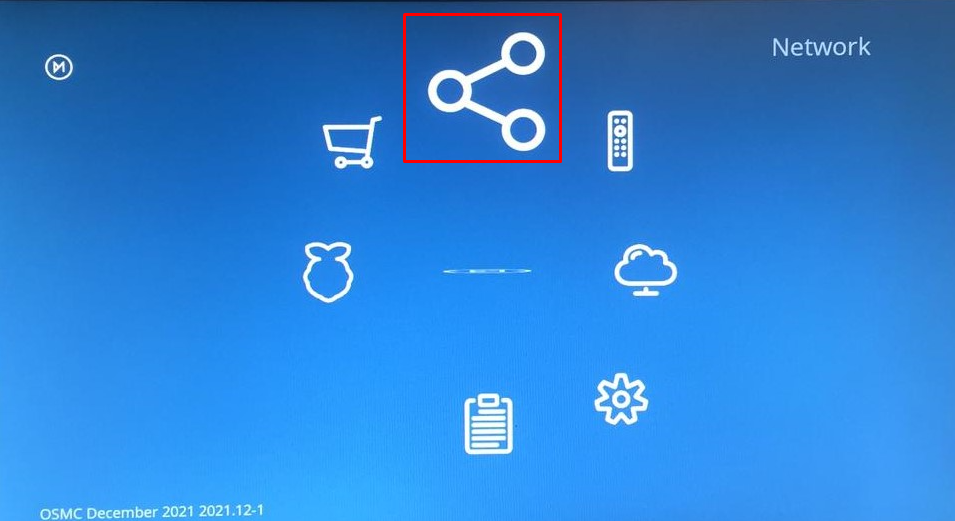
To configure the network on the OSMC, you have two options either through WiFi or using the ethernet. If you want to connect it through the WiFI then go the settings on the Home screen of OSMC:

Click to the Network icon:
And then click on the “Enable Adapter”:
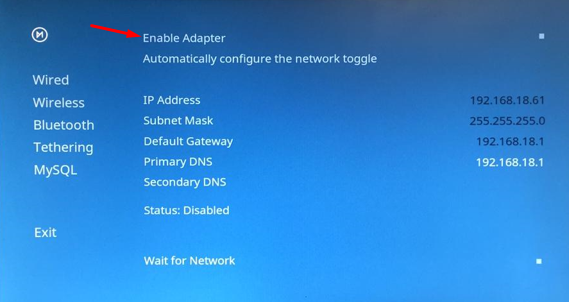
The WiFi will be connected, else connect it with the ethernet cable coming from the internet device and enjoy the online streaming of the videos and music.
Conclusion
The Raspberry Pi users who love to stream music and videos in their free time while having a pack of popcorn can stream and play different media players from the Internet as well as connected storage devices using the OSMC. In this write-up, OSMC’s installation and configuration on the Raspberry Pi have been explained in detail.