This guide will take you towards installing Network Manager on your Raspberry Pi system.
How to Install Network Manager on Raspberry Pi
You can install Network Manager on the Raspberry Pi system using the steps mentioned below:
Step 1: Update Raspberry Pi Packages
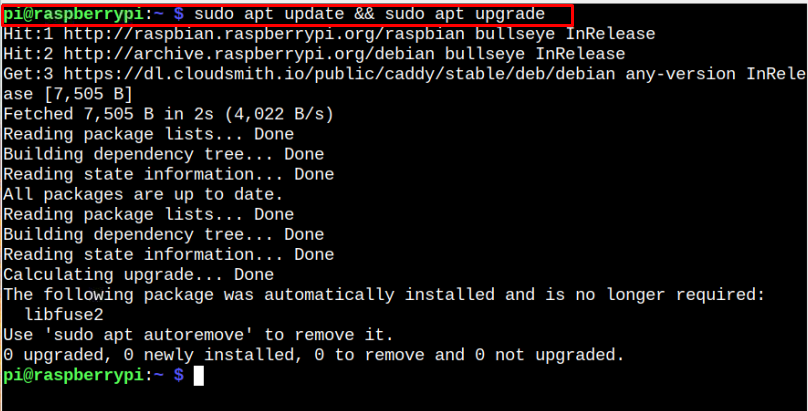
Initially, you must ensure that the packages installed on your Raspberry Pi system are updated and you can confirm it from the following command:
If some packages require upgrading, you should reply with “Y” to upgrade them successfully on the Raspberry Pi system.
Step 2: Install Network Manager on Raspberry Pi
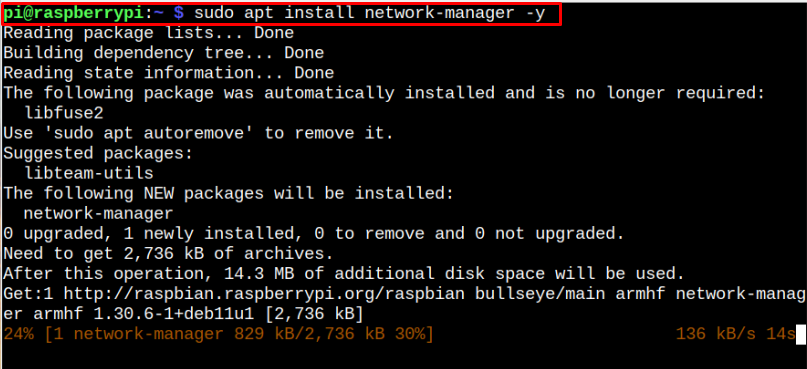
After successfully updating the packages, you can install Network Manager on your Raspberry Pi system from the following command:
Step 3: Activate Network Manager on Raspberry Pi
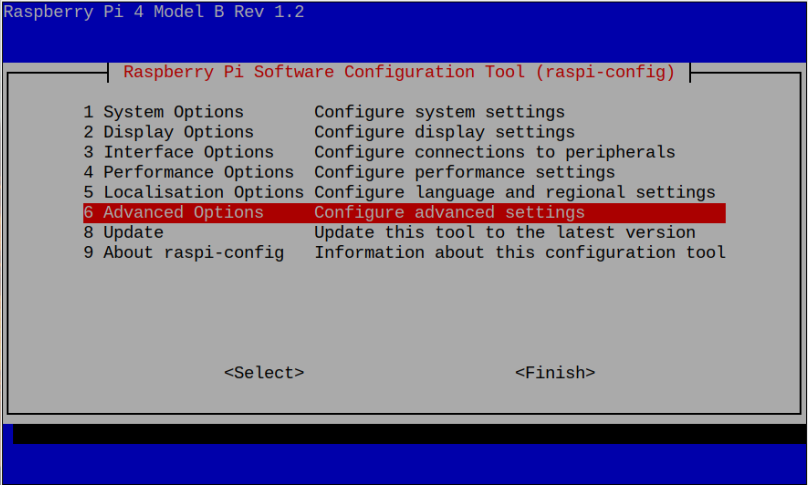
To activate Network Manager on Raspberry Pi system, you should open the Raspberry Pi configuration on your terminal through the following command:
Within the configuration menu, select the “Advanced Options” as highlighted below:
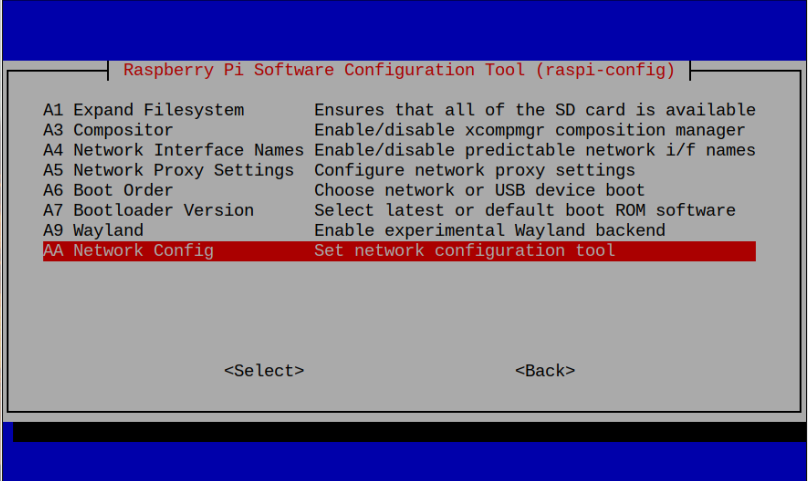
Head towards the “Network Config” option.
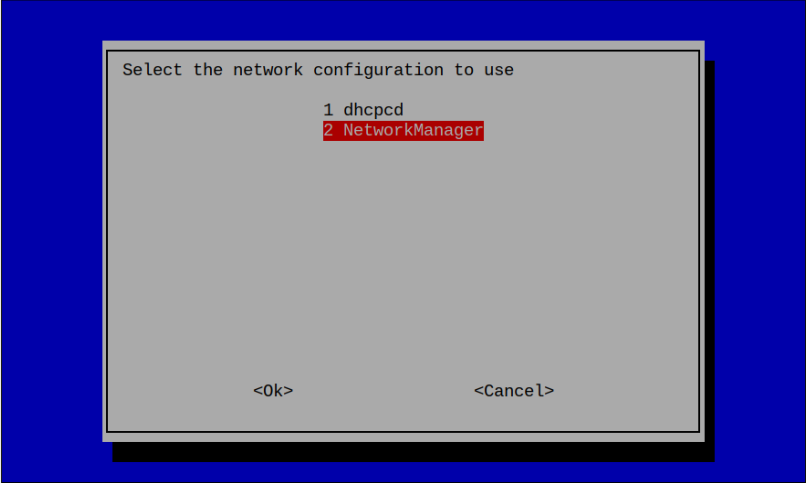
There you will see “dhcpcd” and “Network Manager” options and you must select the “Network Manager” to allow the Raspberry Pi system to use this tool instead of “dhcpcd”.
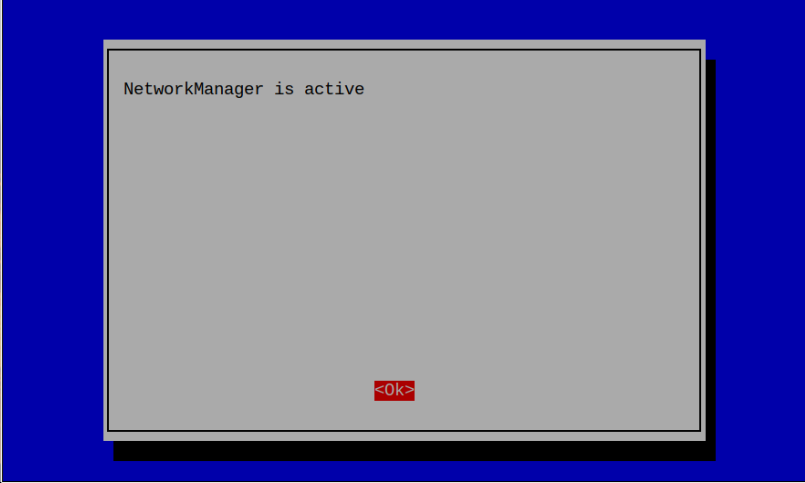
This activates the Network Manager on your Raspberry Pi system.
After the activation, you must reboot your system to make the changes.
Step 4: Use Network Manager Features on Raspberry Pi
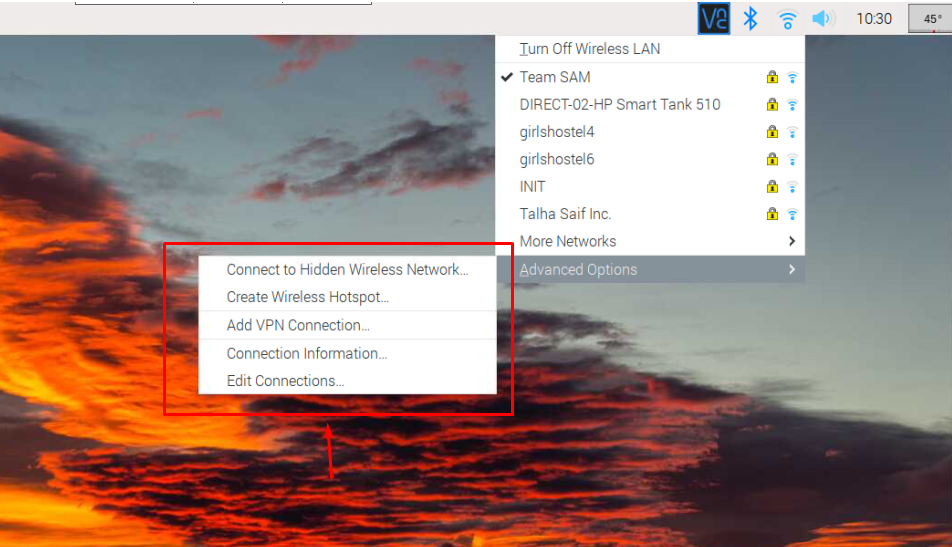
Now, to see the changes on the network interface done through Network Manager, head towards the WIFI option and there you will be able to see the “Advanced Options”, which include different settings, such as creating a hotspot and adding a VPN connection.
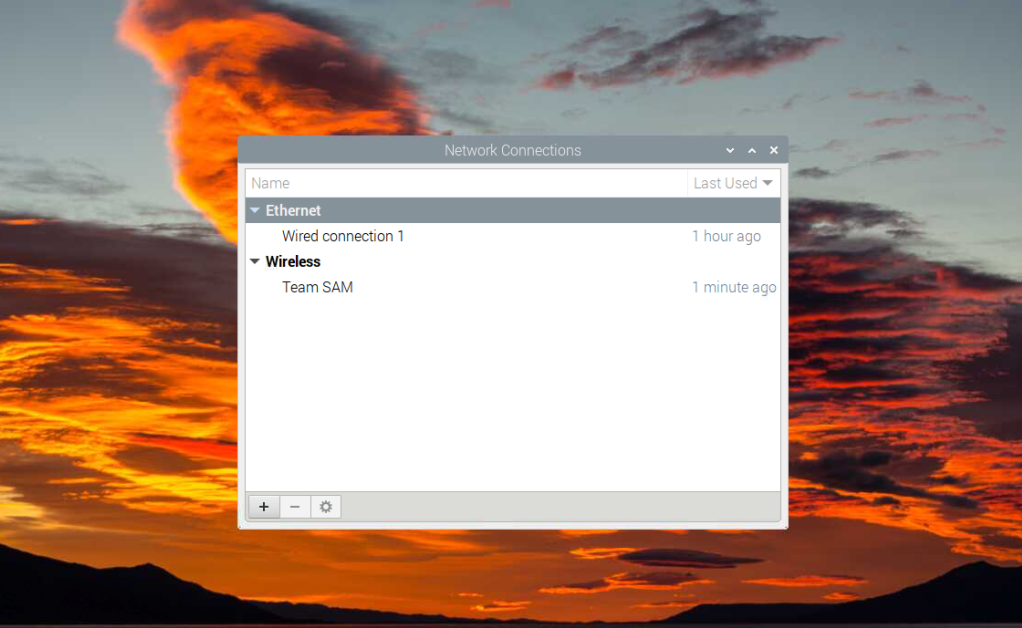
You can also edit your connection from the “Edit Connections” option that allows you to use the internet through Ethernet or WiFi.
If the “Advanced Options” appears in your WIFI setting, your system has successfully set up Network Manager.
Conclusion
Network Manager is an efficient tool for handling network configurations on the Raspberry Pi system. You can easily install this tool from the official Raspberry Pi source list using the “apt” installation command. After the installation, you should activate it by opening the Raspberry Pi configuration through the “raspi-config” command. Once the activation is successful, you can reboot your system and see the changes after the reboots as it adds an “Advanced Options” section in the Internet option. Through this option, you can create a WIFI hotspot or add a VPN connection.

