To install MX Linux on Raspberry Pi, follow this guide.
Install MX Linux on Raspberry Pi
Before installing MX Linux OS on Raspberry Pi, ensure that you have fulfilled the below-mentioned
Pre-requisites
- An SD Card
- SD Card Reader
Once the SD card is formatted correctly, you can install MX Linux OS on Raspberry Pi from the below-given steps:
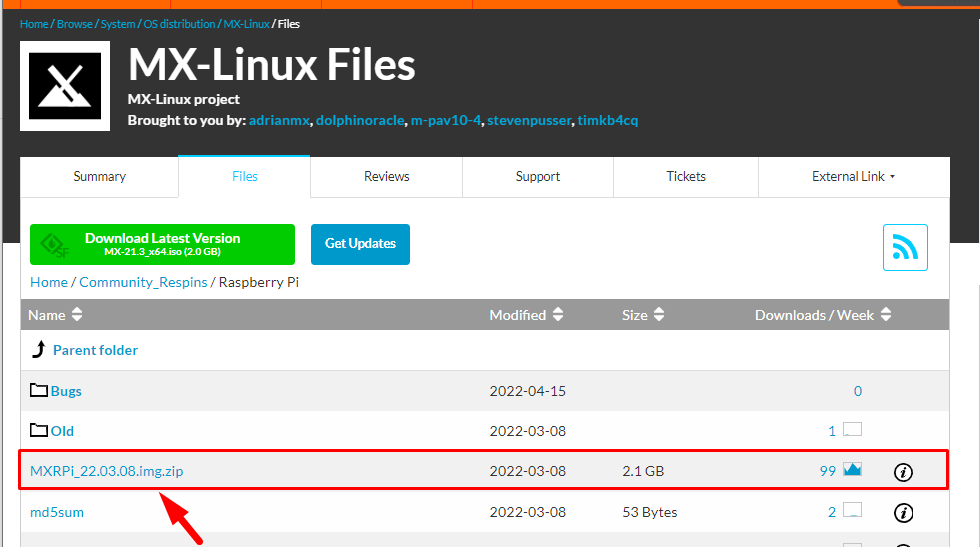
Step 1: The first step is to download an image of MX Linux OS, and for that click here and download the img.zip file on laptop or PC.
Step 2: Download and install balenaEtcher, as this is going to help us in flashing the image file onto the SD card.
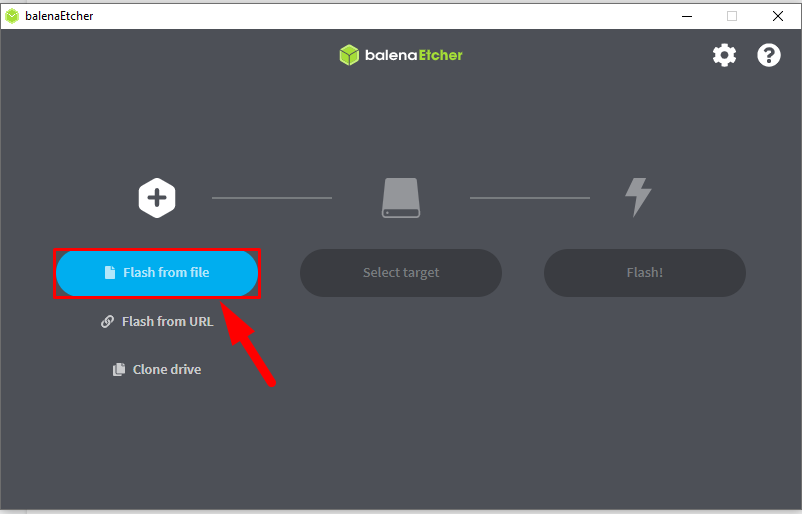
Step 3: Now open the balenaEtcher application and click on the “Flash from file” button:
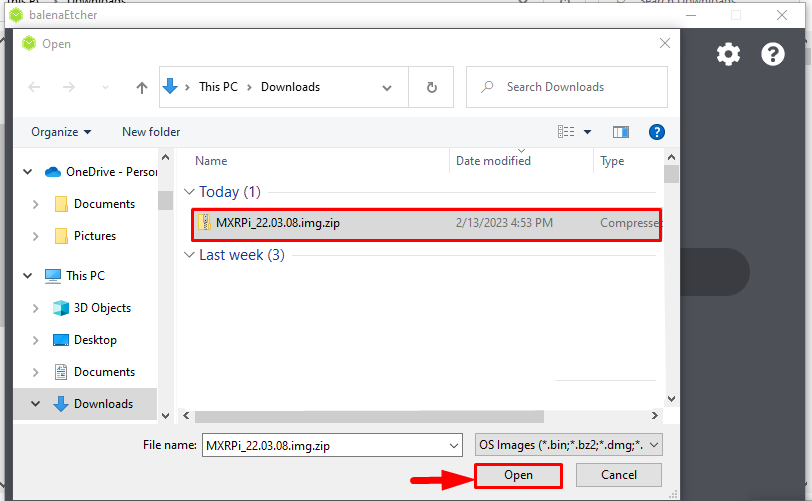
Step 4: Then select the MX Linux downloaded image, and click Open.
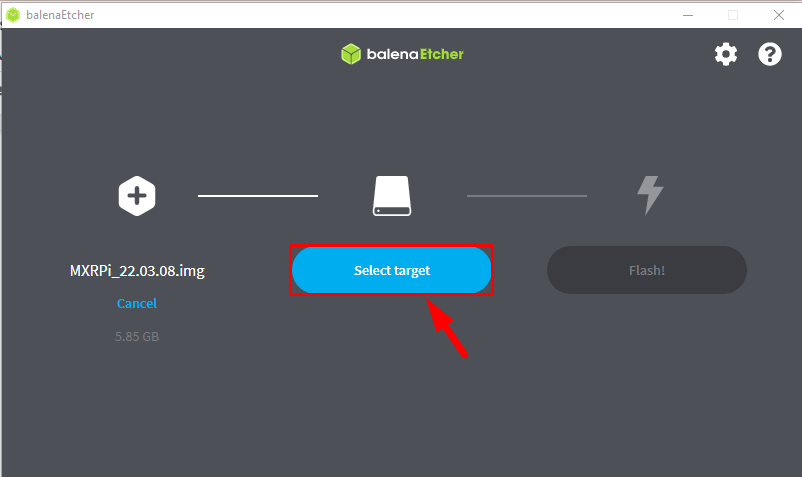
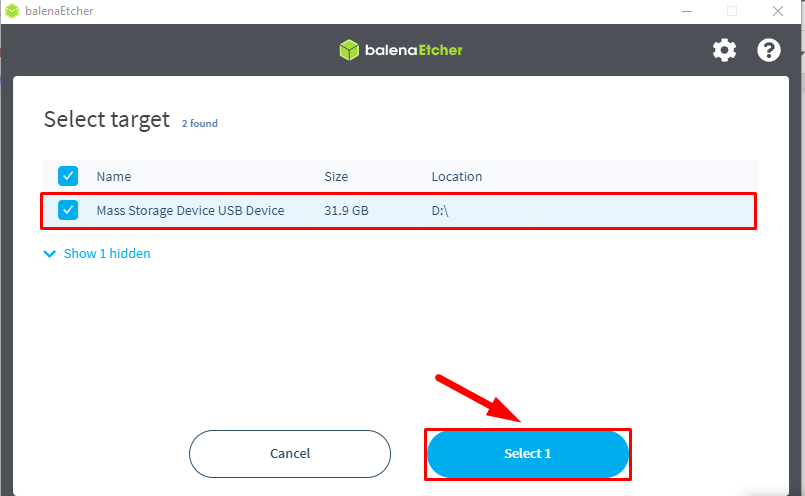
Step 5: After selecting the image file, now it is time to Select target, the target is the device with the card in it (card reader) or the USB drive.
Step 6: Now choose your device here, and hit the Select button at the bottom:
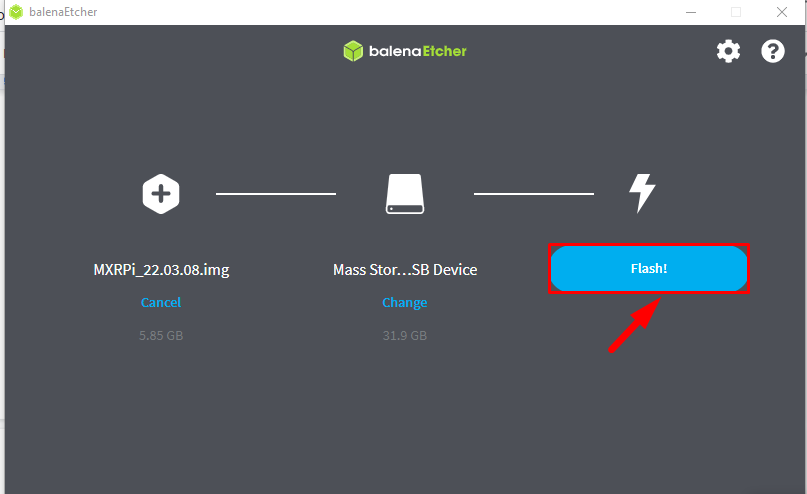
Step 7: Now finally you can flash the MX Linux img on to SD card by clicking on the Flash! button.
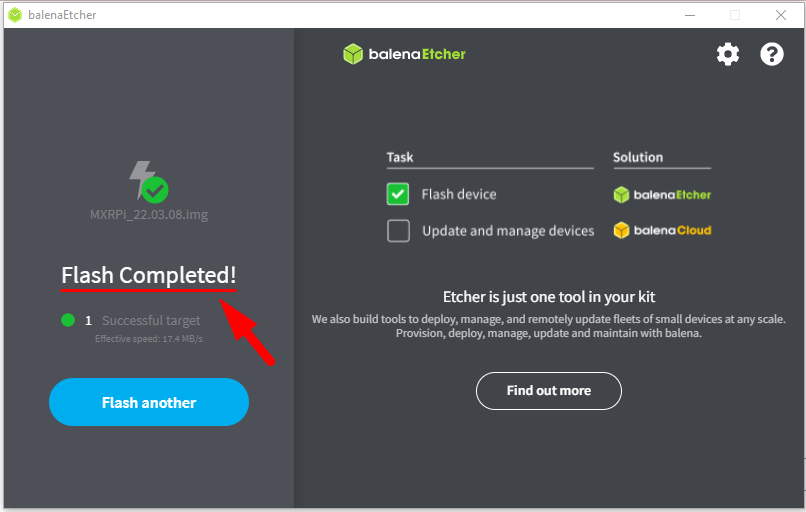
The flashing process will take some time, wait till it completes.
Step 8: Once you are done with all previous steps, then detach the SD card from the card reader to mount it to the device (Raspberry Pi) and power the device. You will see MX Linux OS desktop onto the screen.
Conclusion
To install MX Linux OS on Raspberry Pi, download the image file on laptop or PC. Then by using Balena Etcher flash the image of MX Linux onto the SD card. Once the image is copied/flashed onto the SD card then detach the SD card from the card reader and to mount it to Raspberry Pi. After that, you can use the operating system on your Raspberry Pi device.

