This tutorial will show you how to increase swap on your Raspberry Pi to overcome the low memory issue.
How to increase swap on Raspberry Pi
The following steps will help you in increasing the swap on your Raspberry Pi device.
Step 1: Stop the Swap Process
Before increasing the swap on Raspberry Pi, you will first need to ensure that you are not running any heavy application on your device. The fact is the application is already using your swap memory which is set in by default in your system. To stop the swap process, you can apply the below-mentioned command:

The above command will temporarily stop the swap process on your device if in case any application is using the swap memory.
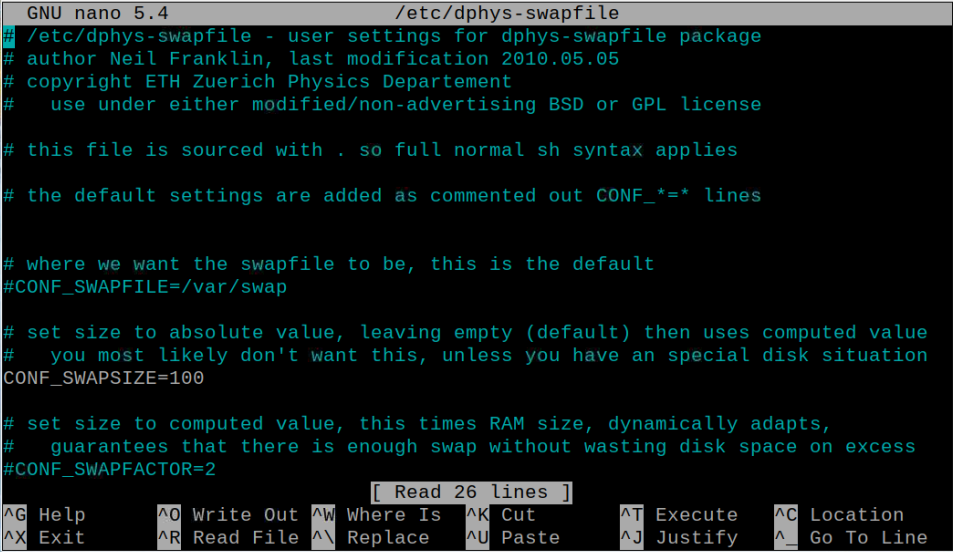
Step 2: Modify the Swap File
Next, you will need to change your swap value in the swap configuration file which can only be possible once you open the configuration file through following command:
Then search the line “CONF_SWAPSIZE=100”.
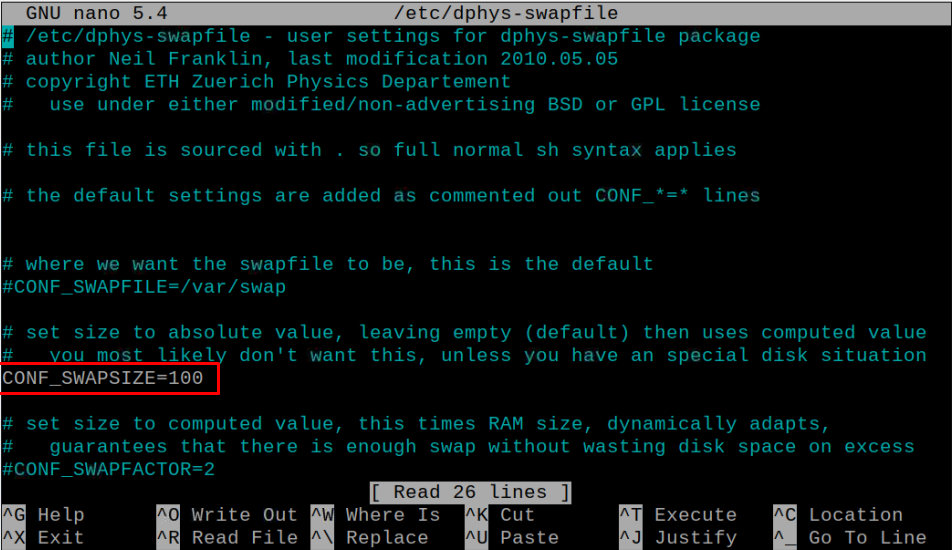
Change the value according to your choice; however, it depends on the space available on your SD card and you have to set the value according to your SD card size. The value “100” given in the configuration file is in MBs and in our case, we are choosing a 512MB swap on our Raspberry Pi model.
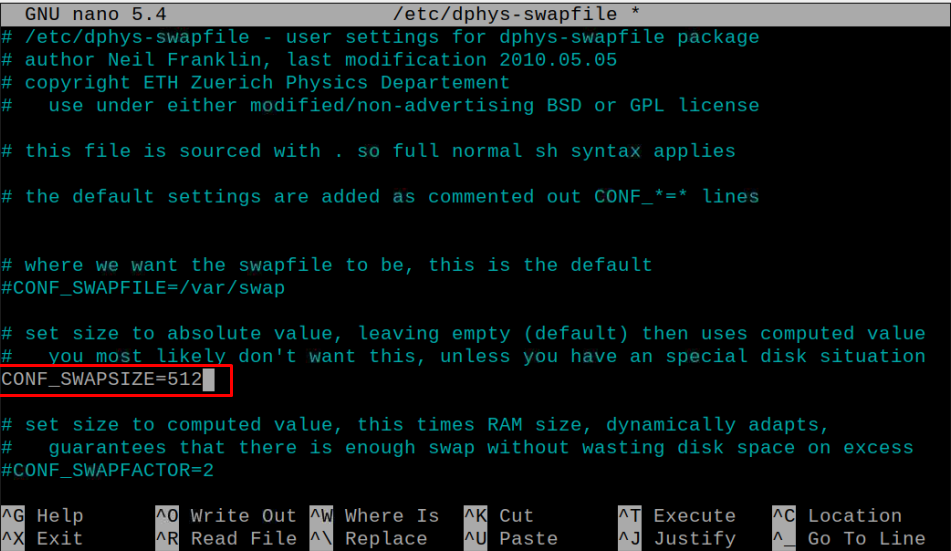
Once the above changes are done, save the file using CTRL+X, press Y and then use the Enter button.
Step 3: Reinitialize the swap file
After making changes to the above file, use the following command to reinitialize the swap file and remove the original swap file.

Step 4: Turn on the Swap
Once the reinitialization of the swap file is completed, you can run the following command to turn on the swap on your Raspberry Pi device.

Once the above steps are completed successfully, you can use the “reboot” command to restart your device and make the changes take place.
This will successfully increase the swap on your Raspberry Pi and you are now able to perform intensive tasks without worrying about any memory error.
Conclusion
The swap on Raspberry Pi is another helpful feature for the Raspberry Pi users who are encountering low memory issues. It creates a virtual memory that you can utilize once your physical memory is filled. The above step-by-step instructions will enable you to increase swap on Raspberry Pi and you have to set your swap memory based on your SD card size. Once the swap memory increases, you will then be able to execute various high computational tasks without worrying about low memory issues.