A browser cache is a data storage that your browser utilizes to speed up the page loading time and gives you a faster internet experience. It stores different web page resources like images, videos, JavaScript and so on. With time, the cache fills up and the page loading time on your browser decreases. This problem is common in low-powered systems like Raspberry Pi, which uses a Chromium browser for internet-related activities.
If you are facing the same problem on your Raspberry Pi device, you should follow this article where we come up with a solution through which you can increase your browser performance by transferring cache on the RAM disk.
Increase Browser Performance on Raspberry Pi With Cache on RAM Disk
Transferring the cache to the RAM disk is a good practice, especially if you have a Raspberry Pi device with 4GB or 8GB RAM, as this would be enough space for the browser cache to improve your browser performance. Further, the RAM read/write speed is must faster compared to an SD card. However, the major issue is that the cache gets clear on every reboot, which can be a downside. Still, if you want to use it as a temporary solution to speed up your browser performance, you can move forward towards the steps to start increasing the Chromium browser performance on Raspberry Pi.
Step 1: Create a RAM Disk
First, you will need to create a RAM disk on your Raspberry Pi device and you can do so by opening the fstab (system configuration) file using the following command:
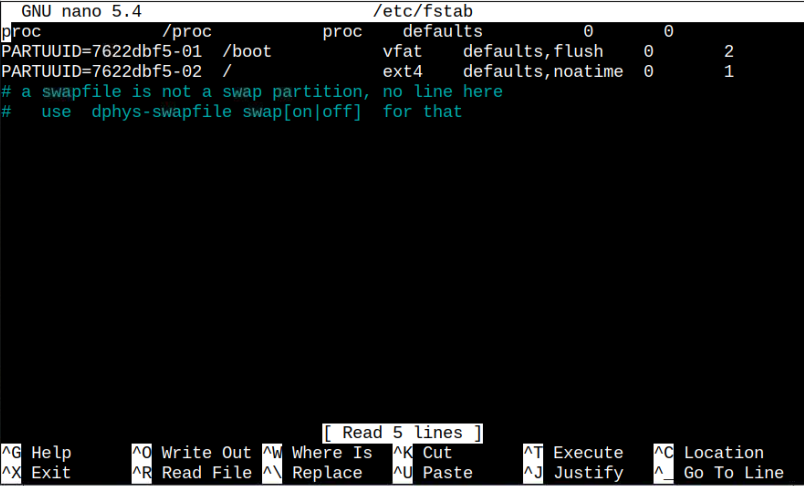
Once, the file is opened, append the following line inside the file:
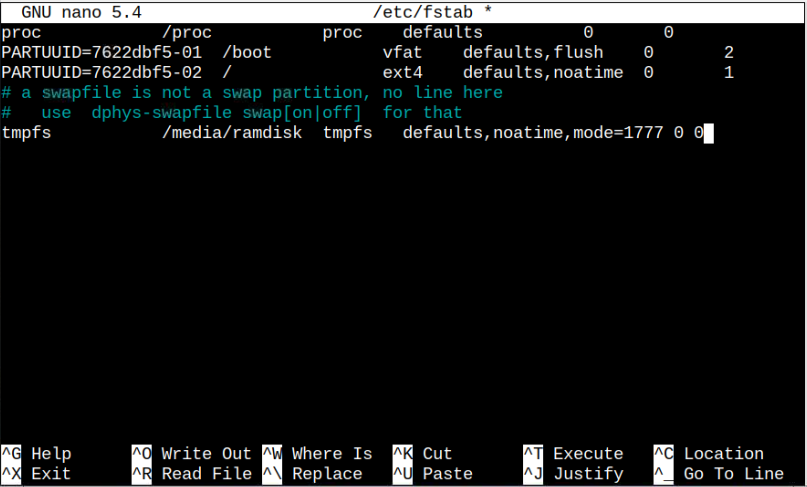
Save the above file using “CTRL+X”, add “Y” and press Enter. Once the changes are done, restart the device using the “reboot” command and after the restart, you will see the RAM disk icon on your desktop.

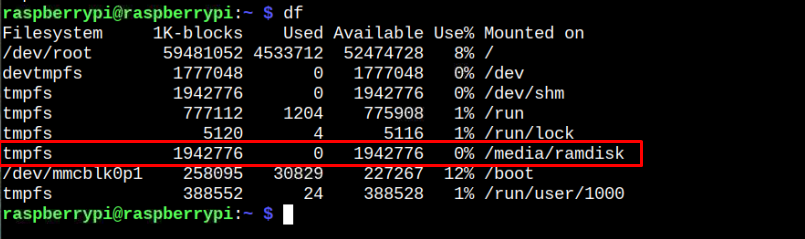
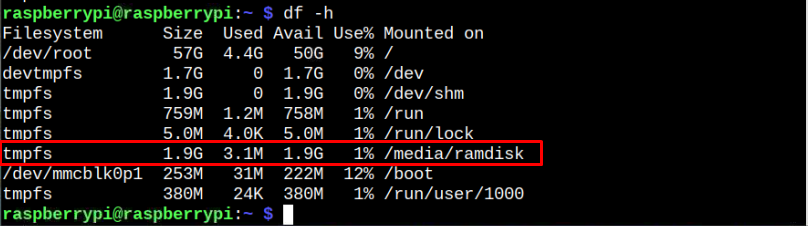
To confirm whether the RAM disk is successfully added to your Raspberry Pi device, you can use the “df” command in the terminal.
Step 2: Change Cache Directory For Chromium Browser
After successfully creating the RAM disk, it’s now time to change the cache directory for the Chromium browser so that the next time all your browser’s resources will be transferred to that directory. To do this, you must need to close all tabs on your Chromium browser and then apply the following command to activate the cache transfer option:

You can also change it from the desktop entries by heading towards the Chromium Web Browser and right click on it to select the “Properties” option.

There, in the Desktop Entry, add the following command in the “Command” section:
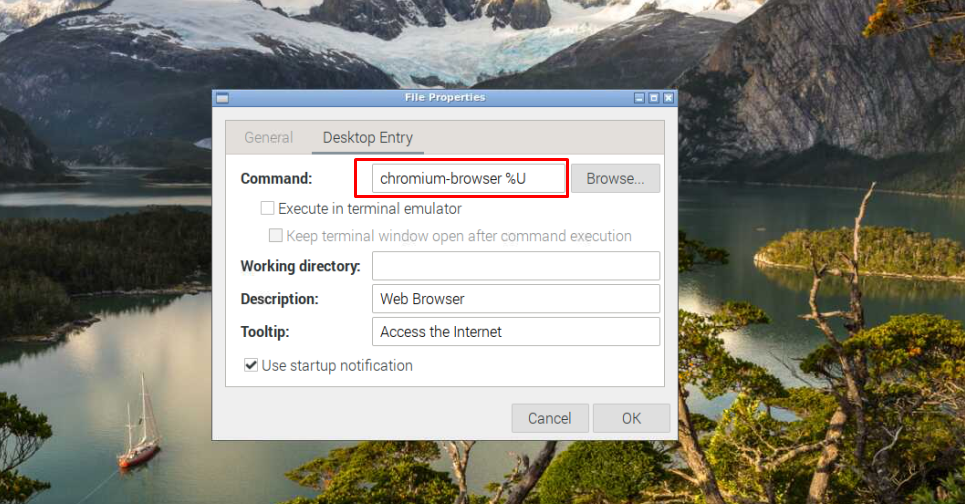
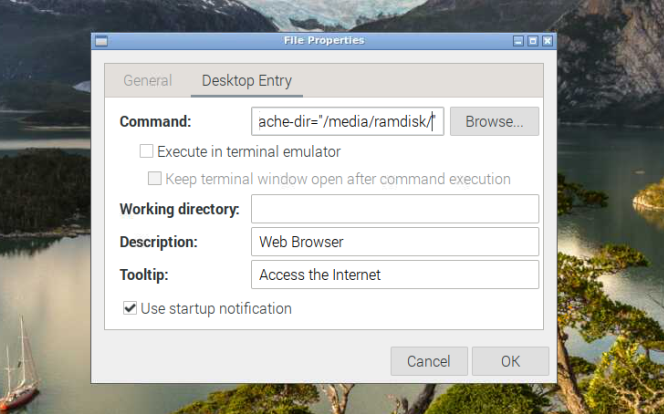
Click on the “OK” button and start visiting different web pages on the Chromium browser. Now, use the “df -h” command again to confirm the browser cache is transferred to the RAM disk.
If somehow, you don’t like the above process, you can remove every change we have made by going in the reverse direction.
Conclusion
Transferring browser cache to RAM disk is a handy task as this will boost up the page loading time of your browser on Raspberry Pi. This method requires creating a RAM disk within the system configuration file and executing a cache transferring command within the terminal to enable the transfer option. You can also use the Chromium browser Properties option to change the cache’s directory to RAM disk to increase the browser performance.