Whenever it comes to creating projects and learning circuit building the Arduino comes as the first option. There are two main reasons for choosing the Arduino platform that are: first the Arduino provides the both software and hardware tools required to build a project second one is that the Arduino boards are compatible with large number of devices and due this the interfacing of peripherals with microcontrollers has become easy.
Home automation is getting popular lately because of the convenience of controlling the entire home from a single device. So, we have created a home automation project that demonstrates how we can control home appliances remotely.
Home automation using Arduino Uno
To control and monitor the home appliances remotely can be referred to as home automation. To demonstrate how we can control multiple appliances using the Arduino Uno with wireless technology we have considered two AC powered bulbs as two appliances. We have controlled them using the Bluetooth module (HC-05) by giving it instructions from the application that we created using the MIT app inventor.
To make the home automation project we have designed a circuit whose schematic is given in the image below:
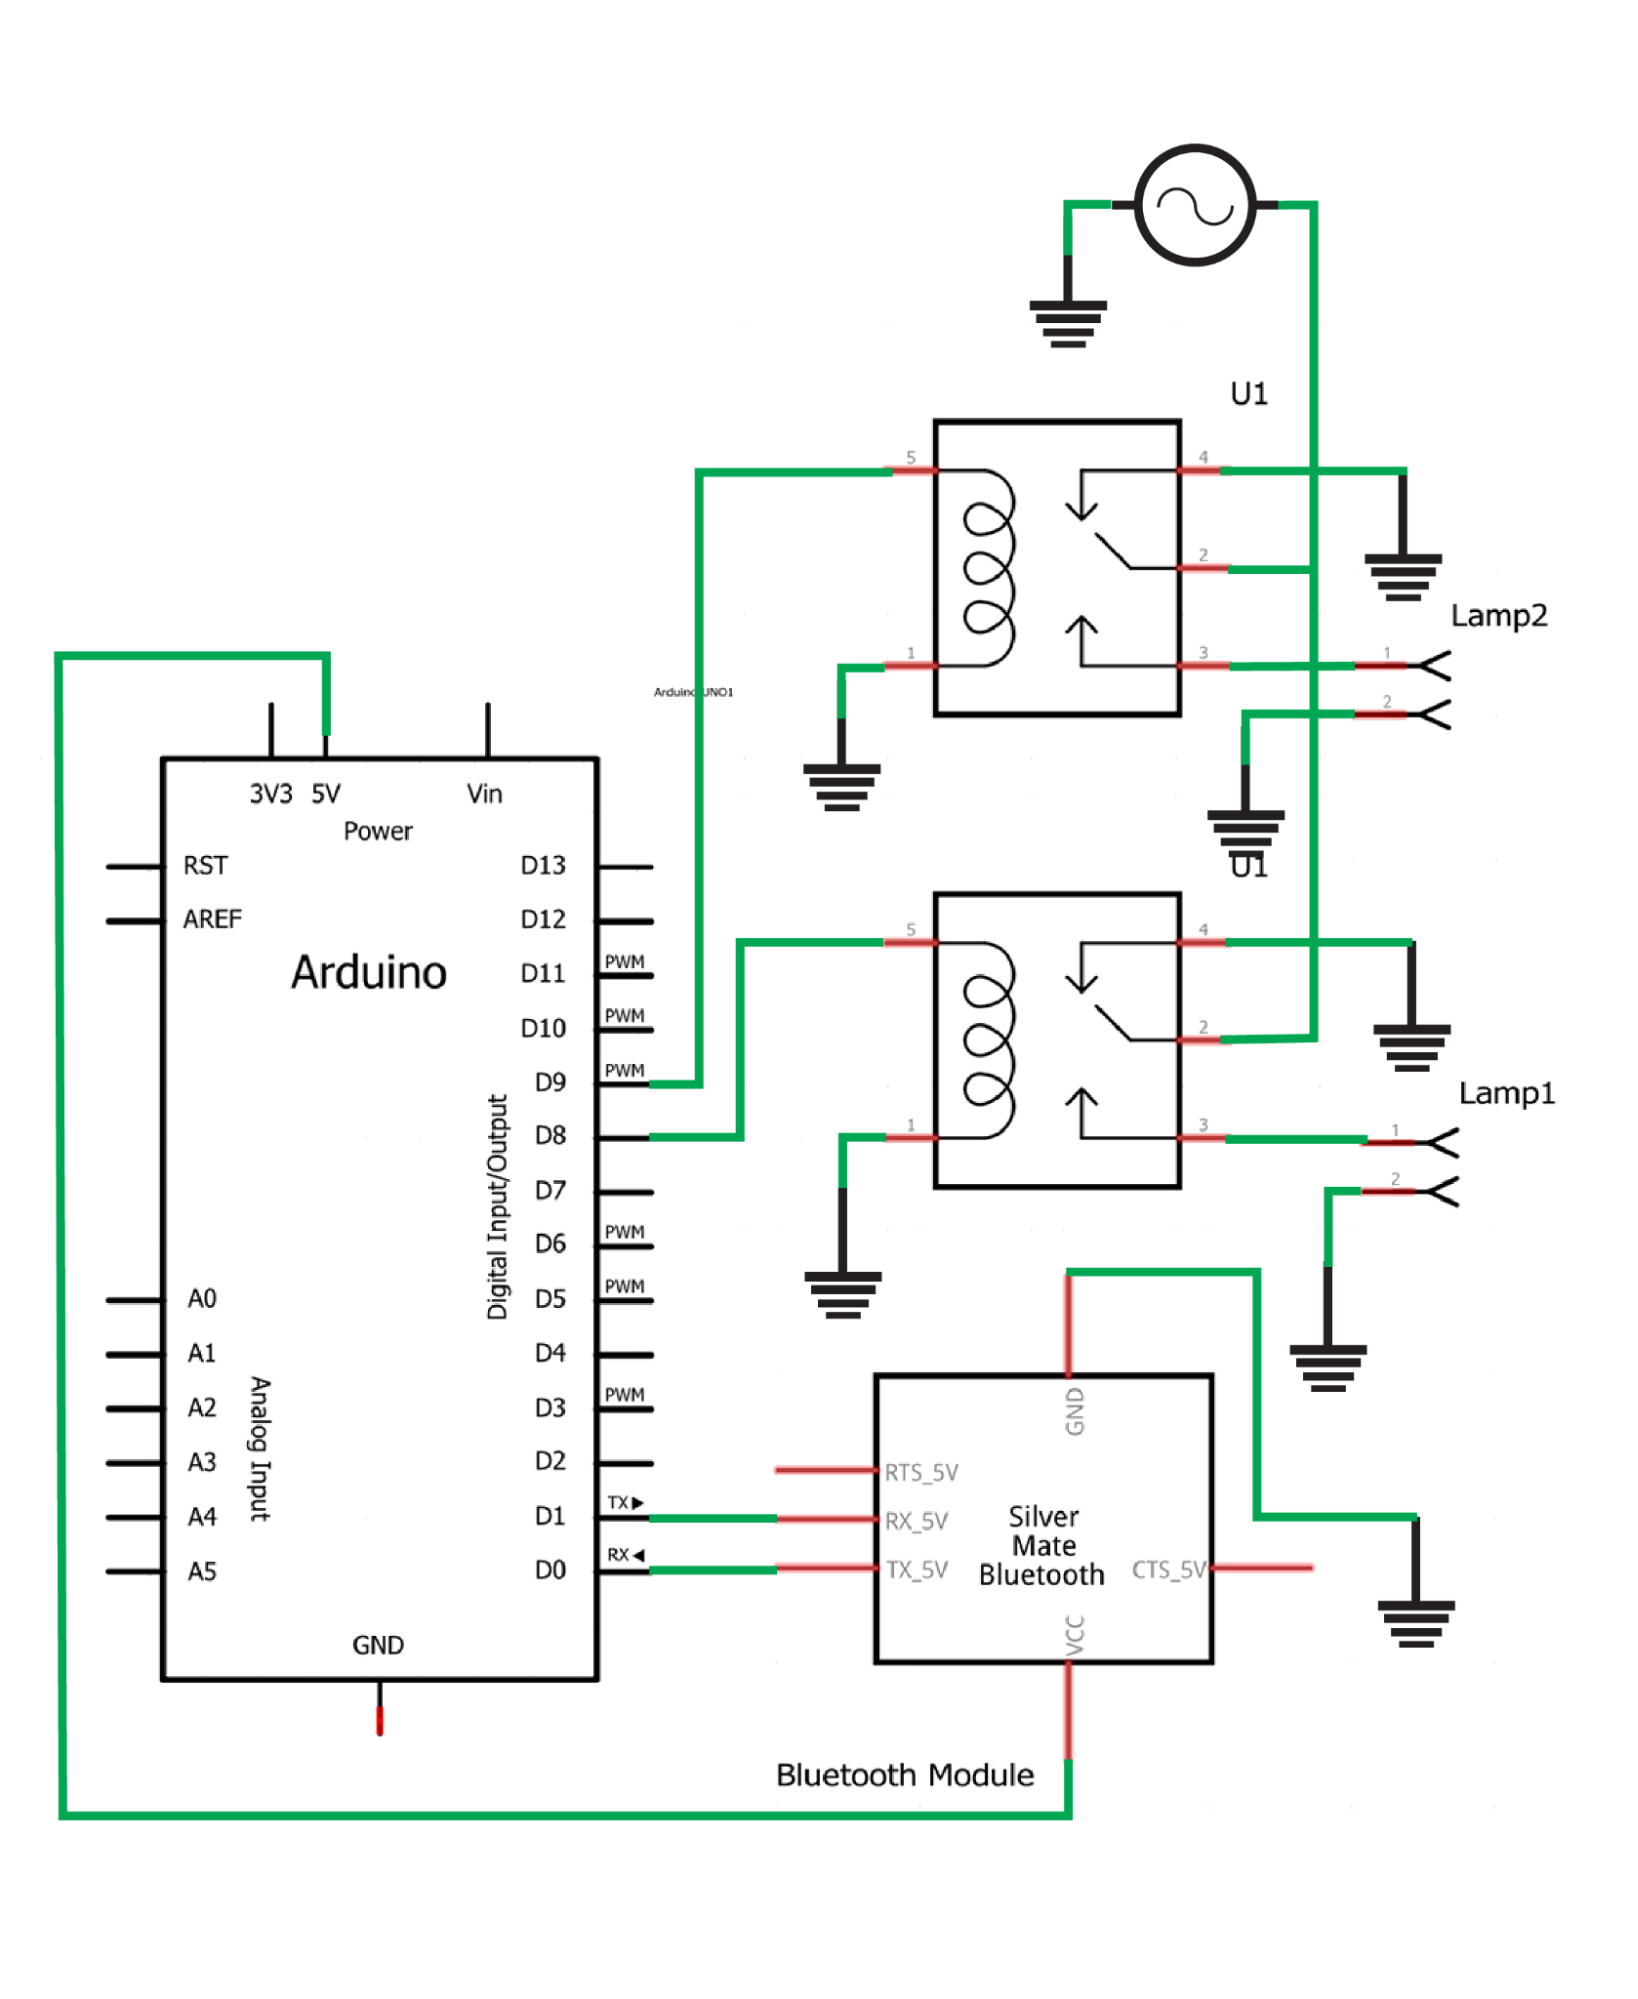
Hardware assembly for making home automation project
To remotely control the home appliances, we have used the following components:
- Arduino Uno
- Breadboard
- Connecting wires
- Bluetooth module (HC-05)
- 2 AC bulbs
- 2 Relay module
To make the connection of the circuit clearer we have provided the image below that further clarifies the connections of each component used for the home automation project:
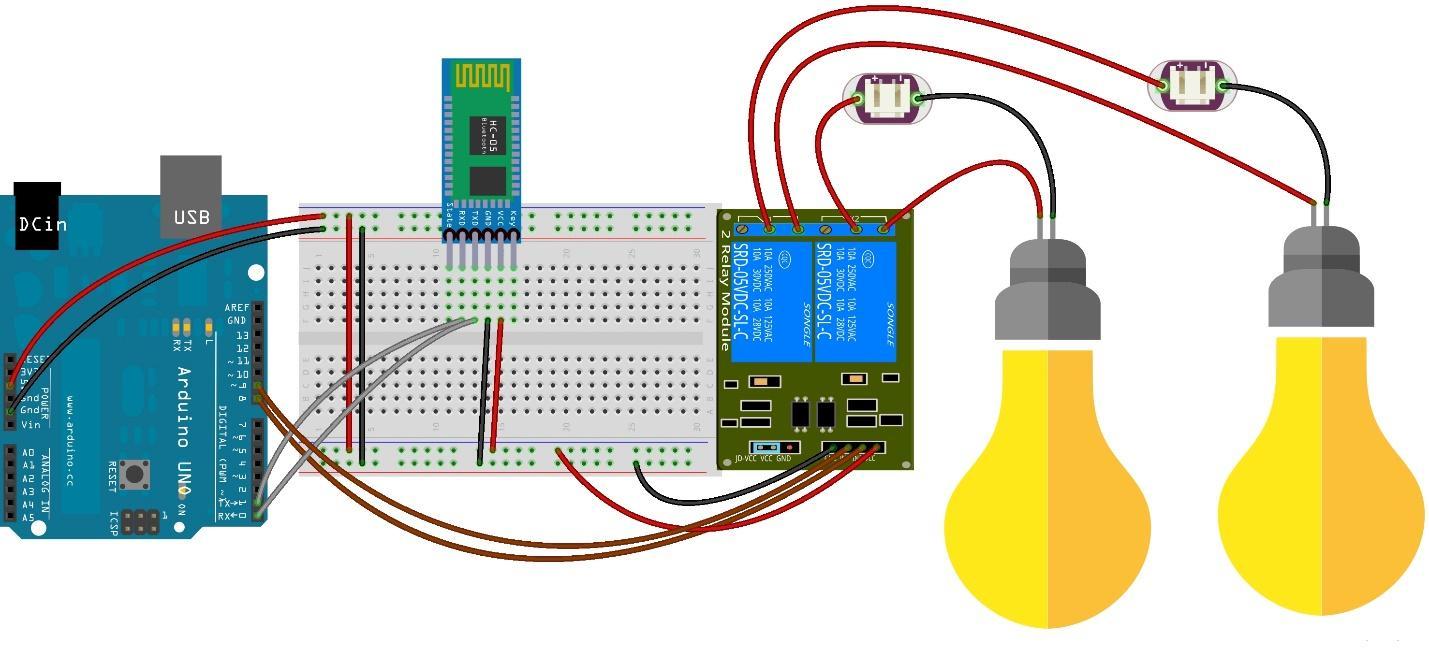
As described earlier we have used two AC bulbs for demonstration purposes, but you can use other AC appliances as well.
The Bluetooth module is placed on the breadboard to connect the Arduino with the Bluetooth module. We have connected the TX pin of the Bluetooth with the RX pin of the Arduino and the TX pin of Arduino with the RX pin of the Bluetooth.
The AC bulbs are connected with the normally open pin of each relay and by using the common pin of each relay we have energized the relays. To give signal to the relays from Arduino we have used the IN1 and IN2 pins by connecting them to the pin 8 and 9 of the Arduino Uno.
For supplying the voltage to the Bluetooth and the relay module we have connected the 5 volt and the ground pin of the Arduino to the breadboard and from there both the modules are connected to the voltage supply
Arduino code for home automation using Bluetooth with Arduino
We have given the Arduino code below that is compiled make the home automation project
int relay2=9;// assigning the signal pin for the first relay
void setup() {
// defining the mode of operation for both the relays
pinMode(relay1, OUTPUT);
pinMode(relay2,OUTPUT);
Serial.begin(9600);// initializing the serial communication
}
void loop() {
if(Serial.available()>0)/*validating if there is any data to read from bluetooth*/
{
char data= Serial.read(); // reading the data from bluetooth
switch(data)/* based on the data we have divided the code in four cases */
{
case 'a': digitalWrite(relay1, HIGH); /* if a is in the data then turn the appliance 1 on*/
break;
case 'b': digitalWrite(relay1, LOW);/* if b is in the data then turn the appliance 1 off*/
break;
case 'c': digitalWrite(relay2, HIGH);/*if c is in the data then turn the appliance 2 on*/
break;
case 'd': digitalWrite(relay2, LOW);/*if d is in the data then turn the appliance 2 off*/
break;
default : break;
}
}
delay(50);/* time after which the loop function will start again */
}
To automate the home appliances, we have used the if condition that checks if there is any data from the Bluetooth module. If there is data, then we have divided the code in 4 different cases and using these four cases we have controlled the AC bulbs. Similarly, to turn on the first appliance we have to send “a “to the Bluetooth and to make it off we have to send the “b” to the Bluetooth module
However, to turn on the second appliance we have to send “c” to the Bluetooth module and to turn it off we have to send “d” to the Bluetooth module.
How to send data to Arduino from smartphone using Bluetooth
As described earlier we have created a Bluetooth app for the Android on the MIT app inventor to send data form the smart phone to the Bluetooth module and you can create your own app by visiting the link MIT App Inventor.
We have given the image of the interface of the application we have created on the MIT App inventor:
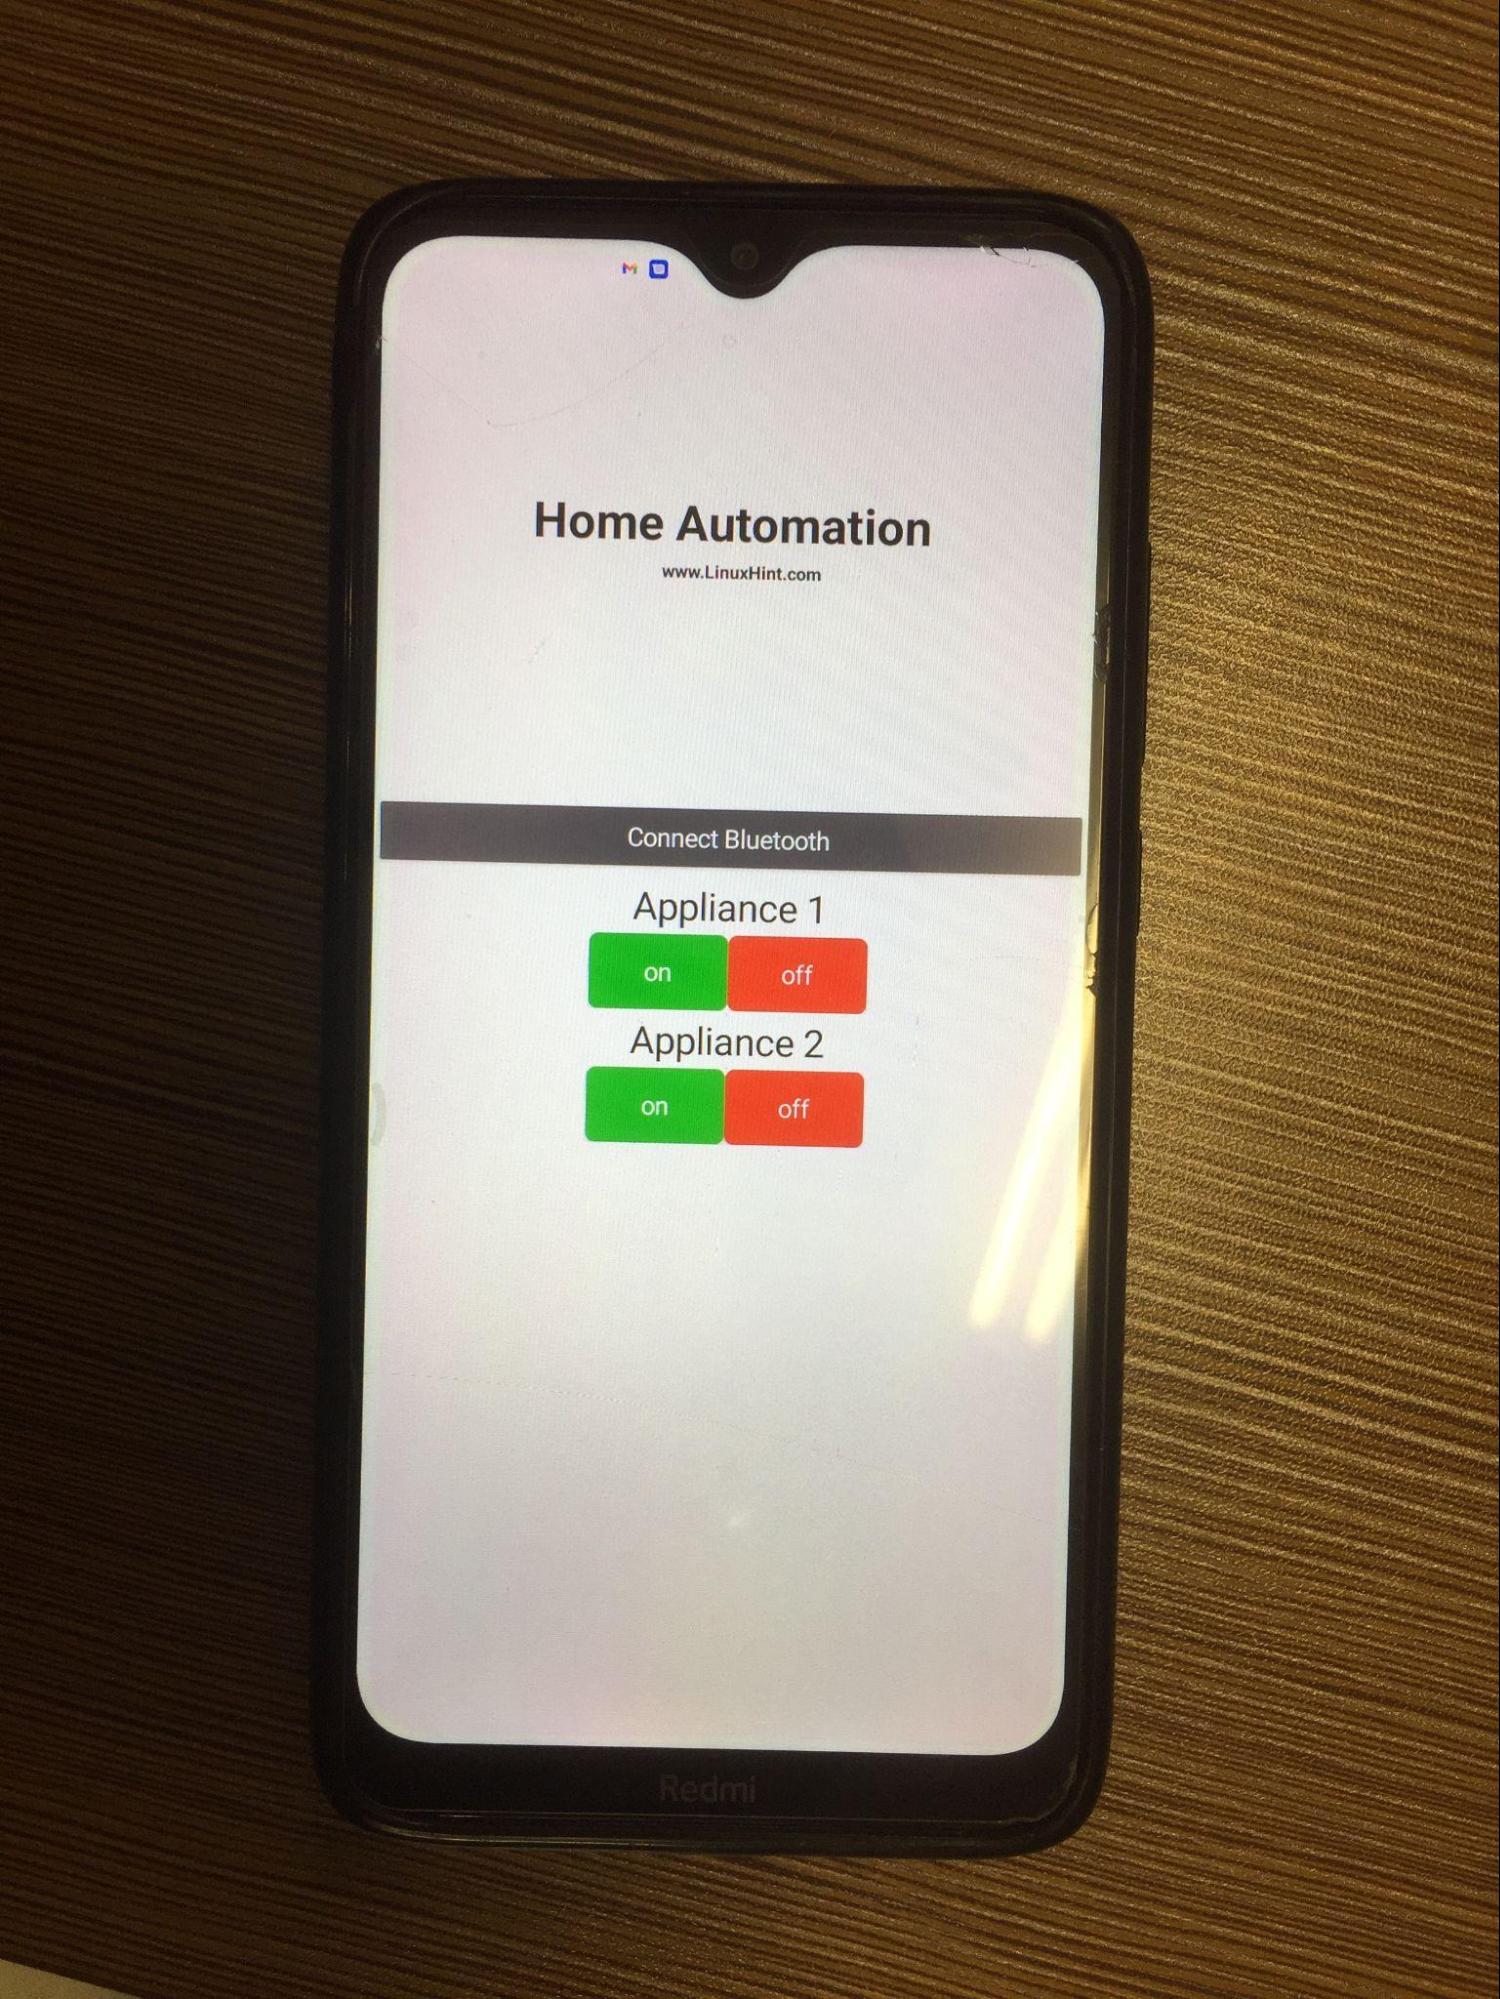
One more thing about the app is that we have configured the buttons in the application by giving the values similar to the case values we used in the Arduino code. You can download this app from here.
Hardware implementation for the home automation using Bluetooth module with Arduino Uno
We have given the image that shows hardware implementation of the hardware assembly we described above:
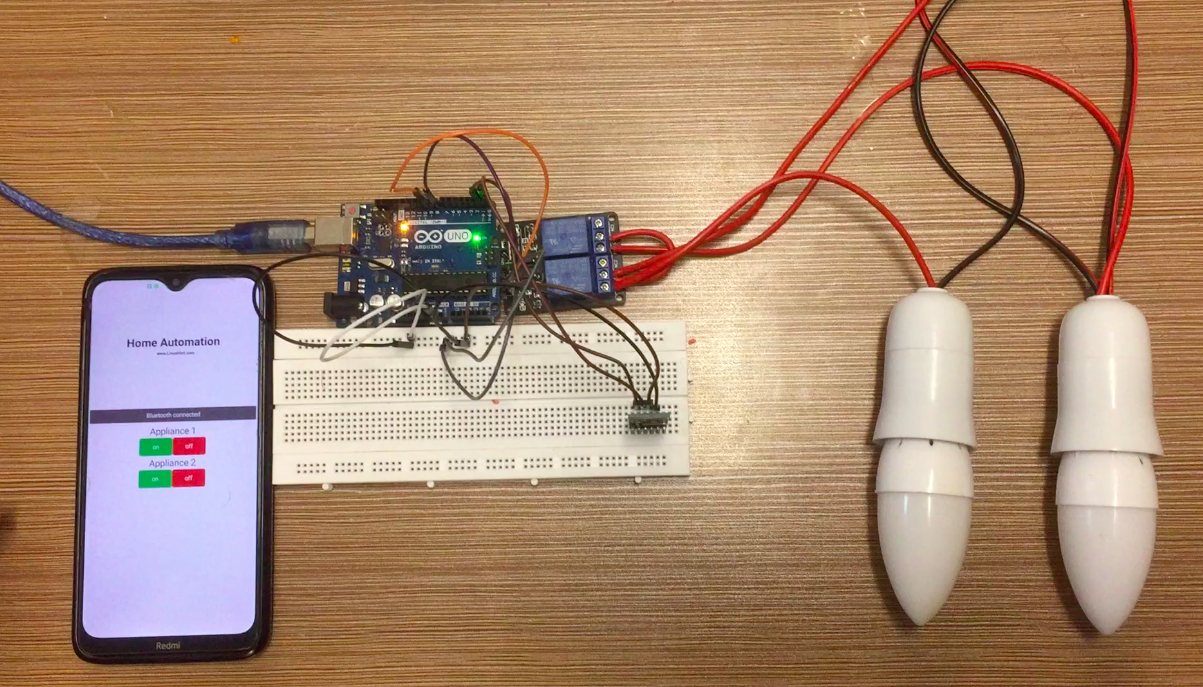
To demonstrate the functionality of the Arduino code we have given the animation of the working of the home automation system that we created:

Conclusion
Home automation has a great significance when it comes to controlling the appliances wirelessly because it makes it easy to turn on/off and monitor the appliances. Similarly, it can help in controlling the electricity bills and prevent human injury in case of any short circuit. We have created a home automation system using Arduino Uno and Bluetooth modules (HC-05) and for demonstration purposes we have considered two AC bulbs as the AC appliances.