Ultrasonic Sensor with Arduino Nano
Ultrasonic sensor uses sound waves to detect and measure object distance. This distance sensor works by sending a high-frequency sound pulse and measures the time required by the wave for hitting an object and reflect to the sensor. The sensor calculates the object distance by using the time taken by the wave.
To begin, connect the ultrasonic sensor to the Arduino Nano using the appropriate pins. The ultrasonic sensor typically requires a trigger and echo pin, as well as power and ground connections. Once the connections are made, you will need to install the appropriate libraries and software to control the sensor.
Today we will use the HC-SR04 sensor. One of the key benefits of using an HC-SR04 ultrasonic sensor is its simplicity and low cost. The HC-SR04 ultrasonic sensor is also highly accurate and can measure distances up to 400 cm (157 inches) with a resolution of 0.3cm (0.12 inches). It has a wide operating voltage range, making it suitable for use with a variety of microcontrollers and power sources.
Here are some main specifications of this sensor:
| Characteristics | Value |
|---|---|
| Operating V | 5V DC |
| Operating I | 15mA |
| Operating Freq | 40KHz |
| Min Range | 2cm/ 1 inch |
| Max Range | 400cm/ 13 feet |
| Accuracy | 3mm |
| Measuring Angle | <15 degree |
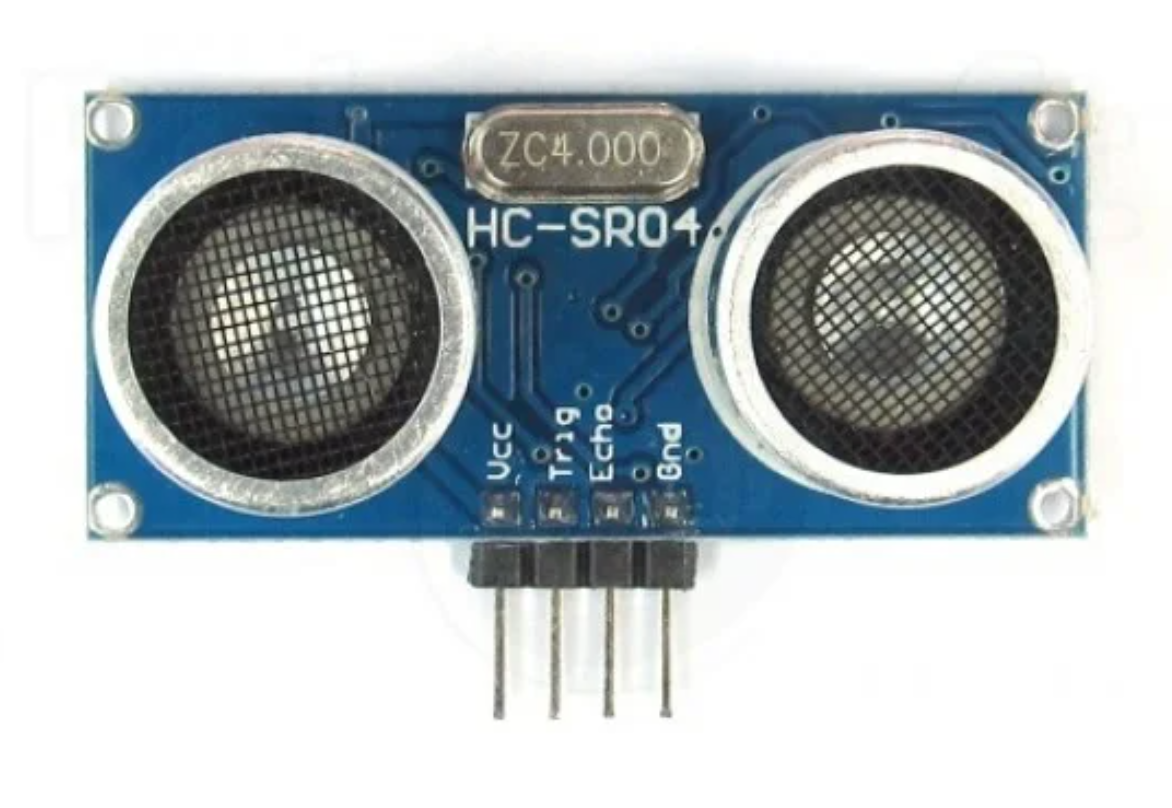
Pinout of Ultrasonic Sensor
HC-SR04 has total of 4 pins:
- Vcc: Power pins for sensor. Normally uses 5V
- GND: GND pin of sensor
- Trig: Trigger pin that receives signal from Arduino digital pin
- Echo: Send a signal to Arduino digital pin. Using this signal Arduino calculates total distance traveled using the time taken by this signal.

How Ultrasonic Works
The HC-SR04 works using the high frequency sound signal to measure distance or detect objects. When interfaced with an Arduino (or other microcontroller), it can be used to measure distance or detect objects in a variety of applications. Here is how it works:
1: The HC-SR04 ultrasonic sensor consists of a transmitter and a receiver, as well as a control circuit and a power supply. The transmitter sends out a high-frequency sound pulse, while the receiver listens for the pulse to bounce back after it hits an object.
2: To measure distance, the Arduino sends a pulse to the trigger pin of the HC-SR04 sensor, causing the transmitter to emit a sound pulse. The sound pulse travels through the air and hits an object, causing it to bounce back to the receiver.
3: The receiver measures the time it takes for the sound pulse to bounce back and sends this information to the control circuit. The control circuit calculates the distance to the object based on the time delay and the speed of sound.
4: The Arduino can then read the distance measurement from the sensor by reading the value on the echo pin. This value is proportional to the distance to the object, and the Arduino can use it to calculate the actual distance.
5: To detect objects, the Arduino can simply check whether the distance measured by the sensor is below a certain threshold. If the distance is below the threshold, it means that there is an object within range of the sensor.

The HC-SR04 sensor will calculate the distance using the time taken by the ultrasonic wave. As ultrasonic is sound wave so speed of sound in air is taken for calculations. Secondly total distance traveled by the wave is divided by 2 to get the one-sided actual object distance from the sensor.

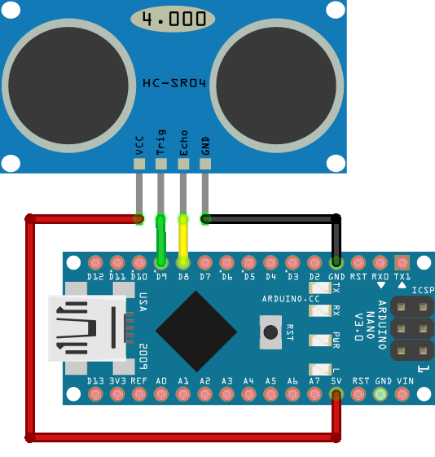
How to Connect Arduino Nano with Ultrasonic Sensor
To connect Arduino Nano with an ultrasonic sensor we need two digital pins for Trigger and Echo. To power ultrasonic 5V and GND pin will be used.
| HC-SR04 Pins | Arduino Nano Pins |
|---|---|
| Vcc | 5V |
| Trig | D9 |
| Echo | D8 |
| GND | GND |
Trigger and echo pin of the sensor can be connected to any digital pins of the Nano board.
Circuit Diagram
Following is the schematic diagram of HC-SR04 with Arduino Nano.
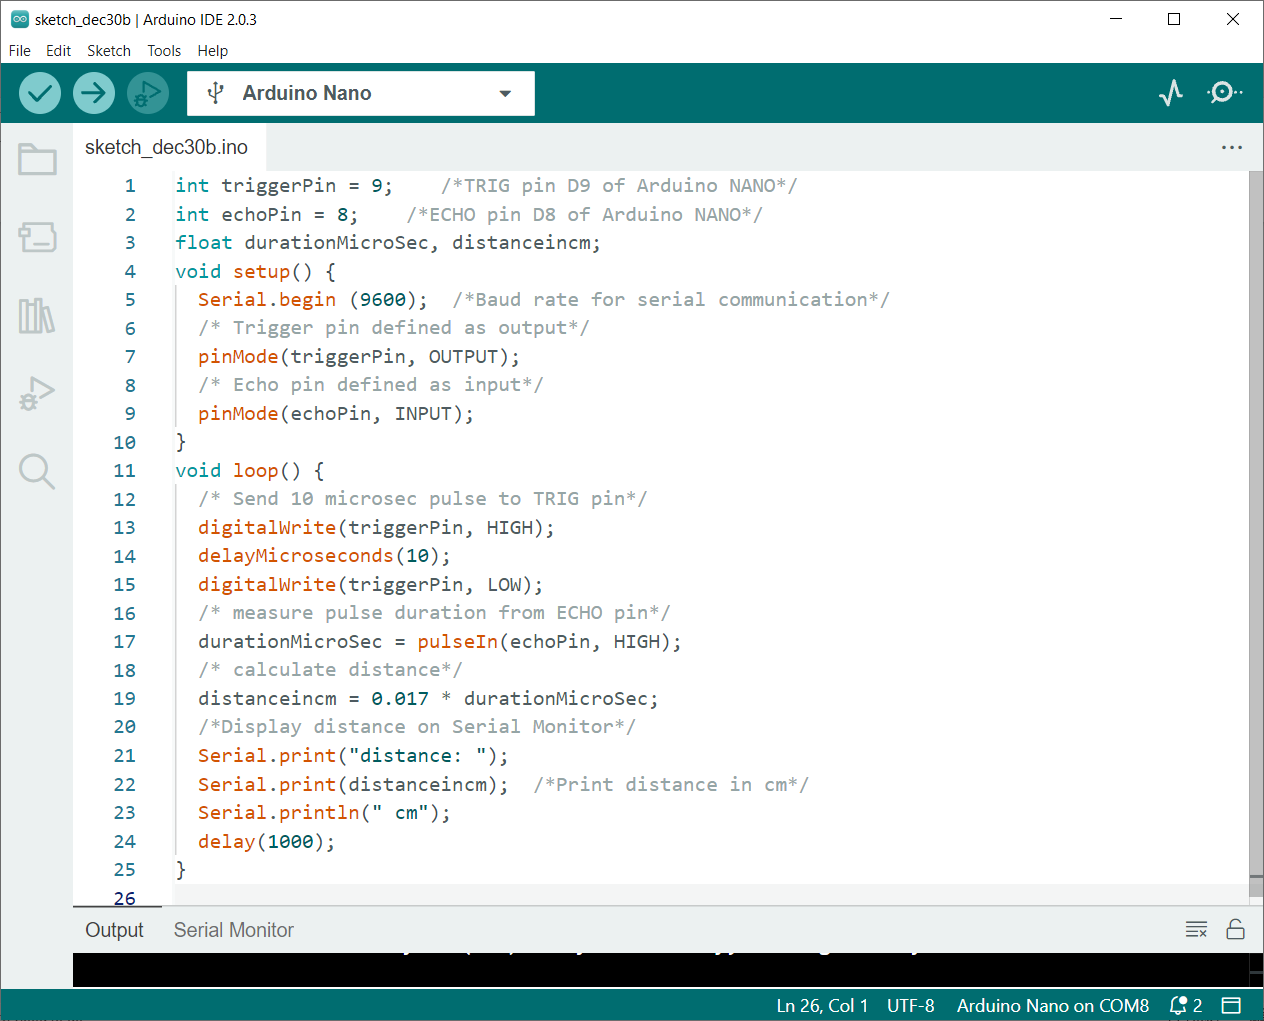
How to Program Ultrasonic Sensor Using Arduino Nano
Connect the Arduino Nano with HC-SR04 using the above schematic. Upload the below code to the Nano board using Arduino IDE.
Code
Open IDE, select Nano board and upload code using USB mini cable.
int echoPin = 8; /*ECHO pin D8 of Arduino NANO*/
float durationMicroSec, distanceincm;
void setup() {
Serial.begin (9600); /*Baud rate for serial communication*/
/* Trigger pin defined as output*/
pinMode(triggerPin, OUTPUT);
/* Echo pin defined as input*/
pinMode(echoPin, INPUT);
}
void loop() {
/* Send 10 microsec pulse to TRIG pin*/
digitalWrite(triggerPin, HIGH);
delayMicroseconds(10);
digitalWrite(triggerPin, LOW);
/* measure pulse duration from ECHO pin*/
durationMicroSec = pulseIn(echoPin, HIGH);
/* calculate distance*/
distanceincm = 0.017 * durationMicroSec;
/*Display distance on Serial Monitor*/
Serial.print("distance: ");
Serial.print(distanceincm); /*Print distance in cm*/
Serial.println(" cm");
delay(1000);
}
Code started by defining the trigger and echo pin. Two float variables are defined that will store the time taken by wave and actual measured distance of object.
Pulse input is defined at the D8 pin of Arduino Nano using the pulseIn() function.
Once the Arduino Nano receives a signal at D8 it will calculate the distance using the distance time formula.
In loop part measured distance in printed o serial monitor using the Serial.println() function.
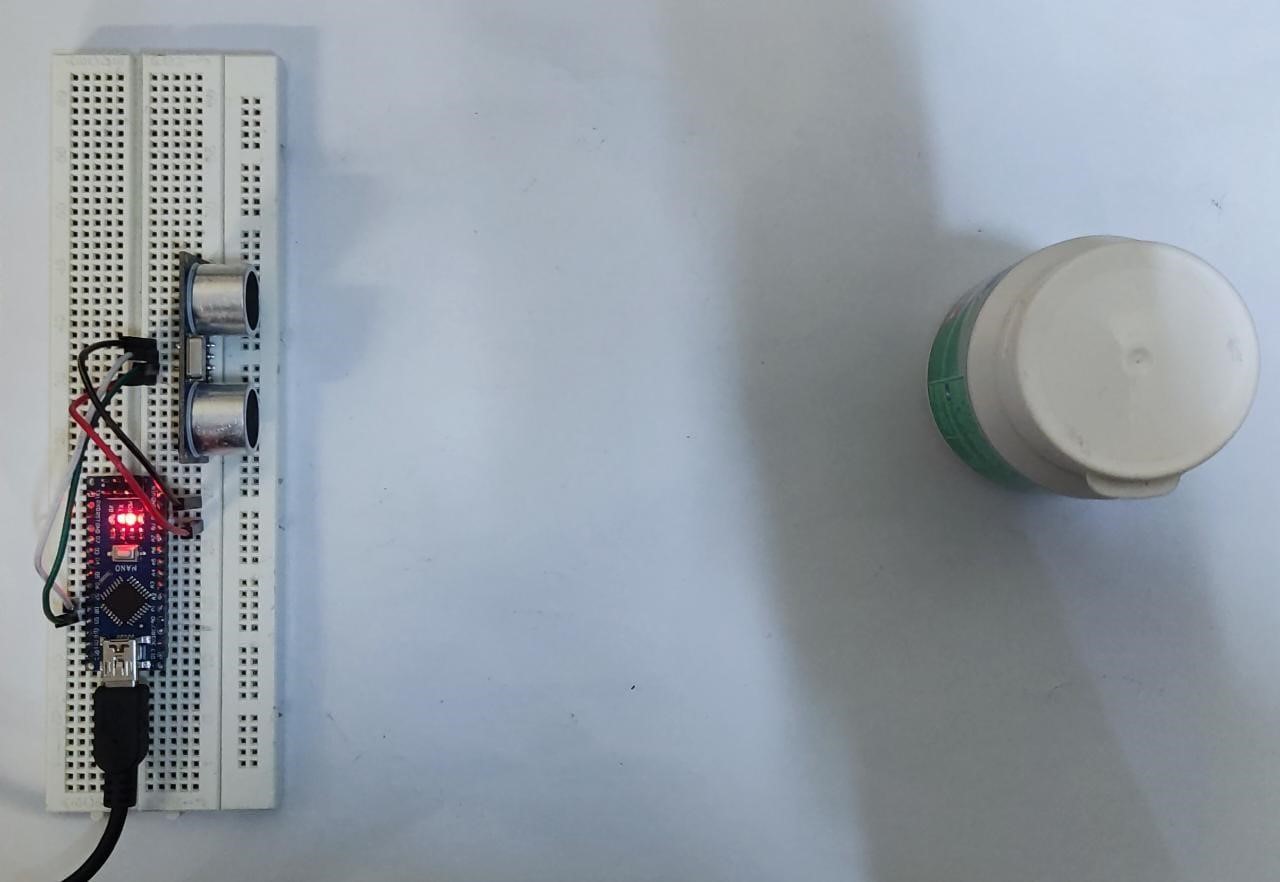
Hardware
Place any object in front of the HC-SR04 sensor at some distance:
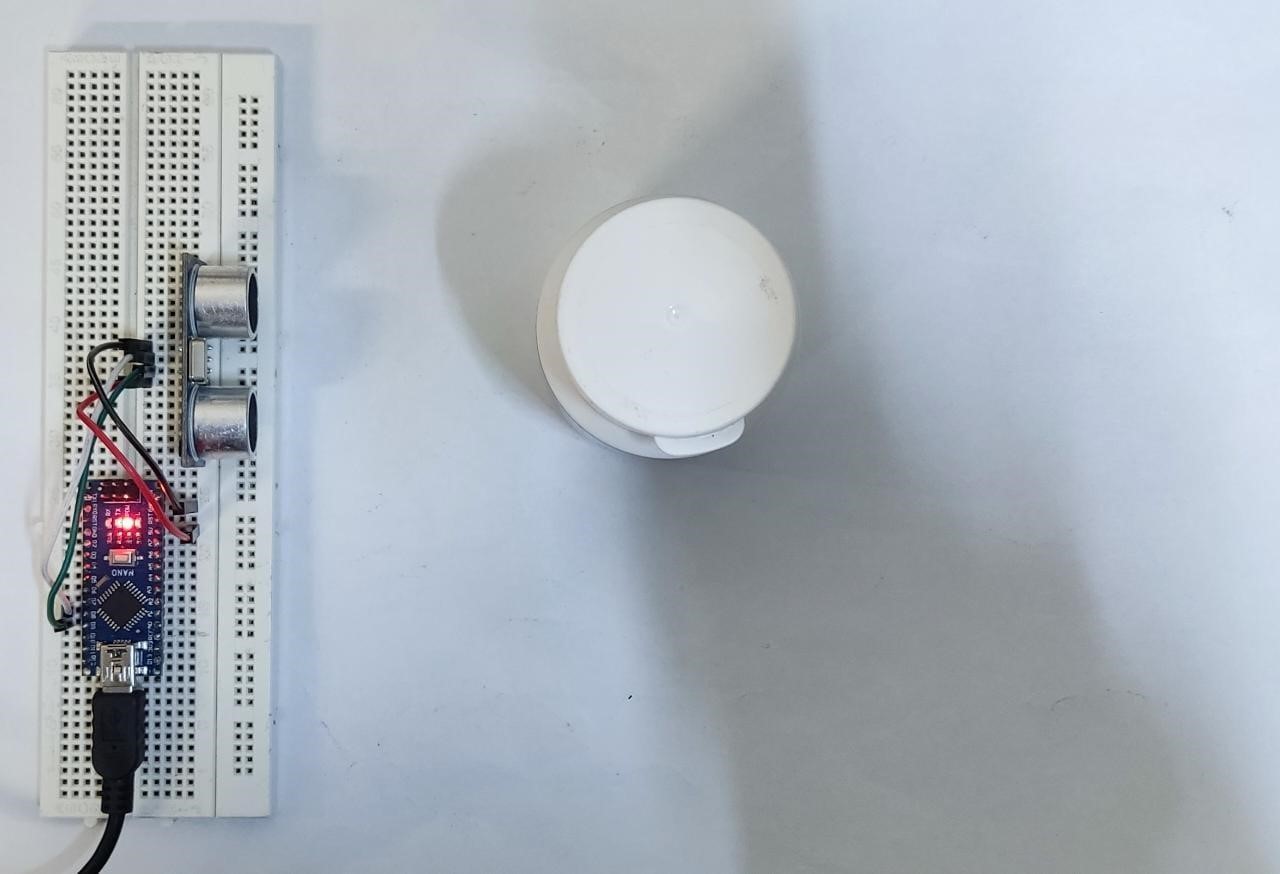
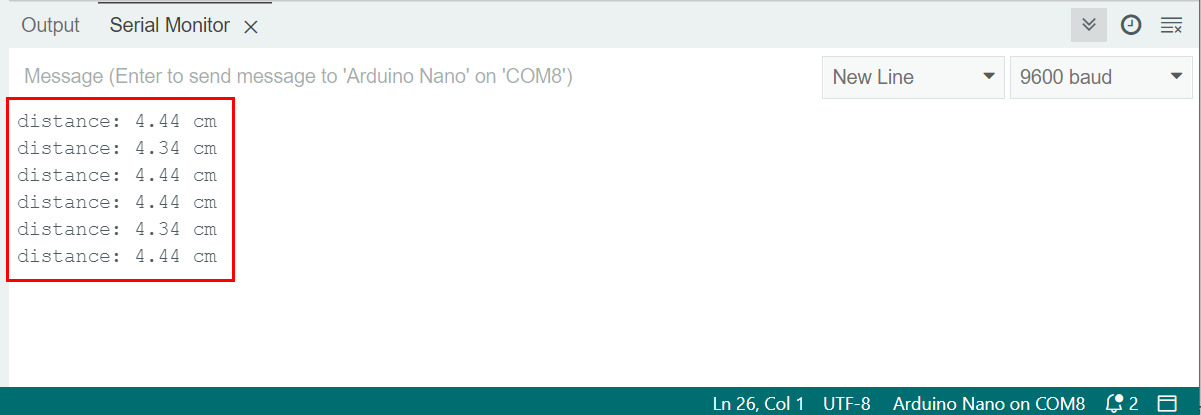
Output
We can see the measured distance on the Arduino IDE serial monitor. The approximate measured value is 4.4 cm.
Now move the object aways from the sensor:
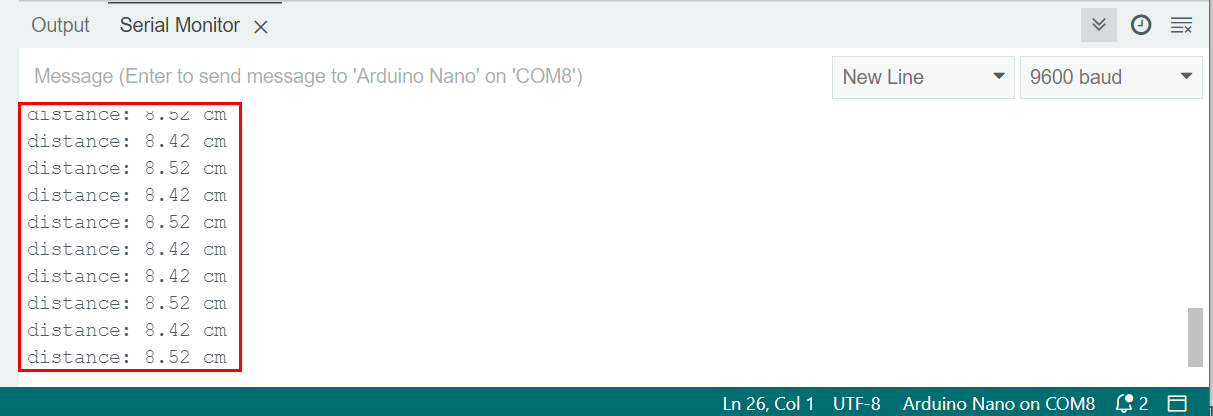
Output
Distance measured by the sensor is 8 cm. As the object is moved away from the sensor:
Conclusion
Ultrasonic HC-SR04 sensor can measure distance using the Arduino code. It measures accurate distance of objects and is widely used in DIY projects. This article covered a detailed guide on working and interfacing of ultrasonic sensors with Arduino Nano boards. For further information read the article.