In this tutorial, we will provide you with an easy setup guide to get started with Node-Red on your Raspberry Pi and start developing your projects with ease.
Getting Started with Node-Red on Raspberry Pi
Node-Red is an amazing tool that uses the concept of visual programming that enables its users to connect different code blocks called nodes together to perform multiple tasks on your Raspberry Pi device. The nodes are needed to be wired in order to exchange different messages and when different nodes are connected together, we call the connection as flows.
In order to run Node-Red on your Raspberry Pi, you will need to properly install it on your Raspberry Pi device and once you do it you can then start the Node-Red service by adding the following command in your device terminal.
After starting the Node-Red services, you can then go to your browser and enter the address “http://hostIPAddress:1880” in the browser tab to open its interface.

Let’s start creating a simple project that is we are going to control LED light by turning it on and off through the following steps.
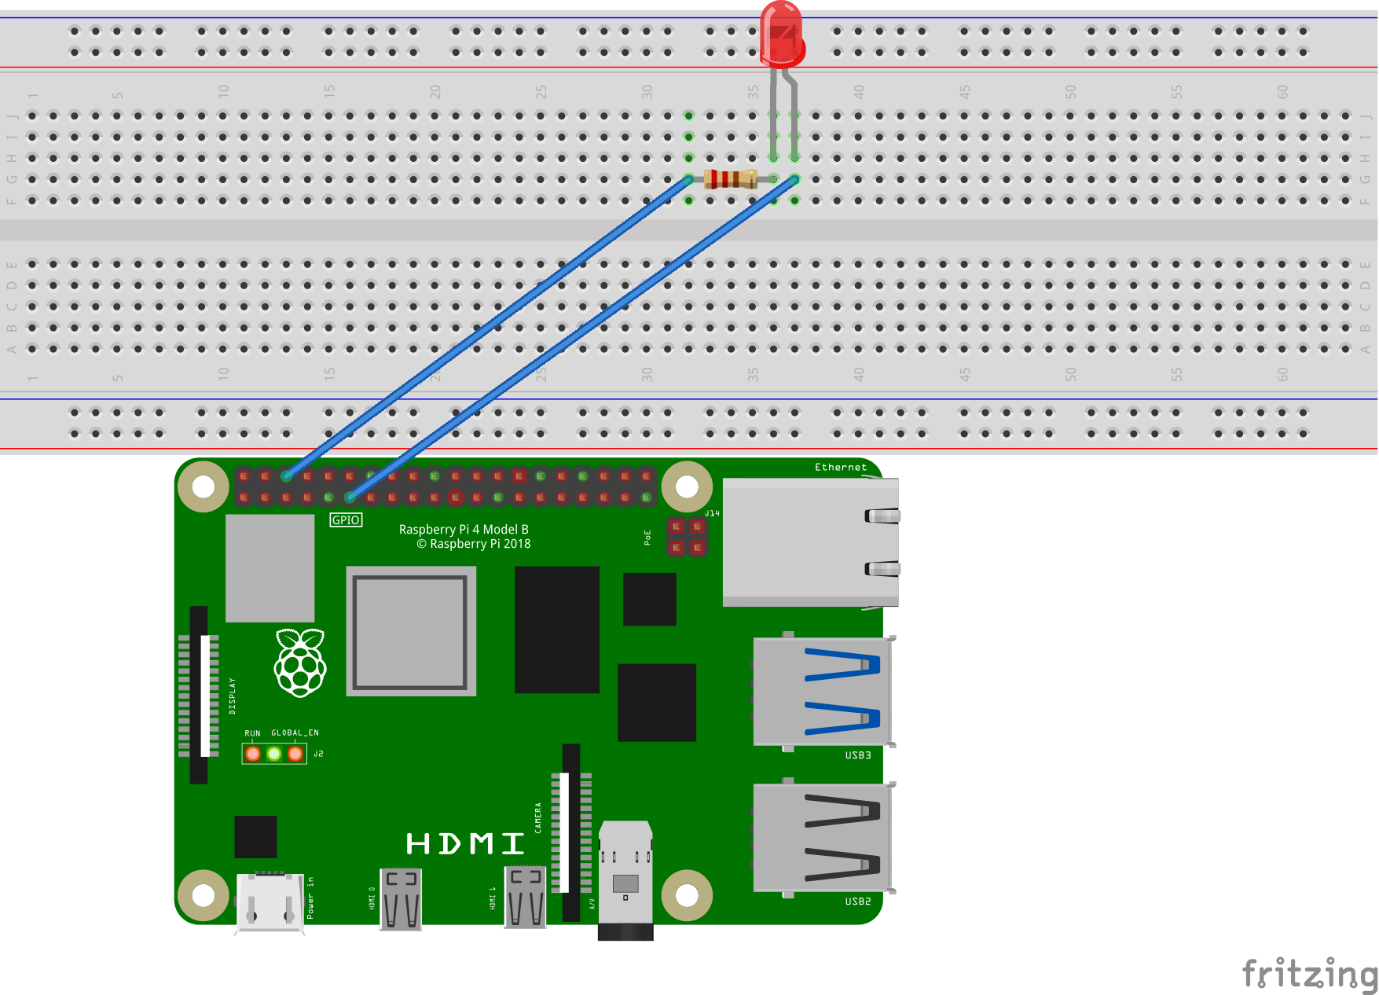
Step 1: First design the circuit on breadboard using the Raspberry Pi GPIO pinouts as shown in the image below.

Step 2: On the Node-Red dashboard, you will need to go to the Raspberry Pi GPIO section which you will find on the left side of the dashboard, you will find a “rpi-gpio out” option so click on that block.
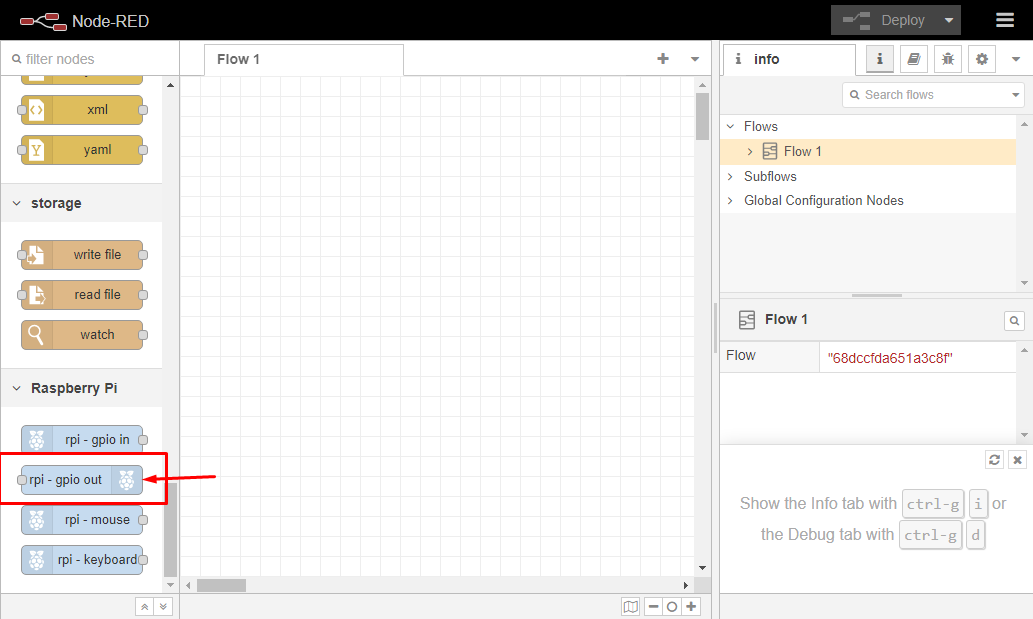
Step 3: Drag the “rpi-gpio out” into the Flow 1 tab.

Step 4: Now, double click on the GPIO block to open the GPIO pinout option.
Step 5: There, you will need to select your pin number which must be similar to the output pin you are using on your Raspberry Pi device. In our case, we have selected Pin 11 (BCM 17):

Step 6: Select “Type” as “Digital output” and checkbox the initial pin state. You can name the GPIO Pin as “LED” by moving down at the bottom:
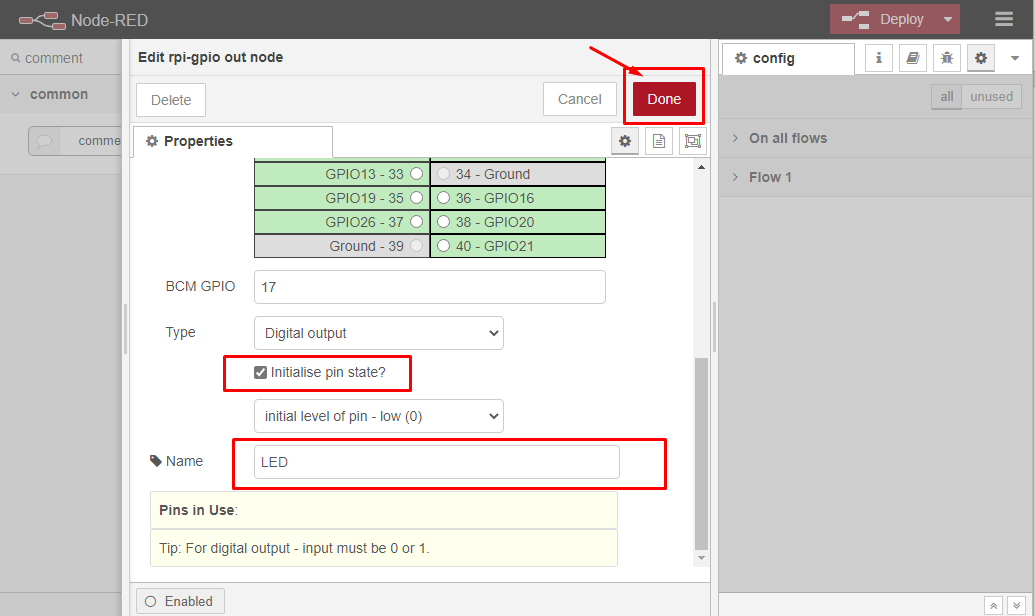
Click on the “Done” option when the pin is selected.
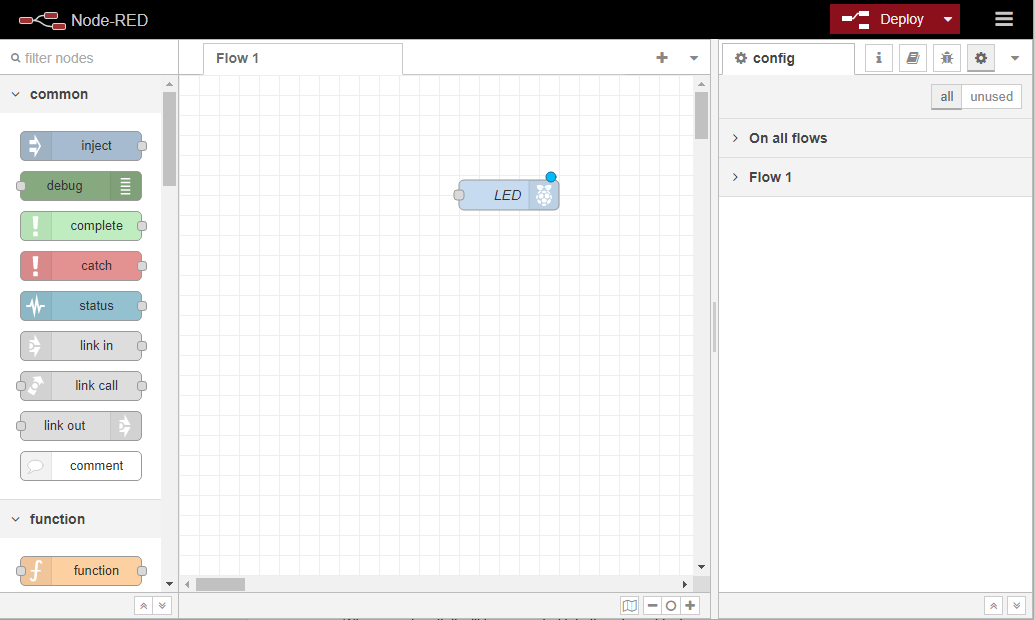
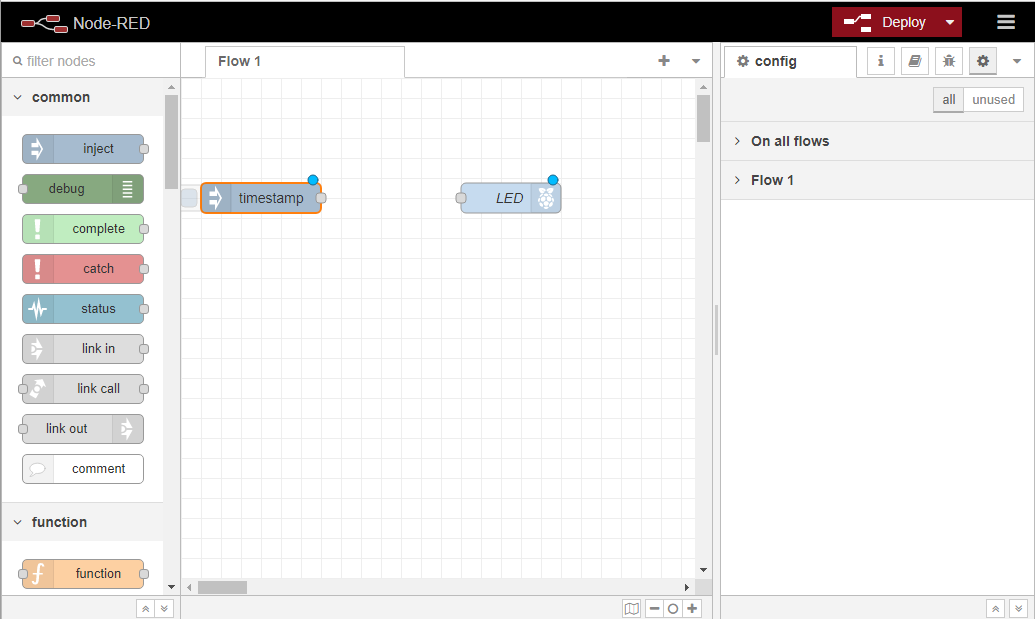
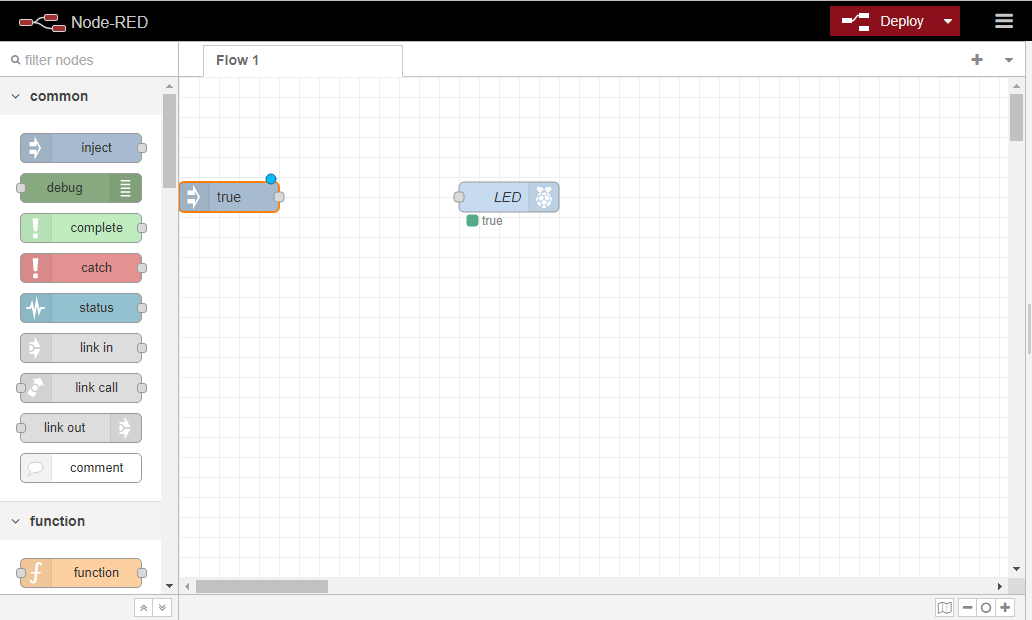
Step 7: Now, select the “inject” box and drag it into the Flow 1 tab.

When you drag it, it will be converted into a “timestamp” block.
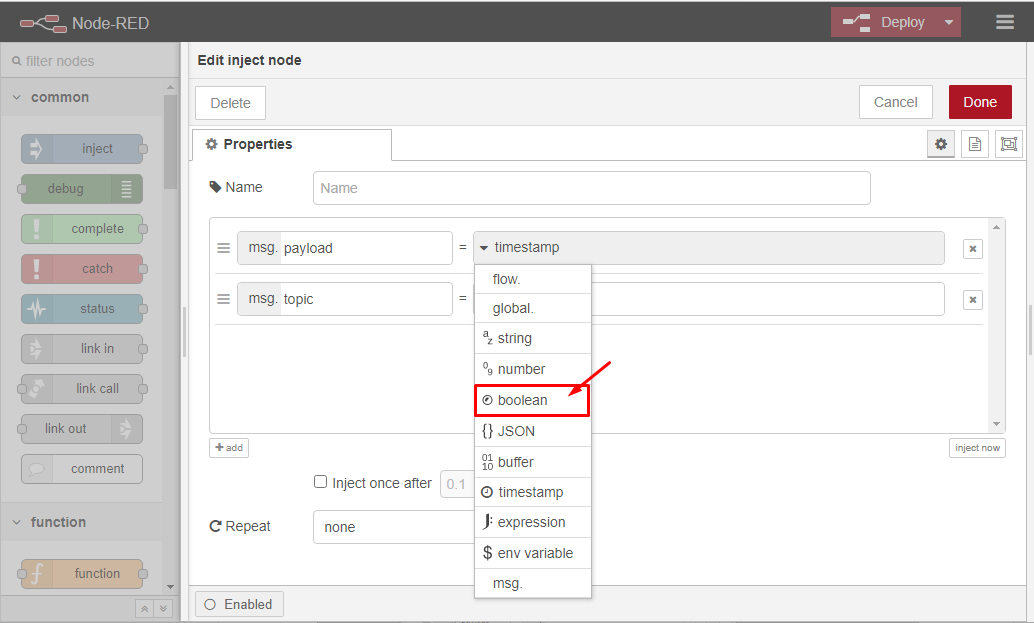
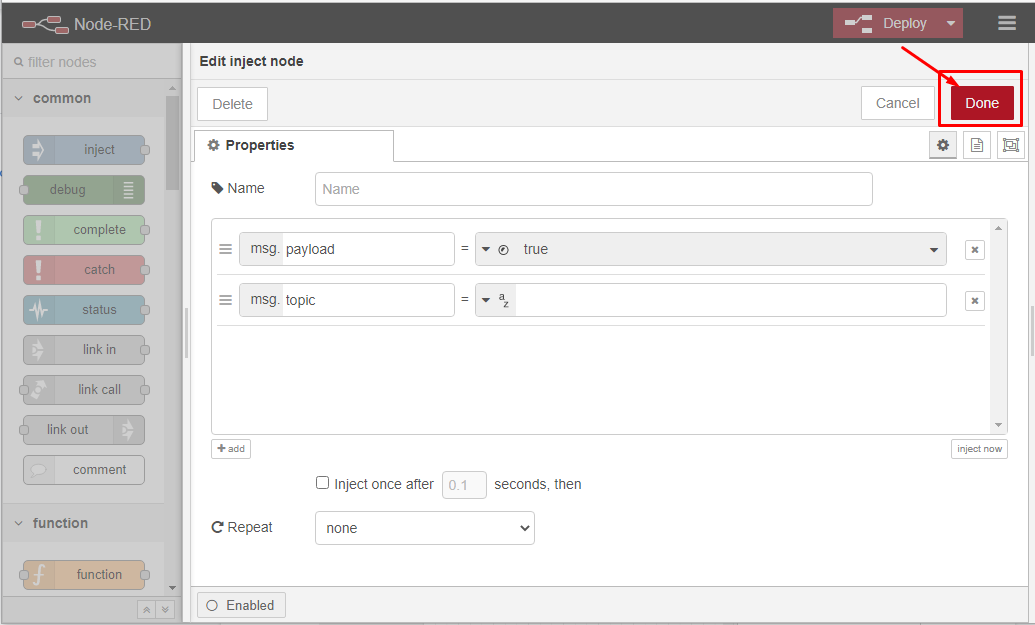
Step 8: Double click on the timestamp block and then you will need to change the payload type. It’s your choice whether to go with Boolean, string or number. Here in our case, we are going with Boolean and when the condition is true the LED will turn ON.

Click on the “Done” option when completed.
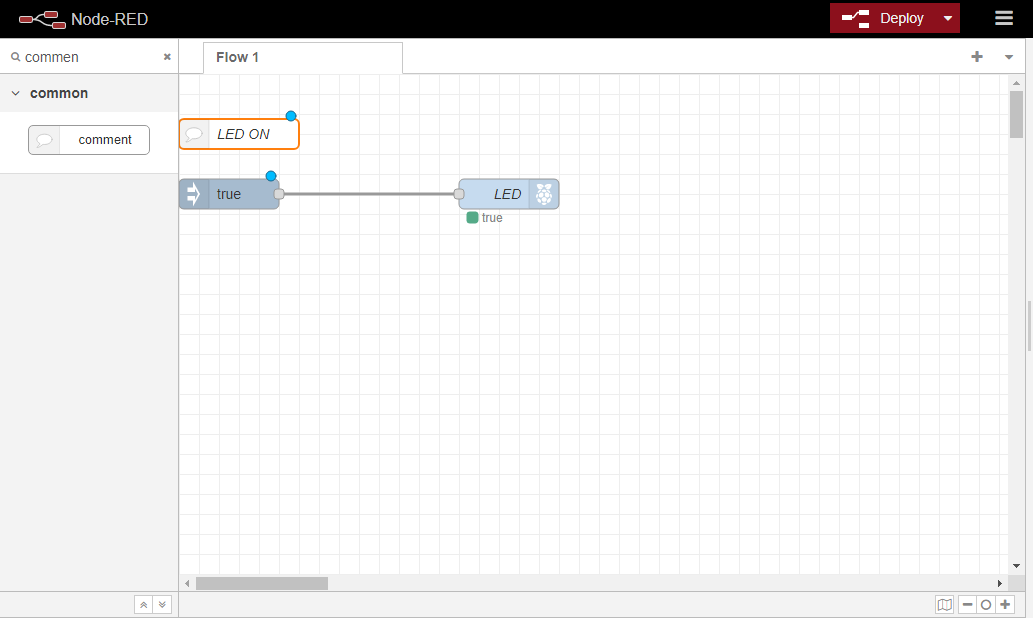
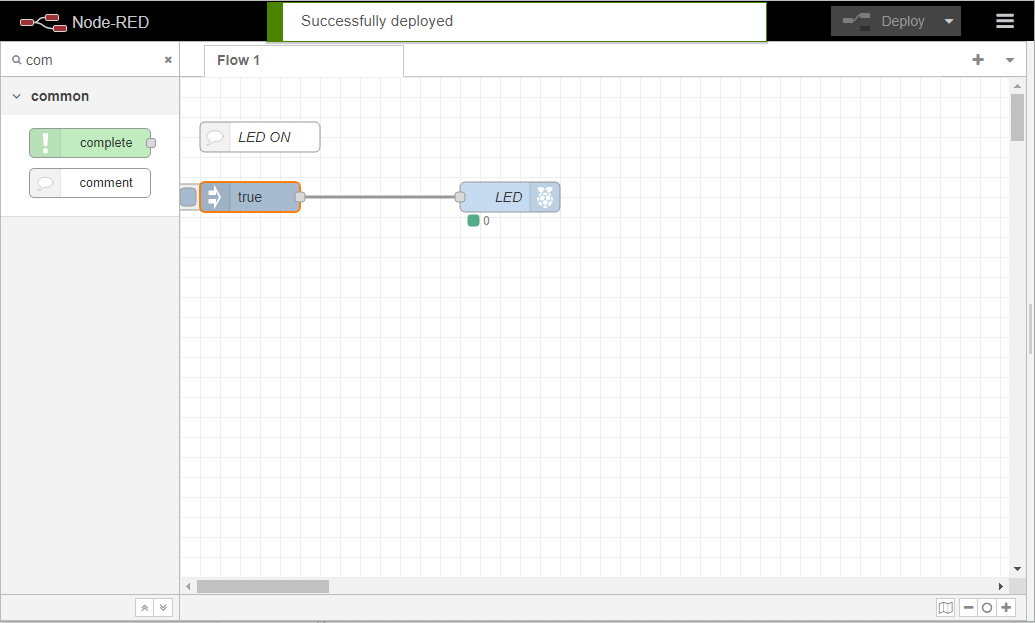
Step 9: Find the “comment” box in the search bar available on the left side and place the box above the “boolean” block.
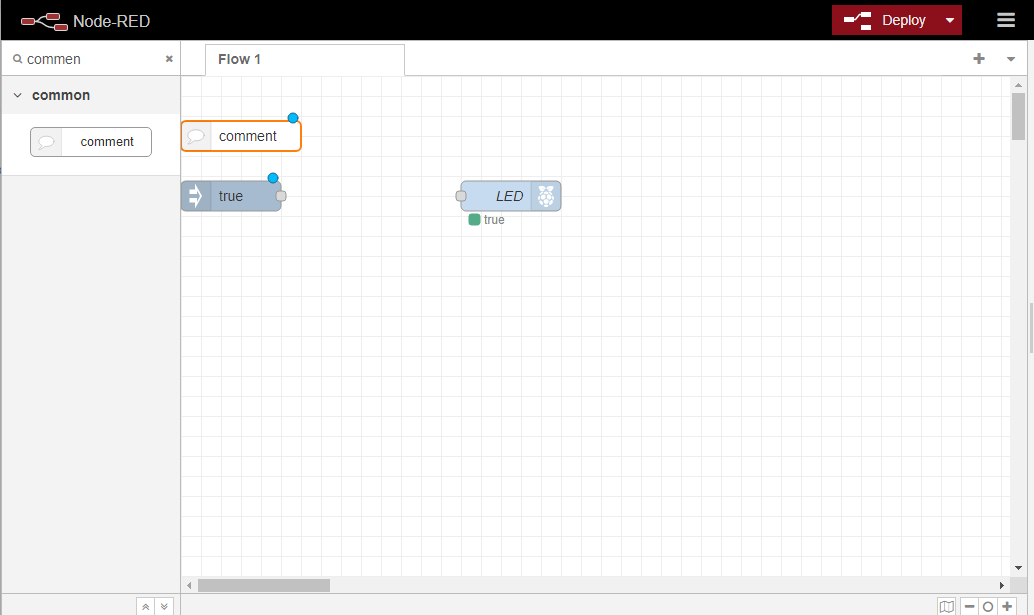
Step 10: Connect both the blocks with each other.

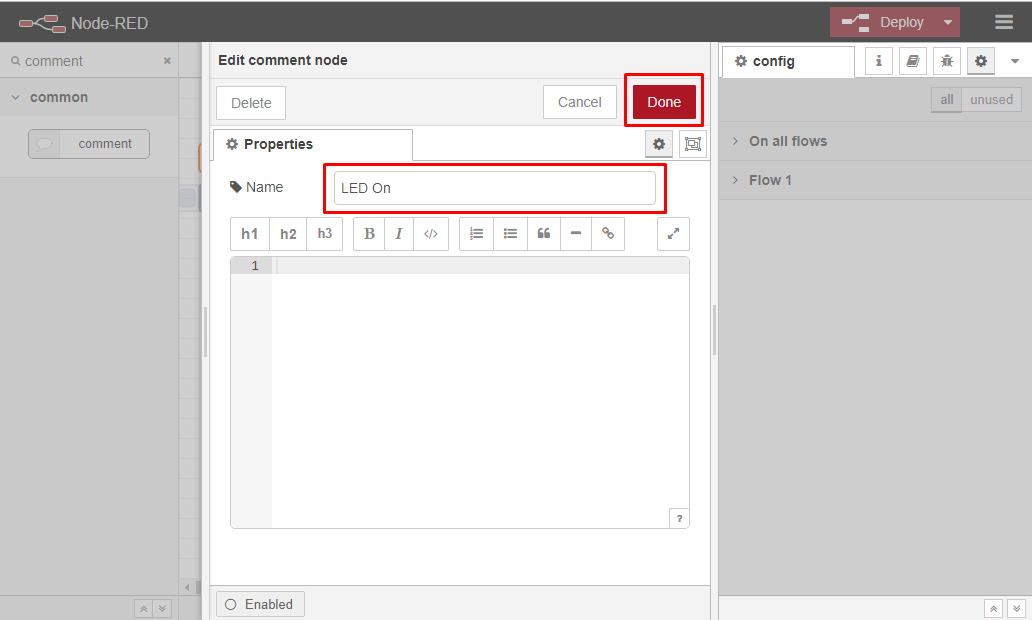
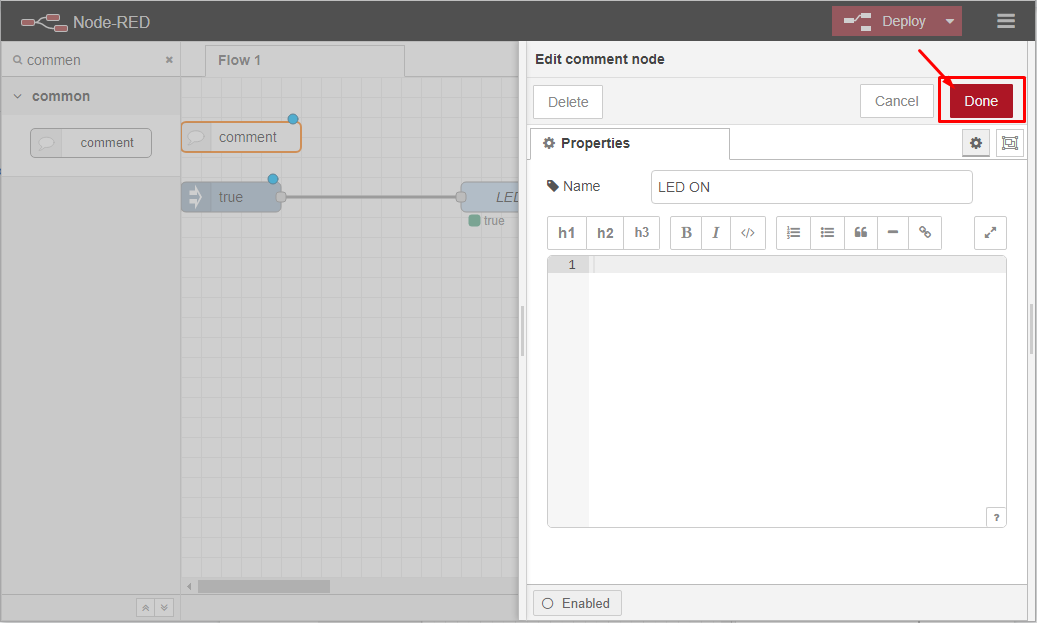
Step 12: Double click on the “comment” box and provide the title “LED ON”.
Step 13: Next, click on the” Deploy” option.

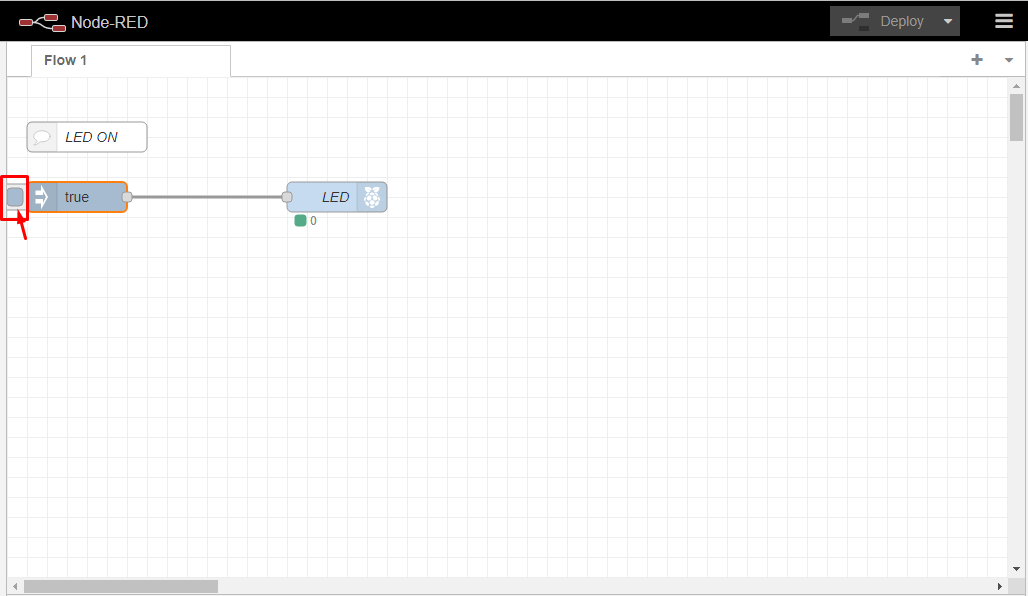
Step 14: Now when you click on the left side of the “Boolean” box, you will see that your LED will turn on.

Step 14: In order to turn the LED off, you will need to create a similar circuit into Flow 1 tab and this time renames the LED ON to OFF in the comment box and use boolean as “False”. 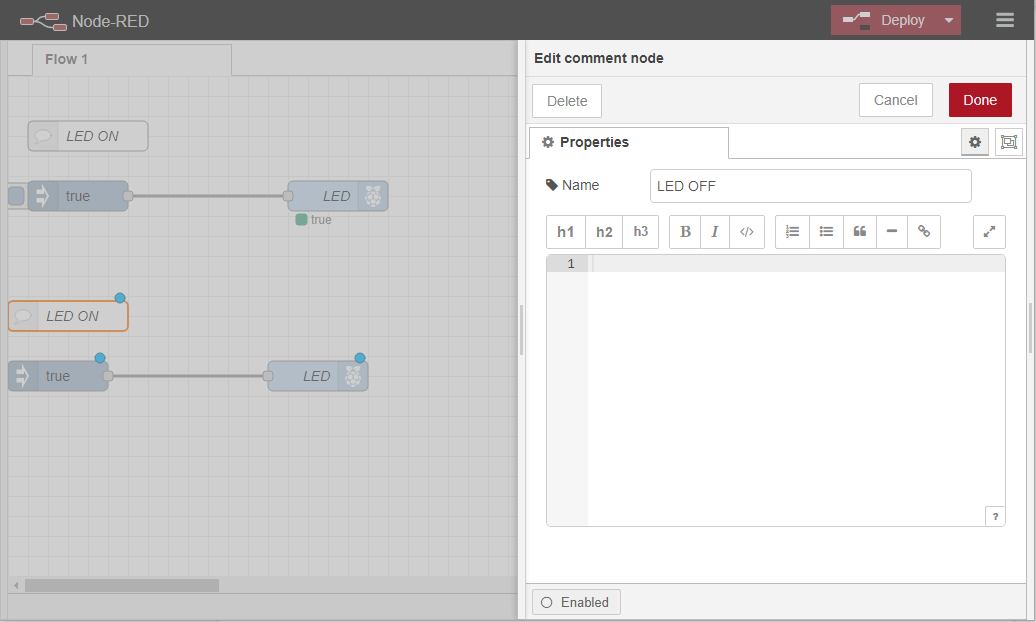

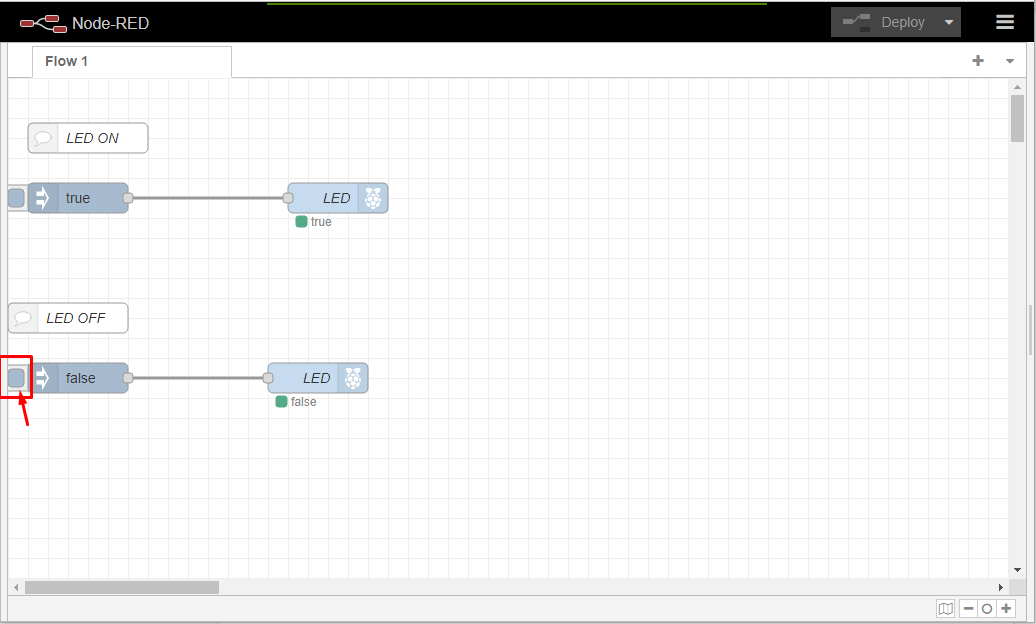
Once it is done, click on the deploy option.

Now, as soon as you click on the left side of the “False” box the LED will turn OFF.
In this way, you can now easily control any circuit on your Raspberry Pi device.
Conclusion
Node-Red is an excellent programming environment that lets you control your Raspberry Pi GPIO pins through a graphical interface. It lets you manage and control different circuits in a more prominent and efficient way. If you want to develop multiple projects on your Raspberry Pi device, you should install Node-Red so that it will help you in controlling circuits without having to write any complex codes.