Formatting a drive is one of the most common tasks on operating systems and it is necessary for users to format a drive before storing data on it. There are several file systems formats that users can use to format a drive. However, not all formats are compatible with the operating system.
Different operating systems follow different formats for their file systems such as for windows NTFS format is most used and for Linux-based systems EXT4 is the most compatible format. For systems like Raspberry Pi, both NTFS and EXT4 are supported, but it is recommended to format the drive to EXT4 format as Raspberry Pi is Linux based and EXT4 is more suitable for it.
If you are searching for a way to format a mounted drive on your Raspberry Pi system from the terminal, follow this article’s guidelines.
How to Format the Mounted Drive in Raspberry Pi Through Command Line
When an external drive is connected to the Raspberry Pi device, it automatically gets mounted to the system but to make it compatible with the system, formatting the drive is important. The steps to format a mounted drive in Raspberry Pi are mentioned below:
Step 1: Finding the Drive Name
After connecting the drive to your Raspberry Pi, run the below-written command to find out all the disk available on the system:
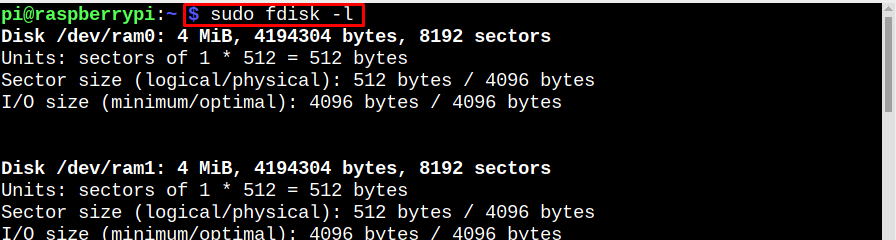
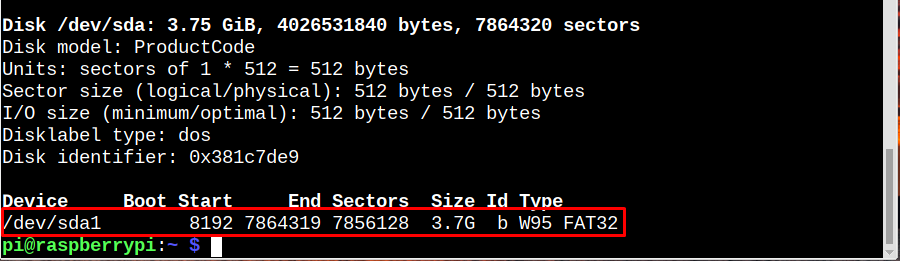
The output of the above-mentioned command will display all the devices, and the externally connected drive is displayed at the bottom of the output:
Step 2: Display All Disk Devices and Partition
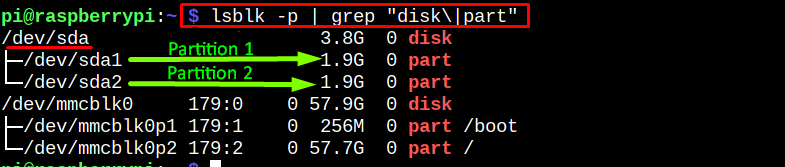
Next run the below-written command to find out all the partitions on the disk, the connected drive will most often mount under /media/pi mount point. Here, you can see my drive has only 1 partition sda1 yours could have the same or more:

Step 3: Unmounting the Drive
To start formatting, we have to unmount the drive and for that run the below-written command:

Step 4: Formatting the Drive
Now remove the data from the drive so that new partitions can be created on it for formatting and this can be done through the following command:
Enter Yes when prompted to continue.

Step 5: Creating Partitions
Now create partitions on the disk, this is totally up to users, they can create as many partitions they want or even they can create one single partition. But remember that while creating partitions the disk space on the drive is assigned respectively i.e. if one partition is required it will be 0-100%, for two 0-50% then 50-100% and so on.
Here, I have created 2 partitions on my drive:


Note: 0-50% creates one partition while 50-100 creates another partition.
After creating the partition, verify it by using below-written command:
Note: If due to some reason you are unable to see the created partitions, then try rebooting the system as sometimes the system needs a boot to update partitions.
Step 6: Formatting Partitions
Once, the partitions are created successfully then format them by using the below-mentioned commands:
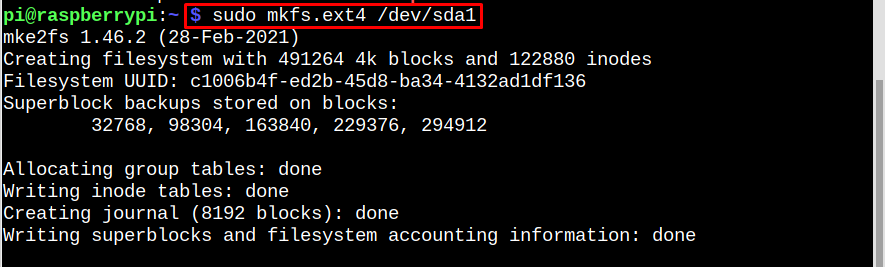

I have formatted both the partitions to ext4 format as it is the most recommended format for Raspberry Pi but you can also format it to NTFS if you intend on using the drive with both windows and Raspberry Pi system.
Step 7: Creating Mount Point
For our newly created and formatted partitions, it is important to create a mount point where they can be mounted on Raspberry Pi. To create the new USB drive mount point run the below-mentioned command:

Step 8: Mounting Drive back
Now finally mount all the partitions to the mount point in Raspberry Pi:
sudo mount /dev/sda2 /mnt/usbdrive

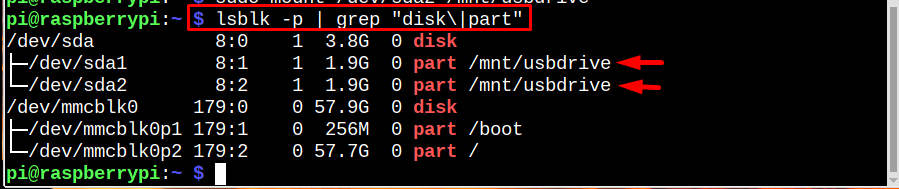
To verify that everything is done as expected, see the below-written command:
In the output, you can see that both the partitions are successfully mounted to the usb/drive mount point.
Conclusion
To format the mounted drive in Raspberry Pi, find the drive name and partitions first. Then unmount all the partitions. After that, clean the drive to remove any stored data. Then create new partitions and format them using mkfs. Once the partitions are formatted successfully mount them back to a mounting point in Raspberry Pi.