ESP32 Touch Sensor Pins
The ESP32 board comes with 10 GPIO pins that support capacitive touch sensors. These GPIO pins can detect changes in electrical charge that may be caused by human skin. So, these pins can detect variations caused by human fingers and generate output accordingly.
These pins can easily be integrated with touch pads and can replace mechanical buttons in ESP32 projects. These touch pins can also wake up ESP32 from deep sleep.
Following are the touch sensor pins highlighted in green color:
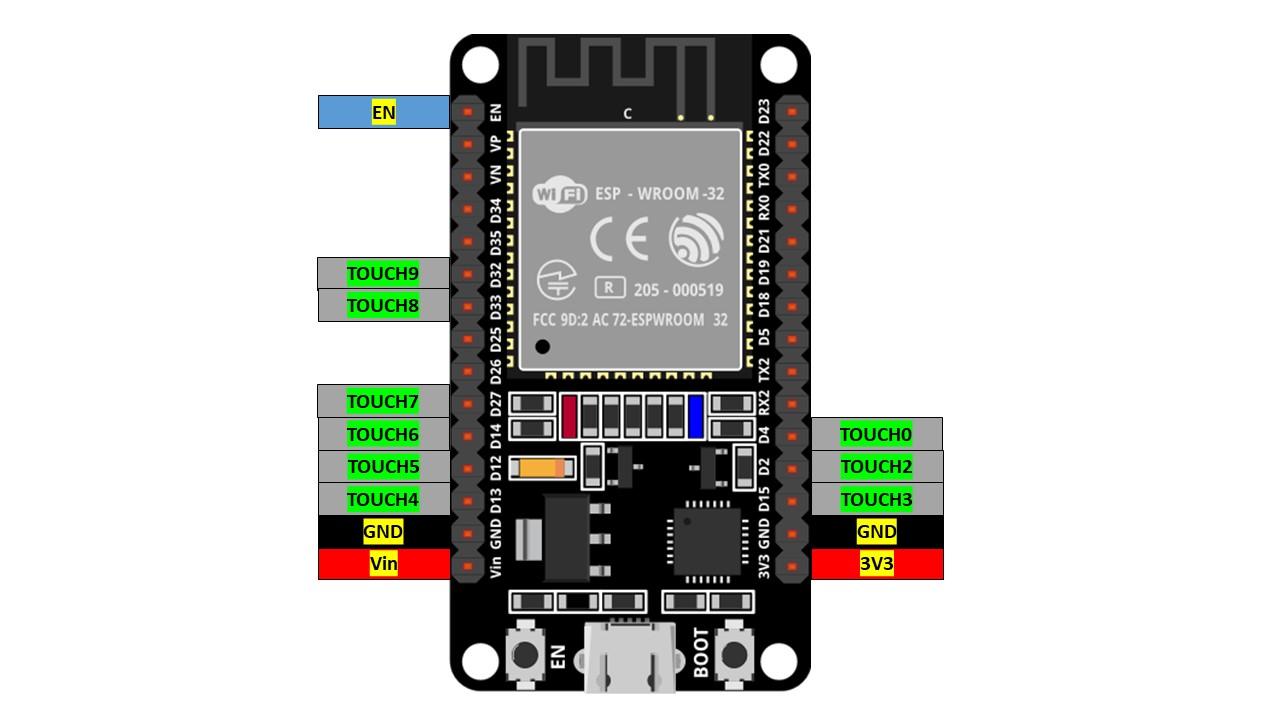
Here touch sensor pin 0 corresponds to GPIO pin 4 and touch sensor 2 is at GPIO pin 2. One pin which is touch pin 1 is missing in this particular version of ESP32 (30 pin) board. Touch sensor 1 is at GPIO pin 0 which is available in the 36-pin version of ESP32 board.
touchRead() Function
Arduino programming has a touchRead() function that takes one argument which is a GPIO pin at which we want to read input. Following is the syntax of touchRead() function:
ESP32 Touch Example
Now we will take an example to test the ESP32 capacitive touch sensor. Make sure to install the ESP32 board in Arduino IDE. To see a guide on ESP32 installation with Arduino IDE click here.
Now open Arduino IDE Go to: File>Examples>ESP32>Touch>TouchRead
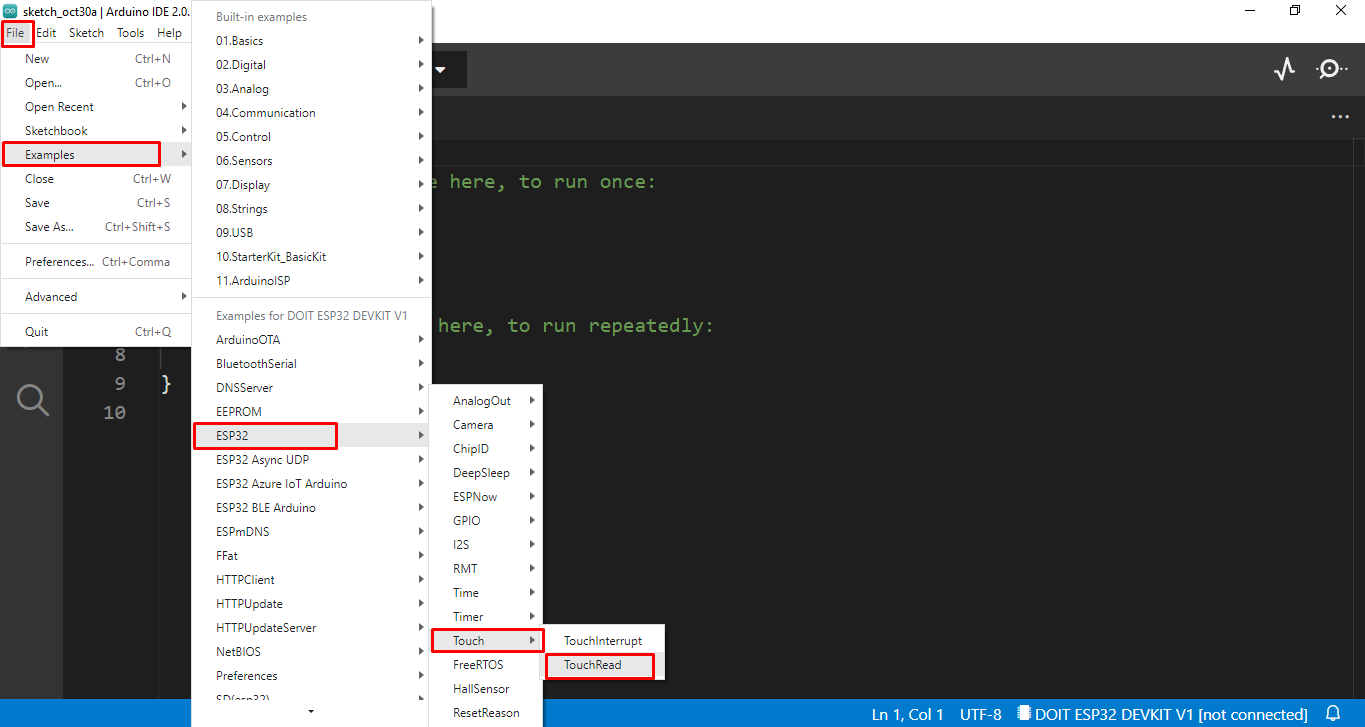
Following code will appear in new window:
{
Serial.begin(115200);
delay(1000);
Serial.println("ESP32 Touch Test");
}
void loop()
{
Serial.println(touchRead(T0)); // get value using T0
delay(1000);
}
This code reads the touch pin T0 and prints the result. Here T0 corresponds to GPIO 4 or D4. In setup code we started by defining baud rate. In the loop part of the code touchRead() function along with Serial.println() is used to display reading on the serial monitor.
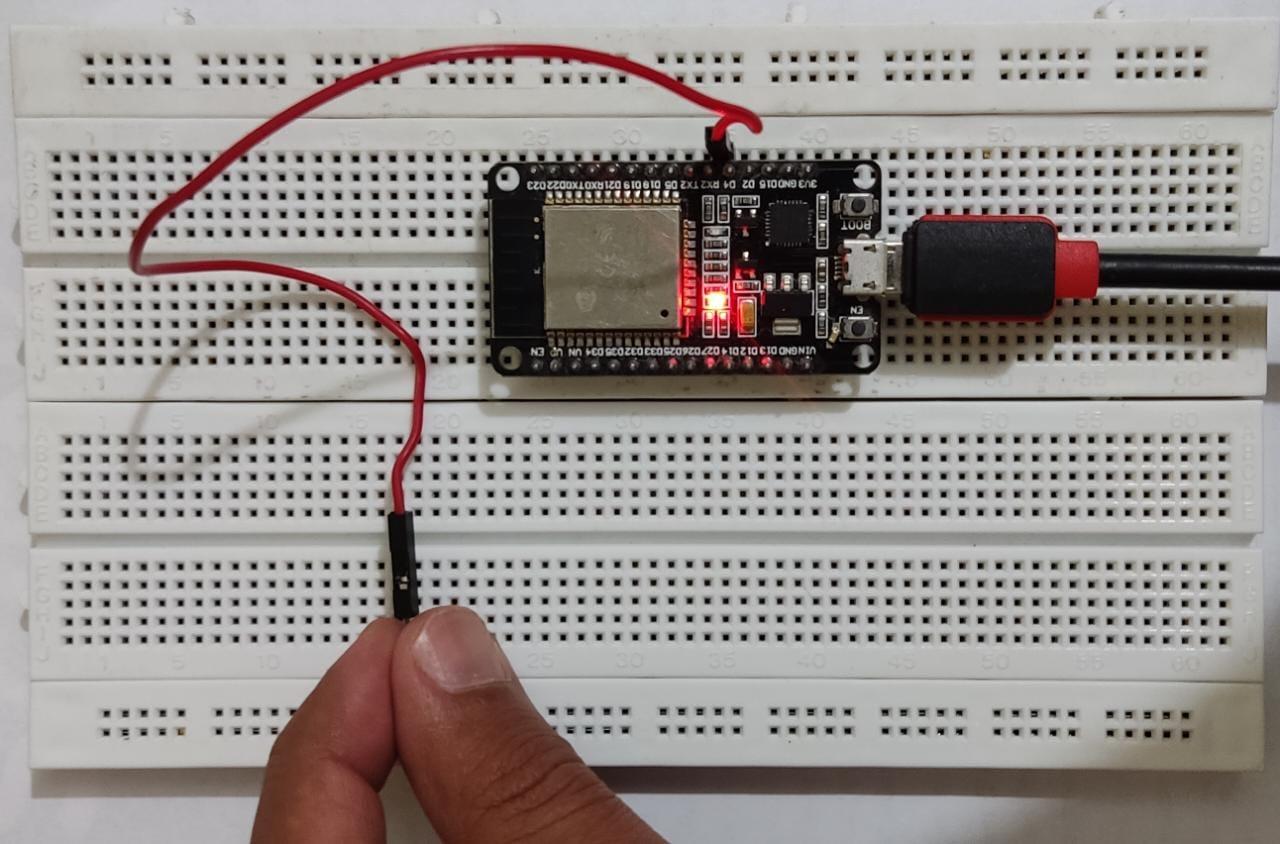
Hardware
To test the code, take a breadboard and place an ESP32 board over there, connect a jumper wire to GPIO 4 and touch it using your finger.
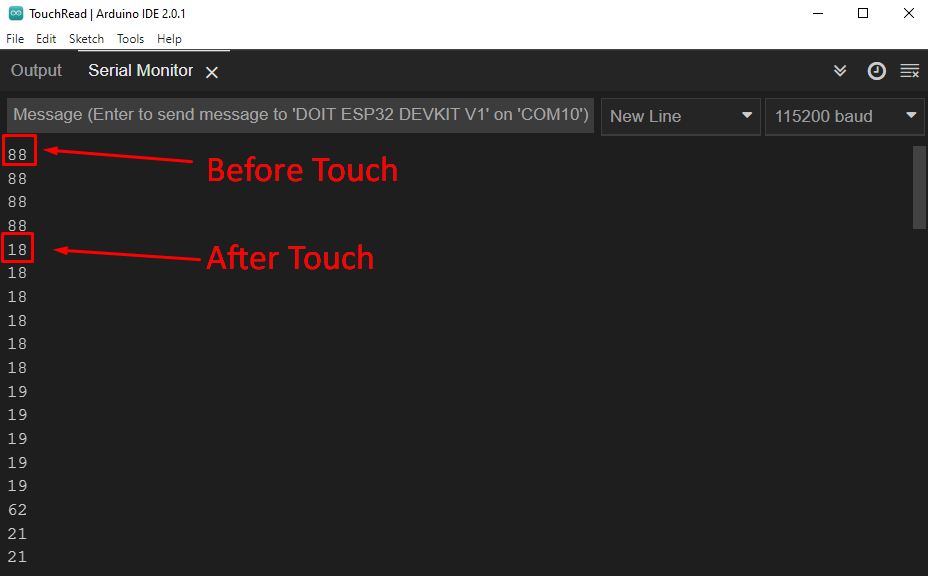
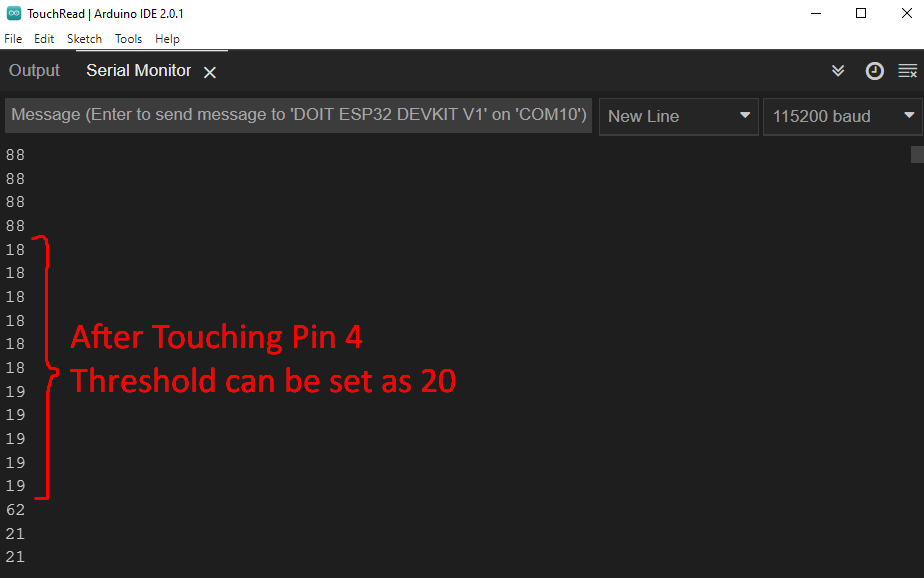
Output
Output displays the reading before and after touching the GPIO pin 4 of ESP32.
Touch Sensitive LED
We can use the touch sensitive pin of ESP32 to trigger a specific output by setting some threshold values. Such as lighting a LED when input at touch pin comes below the threshold value.
Now find the threshold value of the GPIO pin. From previous example result, we can set the threshold value of 20.
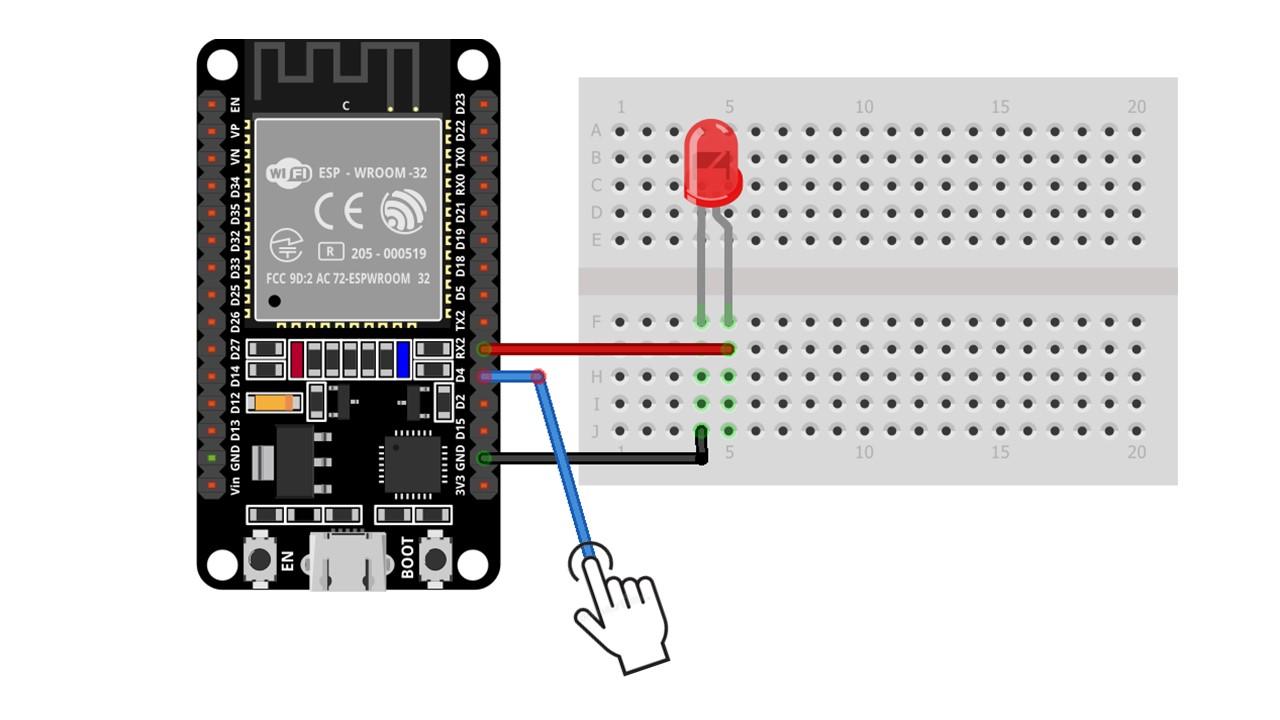
Circuit
Connect a LED at GPIO pin 16 with one terminal to GND. Touch0 at GPIO pin 4 will receive the input. Make a circuit as shown below:
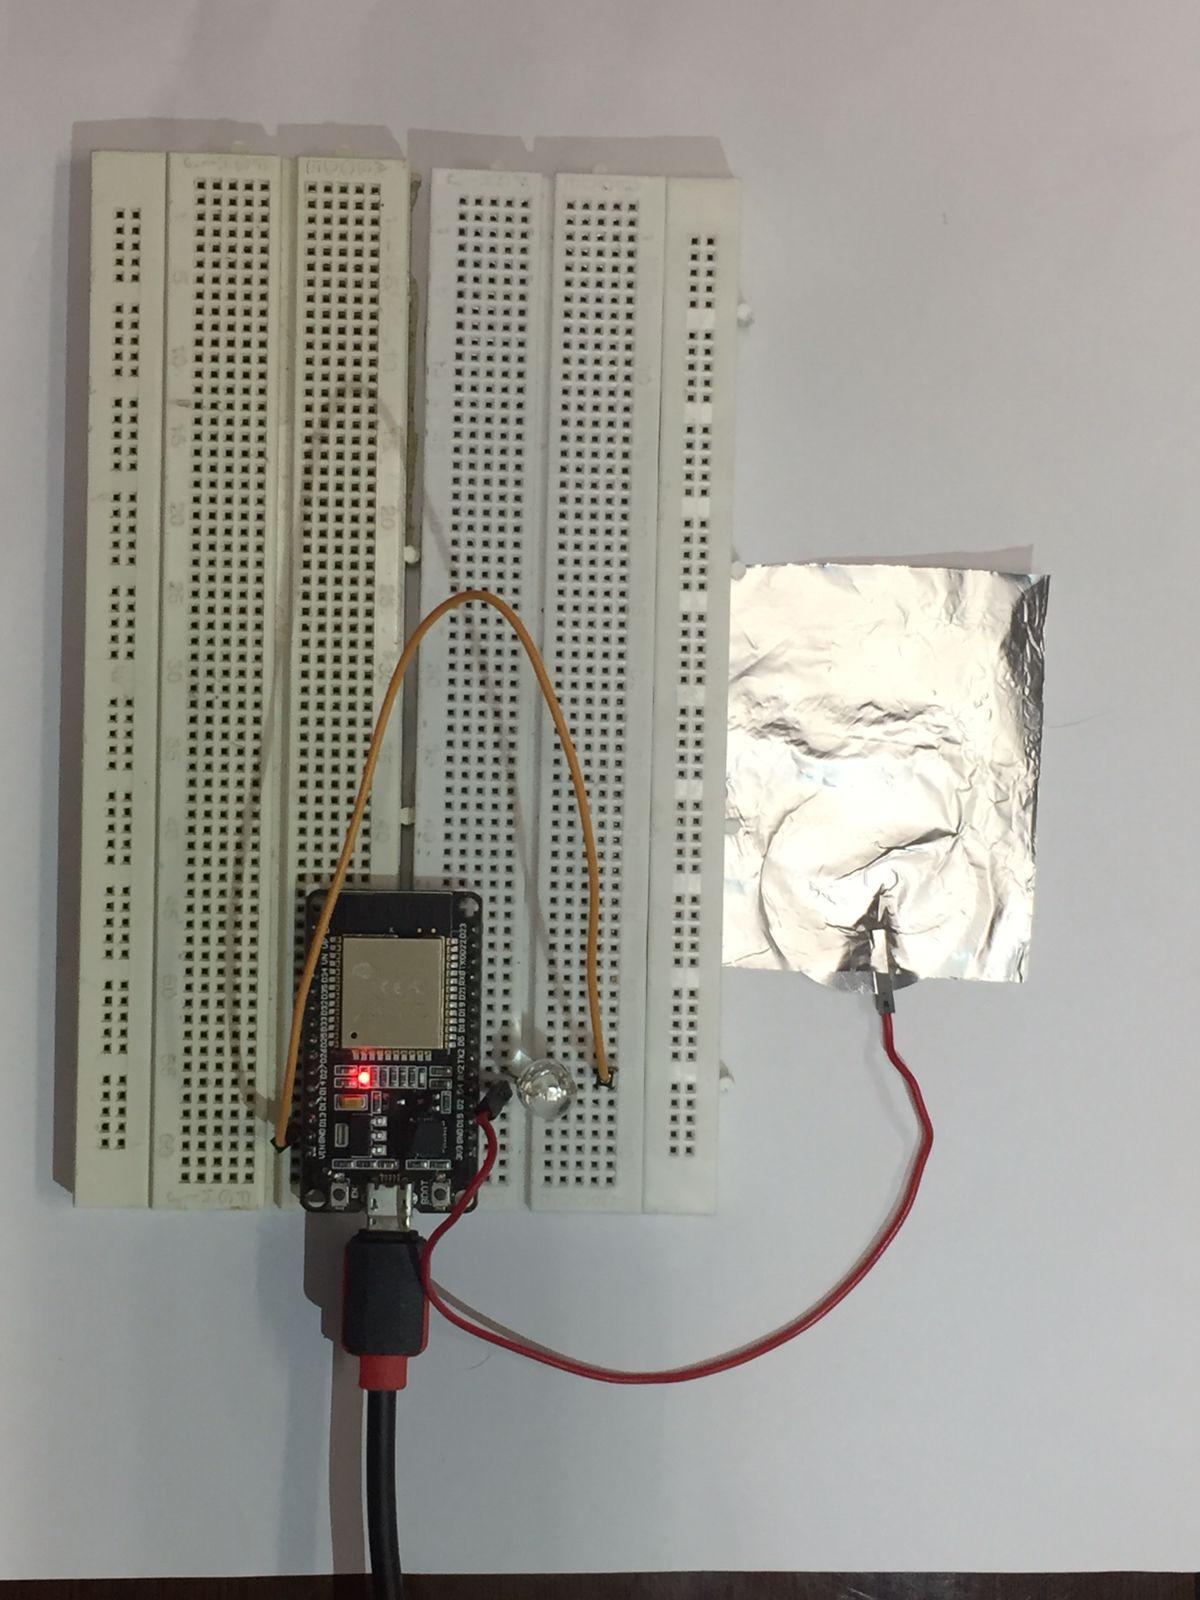
Hardware
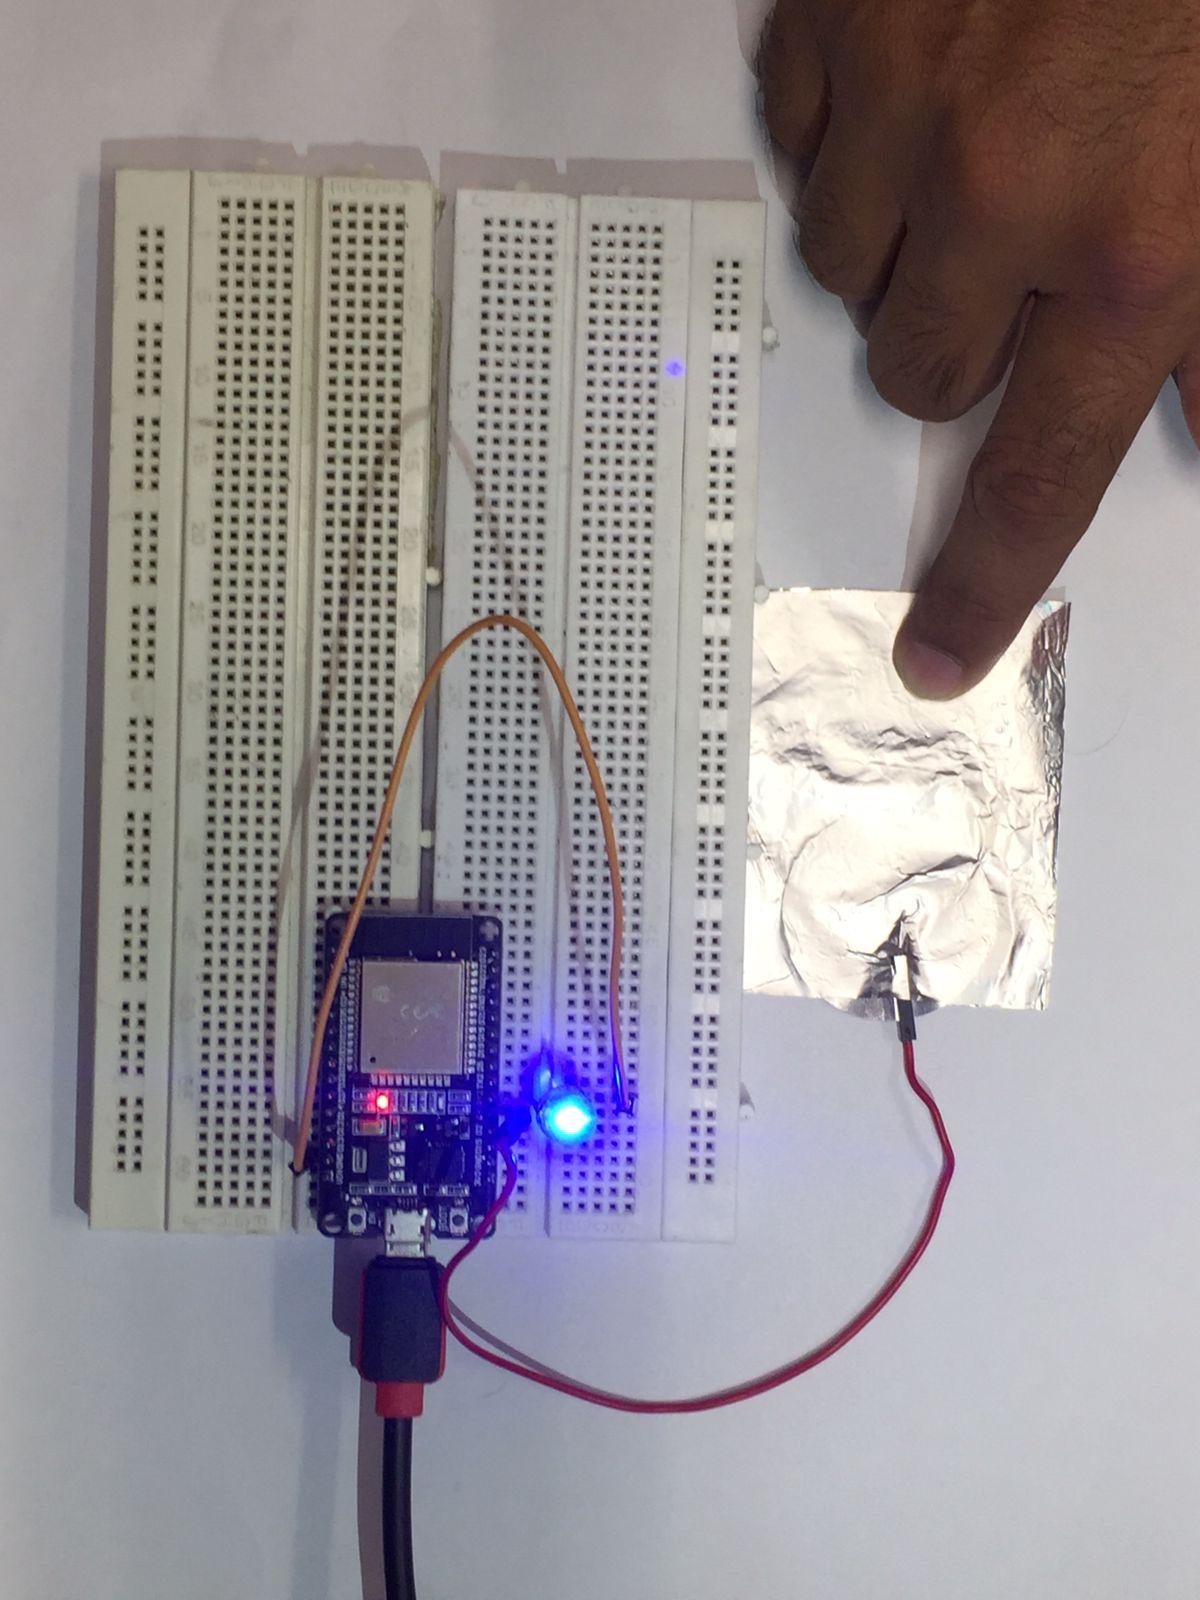
Following image displays the hardware. Here we have wrapped a thin aluminum foil paper with jumper wire. Touching anywhere on this foil will light up the LED.
Code
const int LED = 16; /*led output pin*/
const int threshold = 20; /*threshold value set*/
int TouchVal; /*store input value*/
void setup(){
Serial.begin(115200);
delay(1000);
pinMode (LED, OUTPUT); /*LED set as output*/
}
void loop(){
TouchVal = touchRead(Touch); /*read touch pin value*/
Serial.print(TouchVal);
if(TouchVal < threshold){ /*if touch value is less than threshold LED ON*/
digitalWrite(LED, HIGH);
Serial.println(" - LED on");
}
else{
digitalWrite(LED, LOW); /*else LED will remains OFF*/
Serial.println(" - LED off");
}
delay(500);
}
Here in the above code two pins for LED and Touch are initialized. The threshold value is set to 20 if the touch output becomes less than threshold LED will turn ON else LED will remain off.
Output
In the serial monitor we can see the output when finger is laced over aluminum foil LED will turn ON when finger is moved away LED will again turn OFF.
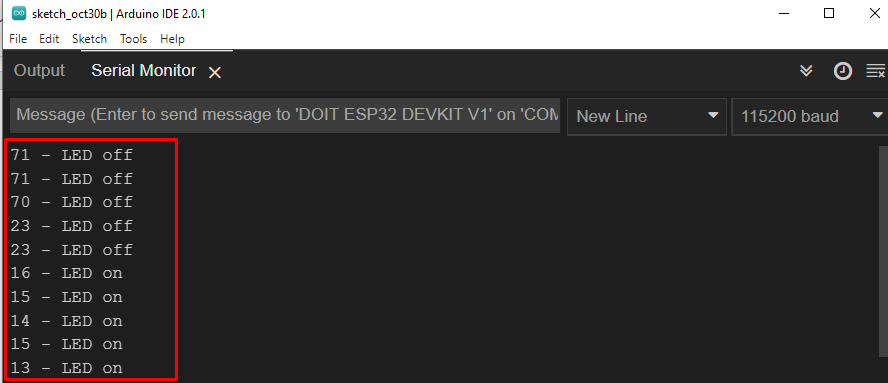
Following is the hardware illustration showing LED turned ON when finger is placed.
Conclusion
ESP32 comes with 10 GPIO touch sensor pins which sense the variation in electrical charge upon touching. We can use this feature in designing touch sensitive projects which can replace normal push buttons. Here we covered taking input and controlling LED using the touch sensor pin.