This lesson includes following topics:
- 1: Introduction to ESP32 OLED Display
- 2: Wiring OLED Display Module to ESP32
- 3: Installing Required Libraries
- 4: Check OLED Display I2C Address
- 5: OLED Display Arduino IDE Example
- 5.1: Code
- 5.2: Output
- 6: Static Text Printing on OLED Display Using ESP32
- 6.1: Code
- 6.2: Output
1: Introduction to ESP32 OLED Display
Before moving further first we must know what an OLED (Organic Light Emitting Diode) display is. OLED displays are used as an alternative for LCD. OLED LEDs are used to produce light displays on OLED screens. The LCD screen uses backlight for illuminating its pixels while OLED displays have their own self emissive LEDs. There are hundreds of self-illuminating LEDs. To display images and text brightness of these LEDs can be controlled pixel by pixel.
Now as we know some basics related to OLED display. Next step is to wire ESP32 with an OLED display module.
2: Wiring OLED Display Module to ESP32
The OLED display mainly comes with two different communication protocols. The two protocols are I2C and SPI. The serial peripheral interface (SPI) is generally faster than I2C, but we preferred I2C over SPI protocol as it required a smaller number of pins.
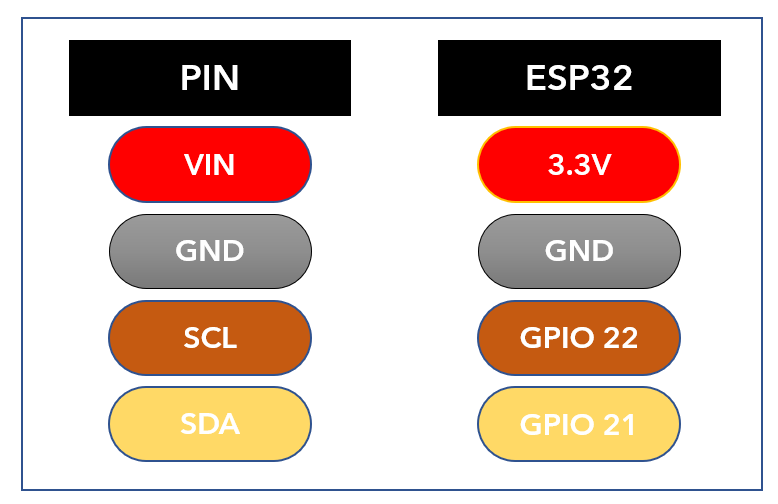
Following image illustrates ESP32 connection diagram with 128×64 pixels (0.96’’) OLED display.
Below is the pin connection table:
Once ESP32 is interfaced with an OLED display, the next step on the list is install all required libraries for ESP32 programming using Arduino IDE.
3: Installing Required Libraries
Multiple libraries are available in Arduino IDE to program ESP32 with an OLED display. Here we will be using two libraries from Adafruit: SSD1306 and GFX library.
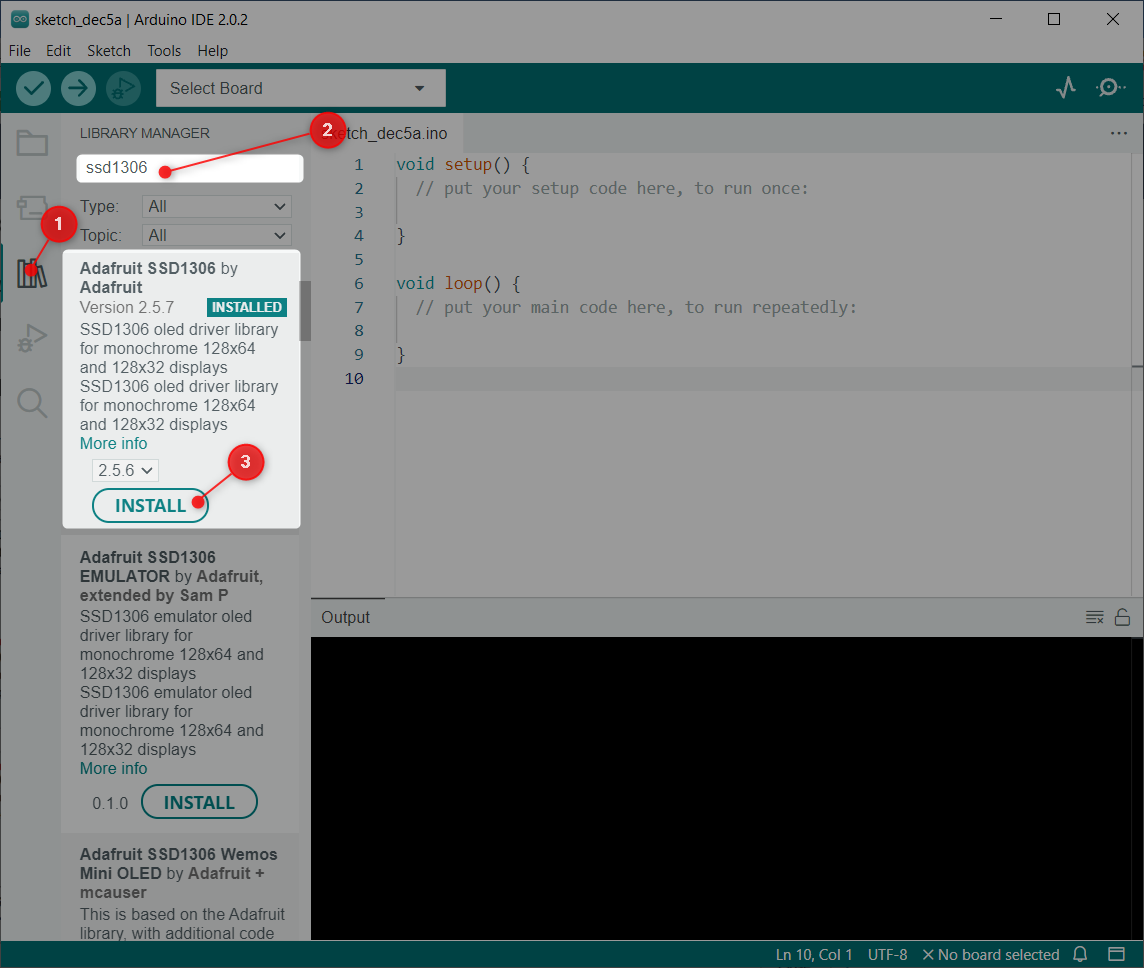
Now Arduino editor and go to Library Manager and search for the SSD1306 library. Install SSD1306 library by Adafruit from the search bar.
Alternatively, one can also go to: Sketch>Include Library>Manage Libraries
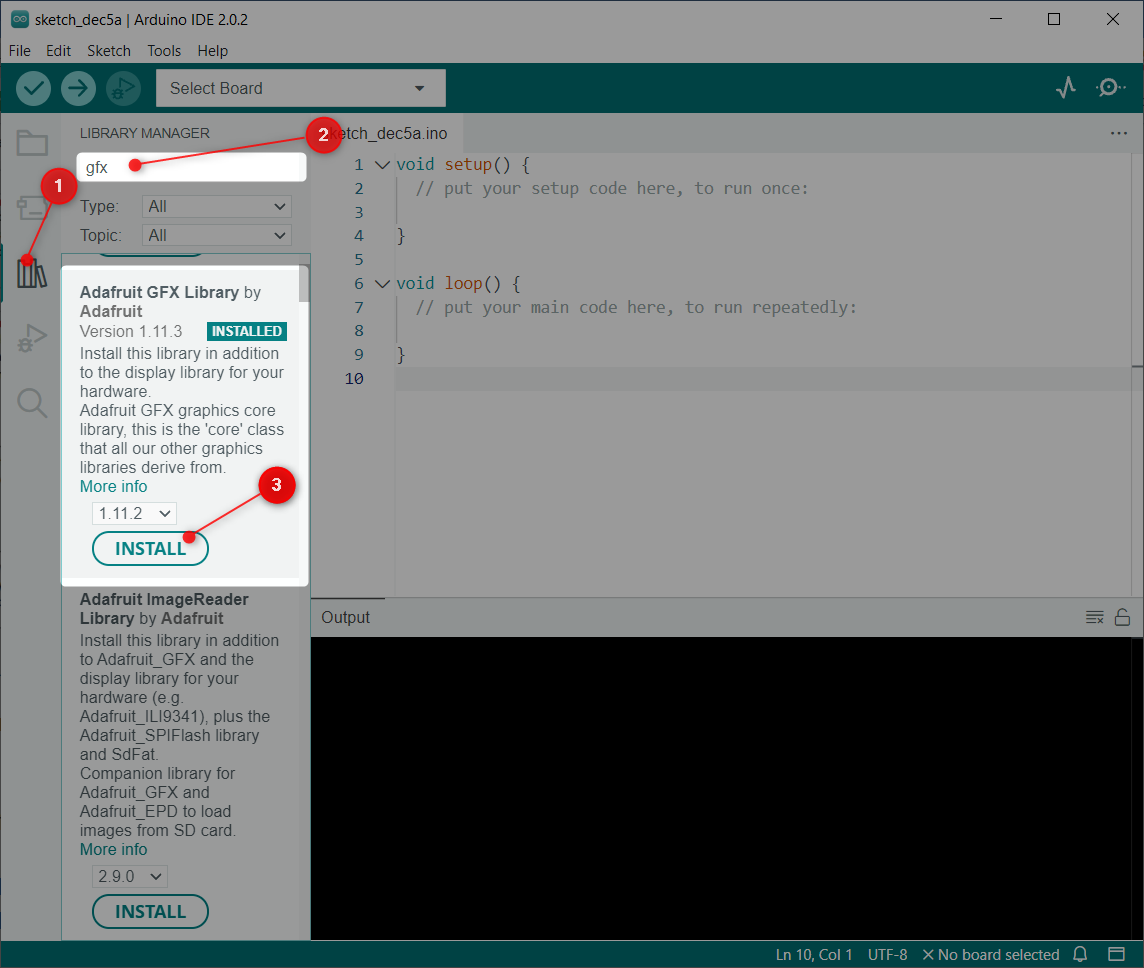
Next library we need to install is the GFX library by Adafruit.
After both libraries are installed successfully, the next step is to check the I2C address where ESP32 is connected.
4: Check OLED Display I2C Address
I2C stands for integrated circuit communication. Using I2C we can interface multiple devices over 2 wires. However, while connecting them every I2C device must use a separate I2C address. This address ranges from 0 to 127. For example, if we have two different I2C devices using the same I2C address they cannot be connected together on the same I2C line.
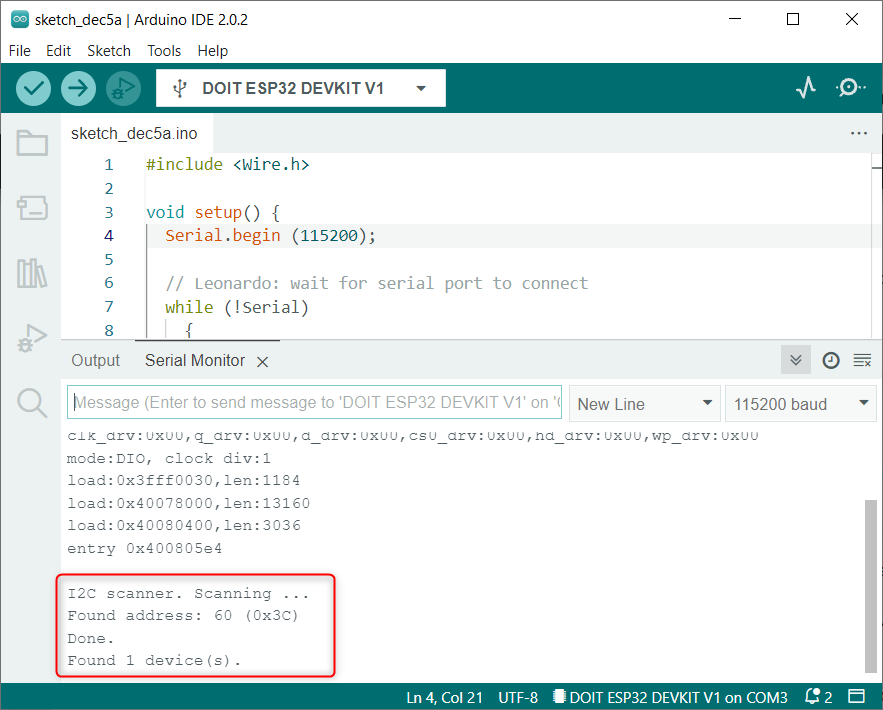
It’s important to check the I2C address first. To check the I2C address of the connected OLED display connected ESP32 with PC, upload the code given in the article Check I2C Address Using Arduino IDE.
After uploading code, the following output will appear. Here in our case the OLED display is connected at I2C address (0x3C).
We will use the mentioned I2C address for the OLED display in Arduino code.
5: OLED Display Arduino IDE Example
After installing libraries, we can see multiple pre-written examples in the Arduino IDE. To test ESP32 interfacing we will upload an example code for the SSD1306 display.
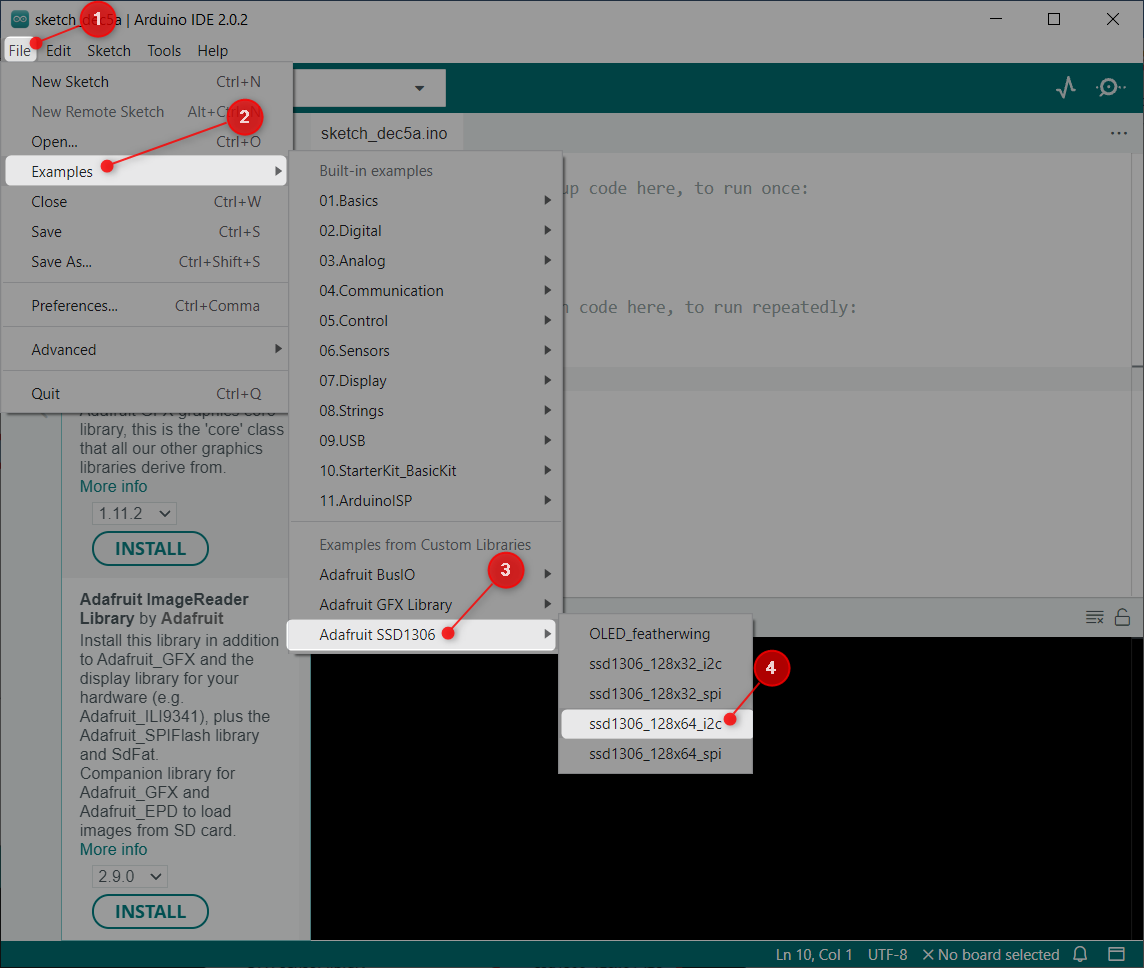
Go to: File>Examples>Adafruit SSD1306>ssd1306_128x64_i2c
5.1: Code
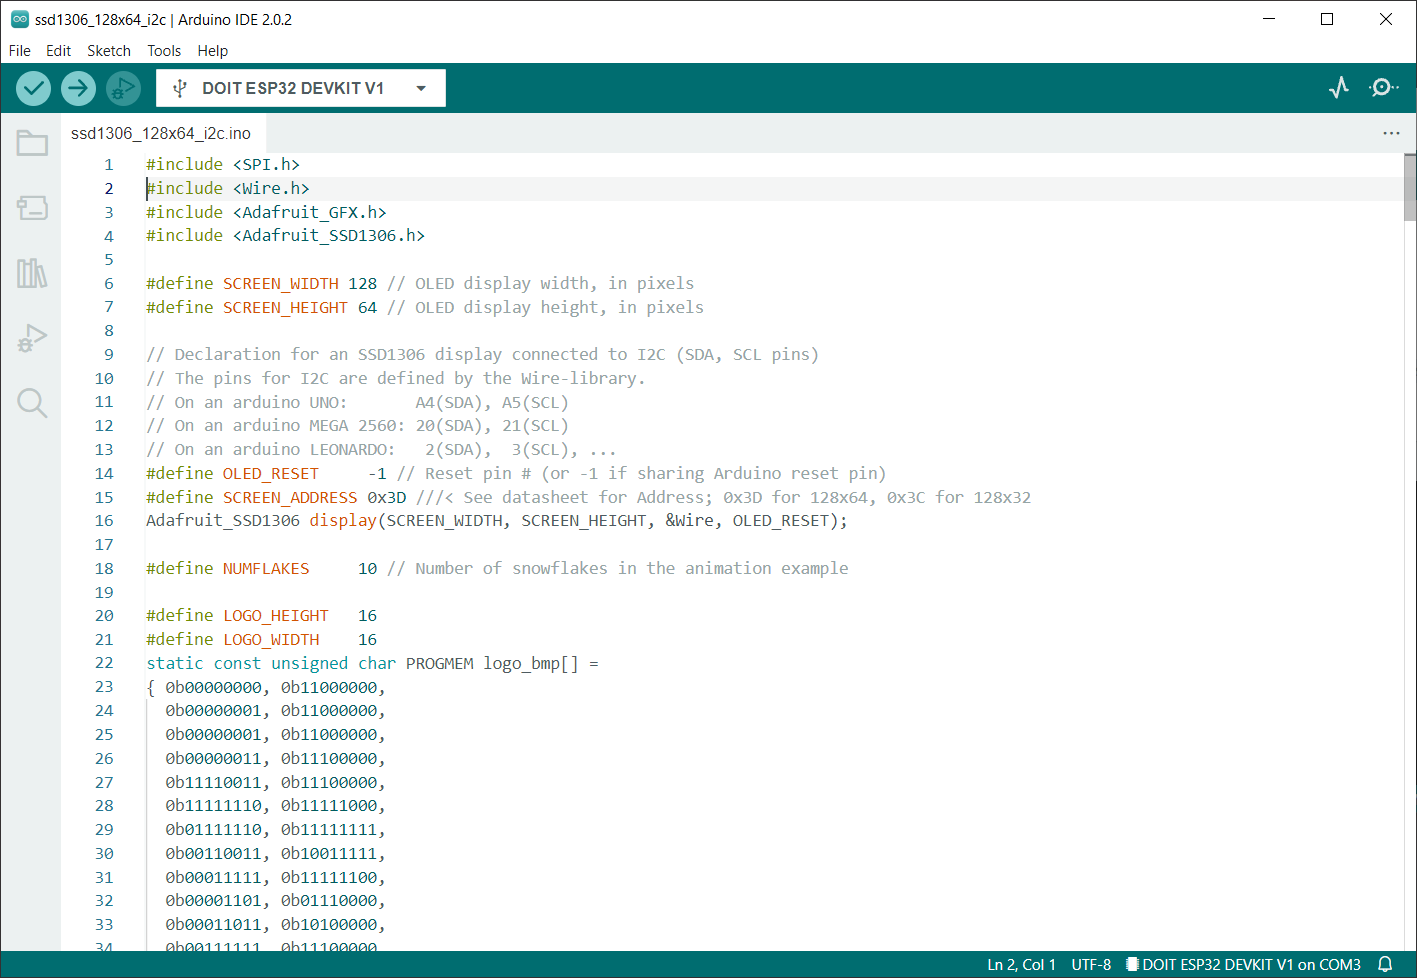
A new window will open showing us the given code. This code will illuminate the OLED display with different patterns like stars, circles, scrolling text and animated text.
5.2: Output
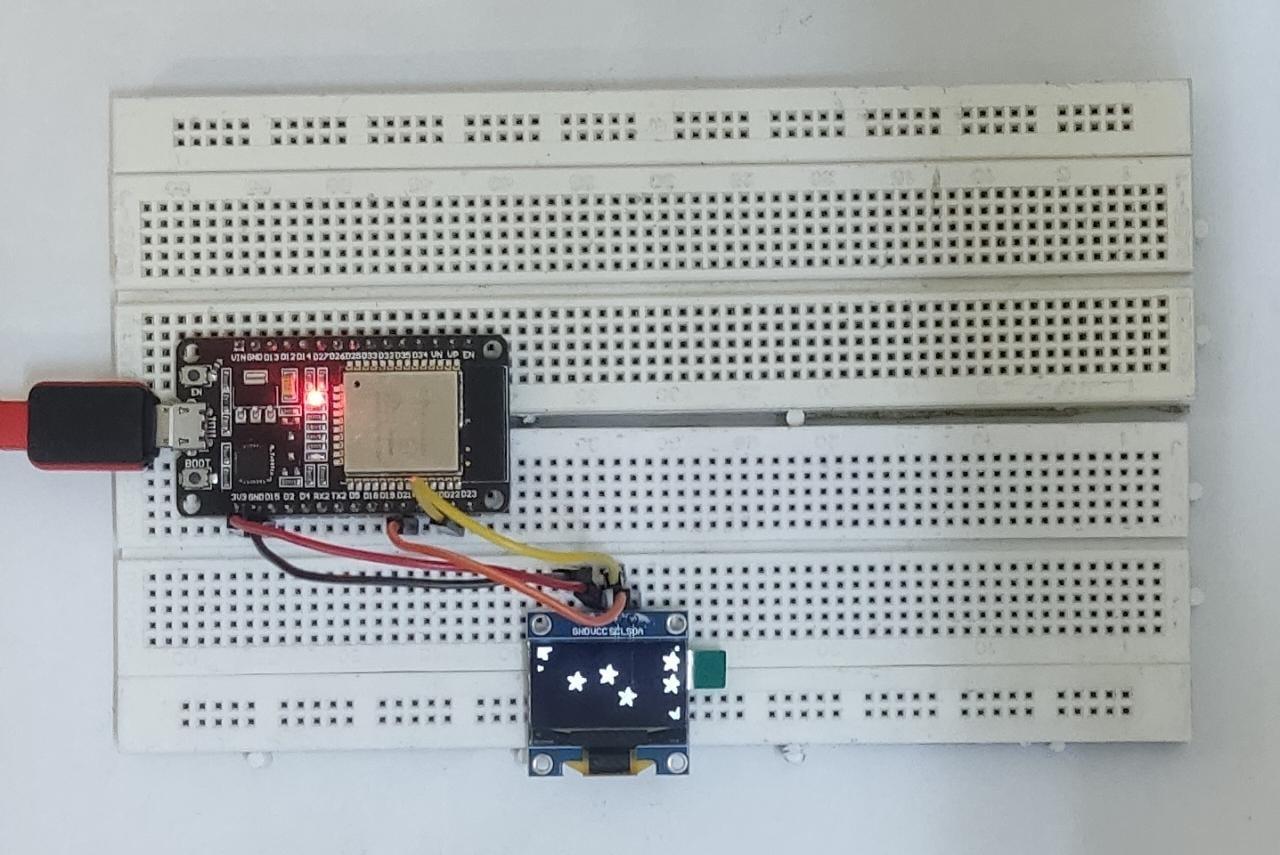
Output section displays a number of different patterns on the OLED display.
Now we have interfaced the OLED display and tested it using a prewritten library example. Next, we will display static text on OLED using ESP32.
6: Static Text Printing on OLED Display Using ESP32
The Adafruit library allows us to display different text with several functions. Here we will display static text using a simple code.
6.1: Code
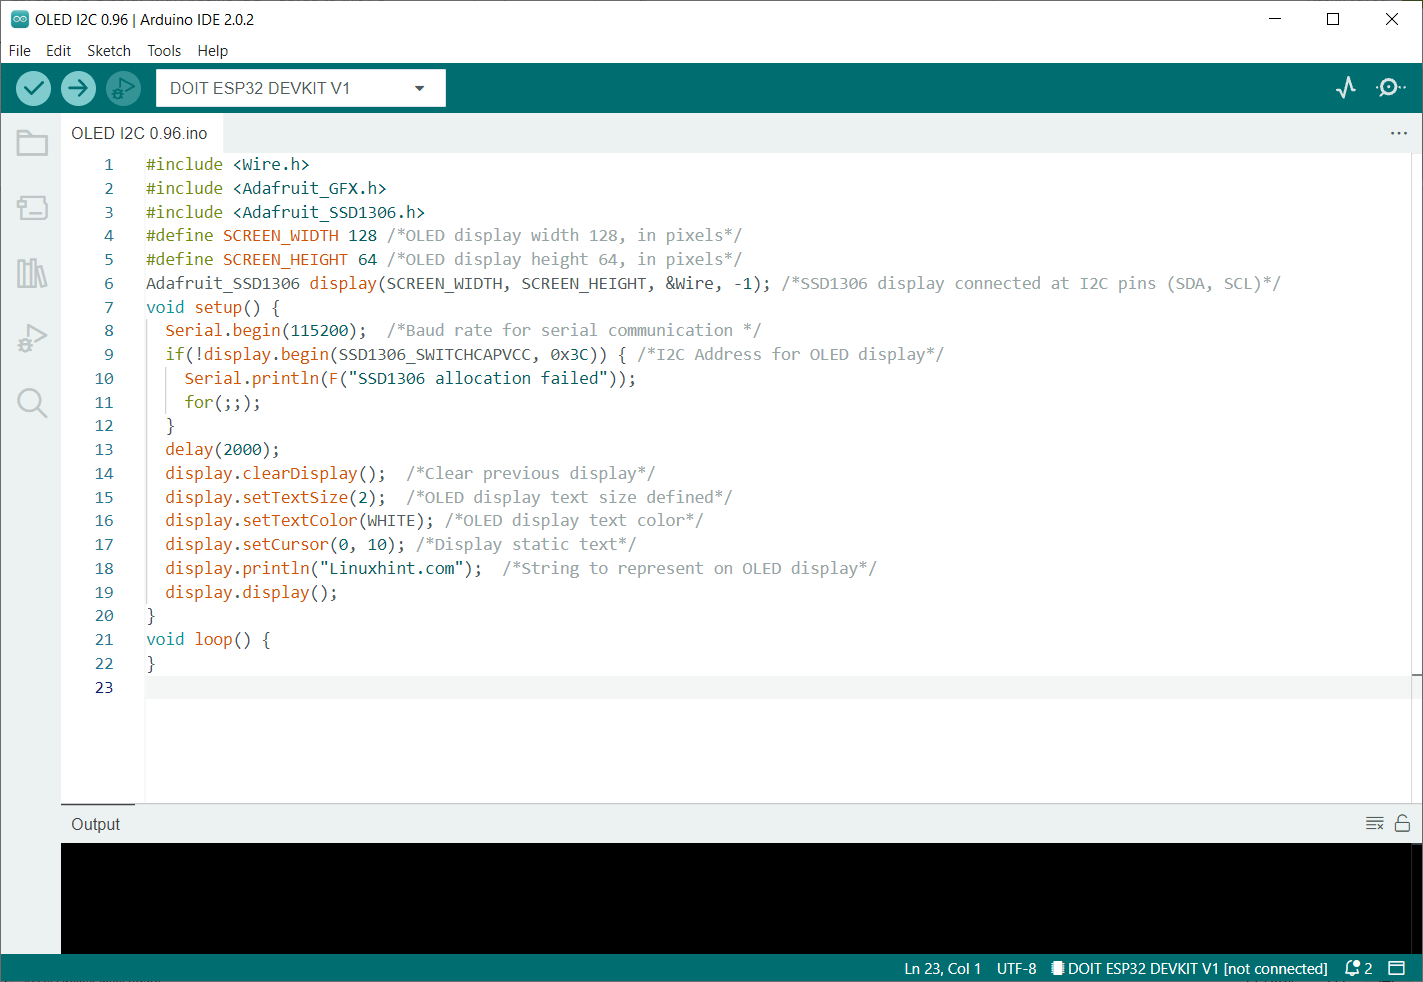
Open Arduino IDE, upload below code to ESP32 board.
#include <Adafruit_GFX.h>
#include <Adafruit_SSD1306.h>
#define SCREEN_WIDTH 128 /*OLED display width 128, in pixels*/
#define SCREEN_HEIGHT 64 /*OLED display height 64, in pixels*/
Adafruit_SSD1306 display(SCREEN_WIDTH, SCREEN_HEIGHT, &Wire, -1); /*SSD1306 display connected at I2C pins (SDA, SCL)*/
void setup() {
Serial.begin(115200); /*Baud rate for serial communication */
if(!display.begin(SSD1306_SWITCHCAPVCC, 0x3C)) { /*I2C Address for OLED display*/
Serial.println(F("SSD1306 allocation failed"));
for(;;);
}
delay(2000);
display.clearDisplay(); /*Clear previous display*/
display.setTextSize(2); /*OLED display text size defined*/
display.setTextColor(WHITE); /*OLED display text color*/
display.setCursor(0, 10); /*Display static text*/
display.println("Linuxhint.com"); /*String to represent on OLED display*/
display.display();
}
void loop() {
}
Code started by importing necessary libraries that we installed earlier. Two libraries include the wire and Adafruit library. Wire libraries allow us to use I2C while Adafruit helps to display the written text on screen.
Next following command is written:
It contains the SCREEN_WIDTH and SCREEN_HEIGHT variables. Using these variables, we defined the size of the OLED display. Here we are using a 128×64 OLED display. After that &Wire object is defined for display.
The last parameter contains (-1), this display that the OLED screen we are using doesn’t have an external reset button. In case we have a reset button on the OLED display. We will pass this parameter to a GPIO pin. Once the reset button is pressed then the OLED screen will display the text.
Next after initializing the I2C communication I2C address (0x3C) is defined which we have found earlier using I2C scanner code.
In the last lines of code, the string or text which is to be printed is defined along with font size and display color.
After uploading code now, we will observe the output.
6.2: Output
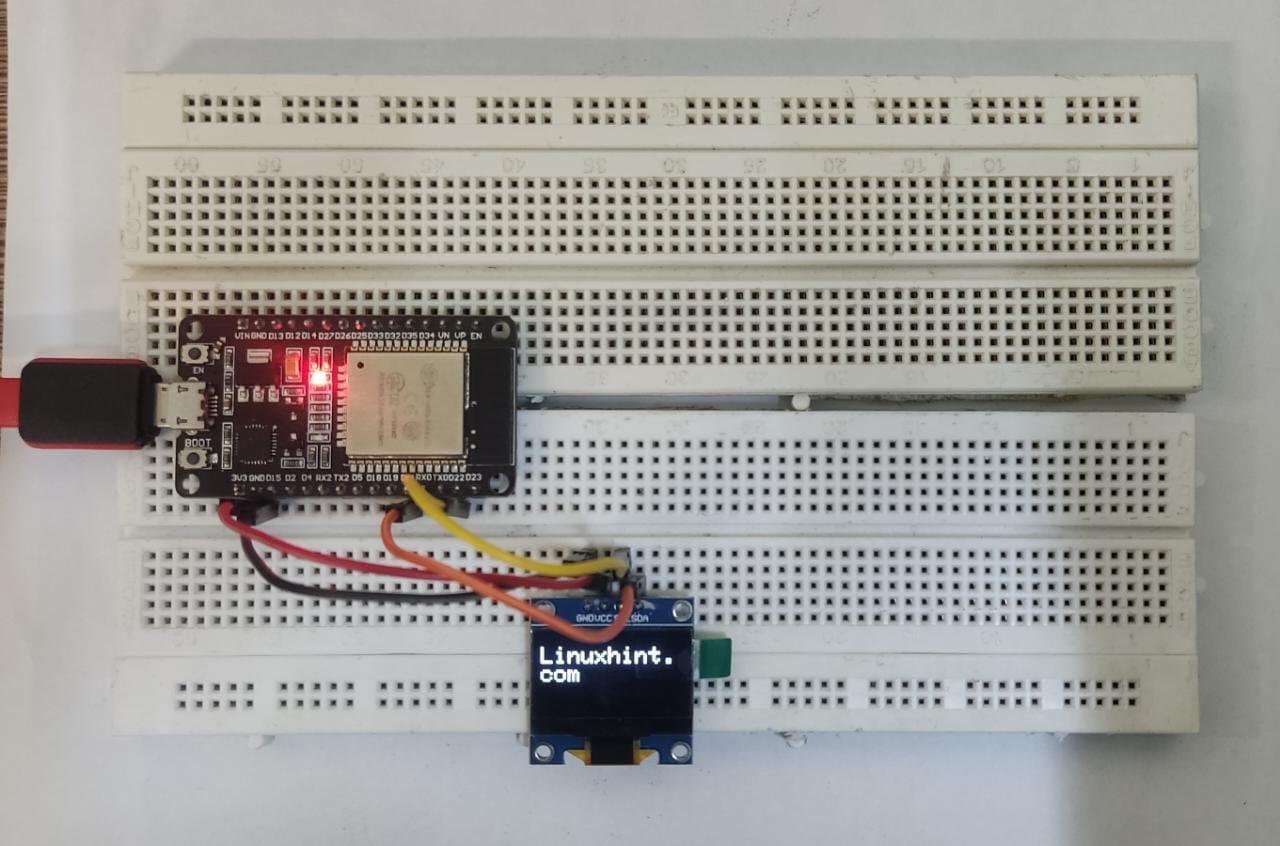
Output represents the string “Linuxhint.com” and it is printed with font size of 2.
We have completed I2C OLED display interfacing with ESP32 board.
Conclusion
An OLED display is a great way of showing outputs without any need for a serial monitor or PC. OLED displays come with two different protocols I2C and SPI. I2C OLED displays are preferred because of a lesser number of wires. This lesson provides all steps required in interfacing ESP32 with I2C 0.96-inch OLED display.


