ESP32 is an advanced microcontroller board that can run multiple instructions to generate outputs. An OLED screen is used for displaying different kinds of data. Using ESP32 with DHT11 sensor we can take temperature and humidity readings. All this data can be represented over an OLED display. This tutorial covers all steps needed to interface these sensors with ESP32.
This tutorial covers following content:
1: Introduction to DHT11 Sensor
3: OLED Display Module with ESP32
4: Installing the Required Libraries
4.1: Arduino Library for DHT Sensor
4.2: Arduino Library for OLED Display
5: Interfacing ESP32 with DHT11 Sensor
1: Introduction to DHT11 Sensor
DHT11 is one of the commonly used temperature and humidity monitoring sensors in the electronics community. It is more precise in giving temperature and relative humidity. It outputs a calibrated digital signal which spits out into two different readings of temperature and humidity.
It uses the digital-signal-acquisition technique that gives reliability and stability. The DHT11 sensor contains a resistive-type humidity measuring component and features a NTC temperature measuring component. Both these are integrated to an 8-bit highly efficient microcontroller which offers fast response, anti-interference ability and cost-effectiveness.
Here are some main technical specifications of DHT11:
-
- DHT11 sensor operates at a voltage of 5V to 5.5V.
- Operating current while measuring is 0.3mA and during standby time is 60uA.
- It output serial data in digital signal.
- Temperature of DHT11 sensor range from 0°C to 50°C.
- Humidity Range: 20% to 90%.
- Accuracy of ±1°C for temperature measuring and ±1% for relative humidity readings.
As we have covered a basic introduction to DHT11 sensor now let’s move towards the pinout of DHT11.
2: DHT11 Sensor Pinout
Most of the time the DHT11 sensor comes in two different pin configurations. The DHT11 sensor which comes in 4 pins configuration has 3 pins not working or labeled as no connection.
The 3 pin DHT11 sensor module comes in three pins which include power, GND and data pin.
2.1: 3 Pin DHT11 Sensor
Given image shows 3 pin configurations of the DHT11 sensor.
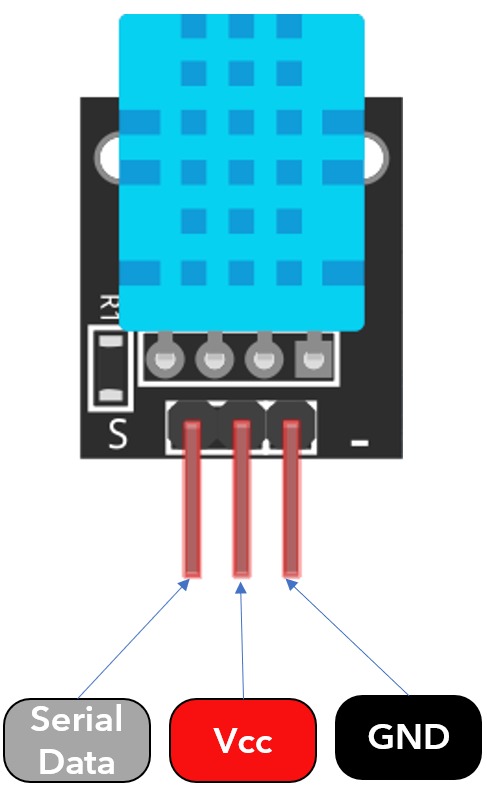
These three pins are:
| 1. | Data | Output temperature and humidity in serial data |
| 2. | Vcc | Input power 3.5V to 5.5V |
| 3. | GND | GND of circuit |
2.2: 4 Pin DHT11 Sensor
Following image illustrate 4 pin DHT11 sensor module:
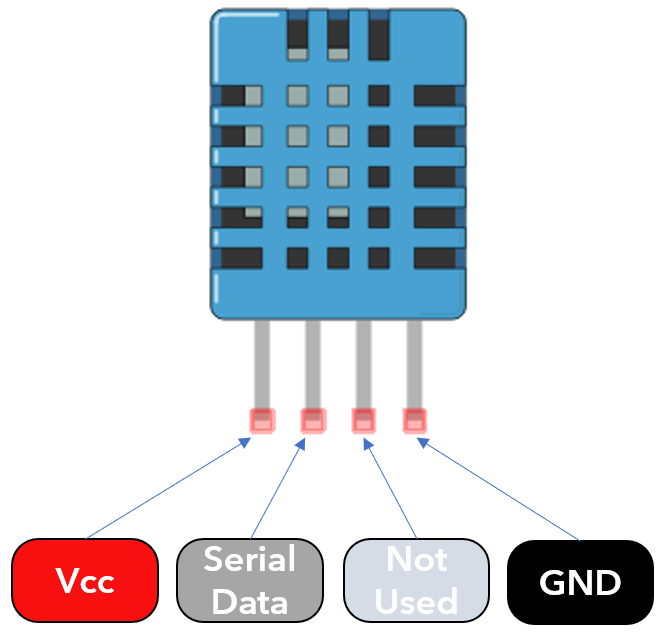
These 4 pins include:
| 1. | Vcc | Input power 3.5V to 5.5V |
| 2. | Data | Output temperature and humidity in serial data |
| 3. | NC | No connection or not used |
| 4. | GND | GND of circuit |
3: OLED Display Module with ESP32
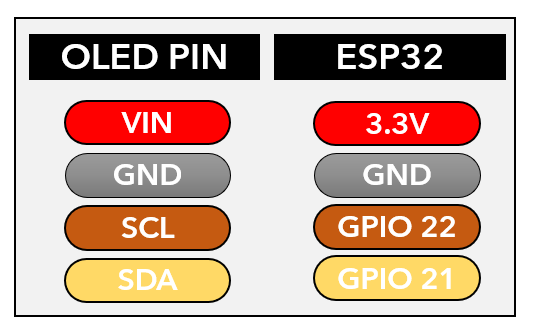
The OLED display mainly comes with two different communication protocols. The two protocols are I2C and SPI. The serial peripheral interface (SPI) is generally faster than I2C, but we preferred I2C over SPI protocol as it required a smaller number of pins.
Following image illustrates ESP32 connection diagram with 128×64 pixels (0.96’’) OLED display.
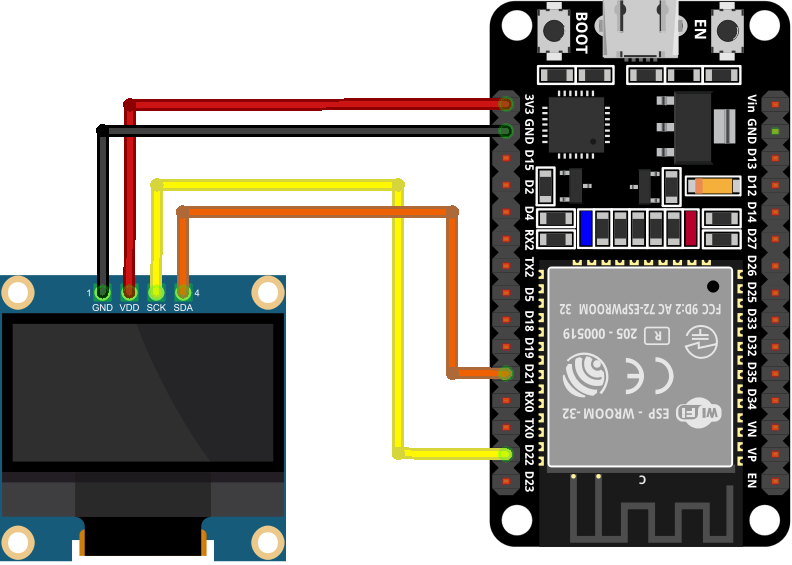
Below is the connection table:
Once ESP32 is interfaced with an OLED display, the next step on the list is install all required libraries for ESP32 programming using Arduino IDE.
4: Installing the Required Libraries
Here we are going to interface two different sensors with ESP32 so both require separate libraries to operate. Now we will install libraries for DHT11 and OLED display.
4.1: Arduino Library for DHT Sensor
Open Arduino IDE, go to: Sketch>Include Library>Manage Libraries
Alternatively, we can also open the library manager from the side button on the Arduino IDE interface.
Search for the DHT library and install the latest updated version. The DHT library will help to read sensor data.
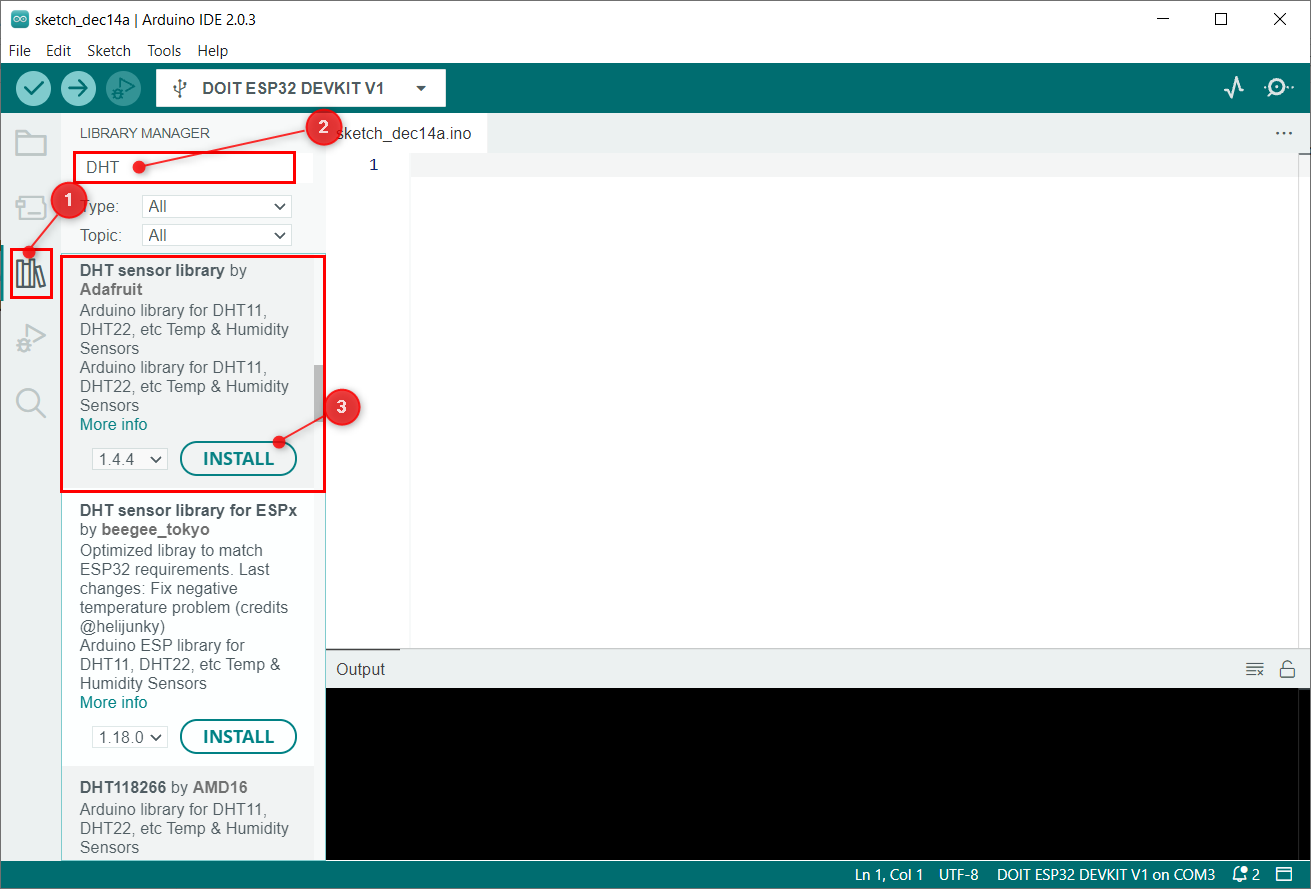
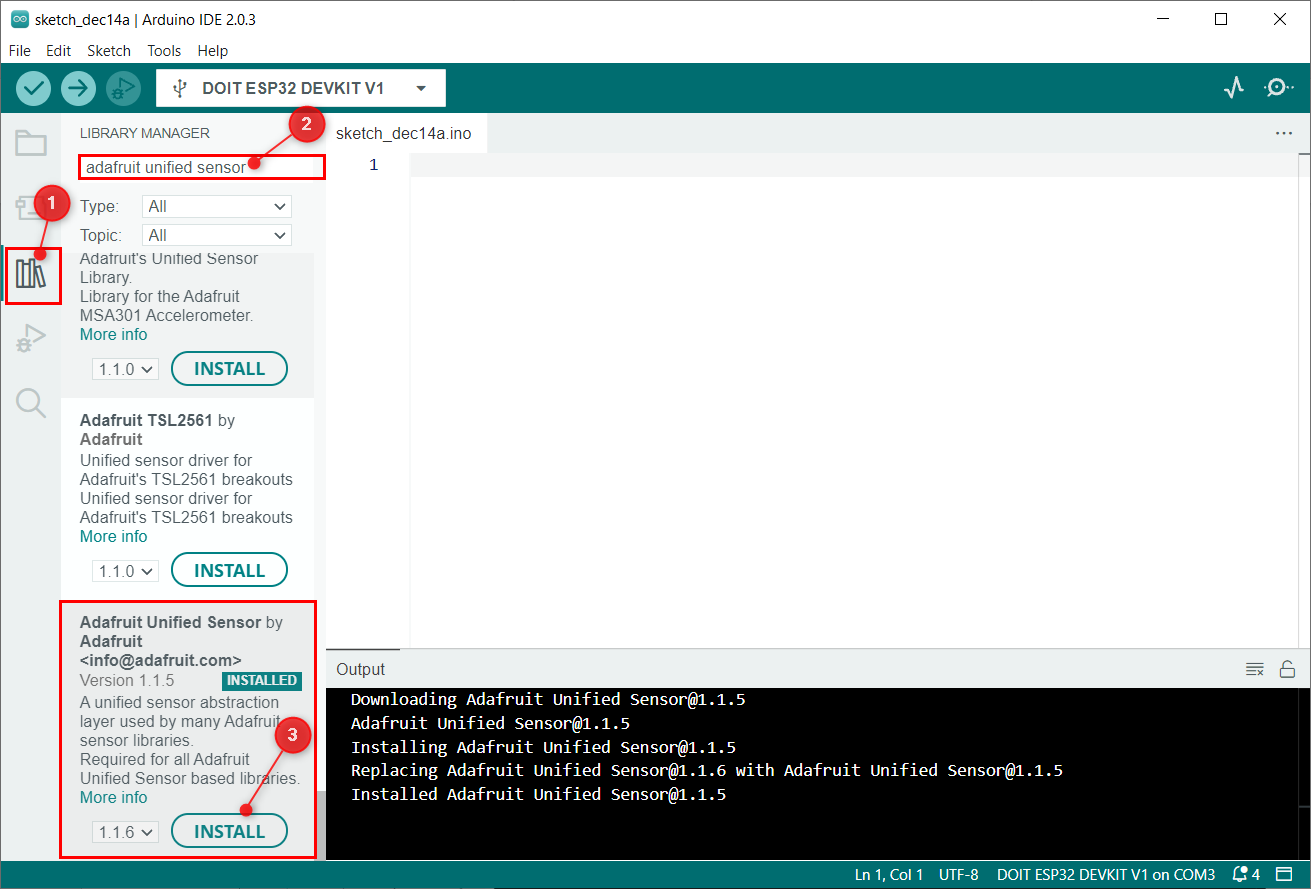
After installing the DHT library next we have to install a unified sensor library by Adafruit.
4.2: Arduino Library for OLED Display
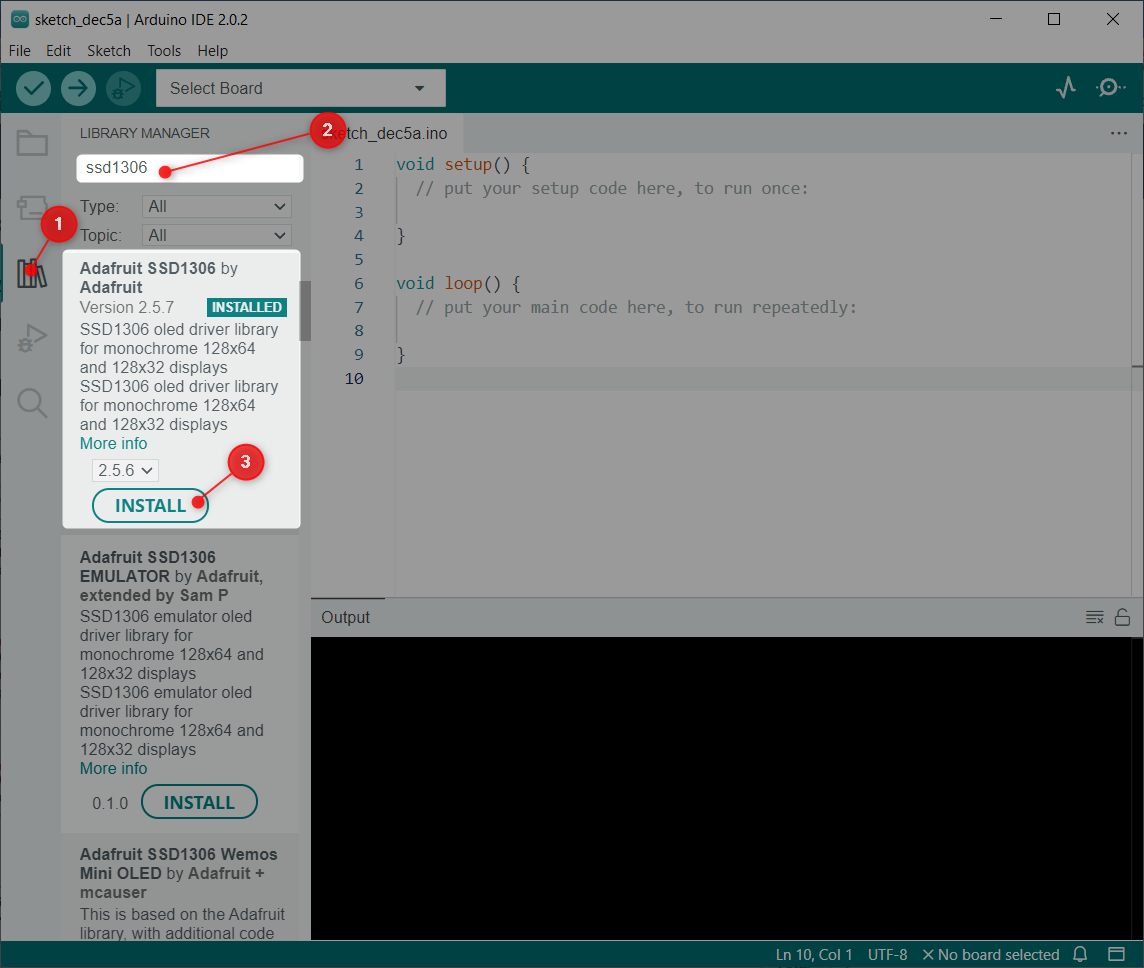
Multiple libraries are available in Arduino IDE to program ESP32 with an OLED display. Here we will be using two libraries from Adafruit: SSD1306 and GFX library.
Open IDE and click Library Manager and search for the OLED SSD1306 library. Install SSD1306 library by Adafruit from the search bar.
Alternatively, one can also go to: Sketch>Include Library>Manage Libraries
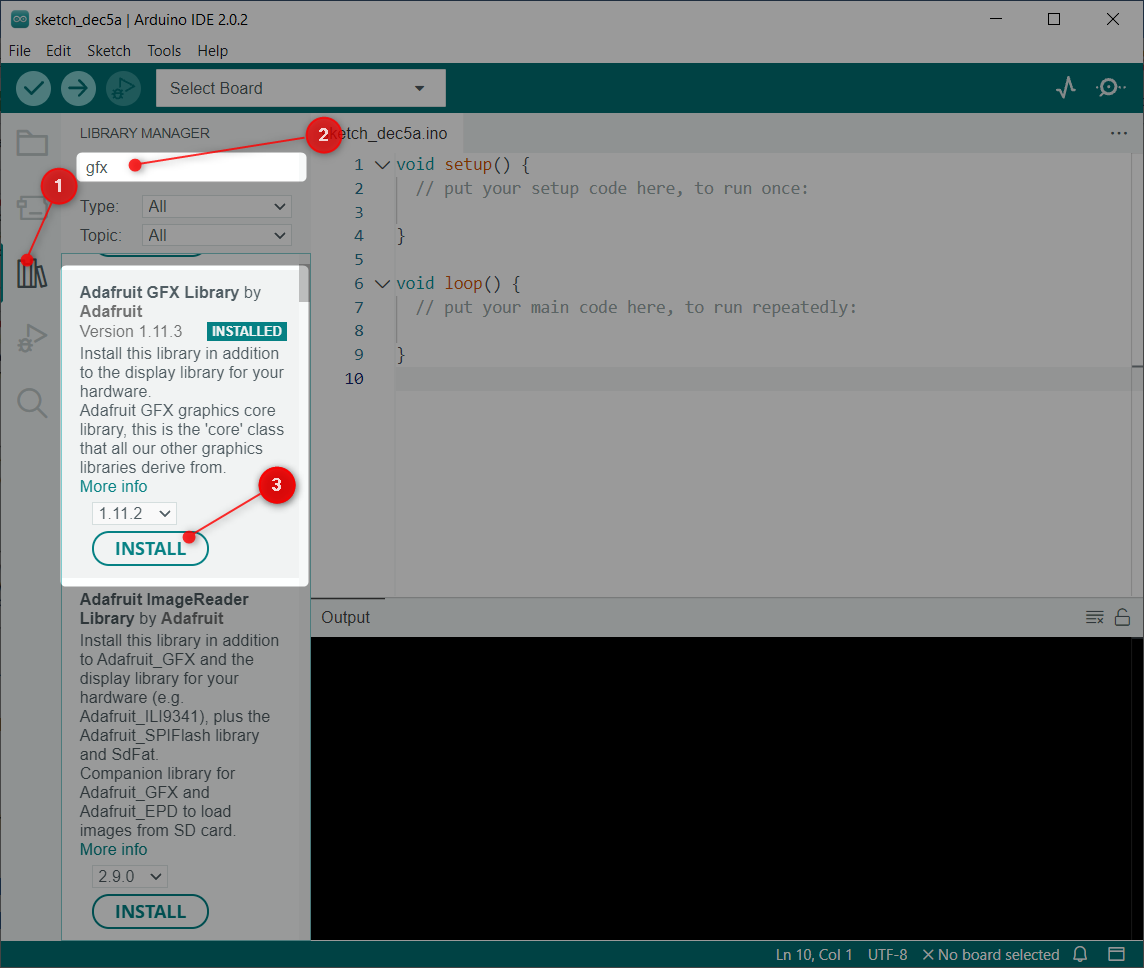
Next library we need to install is the GFX library by Adafruit.
We have installed libraries for both the OLED display and DHT11 sensor. Now we can easily interface both with ESP32.
5: Interfacing ESP32 with DHT11 Sensor and OLED
For interfacing ESP32 with DHT11 sensor we need a digital pin for reading sensor data and to power DHT11 sensor we can either use the 3V3 pin or Vin pin of ESP32.
For OLED display I2C pins SDA and SCL will be used. For powering we can use Vin or a 3V3 pin of ESP32.
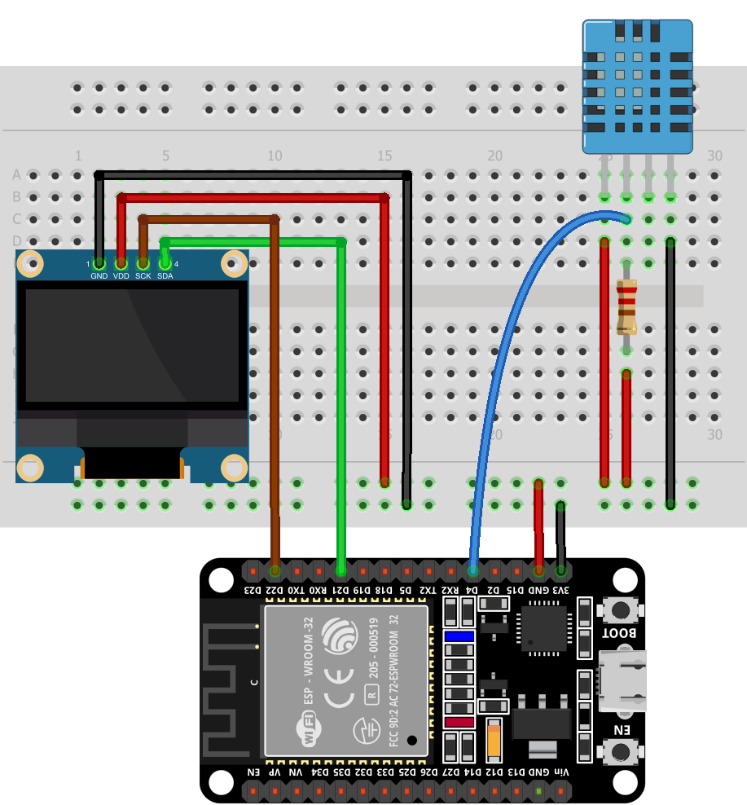
5.1: Schematic
In the given image we can see the schematic diagram of ESP32 with DHT11 and for output an OLED screen is used. This image represents the 3-pin sensor module interfacing with ESP32. Remember to connect a pull up resistor of 10kΩ.
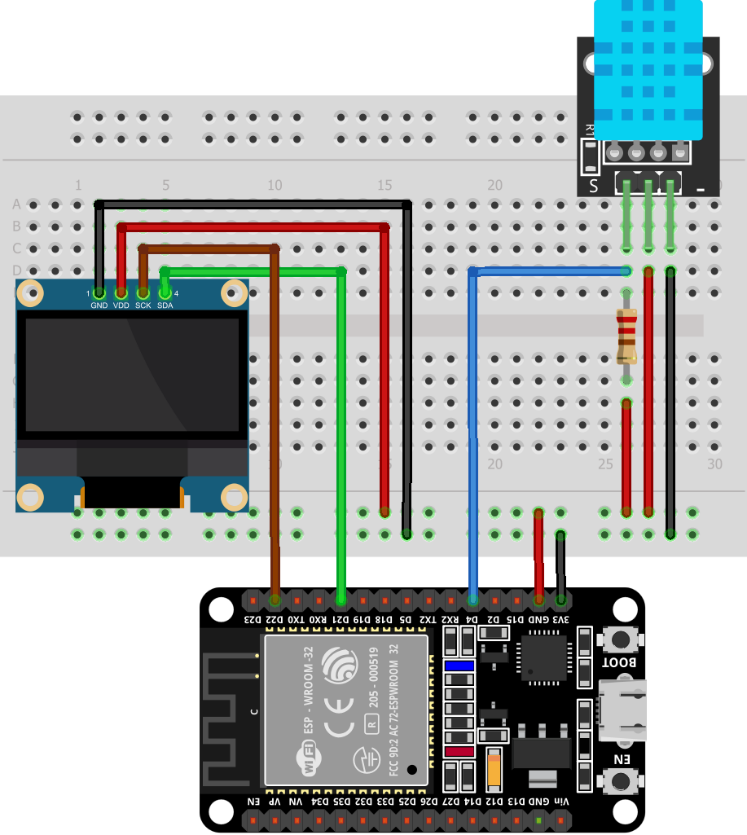
Similarly, 4 pin DHT11 can also be connected, the only difference here is the 3 pin which is of no use or termed as No connection. The data pin is at pin 2 of the sensor.
The OLED display is connected using the I2C SDA and SCL pins at D21 and D22 respectively.
5.2: Code
Connect ESP32 with PC and open Arduino IDE. Upload the given code to the ESP32 board.
#include <Adafruit_GFX.h>
#include <Adafruit_SSD1306.h> /*OLED display library*/
#include <Adafruit_Sensor.h>
#include <DHT.h> /*Temperature and humidity sensor library*/
#define SCREEN_WIDTH 128 /*OLED screen width 128 pixels*/
#define SCREEN_HEIGHT 64 /*OLED screen height 64 pixels*/
Adafruit_SSD1306 display(SCREEN_WIDTH, SCREEN_HEIGHT, &Wire, -1); /*SSD1306 I2C Display initialization*/
#define DHTPIN 4 /*Signal pin for DHT11 Sensor*/
#define DHTTYPE DHT11
DHT dht(DHTPIN, DHTTYPE);
void setup() {
Serial.begin(115200);
dht.begin();
if(!display.begin(SSD1306_SWITCHCAPVCC, 0x3C)) { /*I2C Address at which OLED is connected*/
Serial.println(F("SSD1306 allocation failed"));
for(;;);
}
delay(2000);
display.clearDisplay();
display.setTextColor(WHITE); /*Output text color white */
}
void loop() {
delay(5000);
float t = dht.readTemperature(); /*read temperature*/
float h = dht.readHumidity(); /*read humidity*/
if (isnan(h) || isnan(t)) {
Serial.println("Failed to read from DHT sensor!");
}
display.clearDisplay(); /*clear OLED display before displaying reading*/
display.setTextSize(1); /*OLED text font size*/
display.setCursor(0,0);
display.print("Temperature: ");
display.setTextSize(2);
display.setCursor(0,10);
display.print(t); /*print temperature in Celsius*/
display.print(" ");
display.setTextSize(1);
display.cp437(true);
display.write(167);
display.setTextSize(2);
display.print("C");
display.setTextSize(1);
display.setCursor(0, 35);
display.print("Humidity: ");
display.setTextSize(2);
display.setCursor(0, 45);
display.print(h); /*prints humidity percentage*/
display.print(" %");
display.display();
}
Code started by including the necessary libraries for OLED and DHT11 sensors. After that OLED display dimensions are defined. Next the DHT sensor type is defined in case if you are using DHT22 replace it accordingly.
In the setup part DHT sensor and OLED display is initialized. The OLED screen is connected at an I2C address of 0x3C. In case one wants to check I2C address upload the code given in this article.
The temperature and humidity values are stored inside the float variable t and h respectively. After that both these values are printed on an OLED display.

5.3: Output
In the output we can see the real time measured temperature and humidity displayed on the OLED screen.
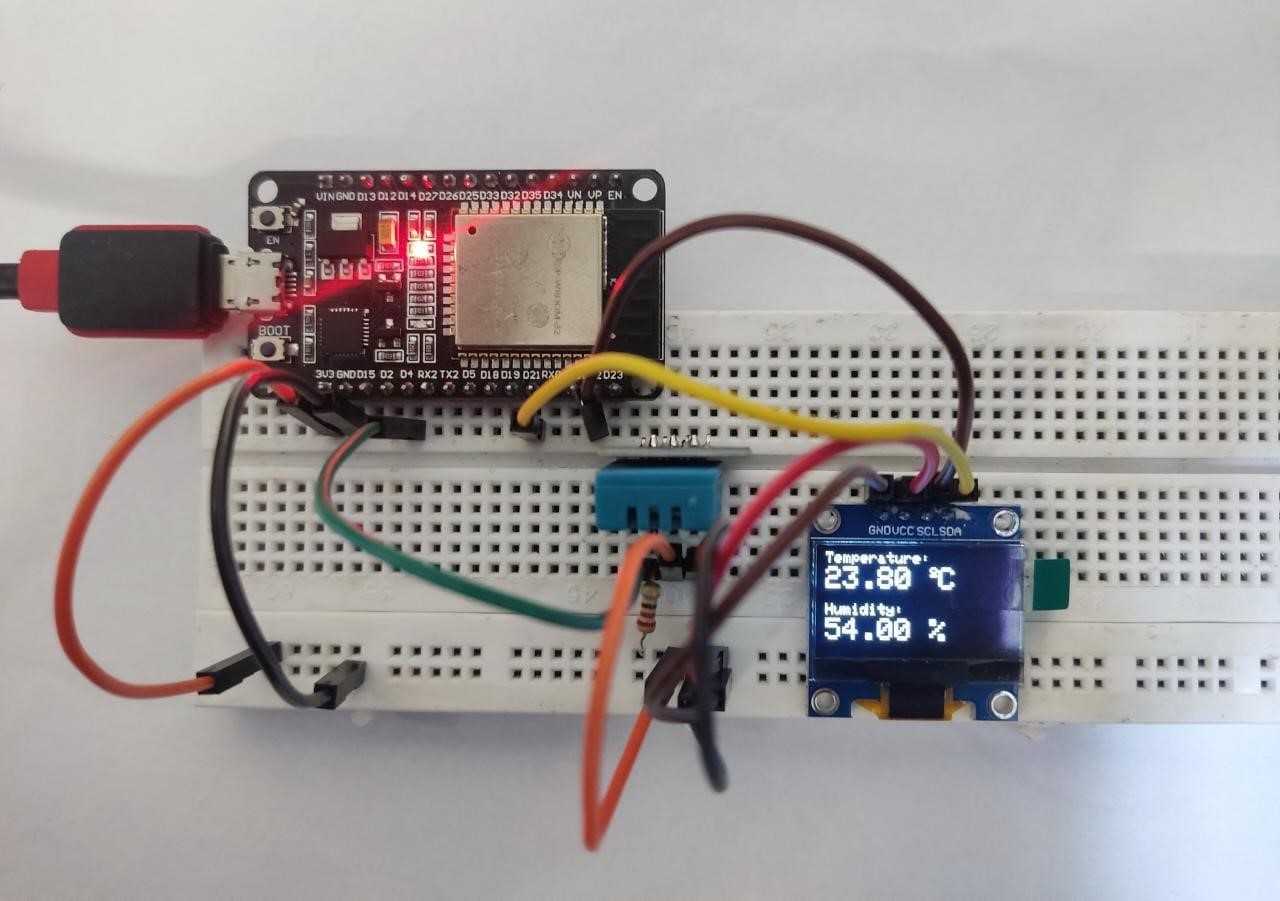
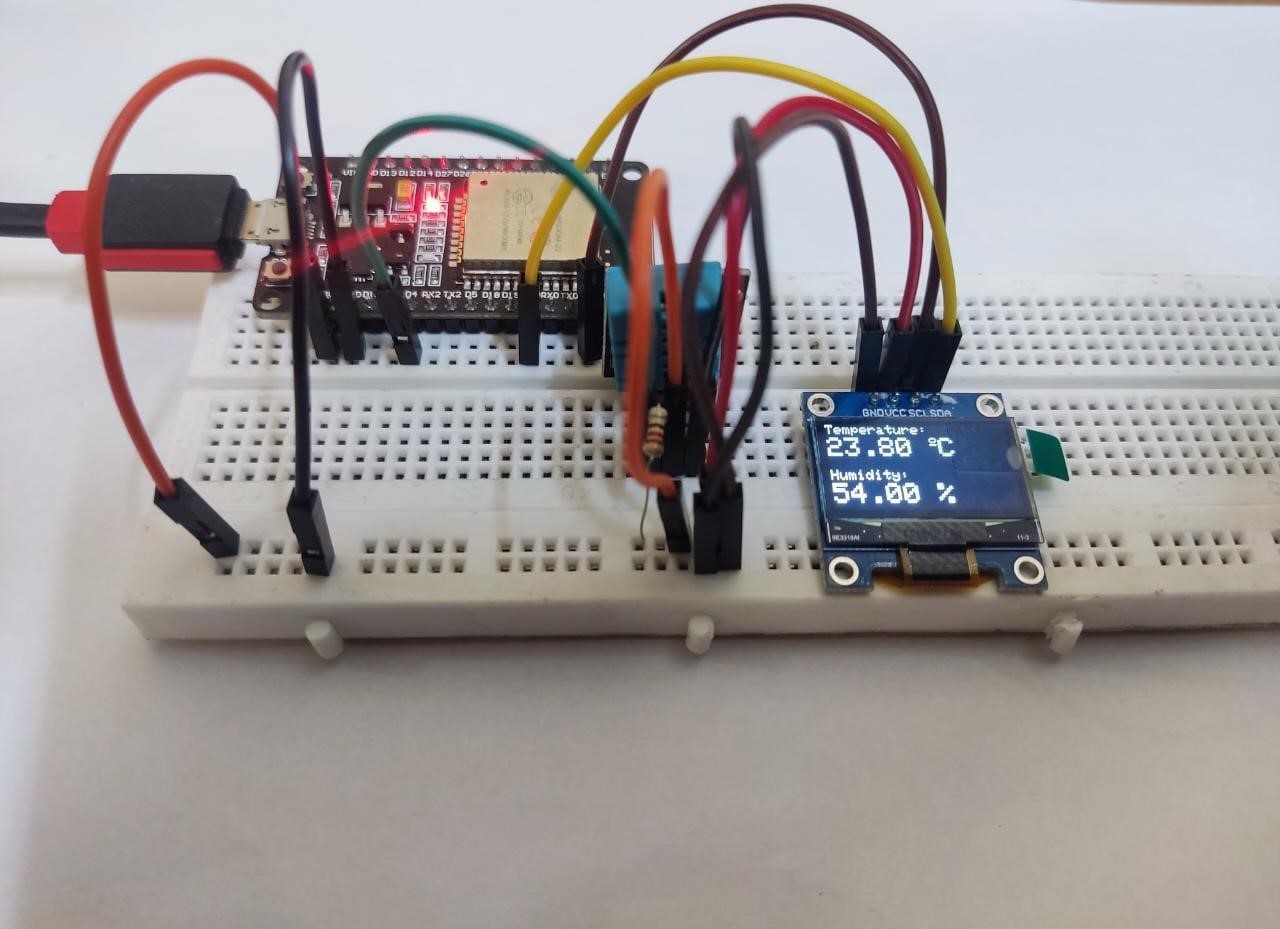
We have successfully completed interfacing of ESP32 with DHT11 sensor and OLED screen.
Conclusion
OLED displays with ESP32 can show multiple data that is read using the external sensors. Here this article covers all steps to interface ESP32 with DHT11 sensor to measure the temperature and humidity of a room. After that all the read data is displayed on the I2C OLED display module.