Making a voting machine using Arduino Uno
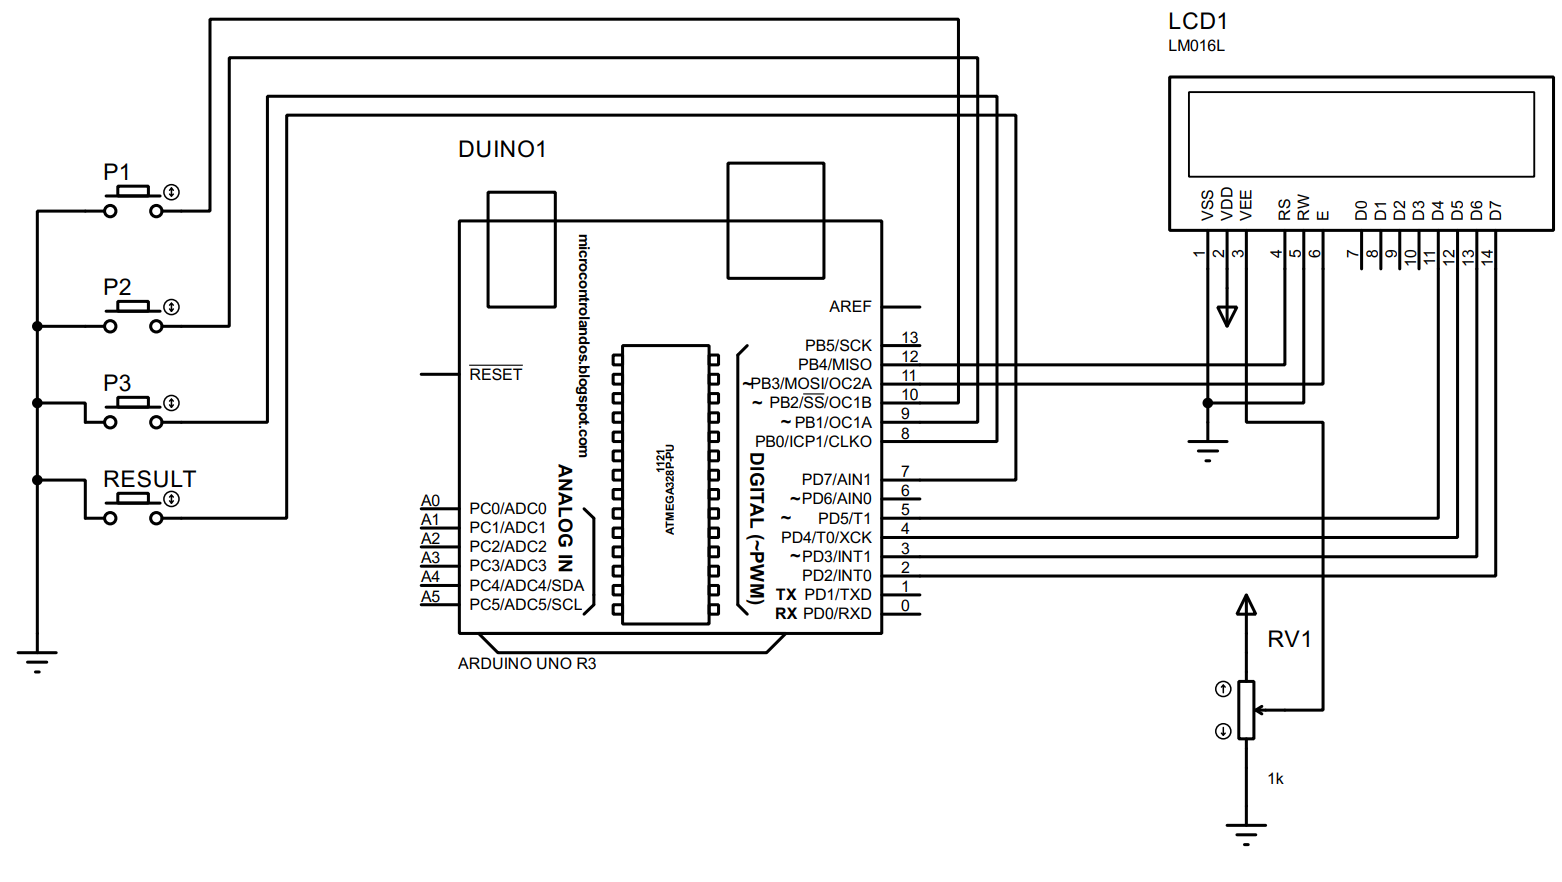
The first step for creating any device is to create its circuit diagram and shortlist the components that will be required to make that specific device. So, we have given the schematic of the circuitry followed by component list:
- 1 16×2 Liquid Crystal Display
- 4 push buttons
- Connecting wires
- Breadboard
- 1 Potentiometer
- Arduino Uno
Hardware assembly for making voting machine using Arduino Uno
Now we have created the circuit for the voting machine so to see how this circuit will look like on the actual hardware we have first created a hardware assembly according to the circuit given above:
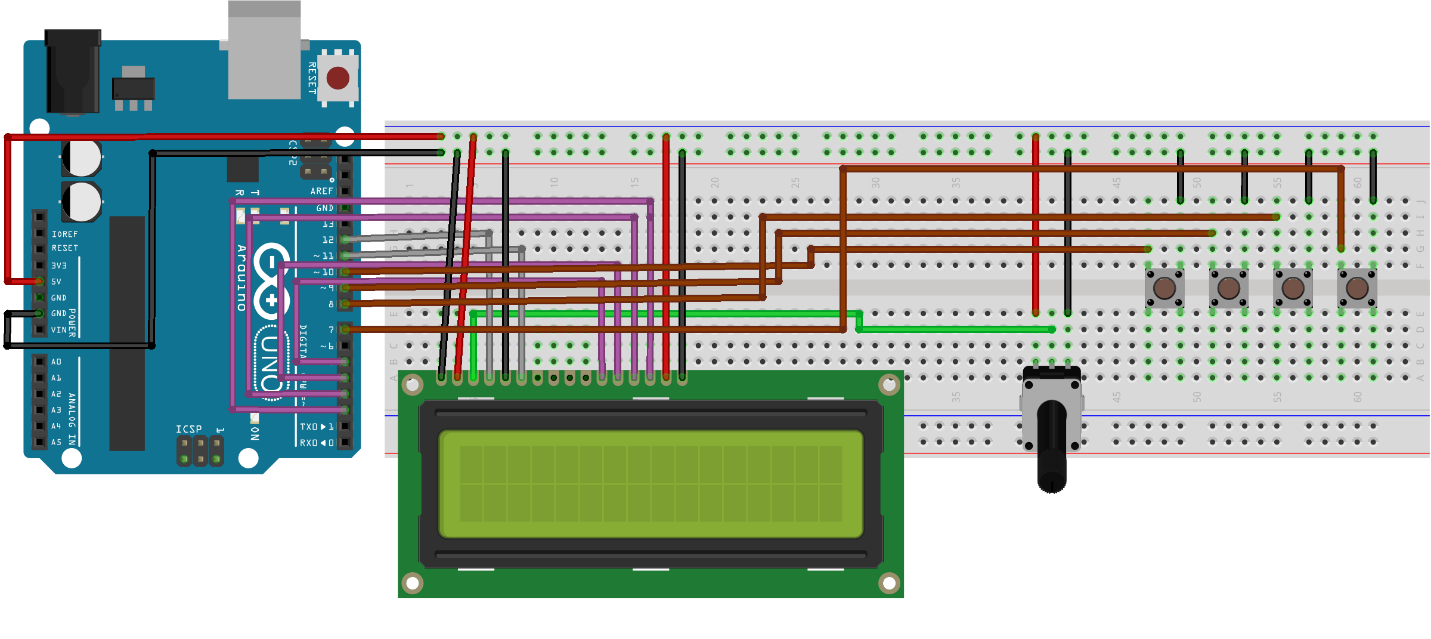
In this smart voting machine we have used the 4 push buttons three of them are used for voting and one is for calculating the result. However, you can increase or decrease the number of push buttons depending upon your need. The connections of the buttons are represented by the brown wires that connect the buttons with Arduino pins 10,9,8,7.
The LCD data pins are connected using the purple wires that used the pins 5 to 2 of the Arduino Uno. Whereas the RS and the E (enable) pins are connected to Arduino Uno by using its 12 and 11 pins and the connection is represented by the gray wires. Moreover, to adjust the brightness of the LCD we have used the output of the potentiometer by connecting it with the V0 pin of LCD using the green wire.
Arduino code for making the voting machine using Arduino Uno
The code written for making the voting machine is not that difficult. We just simply made 3 counters that will increase their values upon pressing their respective buttons. Next by using the if condition for every counter we have compared its values with the rest of the counters, and this is how we have found the winner. The respective Arduino program for making the voting machine is given below:
LiquidCrystallcd(12, 11, 5, 4, 3, 2);/* Arduino pins for LCD*/
//Arduino pins for buttons */
#define p1 10
#define p2 9
#define p3 8
#define p4 7
/* variables for saving the votes of each option */
int v1=0;
int v2=0;
int v3=0;
void setup()
{
/* pin modes for the buttons */
pinMode(p1,INPUT);
pinMode(p2,INPUT);
pinMode(p3,INPUT);
pinMode(p4,INPUT);
/* display the introductory line */
lcd.begin(16, 2);
lcd.print(" Arduino ");
lcd.setCursor(0,1);
lcd.print(" Voting Machine ");
delay(4000);
/* assigning states to buttons*/
digitalWrite(p1, HIGH);
digitalWrite(p2, HIGH);
digitalWrite(p3, HIGH);
digitalWrite(p4, HIGH);
/* displaying the three vote variables */
lcd.clear();
lcd.setCursor(1,0);
lcd.print("P1");
lcd.setCursor(5,0);
lcd.print("P2");
lcd.setCursor(9,0);
lcd.print("P3");
}
void loop()
{
lcd.setCursor(1,0);
lcd.print("P1");
lcd.setCursor(1,1);
lcd.print(v1);
lcd.setCursor(5,0);
lcd.print("P2");
lcd.setCursor(5,1);
lcd.print(v2);
lcd.setCursor(9,0);
lcd.print("P3");
lcd.setCursor(9,1);
lcd.print(v3);
lcd.setCursor(13,0);
/* if p1 is pressed then increment of one in its value*/
if(digitalRead(p1)==0)
v1++;
/* if p2 is pressed then increment of one in its value*/
while(digitalRead(p1)==0);
if(digitalRead(p2)==0)
v2++;
/* if p3 is pressed then increment of one in its value*/
while(digitalRead(p2)==0);
if(digitalRead(p3)==0)
v3++;
/* if p2 is pressed then display the result */
while(digitalRead(p3)==0);
if(digitalRead(p4)==0)
{
int v=v1+v2+v3;
if(v)
{
/* if votes of p1 are more than the others then it is the winner */
if((v1 > v2 && v1 > v3 ))
{
lcd.clear();
lcd.print("P1 is Winner");
delay(3000);
lcd.clear();
}
/* if votes of p2 are more than the others then it is the winner */
else if((v2 > v1 && v2 > v3 ))
{
lcd.clear();
lcd.print("P2 is Winner");
delay(3000);
lcd.clear();
}
/* if votes of p3 are more than the others then it is the winner */
else if((v3 > v1 && v3 > v2 ))
{
lcd.clear();
lcd.print("P3 is Winner");
delay(3000);
lcd.clear();
}
/* else there is either a tie between the candidates or no vote has been given to any */
else
{
lcd.clear();
lcd.print(" Tie Up Or ");
lcd.setCursor(0,1);
lcd.print(" No Result ");
delay(3000);
lcd.clear();
}
}
else
{
lcd.clear();
lcd.print("No Voting....");
delay(3000);
lcd.clear();
}
/* giving zero to all the candidates to start the voting again*/
v1=0;v2=0;v3=0;v=0;
lcd.clear();
}
}
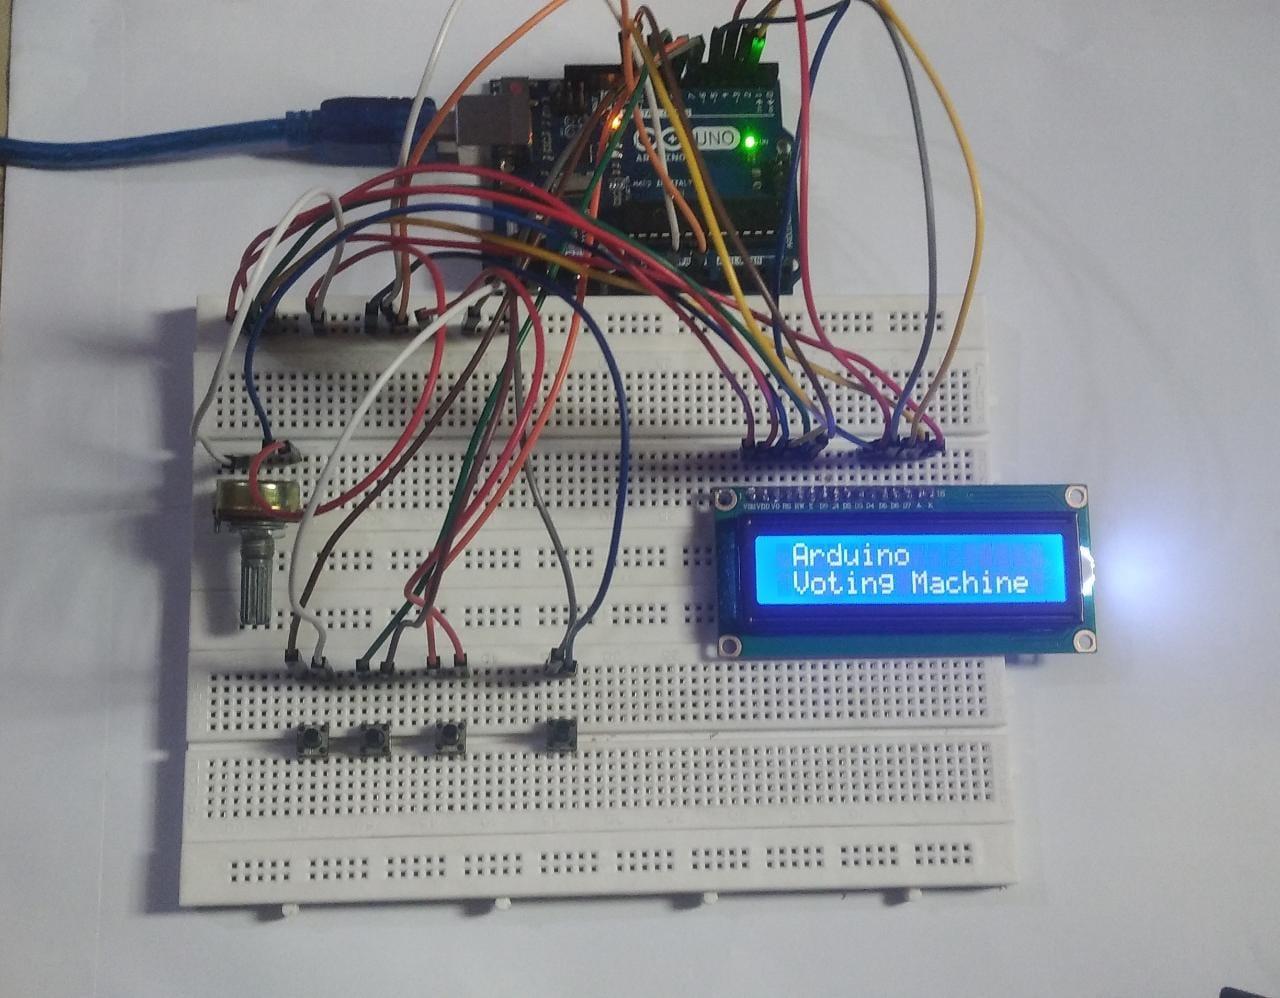
Hardware demonstration of smart voting machine
After successfully creating the hardware assembly and compiling the Arduino code we have implemented the hardware assembly on the breadboard, and it can be seen in the image below:
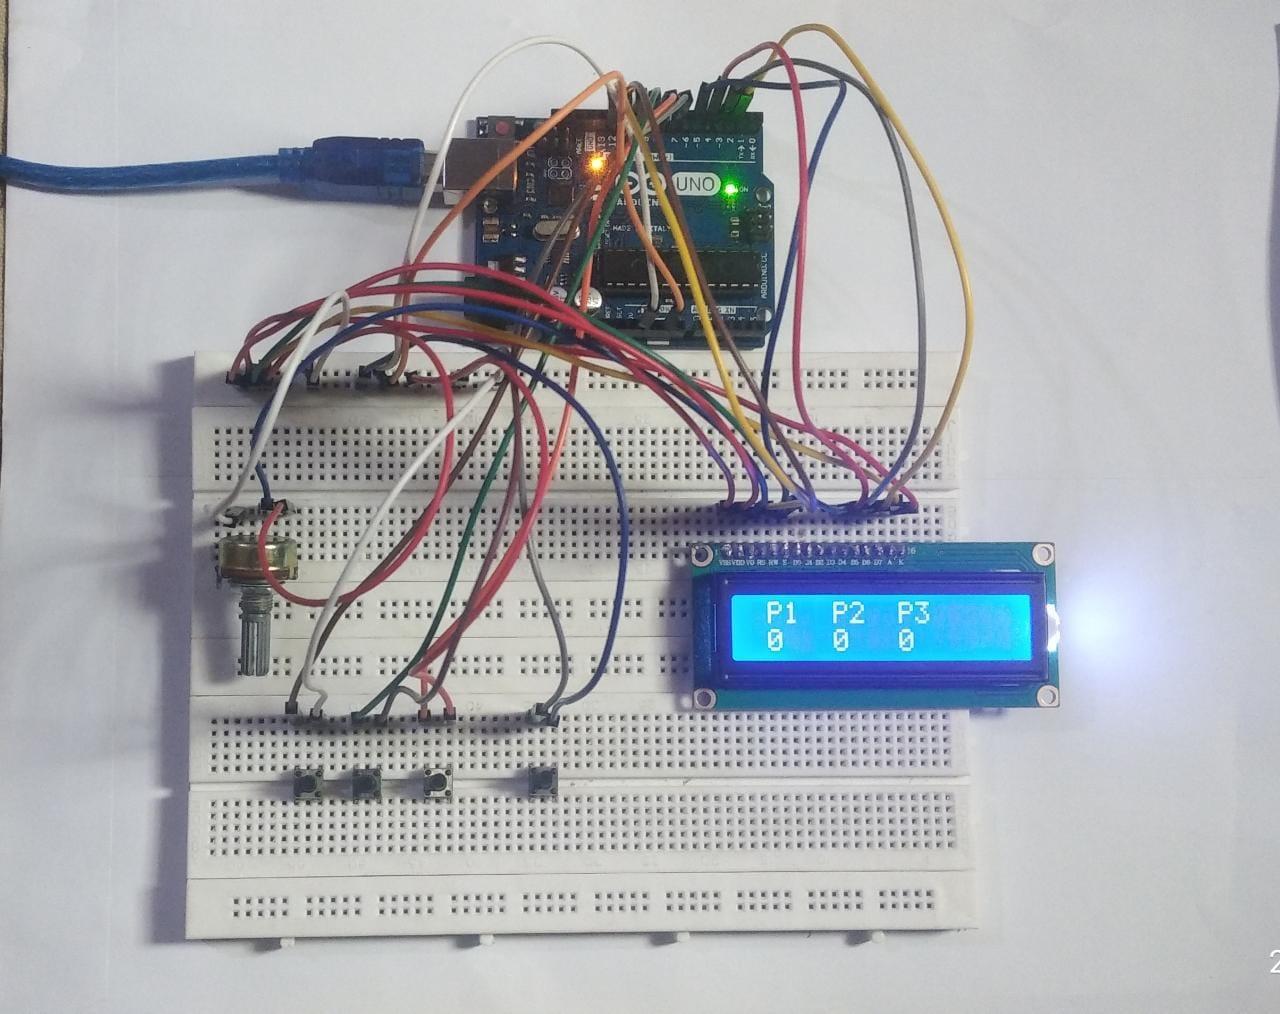
Now we have voted for each candidate using the push buttons as demonstrated in the image below:
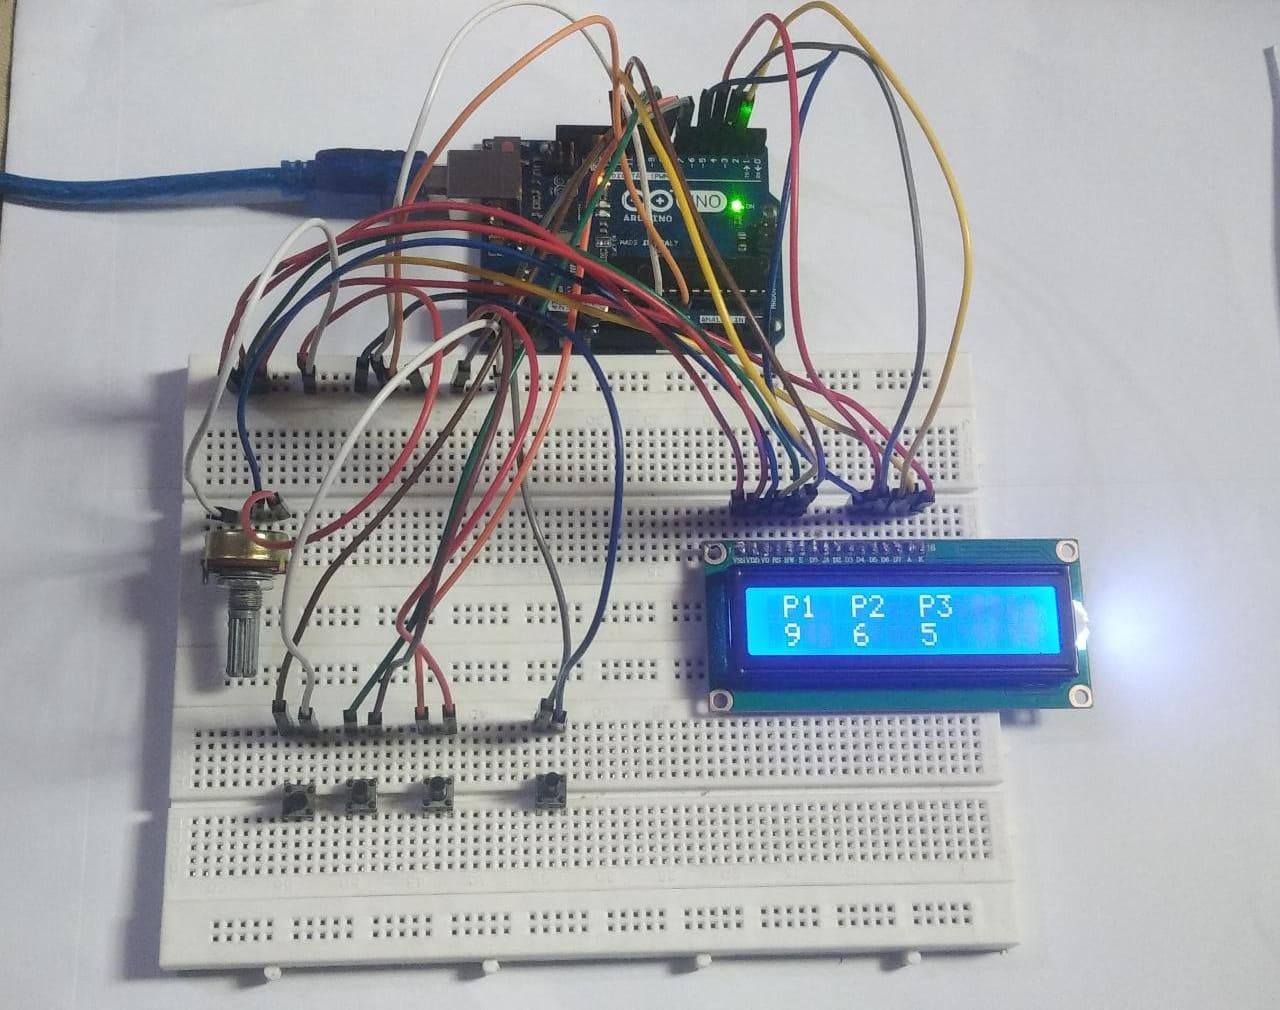
Now let see what the result is by pressing the push button:
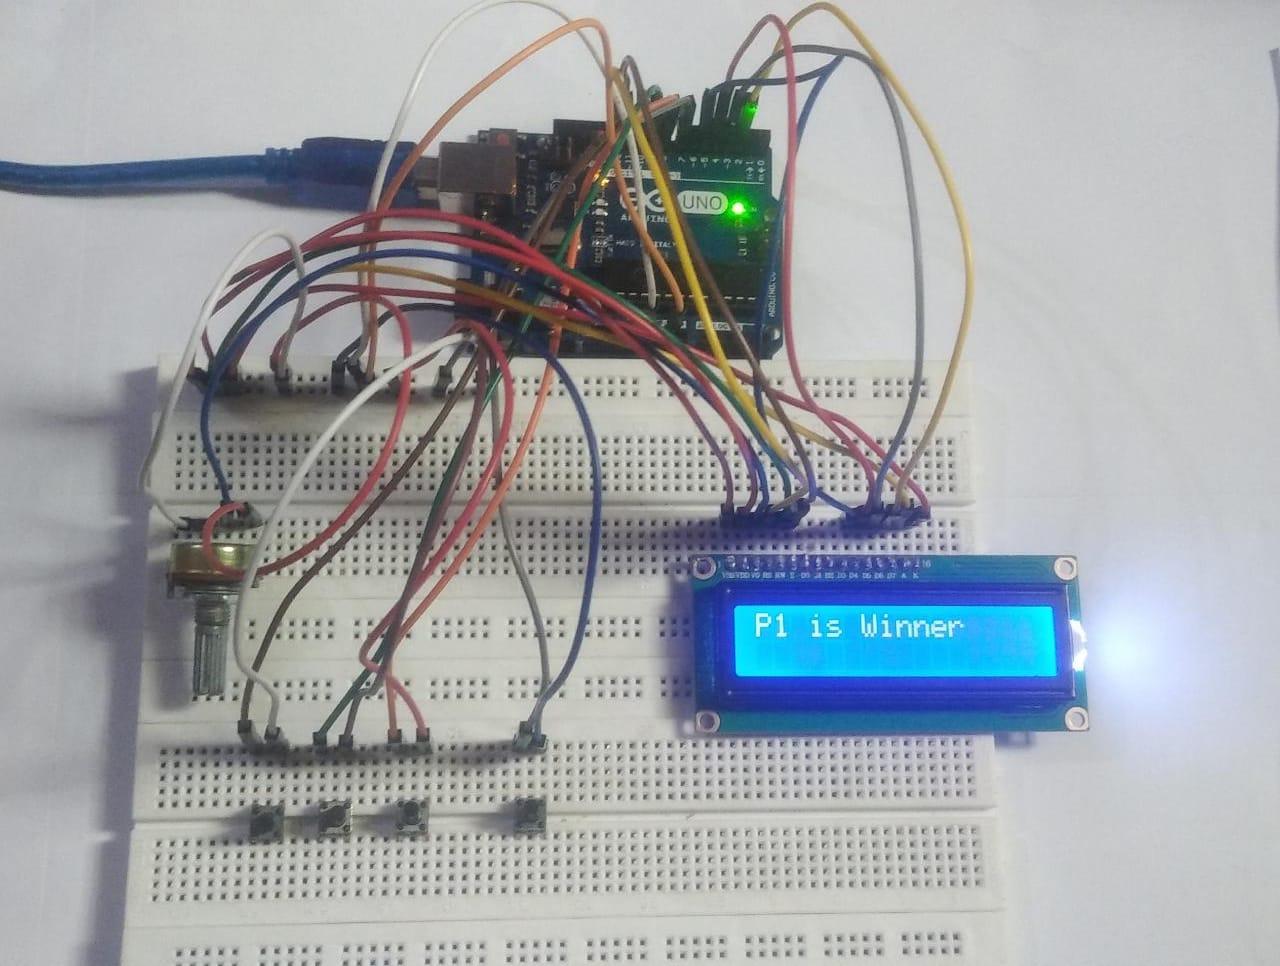
The first candidate is the winner as it has got more votes.
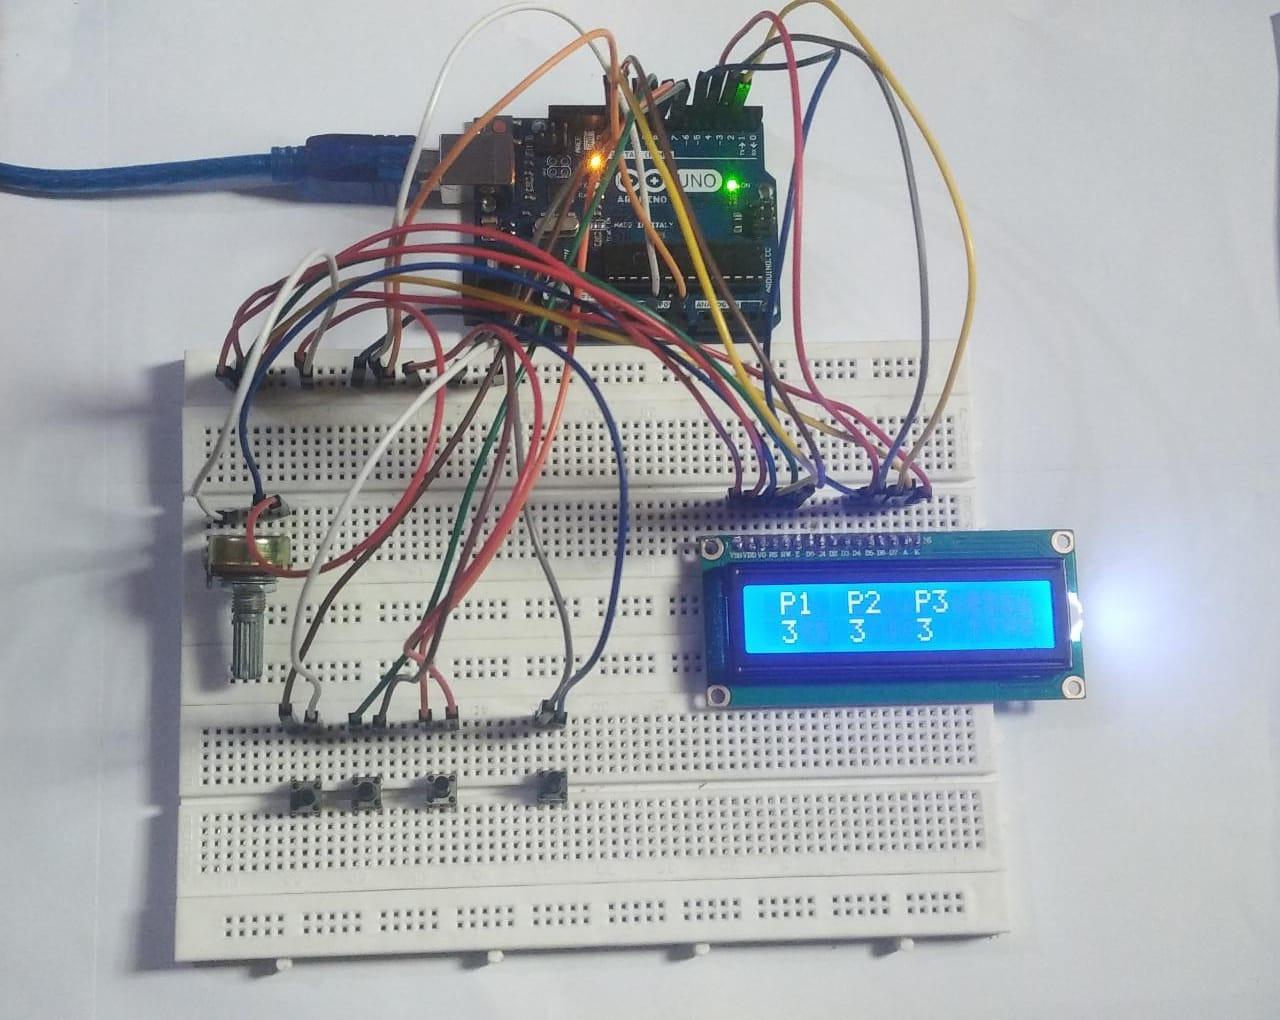
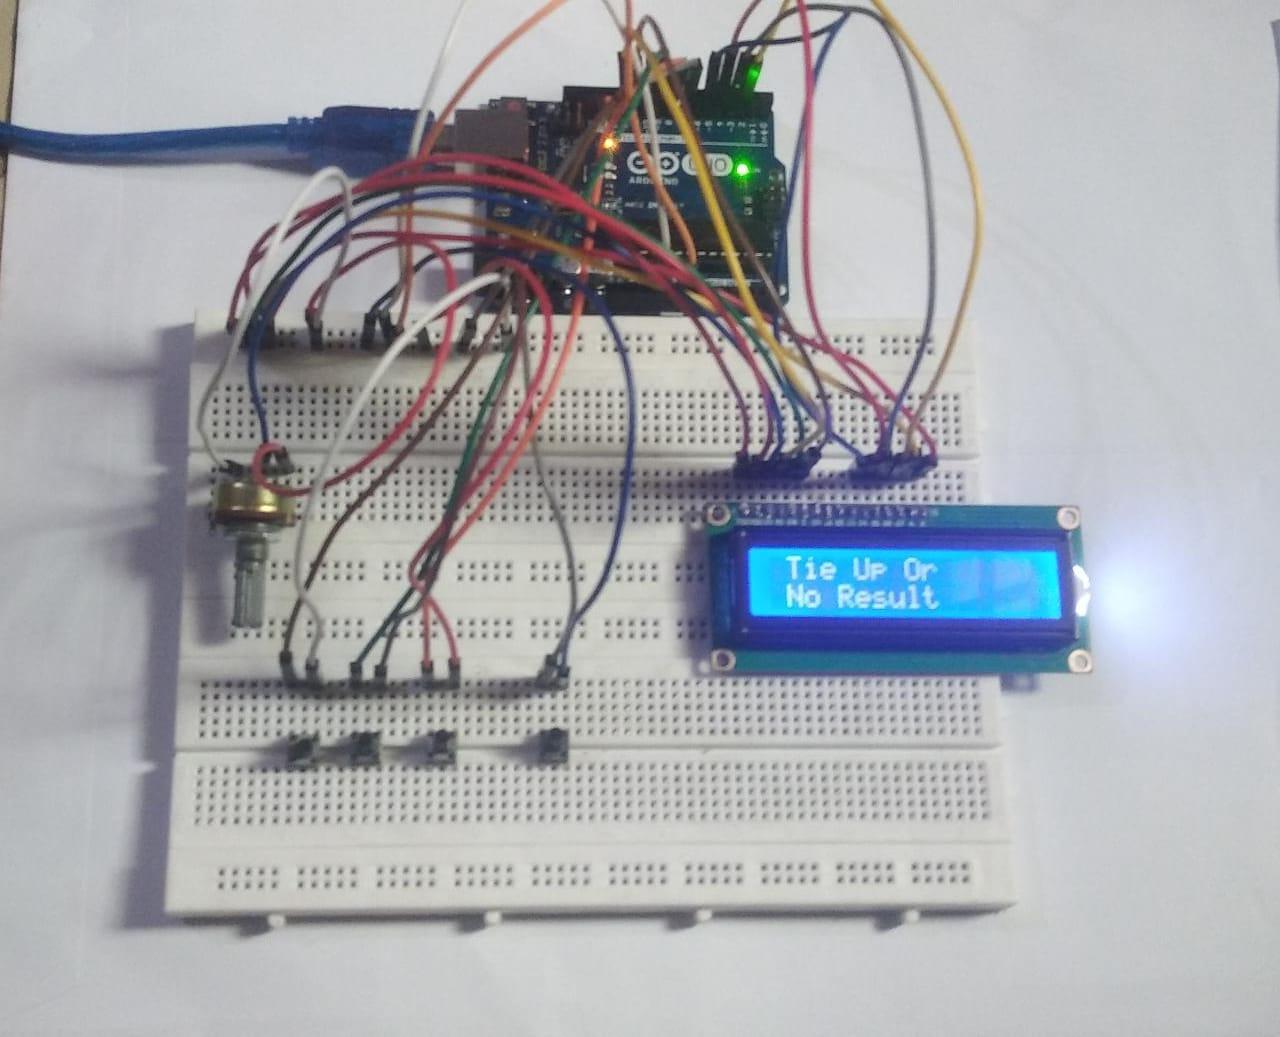
In case if all the candidates have equal votes then there will a tie between them as shown in the subsequent images:
Conclusion
For making the voting system transparent and getting instant results there is a need for an electronic voting machine. We have created a prototype of an electronic voting machine using Arduino Uno that demonstrates how we can use it for voting purposes. To give a clear picture of how the electronic voting machine will work we have provided the hardware assembly along with the Arduino code.