What is Potentiometer
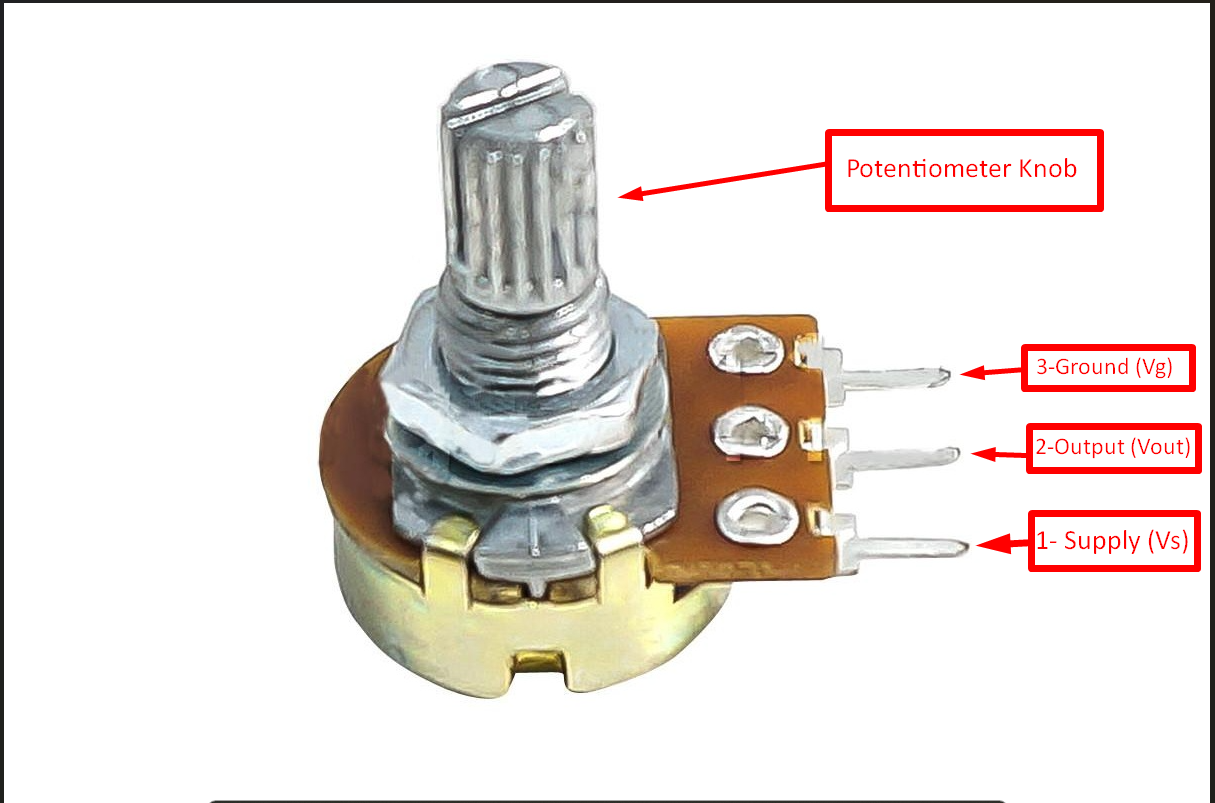
The potentiometer is a resistor whose value for the resistance can be changed by turning its knob and is also known as variable resistor. This generic potentiometer normally has three pins; the pin in the middle is the output of the resistor whereas the other two pins can be used for giving supply and grounding the resistor. There are different types of potentiometers that are used:
| Types of potentiometers | Description |
|---|---|
| Rotary | These potentiometers usually have a knob for changing the resistance and are circular in shape. |
| Linear | These variable resistors are linear in shape and unlike the rotary movement of the knob on the resistance it moves linearly on the resistance. |
| Digital | Another type of variable resistors are the digital potentiometer that have push buttons for changing the resistance. |
Here is the typical potentiometer that is most commonly used:
How to interface the potentiometer with and LCD using Arduino
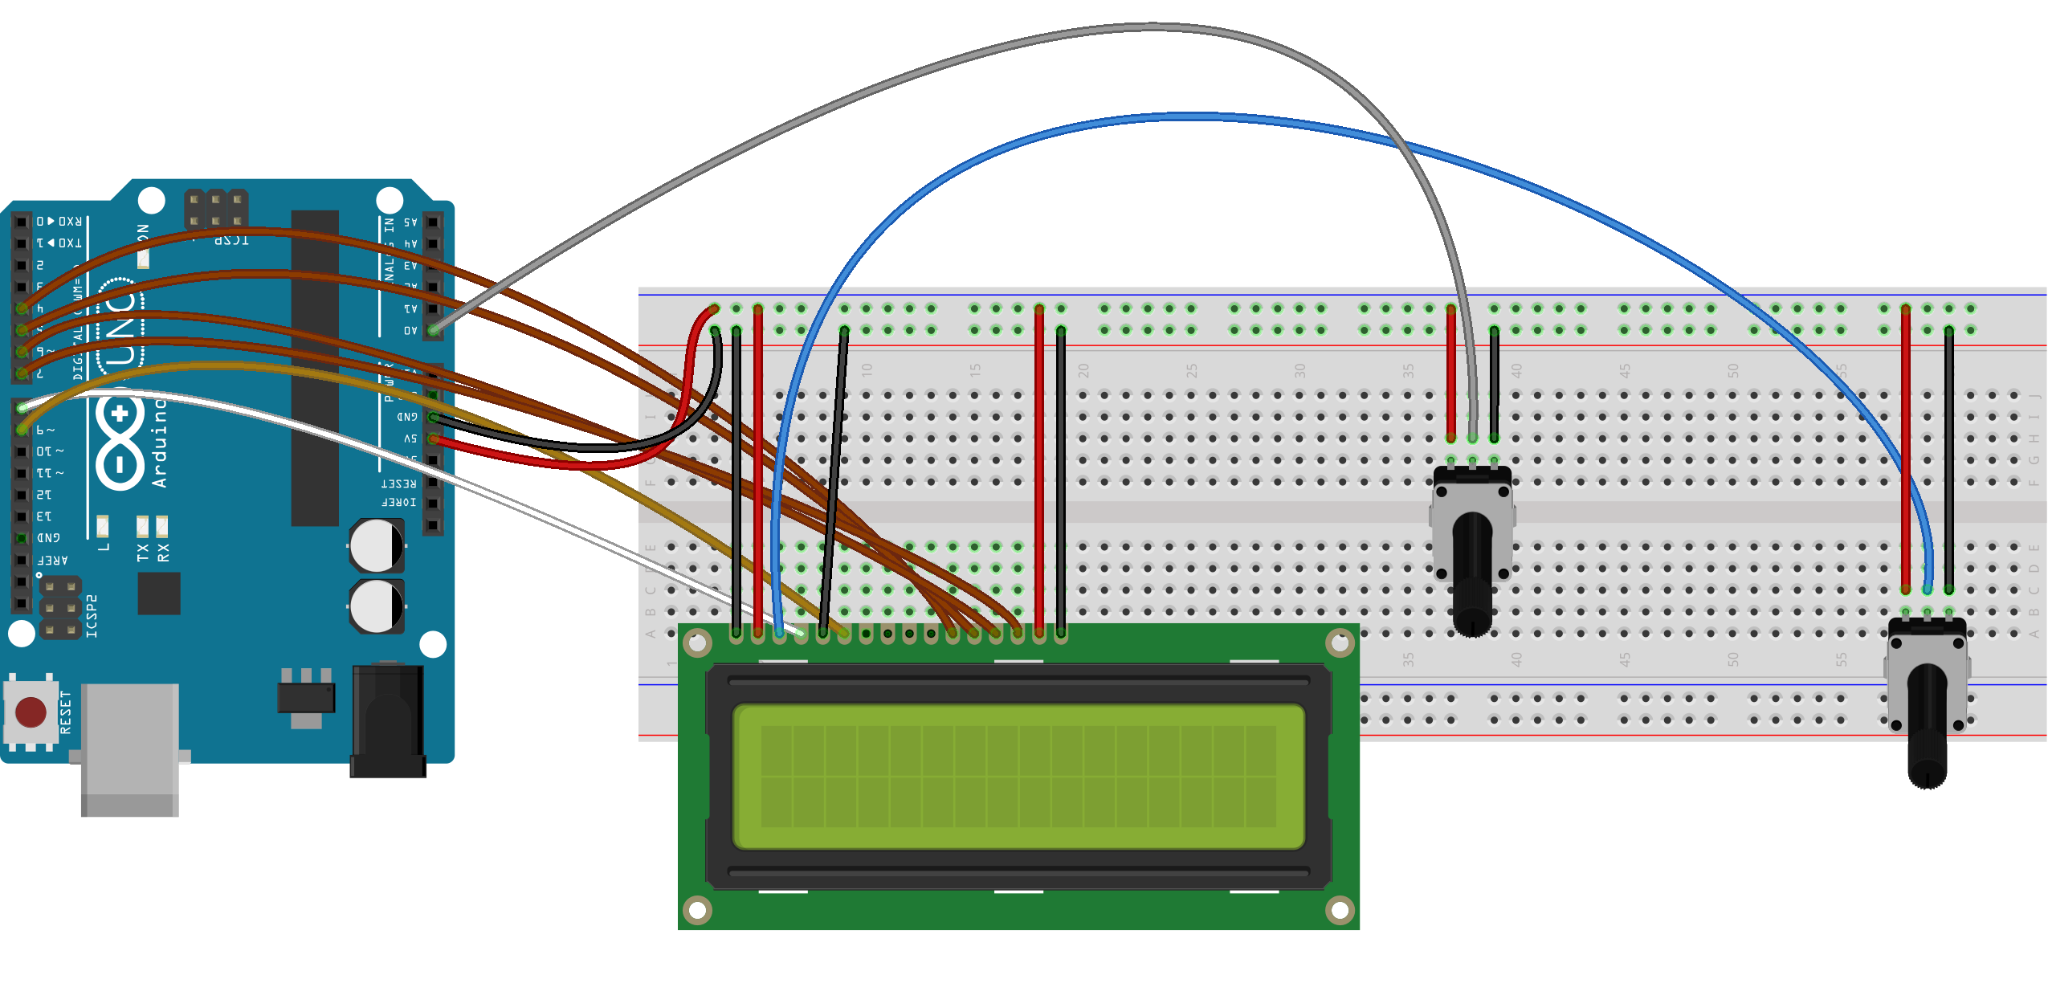
To display the output of the potentiometer on the liquid crystal display we have to interface the LCD and variable resistor with Arduino. The following are the components required for displaying the output of potentiometer on LCD:
- Arduino Uno
- Connecting wires
- Liquid Crystal display (LCD)
- Two 10 kOhms potentiometers
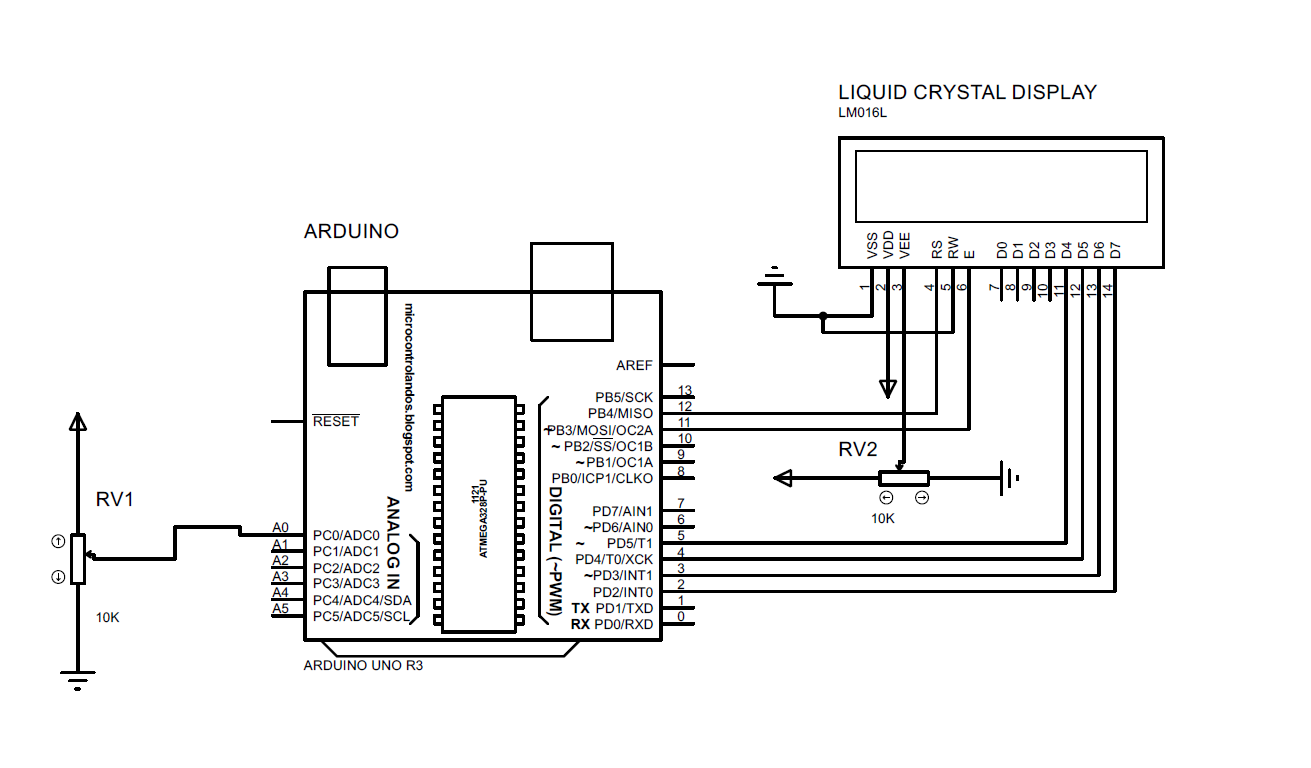
The Arduino program for displaying the output of the potentiometer in the LCD is given followed by the schematic diagram of the circuit.
int POTValue = 0; //variable to read the value of potentiometer
// Declaring the pins of Arduino for LCD
LiquidCrystal lcd(12, 11, 5, 4, 3, 2);
void setup()
{
// Giving the pin for the potentiometer
pinMode(A0, INPUT);
// set up the LCD's number of columns and rows:
lcd.begin(16, 2);
Serial.begin(9600);
}
void loop()
{
// reading the input on analog pin 1:
POTValue = analogRead(A1);
// set the cursor to column 0, line 0:
lcd.setCursor(0, 0);
lcd.print("POT Value ");
// set the place to display the value on LCD to column 0, line 1:
lcd.setCursor(0, 1);
lcd.print(POTValue);
// print out the value on LCD:
Serial.println(POTValue);
delay(1000);
lcd.clear();
}
For interfacing the LCD with the Arduino, first the pins of the Arduino board that are to be connected to the display module are declared.
After that the pin for the variable resistor is initialized and its mode is defined as INPUT. Since the variable resistor is the analog device, the analog pin A1 of Arduino is given to the variable resistor.
Next the dimensions of the LCD module are initialized that are 16×2 and then for the serial communication a baud rate is given.
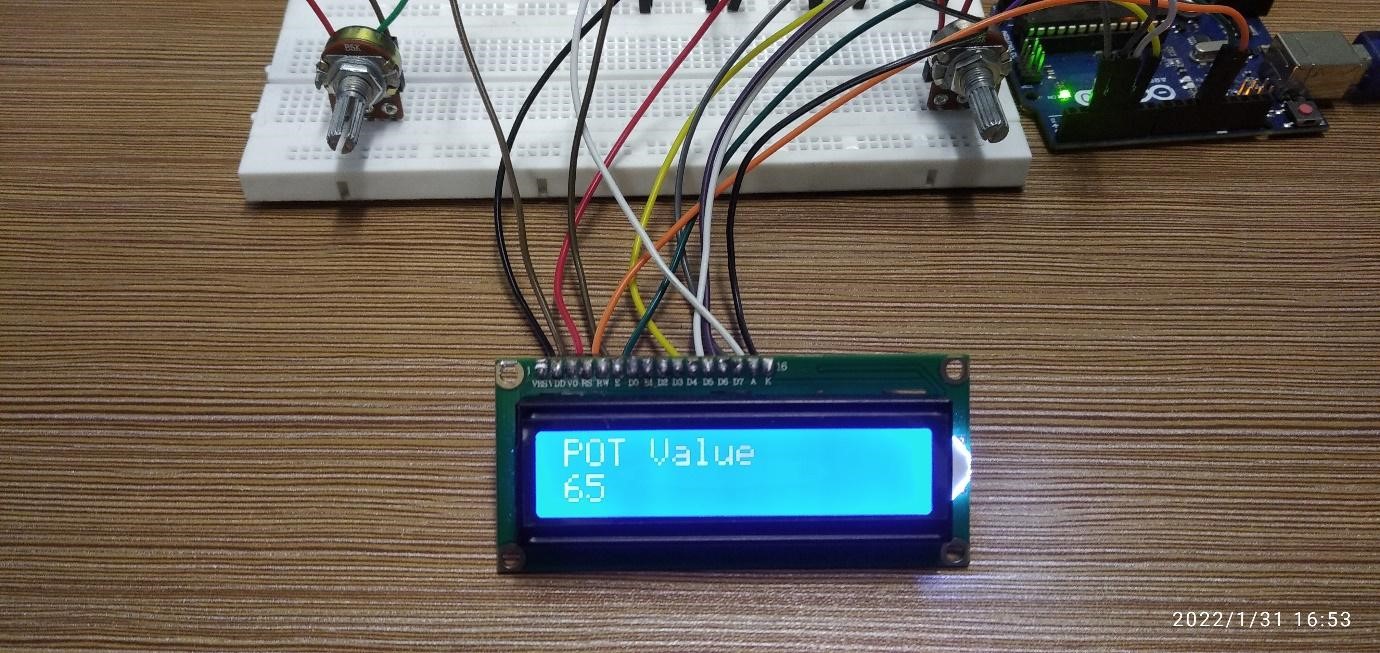
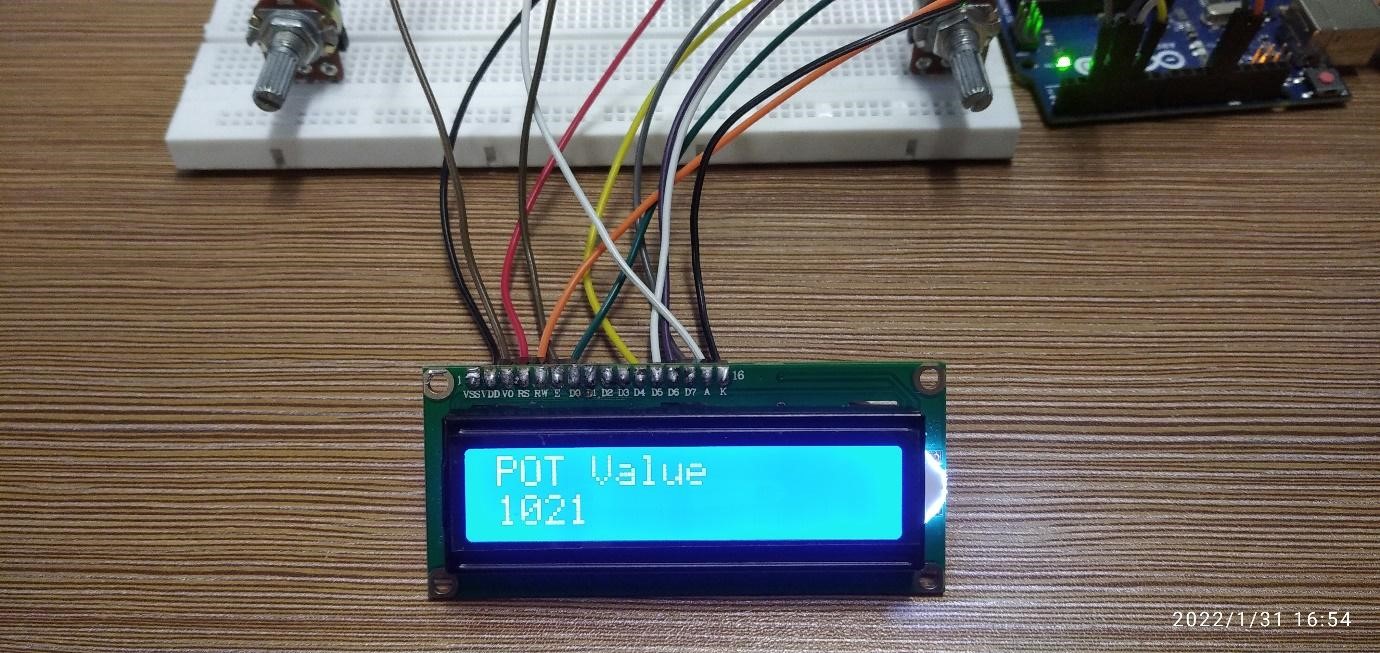
In the loop function the value of the potentiometer is read by using the function analogRead() and the output of the read function is then displayed using the lcd.print() function.
Similarly to assign a specific place for the data to be displayed on the LCD the function lcd.setCursor() is used.
The second potentiometer connected to the (Vee) pin of the LCD is used to control the brightness of the LCD.
Output
Conclusion
There are a number of devices that can be interfaced with Arduino boards and these devices can be used as either input or output for the Arduino. The potentiometer is also an input device of Arduino that can be used for various purposes like controlling the brightness of LED or LCD by increasing or decreasing its resistance. In this write-up a potentiometer is interfaced with Arduino and its values are displayed on the LCD.