This IP address is used to identify the Raspberry Pi 4 and in this write-up, we will learn the method to display this IP address of Raspberry Pi on the 16×2 LCD.
How to interface the LCD with Raspberry Pi 4
We will first interface the 16×2 LCD with the Raspberry Pi 4, for which, we need the following components:
- Potentiometer of 1k ohms
- Raspberry Pi 4
- Breadboard
- 16×2 LCD
- Jumper wires
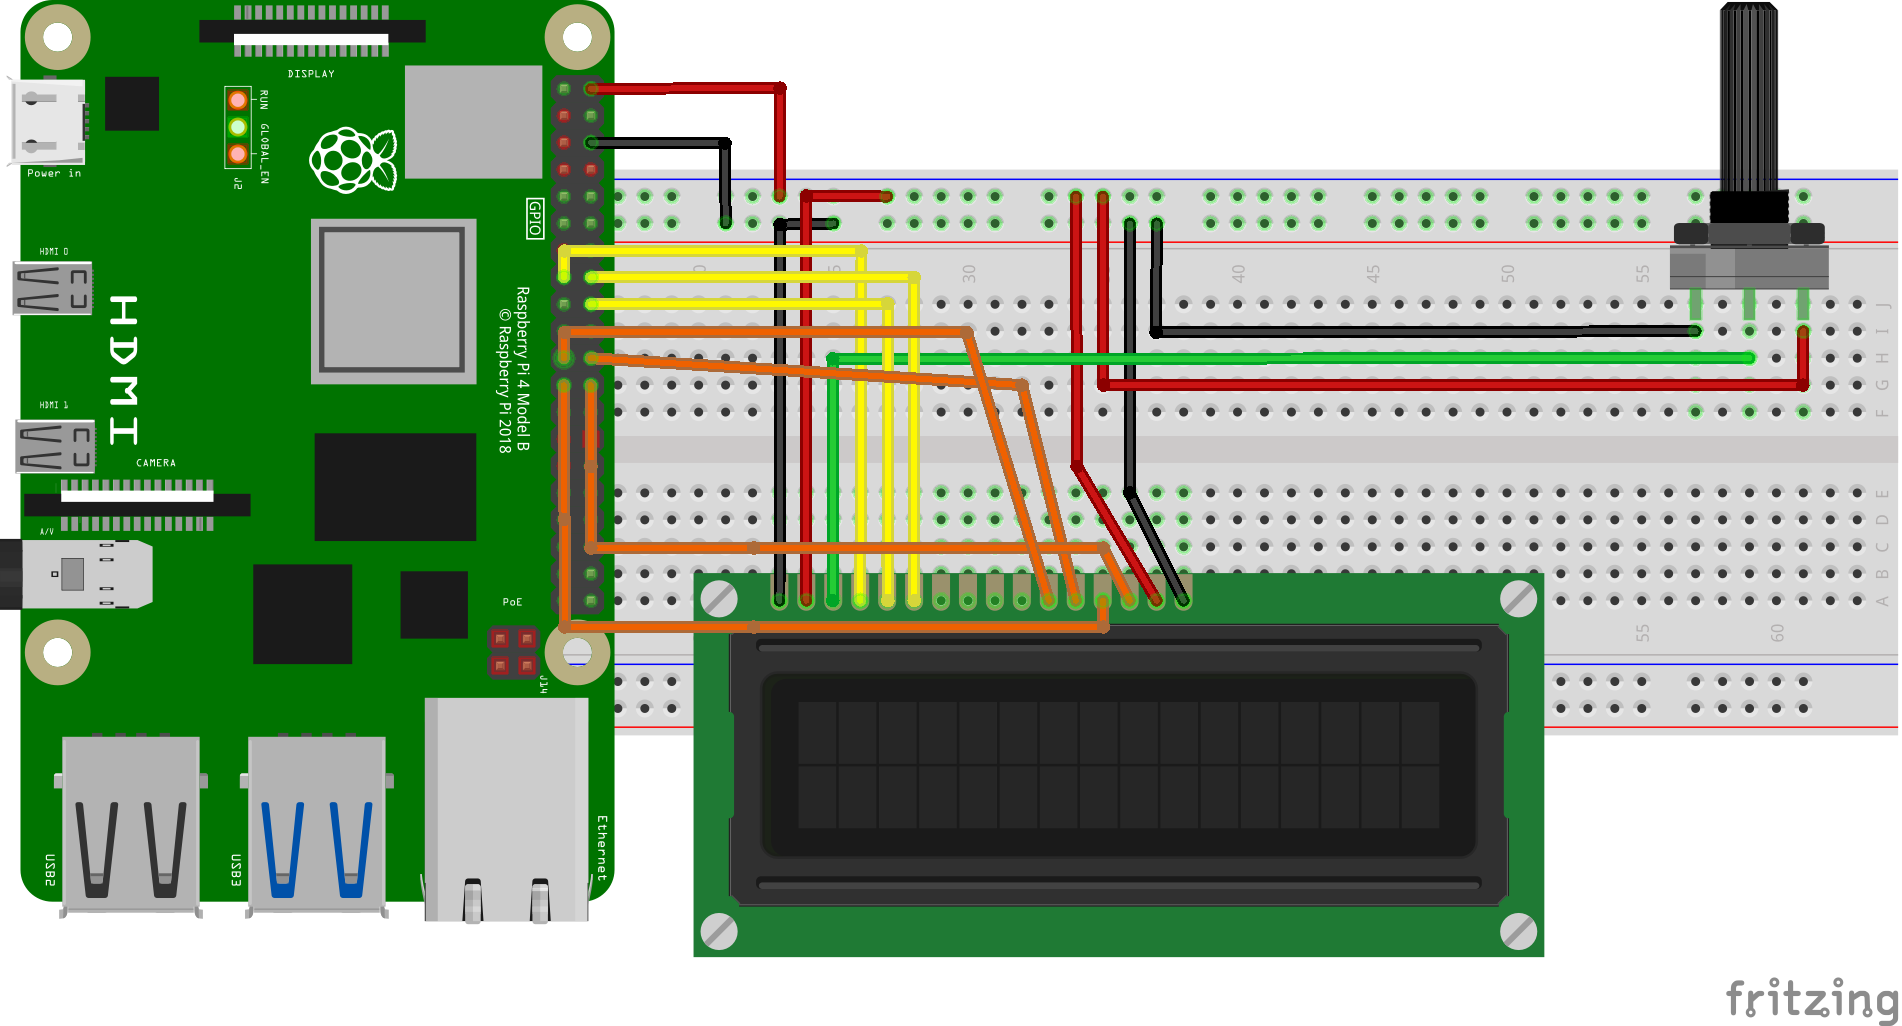
To interface the 16×2 LCD with the Raspberry Pi 4, we will make the connections according to the circuit diagram given below:
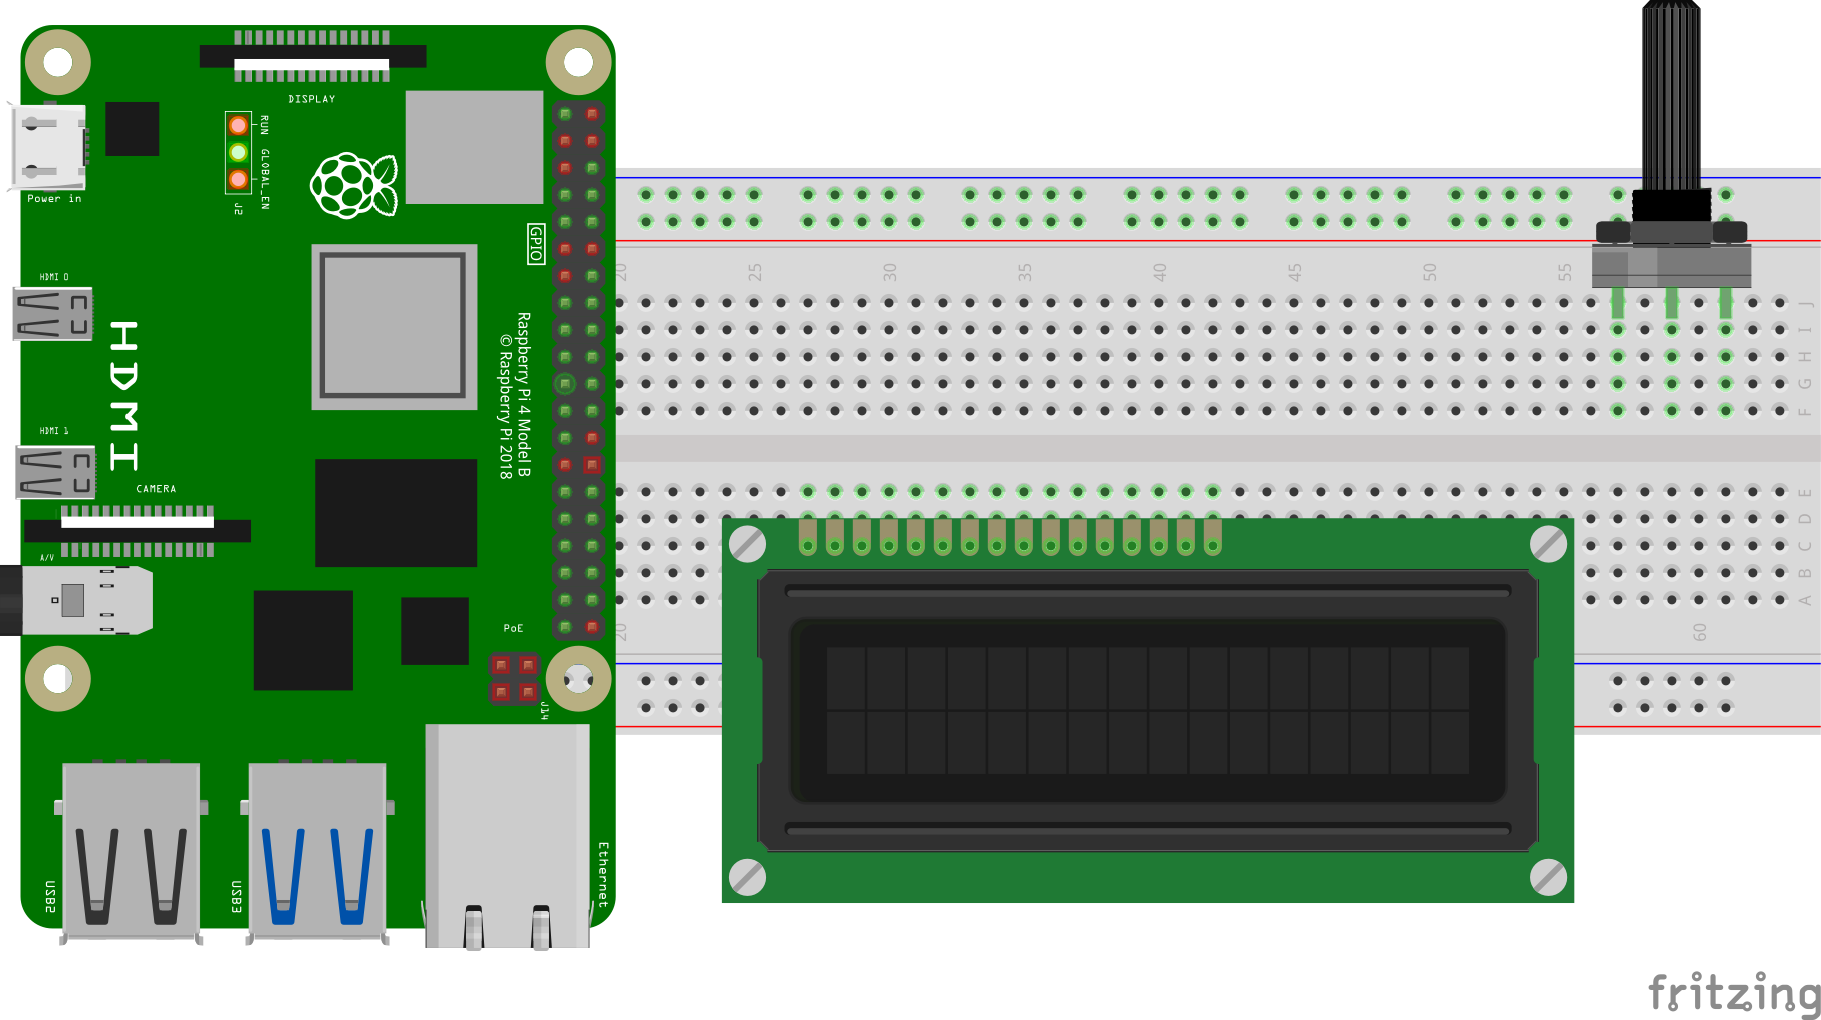
To configure the circuit, we will first placed the Raspberry Pi 4, 16×2 LCD, and a potentiometer on the breadboard:
Now with the help of jumper wires, we will make the connections between all these three electronic components according to the following table:
| GPIO pins of Raspberry Pi | BCM pins of Raspberry Pi | LCD pins |
| GPIO 22 | 15 | RS |
| GPIO 24 | 18 | RW |
| GPIO 23 | 16 | E |
| GPIO 9 | 21 | D4 |
| GPIO 25 | 22 | D5 |
| GPIO 11 | 23 | D6 |
| GPIO 8 | 24 | D7 |
| Ground | 6 | K, VSS |
| 5V | 2 | VDD, A |
Other than these connections, the Vo pin of the LCD is connected to the output pin of a potentiometer and the remaining two pins of potentiometer are connected to the 5V and the ground which are BCM 2 and BCM 6 respectively.
The circuit to interface the 16×2 LCD with the Raspberry Pi 4 has been done successfully.
How to download the RPLCD library on the Raspberry Pi 4
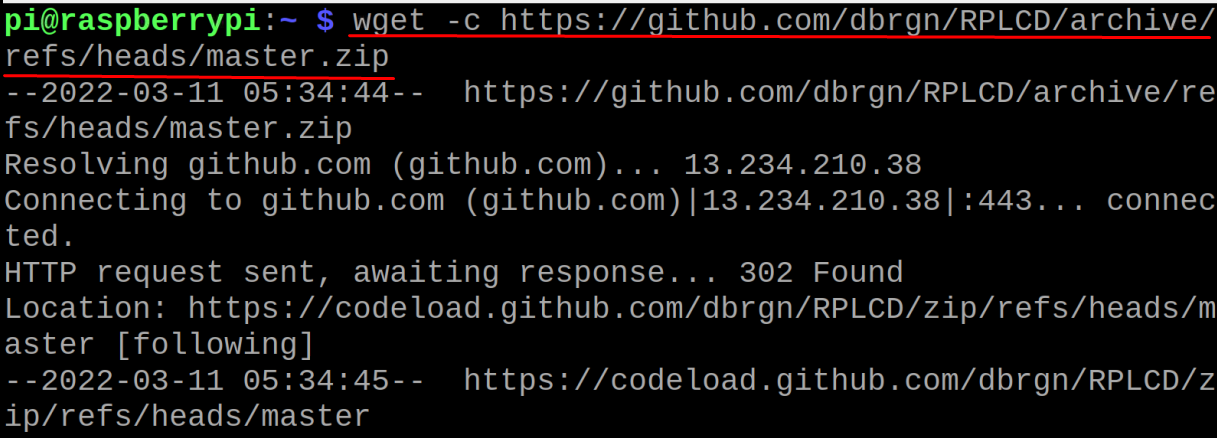
We will use the wget command to download the zip file of the RPLCD library from GitHub using the command:
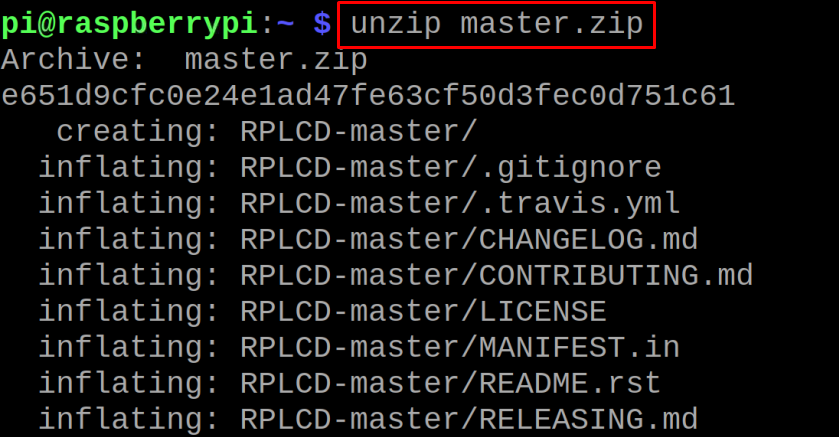
The RPLCD library has been downloaded with the name of master.zip, to unzip this file, we use the command:
We will navigate to the unzipped folder, RPLCD-master, using the command:
What is the Python code to display the IP address of Raspberry Pi 4 on 16×2 LCD
We will first create a file with the name of “IP_LCD.py” using the command:
Now, type the following Python script to display the IP address of the Raspberry Pi on the display of 16×2 LCD:
#import the socket library
import RPi.GPIO as GPIO
#import the RPi.GPIO library
from RPLCD.gpio import CharLCD
#import the CharLCD library from RPLCD.gpio
GPIO.setwarnings(False)
#to ignore the warnings
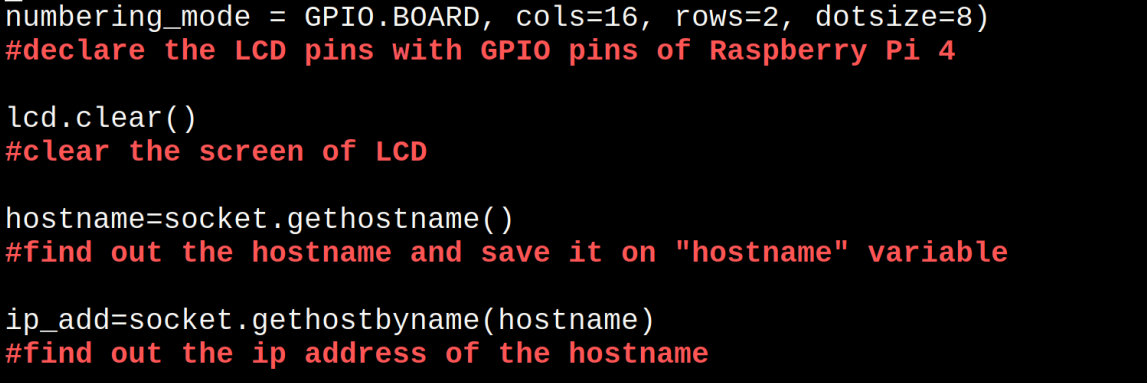
lcd = CharLCD(pin_rs = 15, pin_rw=18, pin_e=16, pins_data= [21,22,23,24],
numbering_mode = GPIO.BOARD, cols=16, rows=2, dotsize=8)
#declare the LCD pins with GPIO pins of Raspberry Pi 4
lcd.clear()
#clear the screen of LCD
hostname=socket.gethostname()
#find out the hostname and save it on "hostname" variable
ip_add=socket.gethostbyname(hostname)
#find out the ip address of the hostname
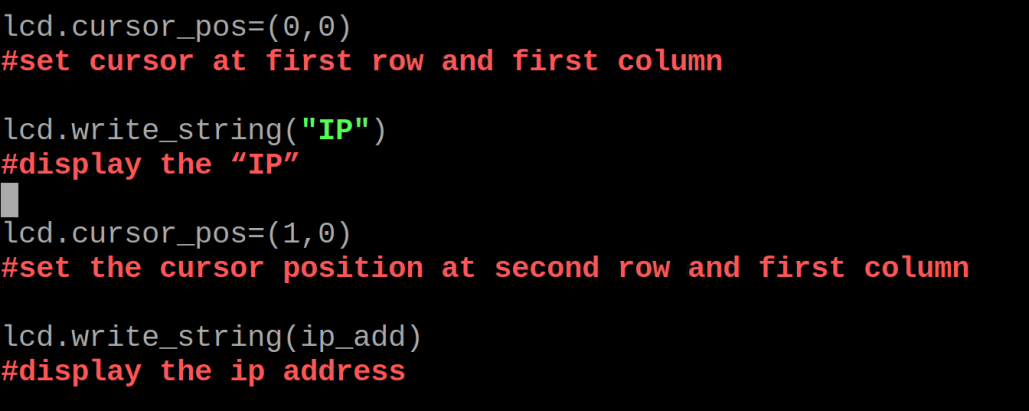
lcd.cursor_pos=(0,0)
#set cursor at first row and first column
lcd.write_string(“IP”)
#display the “IP”
lcd.cursor_pos=(1,0)
#set the cursor position at second row and first column
lcd.write_string(ip_add)
#display the ip address
Explanation of code: In the above code we have first imported the following libraries:
| Library | Function |
| socket | It contains the functions which are used to extract the information of the networking of the Raspberry Pi |
| RPi.GPIO | It contains the functions to control and manage the GPIO pins of the Raspberry Pi |
| RPLCD.gpio | It contains the functions which are used to manage the 16×2 LCD |
Then we have set the warnings to False so that all the warnings will be ignored, initialize the 16×2 LCD by declaring its pins with the Raspberry Pi and clear the display of the LCD. We have extracted the name of the Host of Raspberry Pi and put it in the Hostname variable, similarly then find out the IP address of the specific hostname and store it in the “ip_add” variable. At the end of the script, we simply used the print command to display the values of both variables on the LCD where “cursor_pos” is used to set the cursor at the second row and first column of the 16×2 LCD.
Note: By setting the numbering_mode = GPIO.BOARD we have declared that we will use the board pin nomenclature of the Raspberry Pi 4 which is also known as the BCM.
To run the above Python script after compiling, we use the command:
The working of the hardware will be:
In the above output, we have displayed the IP address of the LocalHost, but if we want to display the IP address which is used to browse or to perform different tasks over the internet, then we will use the following Python script replacing the previous script in IP_LCD.py file:
#import the socket library
import RPi.GPIO as GPIO
#import the RPi.GPIO library
from RPLCD.gpio import CharLCD
#import the CharLCD library from RPLCD.gpio
GPIO.setwarnings(False)
#to ignore the warnings
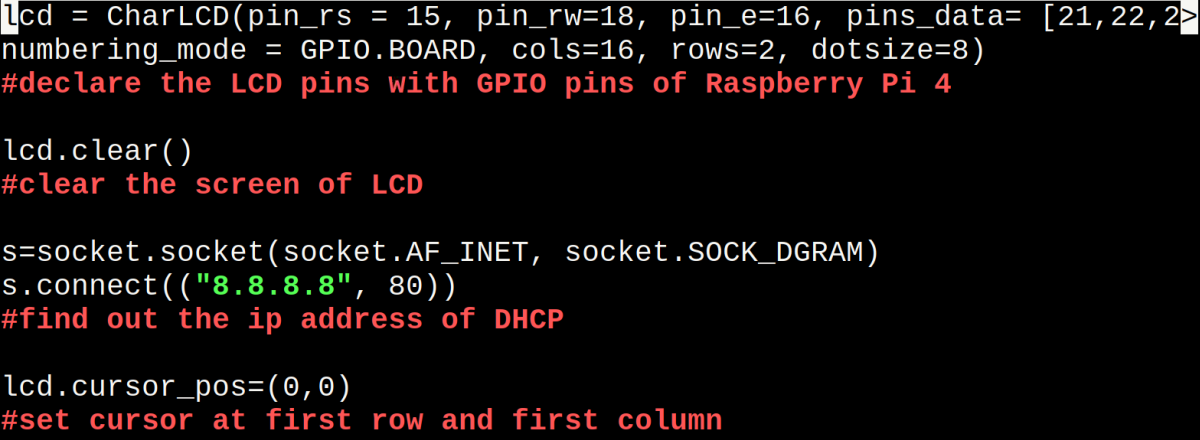
lcd = CharLCD(pin_rs = 15, pin_rw=18, pin_e=16, pins_data= [21,22,23,24],
numbering_mode = GPIO.BOARD, cols=16, rows=2, dotsize=8)
#declare the LCD pins with GPIO pins of Raspberry Pi 4
lcd.clear()
#clear the screen of LCD
s=socket.socket(socket.AF_INET, socket.SOCK_DGRAM)
s.connect(("8.8.8.8", 80))
#find out the ip address of DHCP
lcd.write_string("IP address")
#display the "IP"
lcd.cursor_pos=(1,0)
#set the cursor position at second row and first column
lcd.write_string(s.getsockname()[0])
#display the DHCP ip address
The output of the above script can be seen on the 16×2 LCD after executing the IP_LCD.py using the command:
Conclusion
The Raspberry Pi 4 is a single-board computer that has a unique IP address that is used to identify the device in the local network as well as on the internet. In this write-up, we have interfaced the 16×2 LCD with the Raspberry Pi and then used a Python script to display the hostname as well as the IP address of the Raspberry Pi 4 on the 16×2 LCD.


