This article will guide you on disabling auto login on Raspberry Pi by following a simple procedure.
How to Disable Auto Login on Raspberry Pi
Although the auto login feature is helpful when you don’t want to write a password every time to login into your system. However, to add extra security to your device, you should need to disable it and the below step-by-step instructions will help you disable it on your Raspberry Pi device.
Step 1: Change your Raspberry Pi Password
If you haven’t changed the default Raspberry Pi password, it’s better for you to change it so that only trusted users can log in to your system. To change the password, you should need to apply the following command:
Choose a strong password for your Raspberry Pi device and once it’s done, you are good to follow the next step.
Step 2: Open Raspberry Pi Configuration
Next, open Raspberry Pi configuration on your Raspberry Pi system using the following command:
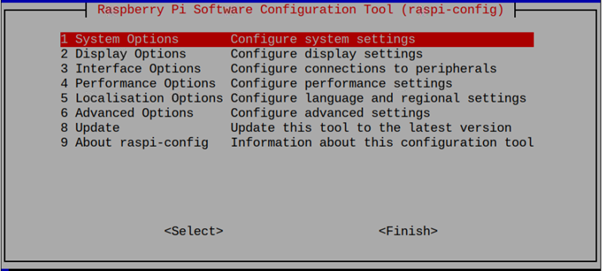
Move towards the “System Options” by pressing the Enter button.
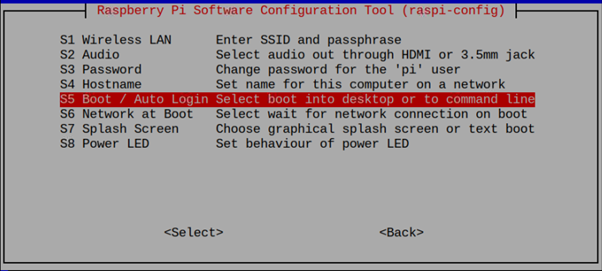
Select the “Boot/Auto Login” option.
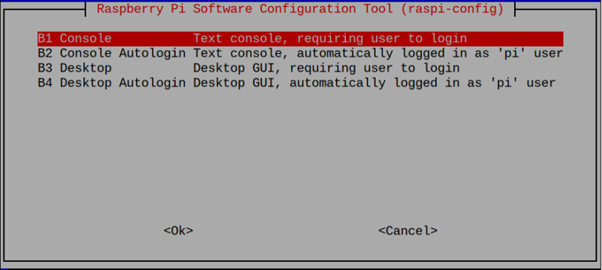
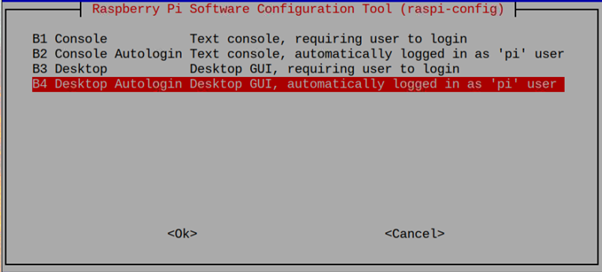
There, you will see four login options, which are as follows:
Console: If you select this option, it will open the Raspberry Pi terminal after the reboot and you must provide a username and password to use the terminal at the start.
Console Autologin: This option is like the above Console option; however, it doesn’t require a username and password for login.
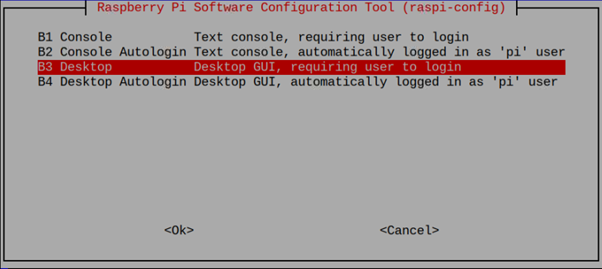
Desktop: You should select this option to disable the Auto Login feature because once you reboot your system, you will need to provide your Raspberry Pi username and password to log in to the system and start using the desktop environment.
Desktop Autologin: This option is already enabled by default; however, you can use this option if you don’t like the login feature on your system.
Since we are disabling the Auto Login feature, we must select the “B3” option.
Reboot the device and once it restarts, you can see the login screen where you should need to provide your system password for login.
The above login screen confirms that we have successfully disabled the Auto login feature on Raspberry Pi.
In case you want to enable the Auto login option, you should select the “B4” option and then reboot your device to apply the changes.
Conclusion
Disabling the auto login feature on Raspberry Pi helps in improving your device security as it allows only trusted users to use your Raspberry Pi device. You can disable auto login on your Raspberry Pi system by first opening the “Raspberry Pi Configuration” in the terminal and then selecting the “Desktop” option from the “Boot/Auto Login” section available in the “System Options”. After the reboot, you can log in to your system with your password and start using the Raspberry Pi desktop.


