How to use createChar() function to create characters
In Arduino there is a special function through which characters can also be made. This function can also be used for making different shapes, different symbols, and some animations as well.
To create characters this function requires the two arguments. The first one is the number of the character which is used when the character is to be displayed.
The second argument is the data of the character that is to be displayed; it can be in the form of binary numbers or hex numbers.
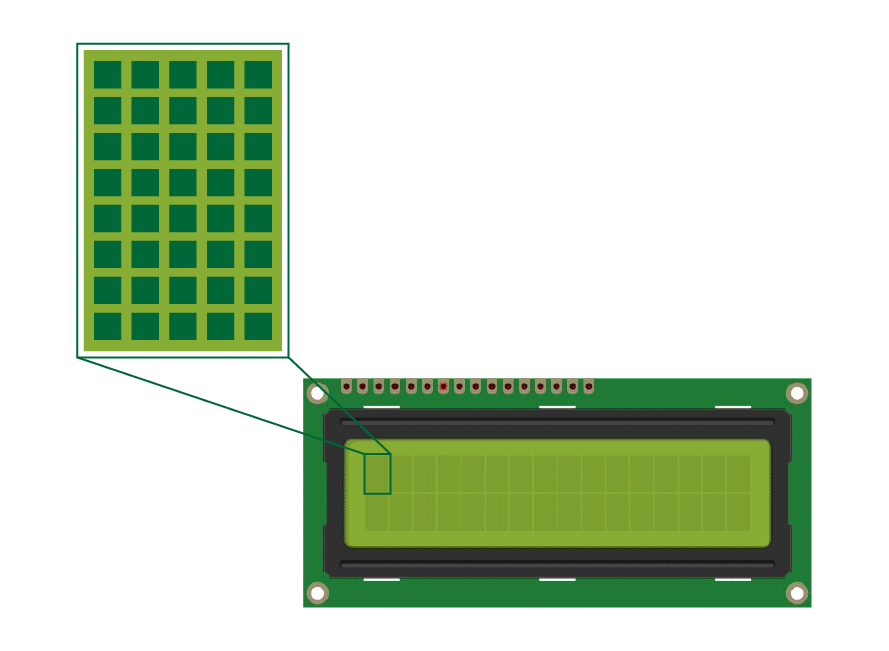
Custom characters can be created by turning on and turning off some parts of the LCD. For example, if we consider a 16×2 LCD each cell of the display is further divided into dots having 8 rows and 5 columns.
So, each cell is of 40 pixels and this createChar() function can use 8-bits of the data at one time. If the data is more than 8-bits, then we can declare multiple characters and call them by numbers for each cell and to display that cell in a specific order.
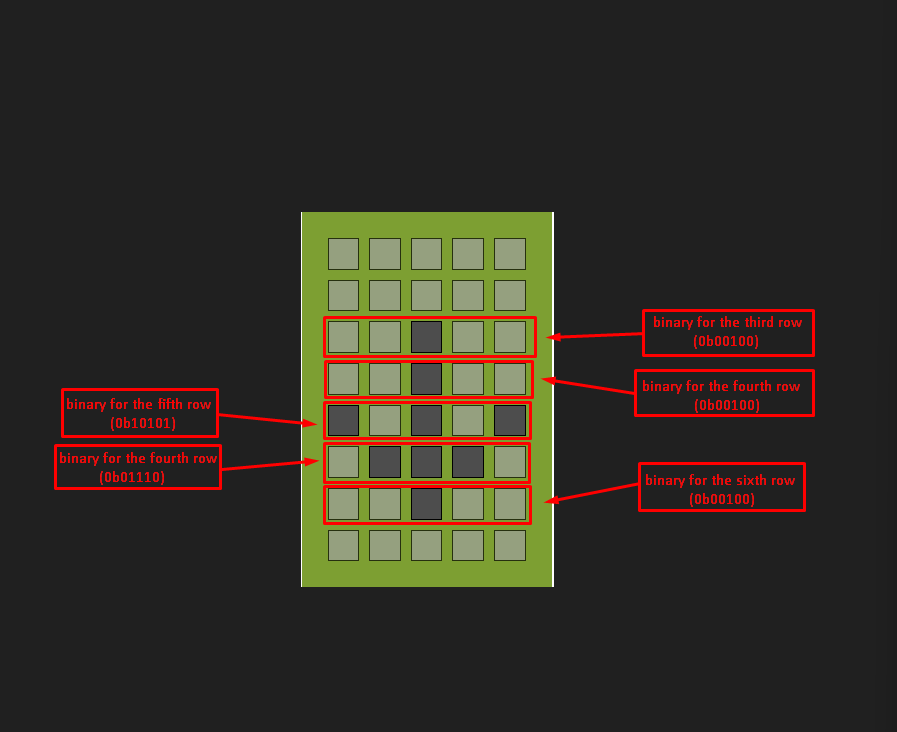
For instance, if we have to display the downward arrow, we have to give the value of one to the respective dot that is to be turned on. Similarly, in the off state the value of each dot will be zero so we can say that by default each row has a binary of 0. So, for displaying the arrow we can declare the following binaries using the byte data type and we can also write customized characters using its hex values using the same byte data type.
byte arrow Char[8] ={ 0b00000,0b00000,0b00100,0b00100,0b10101,0b01110,0b00100,0b00000};
// hex values
byte customChar[] = {0x00,0x00,0x04,0x04,0x15,0x0E,0x04,0x00};
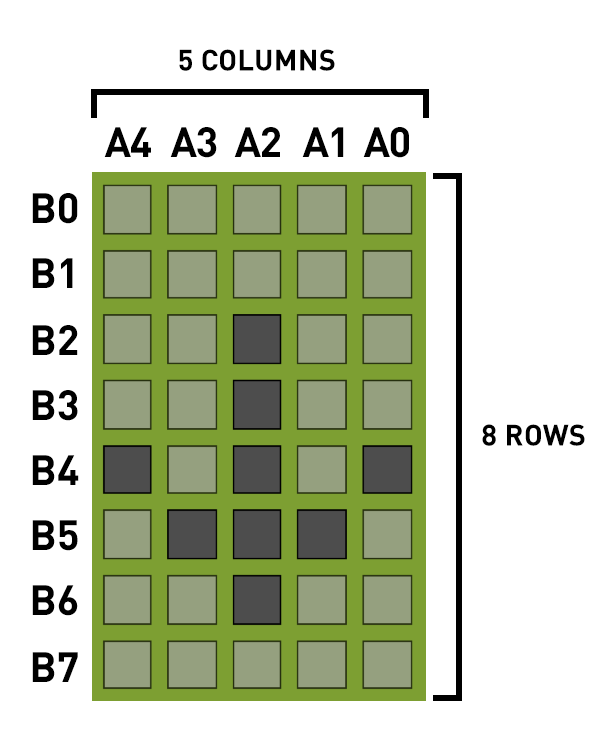
Below we have given the table in which A represents the columns whereas the B represents the rows so each dot has either a value of 0 or 1. In this case we have drawn a downward arrow and for this we have turned on some dots by giving them the value of 1. The row b3 has only one dot that is to be turned in so it has the value of 1 and that dot lies in column A2 and the rest of the table is organized in this way.
| A4 | A3 | A2 | A1 | A0 | |
| B0 | 0 | 0 | 0 | 0 | 0 |
| B1 | 0 | 0 | 0 | 0 | 0 |
| B2 | 0 | 0 | 1 | 0 | 0 |
| B3 | 0 | 0 | 1 | 0 | 0 |
| B4 | 1 | 0 | 1 | 0 | 1 |
| B5 | 0 | 1 | 1 | 1 | 0 |
| B6 | 0 | 0 | 1 | 0 | 0 |
| B7 | 0 | 0 | 0 | 0 | 0 |
Since in the first two rows and the last row of the cell there is no dot that is in the on state so the binaries of those rows will be zero. So, the values for these rows will also be included when declaring the character and also we can use the hexadecimals to create a character.
We can also display multiple characters using the lcd.createChar() function multiple times. Then we can display each character using the lcd.write() function by giving the number assigned to the character.
We have provided the Arduino code for using the lcd.createChar() function in which we have displayed multiple characters. To display the characters we have to allot the specific place for each character in case of multiple characters using the lcd.setCursor() function.
Arduino Code for creating custom characters
LiquidCrystal lcd(12, 11, 5, 4, 3, 2);// Arduino pins for LCD
// declaring the binaries for each character
byte Char1[8] = {0b00000,0b00000,0b00100,0b00100,0b10101,0b01110,0b00100,0b00000};
byte Char2[8] = {0b00000,0b00000,0b00100,0b01010,0b11011,0b01010,0b11111,0b00000};
byte Char3[8] = {0b00000,0b00000,0b01010,0b10101,0b10001,0b01010,0b00100,0b00000};
void setup() {
Serial.begin(9600);
lcd.begin(16, 2); // initializing the dimensions of LCD
lcd.createChar(1,Char1); // creating the first character
lcd.createChar(2,Char2); // creating the second character
lcd.createChar(3,Char3); // creating the third character
lcd.setCursor(1, 0); // place for first character
lcd.write((byte)1); // printing the character using the number given to it
lcd.setCursor(2, 0); //place for second character
lcd.write((byte)2); //printing the character using the number given to it
lcd.setCursor(3, 0); //place for third character
lcd.write((byte)3); //printing the character using the number given to it
}
void loop() {
}
In the Arduino code after defining the library for LCD and assigning the pins of Arduino to LCD the binaries for three characters are defined.
Then in the setup function after declaring the dimensions of the LCD the function lcd.createChar() is used to create the customized character. The defined binaries of the characters are given to this function and each character is assigned a number which is used in the lcd.print() function. For each character the function lcd.createChar() is used separately.
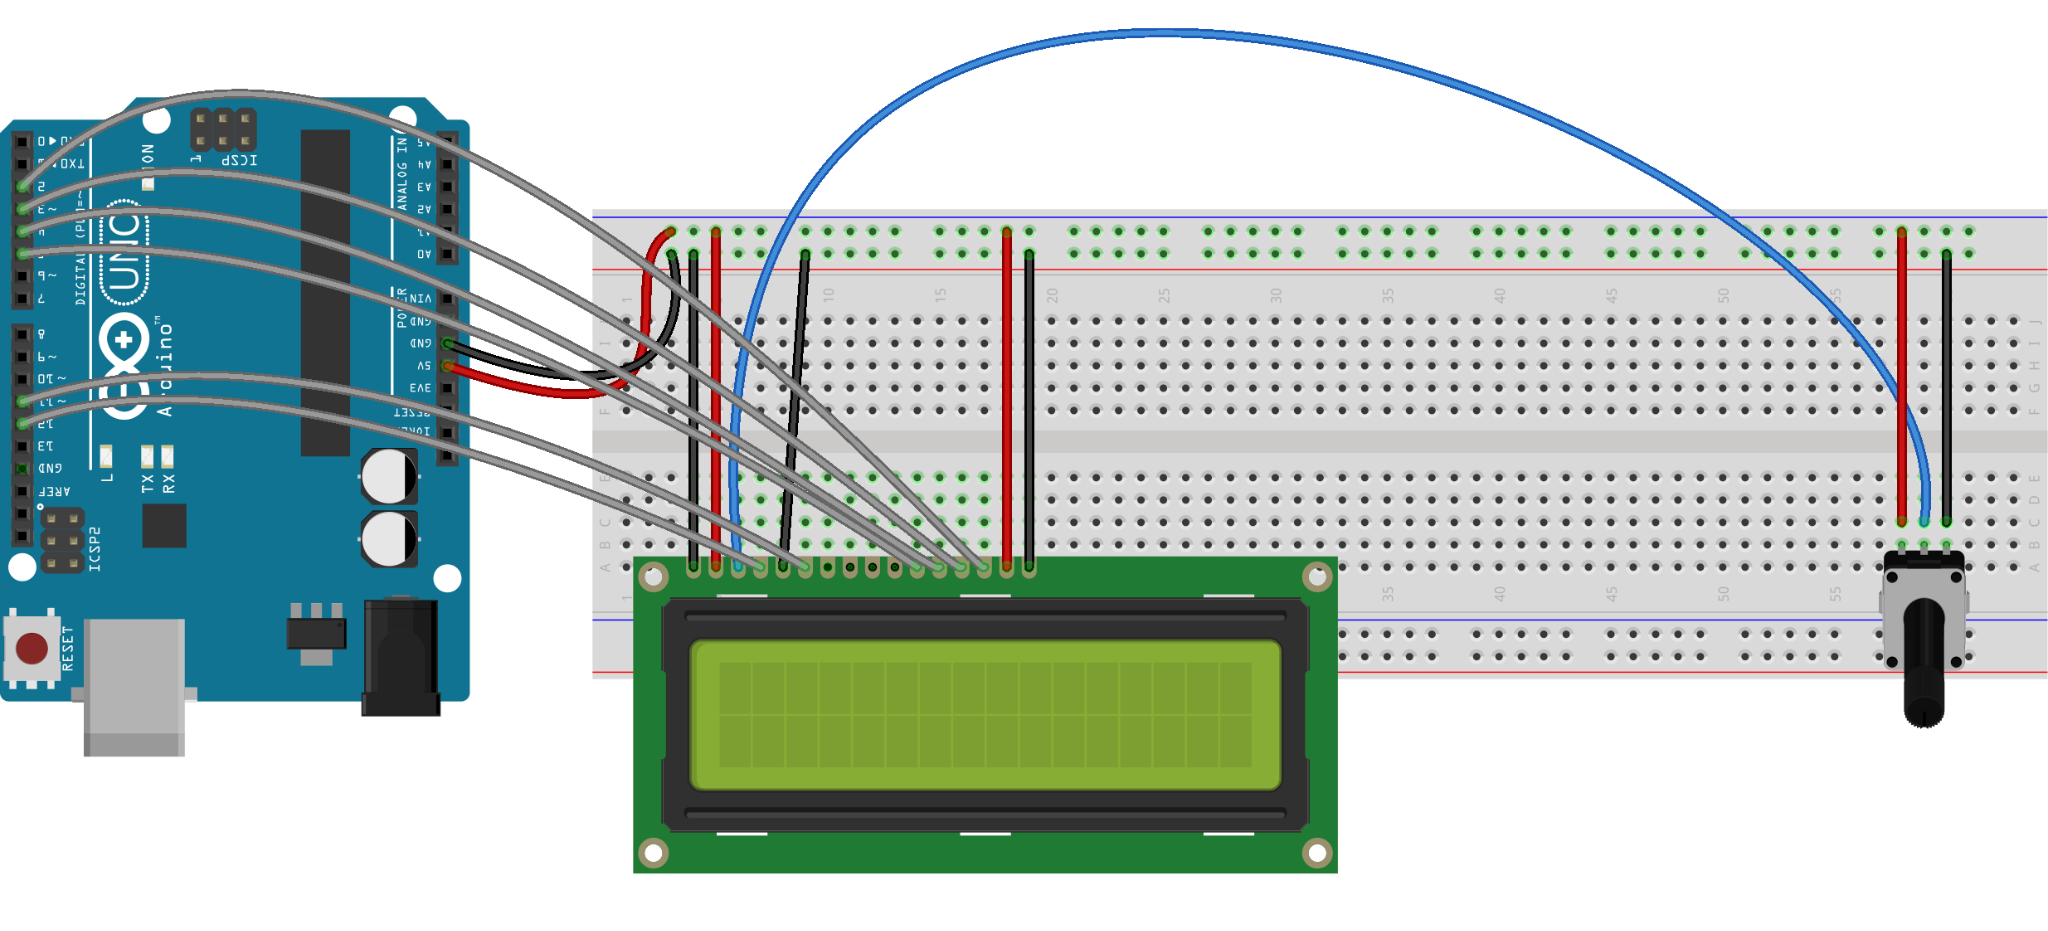
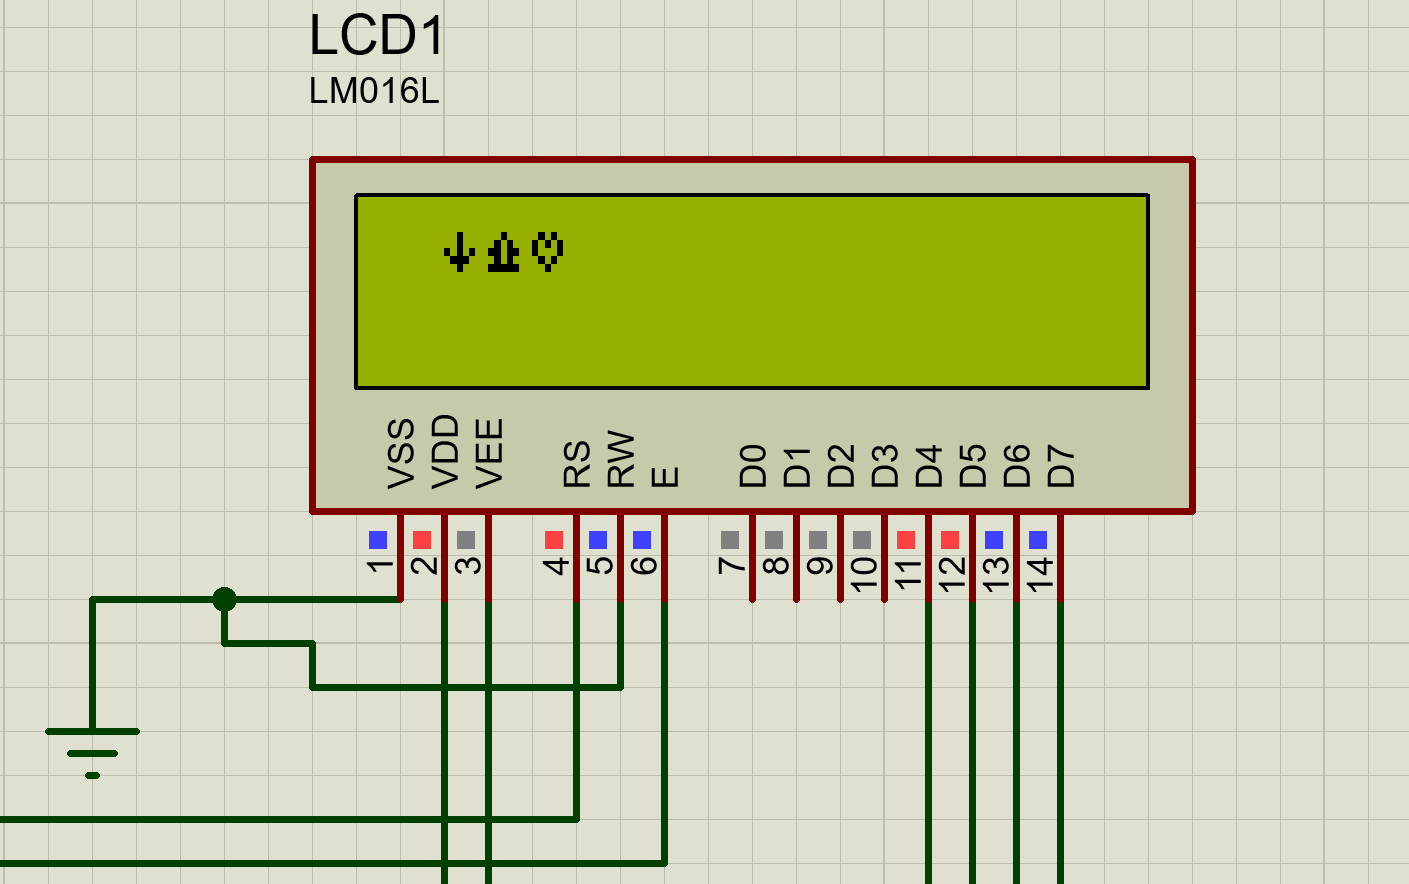
The schematic for the circuit is:
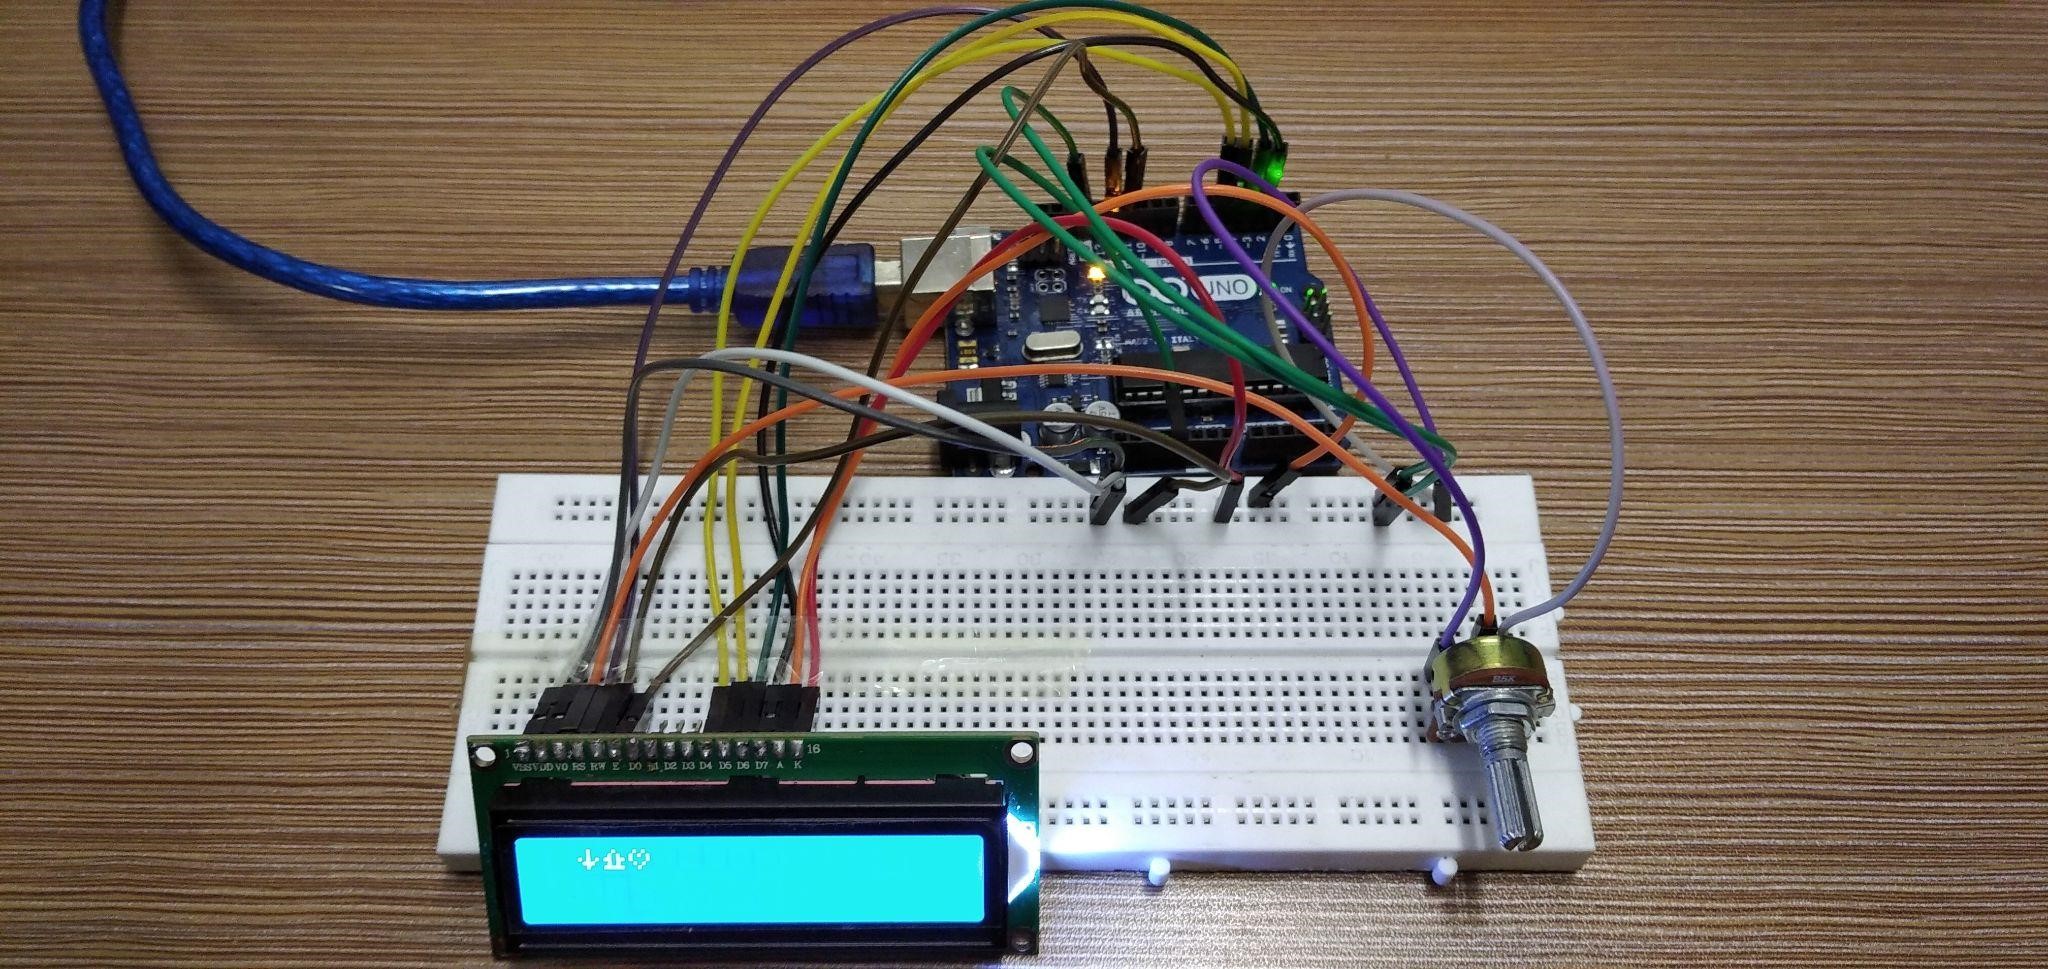
Output

Conclusion
Using characters in programming can help in labeling of the displayed data like displaying the symbol of thermometer for temperature. To create and display the special customized characters in the display module the function lcd.createChar() can be used. This write-up explains how to create special characters using the lcd.createChar() function.