In this article, we will show you the easiest way to create a WiFi hotspot on your Raspberry Pi system quickly.
How to Create a WiFi Hotspot on Raspberry Pi
To easily create a WiFi hotspot on your Raspberry Pi system, follow the below-mentioned steps:
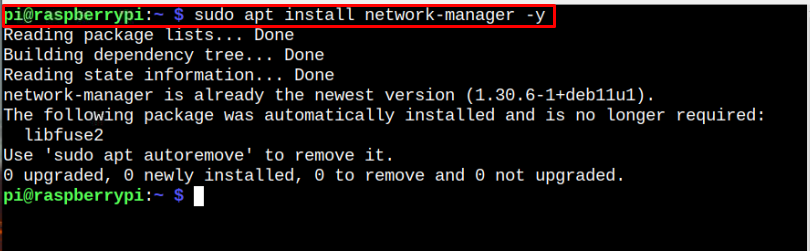
Step 1: Install Network Manager on Raspberry Pi
Network manager is a tool used to handle the configuration of network interfaces on your Raspberry Pi system. Thus, you need to ensure that it must be installed and if it’s not, you can run the following command to install it on your Raspberry Pi system.
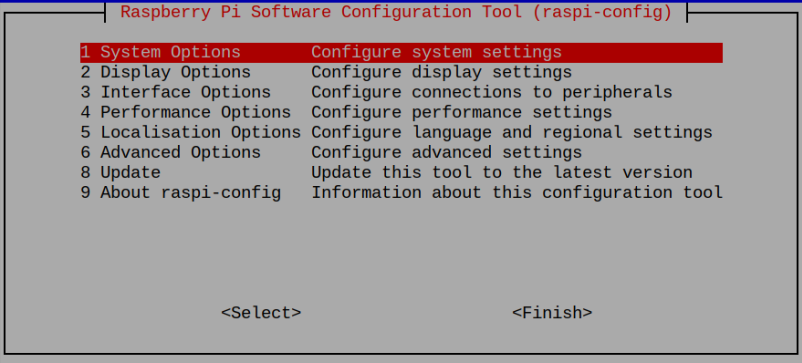
Step 2: Open Raspberry Pi Configuration
Next, you must open the Raspberry Pi configuration in the terminal by executing the following command:
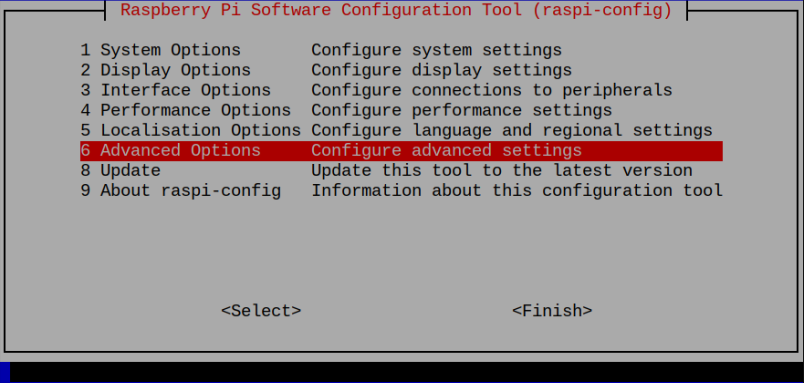
Select the “Advanced Options” within the Raspberry Pi configuration mode.
Then select the “Network Config” option to open the network configuration.
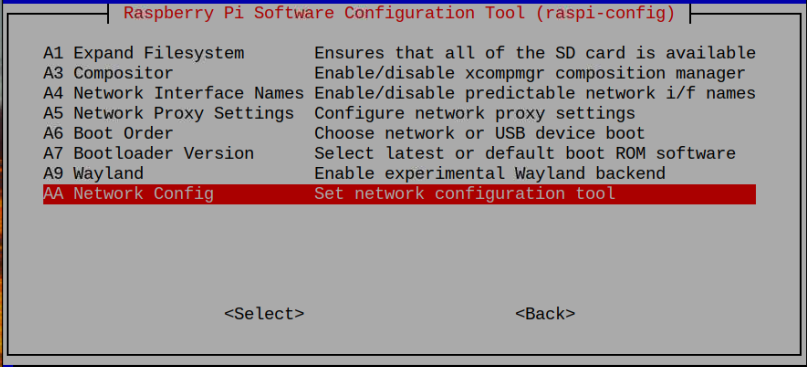
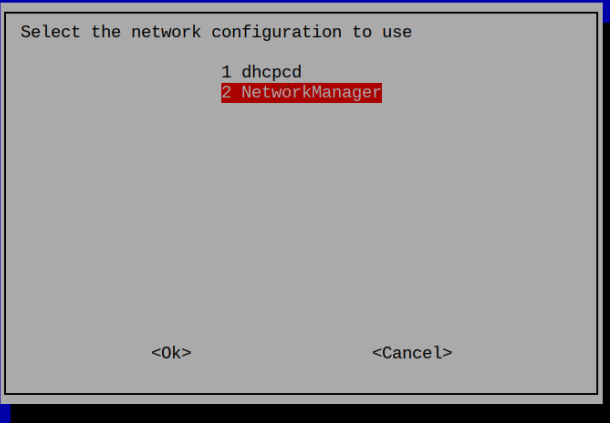
In the network configuration, select the “Network Manager” option, as highlighted in the image below:
After selecting the network configuration, reboot your device to apply the changes.
When your device reboots, you will be disconnected from the internet and to use the internet, you must connect an Ethernet cable with your device.
Step 3: Create Wi-Fi Hotspot on Raspberry Pi
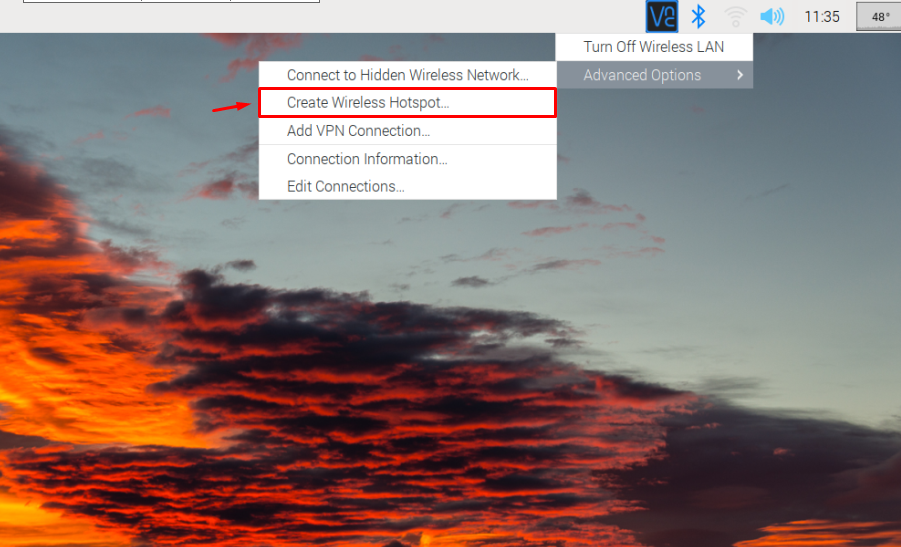
After connecting the Ethernet cable to your Raspberry Pi device, you should ensure an active internet connection. Afterward, you can click on the Internet icon and select the “Create Wireless Hotspot” option in the “Advanced Options” section.
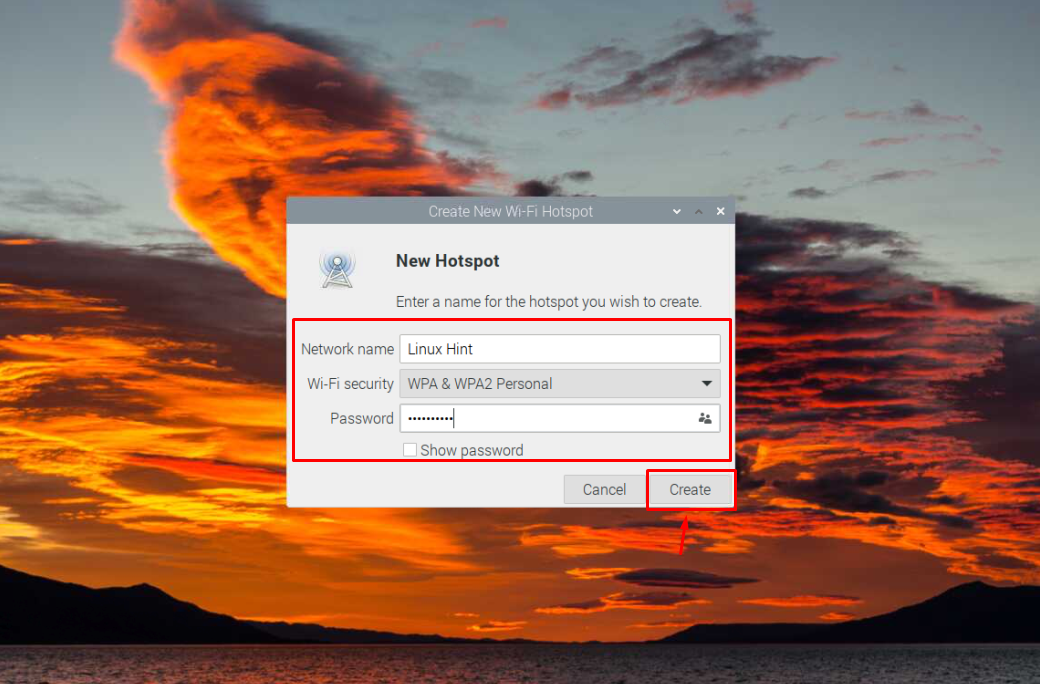
You will see a new onscreen window, where you must provide the Hotspot name, choose WiFi security and set a password for authorized login. You can follow the similar option shown in the image below and click the “Create” button to create a Raspberry Pi hotspot successfully.
Now, search for the Raspberry Pi WiFi hotspot on your other system and start connecting it using the password you provided in the previous step.

After the successful connection, you can use the Raspberry Pi internet on other systems through the WiFi hotspot.
Conclusion
Creating a wireless hotspot on Raspberry Pi isn’t a straightforward task like you do on Windows operating system. However, with the guidelines mentioned above, you can do it easily after installing the network manager on the Raspberry Pi system. Later, you should select the network manager option from the network configuration mode and reboot your device to make the changes. You should also ensure connecting the ethernet cable with your Raspberry Pi device because the process will disable the WiFi network. Afterward, you can create a hotspot from Advanced Options by providing the hotspot name and password to connect other systems with this WiFi hotspot.